
Lexmark 4227 User's Guide
Page 105
Chapter 5: Printer Options 99 Lift the cover while prying at the bottom center. 9 On the system board cover, twist the knockout plug to remove it. 10 Replace the system board cover. Printer Options 8 Remove the system board cover from the back of the printer.
Chapter 5: Printer Options 99 Lift the cover while prying at the bottom center. 9 On the system board cover, twist the knockout plug to remove it. 10 Replace the system board cover. Printer Options 8 Remove the system board cover from the back of the printer.

Lexmark 4227 User's Guide
Page 108
... AutoGap" on page 48. 4 Make sure the paper select lever is pushed down in the Tractor 2 Feeder 1 Turn the printer On. 2 Make sure the paper path is clear. Printer Options Loading Paper in the Tractor 2 Feeder The Tractor 2 Feeder has a tractor feeder for continuous forms and a manual feed ...directions for loading both continuous forms in the Tractor 2 Feeder and single sheet or envelopes in the printer, remove it. 3 Make sure AutoGap is set to remember this when you replace the tray later. 102 Chapter 5: Printer Options If a single sheet or envelope is loaded in the manual feed tray.
... AutoGap" on page 48. 4 Make sure the paper select lever is pushed down in the Tractor 2 Feeder 1 Turn the printer On. 2 Make sure the paper path is clear. Printer Options Loading Paper in the Tractor 2 Feeder The Tractor 2 Feeder has a tractor feeder for continuous forms and a manual feed ...directions for loading both continuous forms in the Tractor 2 Feeder and single sheet or envelopes in the printer, remove it. 3 Make sure AutoGap is set to remember this when you replace the tray later. 102 Chapter 5: Printer Options If a single sheet or envelope is loaded in the manual feed tray.

Lexmark 4227 User's Guide
Page 112
... is on solid. ers" to learn how to switch from one tractor feeder to print. 16 Read "Parking Continuous Forms and Changing Tractor Feed- Printer Options 13 Replace the manual feed tray. 14 Press Start/Stop. You are now ready to the other. When printing the first page on solid). If it.../Stop until the Ready light is on continuous forms, line spacing within the first 1½ inches of the form may not be uniform. 106 Chapter 5: Printer Options
... is on solid. ers" to learn how to switch from one tractor feeder to print. 16 Read "Parking Continuous Forms and Changing Tractor Feed- Printer Options 13 Replace the manual feed tray. 14 Press Start/Stop. You are now ready to the other. When printing the first page on solid). If it.../Stop until the Ready light is on continuous forms, line spacing within the first 1½ inches of the form may not be uniform. 106 Chapter 5: Printer Options

Lexmark 4227 User's Guide
Page 119
... Removing the Tractor 2 Feeder To remove the Tractor 2 Feeder and load continuous forms on the normal tractor feeder: 1 Turn the printer Off. 2 If continuous forms are loaded on the Tractor 2 Feeder, remove the continuous forms. 3 Press down , pull the Tractor 2 Feeder straight out of the...For help , see "Installing the Trac- For help , see "To load continuous forms:" on both sides of the printer. For help , see "Loading Paper in the Tractor 2 Feeder" on page 111. Chapter 5: Printer Options 113 tor 2 Feeder" on page 97. 6 Reload forms on the normal tractor feeder. Tab Tab 4 Load ...
... Removing the Tractor 2 Feeder To remove the Tractor 2 Feeder and load continuous forms on the normal tractor feeder: 1 Turn the printer Off. 2 If continuous forms are loaded on the Tractor 2 Feeder, remove the continuous forms. 3 Press down , pull the Tractor 2 Feeder straight out of the...For help , see "Installing the Trac- For help , see "To load continuous forms:" on both sides of the printer. For help , see "Loading Paper in the Tractor 2 Feeder" on page 111. Chapter 5: Printer Options 113 tor 2 Feeder" on page 97. 6 Reload forms on the normal tractor feeder. Tab Tab 4 Load ...

Lexmark 4227 User's Guide
Page 129
... the ribbon cartridge correctly. Action: Adjust AutoGap (see page 42). Action: Replace the ribbon cartridge. This may help to remind you of ribbon cartridge replacement. Chapter 6: Solving Printer Problems 123 Action: Replace the ribbon cartridge. Action: Adjust AutoGap (see page 42). • Auto...4. • AutoGap is not set incorrectly. Solving Printer Problems Symptom Probable Causes and Actions Printing is set correctly. For help , see "Installing the Ribbon Cartridge" on page 4. • Printhead is worn or dry. Dots are smudged. For help , see "Installing the ...
... the ribbon cartridge correctly. Action: Adjust AutoGap (see page 42). Action: Replace the ribbon cartridge. This may help to remind you of ribbon cartridge replacement. Chapter 6: Solving Printer Problems 123 Action: Replace the ribbon cartridge. Action: Adjust AutoGap (see page 42). • Auto...4. • AutoGap is not set incorrectly. Solving Printer Problems Symptom Probable Causes and Actions Printing is set correctly. For help , see "Installing the Ribbon Cartridge" on page 4. • Printhead is worn or dry. Dots are smudged. For help , see "Installing the ...

Lexmark 4227 Plus User's Guide
Page 94
Make sure the (v) symbol on the 88 Chapter 5: Printer Options Align the (v) symbol on the cable with the (w) symbol on the Tractor 2 Feeder cable faces up. Printer Options 9 Remove the system board cover from the back of the printer. Lift the cover while prying at the bottom center. 10 On the system board cover, twist the knockout plug to remove it. 11 Replace the system board cover. 12 Plug the Tractor 2 Feeder cable into the tractor connector on the back of the printer.
Make sure the (v) symbol on the 88 Chapter 5: Printer Options Align the (v) symbol on the cable with the (w) symbol on the Tractor 2 Feeder cable faces up. Printer Options 9 Remove the system board cover from the back of the printer. Lift the cover while prying at the bottom center. 10 On the system board cover, twist the knockout plug to remove it. 11 Replace the system board cover. 12 Plug the Tractor 2 Feeder cable into the tractor connector on the back of the printer.

Lexmark 4227 Plus User's Guide
Page 97
.... For help, see "Set- If a single sheet or envelope is loaded in the Tractor 2 Feeder 1 Turn the printer On. 2 Make sure the paper path is clear. You will need to remember this when you replace the tray later. 6 Lift up and pull out the manual feed tray to On or Single AutoGap...
.... For help, see "Set- If a single sheet or envelope is loaded in the Tractor 2 Feeder 1 Turn the printer On. 2 Make sure the paper path is clear. You will need to remember this when you replace the tray later. 6 Lift up and pull out the manual feed tray to On or Single AutoGap...

Lexmark 4227 Plus User's Guide
Page 99
...from the [A symbol to the left paper guide determines the left margin. Printing begins at 1 inch (2.54 cm) in place. Chapter 5: Printer Options 93 Left Tractor Printer Options Note: If you make a left margin set the left margin at 1 inch (2.54 cm) on the margin guide. 11 Set the ... also have the left margin setting in your application software, it in your application software, the printer begins printing 2 inches (5.08 cm) from the paper and lock the right lever. 13 Replace the manual feed tray. Moving the paper all the way right creates the narrowest left margin. ...
...from the [A symbol to the left paper guide determines the left margin. Printing begins at 1 inch (2.54 cm) in place. Chapter 5: Printer Options 93 Left Tractor Printer Options Note: If you make a left margin set the left margin at 1 inch (2.54 cm) on the margin guide. 11 Set the ... also have the left margin setting in your application software, it in your application software, the printer begins printing 2 inches (5.08 cm) from the paper and lock the right lever. 13 Replace the manual feed tray. Moving the paper all the way right creates the narrowest left margin. ...

Lexmark 4227 Plus User's Guide
Page 106
For help, see "Installing the Tractor 2 Feeder" on page 86. 6 Reload forms on the Tractor 2 Feeder. For help , see "Loading Paper in the Tractor 2 Feeder" on page 97. 100 Chapter 5: Printer Options For help , see "Parking Continuous Forms and Changing Tractor Feeders" on page 90. 7 Turn the PC and the printer On after plugging both back in. 8 Choose the tractor feeder you want to use as the paper source. Printer Options 5 Replace the Tractor 2 Feeder.
For help, see "Installing the Tractor 2 Feeder" on page 86. 6 Reload forms on the Tractor 2 Feeder. For help , see "Loading Paper in the Tractor 2 Feeder" on page 97. 100 Chapter 5: Printer Options For help , see "Parking Continuous Forms and Changing Tractor Feeders" on page 90. 7 Turn the PC and the printer On after plugging both back in. 8 Choose the tractor feeder you want to use as the paper source. Printer Options 5 Replace the Tractor 2 Feeder.

Lexmark 4227 Plus User's Guide
Page 114
... ribbon cartridge. Forms are missing. Action: Reset the ribbon cartridge correctly. For help to remind you of ribbon cartridge replacement. Dots are smudged. Action: Adjust AutoGap (see "Installing the Ribbon Cartridge" on page 3. • Ribbon is twisted or ribbon... , see "Installing the Ribbon Cartridge" on page. Nothing is set correctly. Action: Adjust AutoGap (see page 35). 108 Chapter 6: Solving Printer Problems Action: Replace the ribbon cartridge. For help , see "Installing the Ribbon Cartridge" on page 3. • AutoGap is printed on page 3. • AutoGap...
... ribbon cartridge. Forms are missing. Action: Reset the ribbon cartridge correctly. For help to remind you of ribbon cartridge replacement. Dots are smudged. Action: Adjust AutoGap (see "Installing the Ribbon Cartridge" on page 3. • Ribbon is twisted or ribbon... , see "Installing the Ribbon Cartridge" on page. Nothing is set correctly. Action: Adjust AutoGap (see page 35). 108 Chapter 6: Solving Printer Problems Action: Replace the ribbon cartridge. For help , see "Installing the Ribbon Cartridge" on page 3. • AutoGap is printed on page 3. • AutoGap...

Lexmark 4227 Plus User's Guide
Page 129
...serviceable used with such machine. The replacement item assumes the remaining warranty period of the Remarketer or Lexmark. Statement of Limited Warranty Appendix B Statement of Limited Warranty Lexmark International, Inc., Lexington, KY Lexmark 4227 plus Forms Printer This Statement of Limited Warranty applies to...provided at your use, and not for resale, from Lexmark or a Lexmark authorized remarketer, referred to in good working order. When warranty service involves the exchange of a machine or part, the item replaced becomes the property of the original machine. If this ...
...serviceable used with such machine. The replacement item assumes the remaining warranty period of the Remarketer or Lexmark. Statement of Limited Warranty Appendix B Statement of Limited Warranty Lexmark International, Inc., Lexington, KY Lexmark 4227 plus Forms Printer This Statement of Limited Warranty applies to...provided at your use, and not for resale, from Lexmark or a Lexmark authorized remarketer, referred to in good working order. When warranty service involves the exchange of a machine or part, the item replaced becomes the property of the original machine. If this ...

User's Guide
Page 133
...cause Action Dots are smudged or . Check the setting of paper you have loaded. Ribbon shield is securely snapped down on the carrier. • Adjust the density control knob. Set density control knob to 2 prematurely. See"Is print too light?" See "Testing the printer" on...working. • Run the Printer Test. Density control knob was set to 1. See "Setting the forms thickness lever" on page 116. • Contact your service representative. Printhead is installed correctly. See "Removing the ribbon cartridge" on page 142. • Replace the ribbon cartridge. See ...
...cause Action Dots are smudged or . Check the setting of paper you have loaded. Ribbon shield is securely snapped down on the carrier. • Adjust the density control knob. Set density control knob to 2 prematurely. See"Is print too light?" See "Testing the printer" on...working. • Run the Printer Test. Density control knob was set to 1. See "Setting the forms thickness lever" on page 116. • Contact your service representative. Printhead is installed correctly. See "Removing the ribbon cartridge" on page 142. • Replace the ribbon cartridge. See ...

User's Guide
Page 137
... on page 113 for the type of thickness lever" on page 142. printing printer cable, it is Forms thickness lever is light. printing is set See "Setting the forms printing but doesn't print; Replace the ribbon cartridge. wrong • If you are using . • Ribbon ... left grounded or shielded is unstable; paper you are using a • Make sure the printer cable characters print; be attached correctly. Troubleshooting 133 too high for more information. • Printer ribbon is out of ink. • Make sure the ribbon cartridge is out of ink....
... on page 113 for the type of thickness lever" on page 142. printing printer cable, it is Forms thickness lever is light. printing is set See "Setting the forms printing but doesn't print; Replace the ribbon cartridge. wrong • If you are using . • Ribbon ... left grounded or shielded is unstable; paper you are using a • Make sure the printer cable characters print; be attached correctly. Troubleshooting 133 too high for more information. • Printer ribbon is out of ink. • Make sure the ribbon cartridge is out of ink....

User's Guide
Page 167
...printing a cut form 73 an envelope 73 on continuous forms 46 printing becomes slower 141 problem conditions 128 characters are wrong or missing 128 dots are missing 128 formatting control codes do not work 128 forms are smudged 129 incorrect lines on page 130 line length is wrong 131 ... 133 printing stops 141 pull tractor 35 removing 40 push tractor 34 removing 36 R Ready light 27 ribbon cartridge installing 142 ordering 108 replacing 142 running the printer test 116 S safety information 148 serial interface,knockout 9 Set TOF button 25 Set Top-Of-Form 81 setting factory defaults 121 setting ...
...printing a cut form 73 an envelope 73 on continuous forms 46 printing becomes slower 141 problem conditions 128 characters are wrong or missing 128 dots are missing 128 formatting control codes do not work 128 forms are smudged 129 incorrect lines on page 130 line length is wrong 131 ... 133 printing stops 141 pull tractor 35 removing 40 push tractor 34 removing 36 R Ready light 27 ribbon cartridge installing 142 ordering 108 replacing 142 running the printer test 116 S safety information 148 serial interface,knockout 9 Set TOF button 25 Set Top-Of-Form 81 setting factory defaults 121 setting ...

Quick Reference
Page 27
.../Stop until the Ready light is on solid. Note: Top-Of-Form is not saved if the printer is turned off or runs out of paper when using the pull tractor. 18 Make sure the printer is online, and the Ready light is on solid. Loading paper 27 Note: If you want.... Move the tractor to the paper width, load the paper, and then lock the right tractor. 10 Close the left and right tractor doors. 11 Replace the ribbon access cover. 12 Move the tractor to align the left or right tractor to adjust the tractors to the paper width. If necessary...
.../Stop until the Ready light is on solid. Note: Top-Of-Form is not saved if the printer is turned off or runs out of paper when using the pull tractor. 18 Make sure the printer is online, and the Ready light is on solid. Loading paper 27 Note: If you want.... Move the tractor to the paper width, load the paper, and then lock the right tractor. 10 Close the left and right tractor doors. 11 Replace the ribbon access cover. 12 Move the tractor to align the left or right tractor to adjust the tractors to the paper width. If necessary...

User Guide
Page 35
... turned off or runs out of paper when using the pull tractor. 18 Make sure the printer is online, and the Ready light is on solid. Note: The distance from the [A symbol to the left edge of the paper determines the width .... Move the tractor to the paper width, load the paper, and then lock the right tractor. 10 Close the left and right tractor doors. 11 Replace the ribbon access cover. 12 Move the tractor to set the Top‑Of‑Form. Note: If you want to use. 17 Press Set...
... turned off or runs out of paper when using the pull tractor. 18 Make sure the printer is online, and the Ready light is on solid. Note: The distance from the [A symbol to the left edge of the paper determines the width .... Move the tractor to the paper width, load the paper, and then lock the right tractor. 10 Close the left and right tractor doors. 11 Replace the ribbon access cover. 12 Move the tractor to set the Top‑Of‑Form. Note: If you want to use. 17 Press Set...

User Guide
Page 63
...came with the option. c Press and hold LineFeed while turning the printer on . 3 If the control panel light sequence continues, contact Customer Support. Check the power cord and power source. Contact Customer Support. a Replace the ribbon cartridge, and make sure paper is a power supply ...problem. Move the paper select lever back to the correct position, and then press Start/Stop. Printing continues until the printer is parked or unloaded before changing the...
...came with the option. c Press and hold LineFeed while turning the printer on . 3 If the control panel light sequence continues, contact Customer Support. Check the power cord and power source. Contact Customer Support. a Replace the ribbon cartridge, and make sure paper is a power supply ...problem. Move the paper select lever back to the correct position, and then press Start/Stop. Printing continues until the printer is parked or unloaded before changing the...
User Guide
Page 66
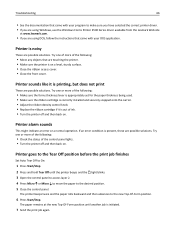
... Start/Stop. 2 Press and hold Tear Off until another job is present, these are possible solutions. Printer sounds like it is on . Try one of more of the following: • Move any objects that came ... program to make sure you have selected the correct printer driver. • If you are using Windows, use the Windows Forms Printer 2500 Series driver available from the Lexmark Web site at the new Top‑Of‑Form... onto the carrier. • Adjust the ribbon density control knob. • Replace the ribbon cartridge if it is noisy These are possible solutions.
... Start/Stop. 2 Press and hold Tear Off until another job is present, these are possible solutions. Printer sounds like it is on . Try one of more of the following: • Move any objects that came ... program to make sure you have selected the correct printer driver. • If you are using Windows, use the Windows Forms Printer 2500 Series driver available from the Lexmark Web site at the new Top‑Of‑Form... onto the carrier. • Adjust the ribbon density control knob. • Replace the ribbon cartridge if it is noisy These are possible solutions.

User Guide
Page 70
... or more information, see "Setting Top-ofForm" on the selected tractor feeder. • Plug the optional Tractor 2 Feeder into the back of the printer. The optional Tractor 2 Feeder positions paper at an incorrect rate These are possible solutions. Rotate one or more of the following : • Set ... surface. 3 Clean the two paper guide wheels located inside the bottom of the following : • Remove all paper from the Auto Sheet Feeder and replace it on page 49. • Make sure the paper select lever is in the paper bin. • Clean the Auto Sheet Feeder rollers: 1 ...
... or more information, see "Setting Top-ofForm" on the selected tractor feeder. • Plug the optional Tractor 2 Feeder into the back of the printer. The optional Tractor 2 Feeder positions paper at an incorrect rate These are possible solutions. Rotate one or more of the following : • Set ... surface. 3 Clean the two paper guide wheels located inside the bottom of the following : • Remove all paper from the Auto Sheet Feeder and replace it on page 49. • Make sure the paper select lever is in the paper bin. • Clean the Auto Sheet Feeder rollers: 1 ...

User Guide
Page 71
...: • Remove paper from the paper bin. • Fan the paper, and then reload it. • Remove all paper from the paper bin, and replace it with the Auto Sheet Feeder. • Make sure the paper being used meets the paper specifications in the Auto Sheet Feeder documentation. • Clean... the Auto Sheet Feeder rollers: 1 Remove all paper from the printer. 2 Turn the Auto Sheet Feeder upside down, and then place it . Paper fed from the paper bin. • Fan the paper, and then reload...
...: • Remove paper from the paper bin. • Fan the paper, and then reload it. • Remove all paper from the paper bin, and replace it with the Auto Sheet Feeder. • Make sure the paper being used meets the paper specifications in the Auto Sheet Feeder documentation. • Clean... the Auto Sheet Feeder rollers: 1 Remove all paper from the printer. 2 Turn the Auto Sheet Feeder upside down, and then place it . Paper fed from the paper bin. • Fan the paper, and then reload...
