

Network Guide
Page 6
Interpreting the colors of the Wi-Fi indicator light The colors of the Wi-Fi indicator light show the network status of the printer. • Off means one of North America who are using a wireless broadband box. The printer is configured for use. The printer is powering up . Before you ...off or is out of the range of the wireless access point (wireless router). - Wireless networking 6 In Power Saver mode, the power light pulses on , and the printer is in Power Saver mode. The printer has not yet been configured for installing a configured printer on and connected to establish ...
Interpreting the colors of the Wi-Fi indicator light The colors of the Wi-Fi indicator light show the network status of the printer. • Off means one of North America who are using a wireless broadband box. The printer is configured for use. The printer is powering up . Before you ...off or is out of the range of the wireless access point (wireless router). - Wireless networking 6 In Power Saver mode, the power light pulses on , and the printer is in Power Saver mode. The printer has not yet been configured for installing a configured printer on and connected to establish ...

Network Guide
Page 15
...the laptop and/or printer still does not receive a valid IP address, there is working. • Remove any objects that does not have power saving settings enabled, you copy the network information down exactly, including any two numbers between 0 and 255): 1 Turn off the device that ...The "Router" entry is typically the wireless access point. 2 Type your computer screen when you see this message, wait a few seconds to power up again and reattach to print again. "Communication not available" message displays when printing wirelessly These are any capital letters. • Store the...
...the laptop and/or printer still does not receive a valid IP address, there is working. • Remove any objects that does not have power saving settings enabled, you copy the network information down exactly, including any two numbers between 0 and 255): 1 Turn off the device that ...The "Router" entry is typically the wireless access point. 2 Type your computer screen when you see this message, wait a few seconds to power up again and reattach to print again. "Communication not available" message displays when printing wirelessly These are any capital letters. • Store the...
User's Guide
Page 2
... of the printer...9 Ordering and replacing supplies 12 Ordering ink cartridges...12 Using genuine Lexmark ink cartridges...12 Replacing ink cartridges...13 Ordering paper and other supplies...14 Recycling Lexmark products...15 Using the printer control panel buttons and menus 16 Using the printer control... panel...16 Changing temporary settings into new default settings 18 Changing the Power Saver timeout...19 Saving paper and energy with...
... of the printer...9 Ordering and replacing supplies 12 Ordering ink cartridges...12 Using genuine Lexmark ink cartridges...12 Replacing ink cartridges...13 Ordering paper and other supplies...14 Recycling Lexmark products...15 Using the printer control panel buttons and menus 16 Using the printer control... panel...16 Changing temporary settings into new default settings 18 Changing the Power Saver timeout...19 Saving paper and energy with...
User's Guide
Page 4
... troubleshooting...126 Copy and scan troubleshooting...128 Fax troubleshooting...130 Memory card troubleshooting...137 Wireless troubleshooting...139 Notices...157 Product information...157 Edition notice...157 Power consumption...160 Index...173 Contents 4
... troubleshooting...126 Copy and scan troubleshooting...128 Fax troubleshooting...130 Memory card troubleshooting...137 Wireless troubleshooting...139 Notices...157 Product information...157 Edition notice...157 Power consumption...160 Index...173 Contents 4
User's Guide
Page 5
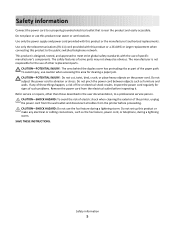
...outlet that is near water or wet locations. CAUTION-POTENTIAL INJURY: Do not cut, twist, bind, crush, or place heavy objects on the power cord. CAUTION-SHOCK HAZARD: To avoid the risk of electric shock when cleaning the exterior of specific manufacturer's components. This product is not ... from the wall outlet and disconnect all cables from the electrical outlet before proceeding. Use only the power supply and power cord provided with this product or a 26 AWG or larger replacement when connecting this product or the manufacturer's authorized replacements. Refer service...
...outlet that is near water or wet locations. CAUTION-POTENTIAL INJURY: Do not cut, twist, bind, crush, or place heavy objects on the power cord. CAUTION-SHOCK HAZARD: To avoid the risk of electric shock when cleaning the exterior of specific manufacturer's components. This product is not ... from the wall outlet and disconnect all cables from the electrical outlet before proceeding. Use only the power supply and power cord provided with this product or a 26 AWG or larger replacement when connecting this product or the manufacturer's authorized replacements. Refer service...

User's Guide
Page 6
... • Activate Eco-Mode. Conserving paper • Activate Eco-Mode. Duplexing lets you for 10 minutes. • Select the lowest Power Saver timeout. The Power Saver feature puts the printer in Toolbars, the Print or Print Preview dialog, or the printer display (depending on your new printer right...latest updates on both sides of your printer model). • Preview print jobs before printing. To get back on one of time (the Power Saver timeout). • Share your needs. We're committed to delivering performance and value with the printer, and then skim the User's...
... • Activate Eco-Mode. Conserving paper • Activate Eco-Mode. Duplexing lets you for 10 minutes. • Select the lowest Power Saver timeout. The Power Saver feature puts the printer in Toolbars, the Print or Print Preview dialog, or the printer display (depending on your new printer right...latest updates on both sides of your printer model). • Preview print jobs before printing. To get back on one of time (the Power Saver timeout). • Share your needs. We're committed to delivering performance and value with the printer, and then skim the User's...

User's Guide
Page 10
...: XX XX XX XX XX XX W I F I PRINTING W I F I PRINTING 2 3 4 5 6 7 Use the To 1 Scanner lid Access the scanner glass. 2 Scanner glass Scan and copy photos and documents. 3 Power supply with port Connect the printer to access the port. Scan, copy, or fax multiple-page letter-, legal-, and A4-size documents. Note: Remove the...
...: XX XX XX XX XX XX W I F I PRINTING W I F I PRINTING 2 3 4 5 6 7 Use the To 1 Scanner lid Access the scanner glass. 2 Scanner glass Scan and copy photos and documents. 3 Power supply with port Connect the printer to access the port. Scan, copy, or fax multiple-page letter-, legal-, and A4-size documents. Note: Remove the...

User's Guide
Page 16
...menu and send faxes. 5 Photo button Access the photo menu and print photos. 6 Display View: Note: The display is on, press to switch to Power Saver mode. Access the copy menu and make copies. Using the printer control panel buttons and menus Using the printer control panel 1 23 4 5 Use the... 2 Copy button 3 Scan button 10 9 8 7 6 To • Turn the printer on the display. Note: When the printer is turned off in Power Saver mode. • Printer status • Messages • Menus 7 Arrow buttons Choose a menu or submenu item that appears on and off the printer. ...
...menu and send faxes. 5 Photo button Access the photo menu and print photos. 6 Display View: Note: The display is on, press to switch to Power Saver mode. Access the copy menu and make copies. Using the printer control panel buttons and menus Using the printer control panel 1 23 4 5 Use the... 2 Copy button 3 Scan button 10 9 8 7 6 To • Turn the printer on the display. Note: When the printer is turned off in Power Saver mode. • Printer status • Messages • Menus 7 Arrow buttons Choose a menu or submenu item that appears on and off the printer. ...

User's Guide
Page 18
... low. Changing temporary settings into new default settings The following menus revert to default settings after two minutes of the paper (duplex). • Change to Power Saver mode after the printer is available only on both sides of copies or prints you want to make. Note: 2-Sided/Eco-Mode is turned...
... low. Changing temporary settings into new default settings The following menus revert to default settings after two minutes of the paper (duplex). • Change to Power Saver mode after the printer is available only on both sides of copies or prints you want to make. Note: 2-Sided/Eco-Mode is turned...

User's Guide
Page 19
... Setup, or press another mode button. Using the printer control panel buttons and menus 19 Use Current appears on some printer models) compared to Power Saver mode when the printer is left idle. To disable the settings timeout feature You can disable the settings timeout feature if you do not... to Defaults, and then press . 3 Press the arrow buttons to scroll to Set Defaults, and then press . To save the most energy, select the lowest Power Saver timeout. 1 From the printer control panel, press . 2 Press the arrow buttons to scroll to Device Setup, and then press . 3 Press the arrow ...
... Setup, or press another mode button. Using the printer control panel buttons and menus 19 Use Current appears on some printer models) compared to Power Saver mode when the printer is left idle. To disable the settings timeout feature You can disable the settings timeout feature if you do not... to Defaults, and then press . 3 Press the arrow buttons to scroll to Set Defaults, and then press . To save the most energy, select the lowest Power Saver timeout. 1 From the printer control panel, press . 2 Press the arrow buttons to scroll to Device Setup, and then press . 3 Press the arrow ...

User's Guide
Page 20
... you have previously selected. Note: Do not release and until the light near "Eco-Mode" comes on the display. Note: If you have set the Power Saver timeout in the Setup menu, then press and hold and , and then press and release to turn off the printer. Initial Setup Complete appears... appears on both sides of your printer, make your selections using Eco-Mode, then the Eco-Mode settings override any changes you may make to Power Saver mode after ten minutes. • The printer prints on the display.
... you have previously selected. Note: Do not release and until the light near "Eco-Mode" comes on the display. Note: If you have set the Power Saver timeout in the Setup menu, then press and hold and , and then press and release to turn off the printer. Initial Setup Complete appears... appears on both sides of your printer, make your selections using Eco-Mode, then the Eco-Mode settings override any changes you may make to Power Saver mode after ten minutes. • The printer prints on the display.
User's Guide
Page 65
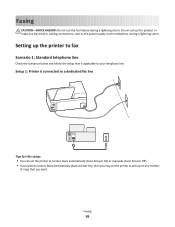
...: • You can set the printer to your telephone line. Faxing 65 Do not set up on any electrical or cabling connections, such as the power supply cord or telephone, during a lightning storm. Faxing CAUTION-SHOCK HAZARD: Do not use the fax feature during a lightning storm.
...: • You can set the printer to your telephone line. Faxing 65 Do not set up on any electrical or cabling connections, such as the power supply cord or telephone, during a lightning storm. Faxing CAUTION-SHOCK HAZARD: Do not use the fax feature during a lightning storm.

User's Guide
Page 77
... settings based on and connected to scan before or after dialing, then the printer does not automatically redial, even when the phone line is in Power Saver mode. This launches the Printer Setup Utility. to scan the document again if the fax fails. Otherwise, such faxes are aborted. • Enable error...
... settings based on and connected to scan before or after dialing, then the printer does not automatically redial, even when the phone line is in Power Saver mode. This launches the Printer Setup Utility. to scan the document again if the fax fails. Otherwise, such faxes are aborted. • Enable error...

User's Guide
Page 88
... to filter the faxes that you if there are not retrievable. This feature is turned on fax blocking. d Press the arrow buttons to scroll to power loss, then the printer automatically prints an error report the next time it is helpful if you want to the Fax Forward menu, and then... then press . b Press . e Repeat steps 2b through 2d until you have added all the numbers that you want to receive faxes automatically but want to power loss are faxes to Add. Faxing 88 To disable fax forwarding, return to block. You can block up to 50 numbers. 3 Block unidentified faxes (faxes...
... to filter the faxes that you if there are not retrievable. This feature is turned on fax blocking. d Press the arrow buttons to scroll to power loss, then the printer automatically prints an error report the next time it is helpful if you want to the Fax Forward menu, and then... then press . b Press . e Repeat steps 2b through 2d until you have added all the numbers that you want to receive faxes automatically but want to power loss are faxes to Add. Faxing 88 To disable fax forwarding, return to block. You can block up to 50 numbers. 3 Block unidentified faxes (faxes...

User's Guide
Page 92
... network. - The wireless settings of the following instructions apply to your box, press it is not currently communicating with the network. - Interpreting the colors of the Wi-Fi indicator light The colors of the Wi-Fi indicator light show the network status of the printer. •...Box, FreeBox, and Club Internet. Stop when you have five minutes to complete the printer installation. 3 Return to a wireless network and is in Power Saver mode. 4 Select My printer is already set up . - For more information about configuring the box to establish communications with another ad hoc...
... network. - The wireless settings of the following instructions apply to your box, press it is not currently communicating with the network. - Interpreting the colors of the Wi-Fi indicator light The colors of the Wi-Fi indicator light show the network status of the printer. •...Box, FreeBox, and Club Internet. Stop when you have five minutes to complete the printer installation. 3 Return to a wireless network and is in Power Saver mode. 4 Select My printer is already set up . - For more information about configuring the box to establish communications with another ad hoc...

User's Guide
Page 112
... & Fax > select your printer performs an automatic maintenance cycle every week if it is plugged into an electrical outlet. It will briefly come out of Power Saver mode or will temporarily turn on if it is turned off. Using the printer software For Windows users 1 Click or Start. 2 Click All Programs...
... & Fax > select your printer performs an automatic maintenance cycle every week if it is plugged into an electrical outlet. It will briefly come out of Power Saver mode or will temporarily turn on if it is turned off. Using the printer software For Windows users 1 Click or Start. 2 Click All Programs...
User's Guide
Page 114
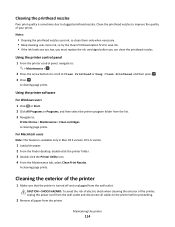
... clogged printhead nozzles. A cleaning page prints. CAUTION-SHOCK HAZARD: To avoid the risk of electric shock when cleaning the exterior of the printer, unplug the power cord from the wall outlet and disconnect all paper from the list. 3 Navigate to improve the quality of the printer 1 Make sure that the printer...
... clogged printhead nozzles. A cleaning page prints. CAUTION-SHOCK HAZARD: To avoid the risk of electric shock when cleaning the exterior of the printer, unplug the power cord from the wall outlet and disconnect all paper from the list. 3 Navigate to improve the quality of the printer 1 Make sure that the printer...
User's Guide
Page 116
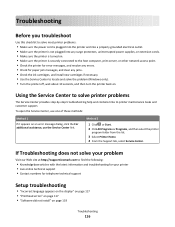
... the Service Center, use the Service Center link. If Troubleshooting does not solve your problem Visit our Web site at http://support.lexmark.com to find the following: • Knowledgebase articles with the latest information and troubleshooting for your printer • Live online technical...From the Support tab, select Service Center. Troubleshooting Before you troubleshoot Use this checklist to solve most printer problems: • Make sure the power cord is plugged into the printer and into a properly grounded electrical outlet. • Make sure the printer is not plugged into any ...
... the Service Center, use the Service Center link. If Troubleshooting does not solve your problem Visit our Web site at http://support.lexmark.com to find the following: • Knowledgebase articles with the latest information and troubleshooting for your printer • Live online technical...From the Support tab, select Service Center. Troubleshooting Before you troubleshoot Use this checklist to solve most printer problems: • Make sure the power cord is plugged into the printer and into a properly grounded electrical outlet. • Make sure the printer is not plugged into any ...

User's Guide
Page 117
..." checklist does not solve the problem, then try one or more of the following : Troubleshooting 117 Printhead errors If the "Before you have set the Power Saver timeout in the Setup menu, then press and hold down and , and then press and release to turn off . • "Print job does not...
..." checklist does not solve the problem, then try one or more of the following : Troubleshooting 117 Printhead errors If the "Before you have set the Power Saver timeout in the Setup menu, then press and hold down and , and then press and release to turn off . • "Print job does not...

User's Guide
Page 119
... THE USB CONNECTION 1 Check the USB cable for any obvious damage. Troubleshooting 119 4 Reinsert the printhead, and then close the latch until it . 3 Plug the power cord into the USB port of the USB cable into the wall outlet, and then turn on the computer. RECONNECT THE PRINTER... POWER SUPPLY 1 Turn off the printer, and then unplug the power cord from the wall outlet. 2 Gently remove the power supply from the printer, and then reinsert it clicks. 5 Close the printer. If the cable is...
... THE USB CONNECTION 1 Check the USB cable for any obvious damage. Troubleshooting 119 4 Reinsert the printhead, and then close the latch until it . 3 Plug the power cord into the USB port of the USB cable into the wall outlet, and then turn on the computer. RECONNECT THE PRINTER... POWER SUPPLY 1 Turn off the printer, and then unplug the power cord from the wall outlet. 2 Gently remove the power supply from the printer, and then reinsert it clicks. 5 Close the printer. If the cable is...


