User Manual
Page 13
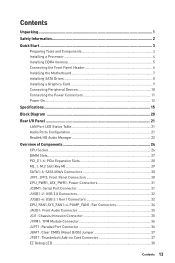
... Header 6 Installing the Motherboard 7 Installing SATA Drives 8 Installing a Graphics Card 9 Connecting Peripheral Devices 10 Connecting the Power Connectors 11 Power On...12 Specifications...15 Block Diagram ...20 Rear I/O Panel ...21 LAN Port LED Status Table 21 Audio Ports Configuration 21 Realtek HD Audio Manager 22 Overview of Components 24 CPU Socket...
... Header 6 Installing the Motherboard 7 Installing SATA Drives 8 Installing a Graphics Card 9 Connecting Peripheral Devices 10 Connecting the Power Connectors 11 Power On...12 Specifications...15 Block Diagram ...20 Rear I/O Panel ...21 LAN Port LED Status Table 21 Audio Ports Configuration 21 Realtek HD Audio Manager 22 Overview of Components 24 CPU Socket...

User Manual
Page 23
Audio jacks to headphone and microphone diagram Audio jacks to stereo speakers diagram AUDIO INPUT Audio jacks to 7.1-channel speakers diagram AUDIO INPUT Front Center/ Subwoofer Rear Side Rear I/O Panel 23
Audio jacks to headphone and microphone diagram Audio jacks to stereo speakers diagram AUDIO INPUT Audio jacks to 7.1-channel speakers diagram AUDIO INPUT Front Center/ Subwoofer Rear Side Rear I/O Panel 23

User Manual
Page 71
... for your external storage or memory cards. enables or disables Run X-BOOST when windows starts. Software Description 71 displays the system performance diagram of system performance. Easy In Easy page, you to select the system performance mode to enable it. y Performance information - y Setting - X-BOOST... The MSI X-BOOST allows you can select one of performance mode and click on the ON button to meet the current system environment. Important The Customize...
... for your external storage or memory cards. enables or disables Run X-BOOST when windows starts. Software Description 71 displays the system performance diagram of system performance. Easy In Easy page, you to select the system performance mode to enable it. y Performance information - y Setting - X-BOOST... The MSI X-BOOST allows you can select one of performance mode and click on the ON button to meet the current system environment. Important The Customize...


