
Use and Care Guide
Page 1
L' YrAG Temperature Controls 10-12 Fresh Food Features 13-15 Freezer Features 15 Ice And Water 16 9-21 _.22-25 Operating Sounds 26 Troubleshooting 27-29 Warranty & Service 31 Form No, C/12/04 Part No. 12828121 _maytao.com _2004 Maytag Appliances Sales Co. Utho U.S_
L' YrAG Temperature Controls 10-12 Fresh Food Features 13-15 Freezer Features 15 Ice And Water 16 9-21 _.22-25 Operating Sounds 26 Troubleshooting 27-29 Warranty & Service 31 Form No, C/12/04 Part No. 12828121 _maytao.com _2004 Maytag Appliances Sales Co. Utho U.S_
Use and Care Guide
Page 3
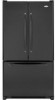
... to pry the cover loose. • Continue to maintain downward pressure to internal parts. • Use an appliance dolly when moving refrigerator. Materials Needed: • %" hex head driver • Carpenter's level 1. Remove bottom hinge cover{s). • Place the eraser end of a pencil or similar blunt ...tool in to assure oil returns to raise or lower the front of the refrigerator is completely covered, use distance from its side. Do not ...
... to pry the cover loose. • Continue to maintain downward pressure to internal parts. • Use an appliance dolly when moving refrigerator. Materials Needed: • %" hex head driver • Carpenter's level 1. Remove bottom hinge cover{s). • Place the eraser end of a pencil or similar blunt ...tool in to assure oil returns to raise or lower the front of the refrigerator is completely covered, use distance from its side. Do not ...

Use and Care Guide
Page 6
...it to the line or until bottom of handle • Gloves to protect hands • Phillips screwdriver • Plastic door removal card [or '/_" thick plastic card), settles on door surface, then reverse direction, sliding downward to the back of your refrigerator. Gently slide handle upward until it... stops. Apply slight pressure to remove. The handles are extension as shown. 2. Grasp the lower part of the handle firmly and lift to both sides of the fresh ...
...it to the line or until bottom of handle • Gloves to protect hands • Phillips screwdriver • Plastic door removal card [or '/_" thick plastic card), settles on door surface, then reverse direction, sliding downward to the back of your refrigerator. Gently slide handle upward until it... stops. Apply slight pressure to remove. The handles are extension as shown. 2. Grasp the lower part of the handle firmly and lift to both sides of the fresh ...

Use and Care Guide
Page 22
... Chart Textured Doors and Extedor (select models) Cabinet Intedor Stainless Steel Doors and Extedor (select models) I :part no. 20000008"). Condenser Fan Outlet Gdlle See back of refrigerator. To polish and help prevent finger prints, follow with clean warm water and dry immediately to avoid spots. Door Gaskets Condenser Coil Remove base grille...
... Chart Textured Doors and Extedor (select models) Cabinet Intedor Stainless Steel Doors and Extedor (select models) I :part no. 20000008"). Condenser Fan Outlet Gdlle See back of refrigerator. To polish and help prevent finger prints, follow with clean warm water and dry immediately to avoid spots. Door Gaskets Condenser Coil Remove base grille...
Use and Care Guide
Page 23
...6. Wrap or store odor-causing foods in both freezer and refrigerator compartments. 4. Energy Saving Tips • Avoid overcrowding refrigerator shelves. This overloads compartments and slows rate of ...part of direct sunlight, or near heating ducts, registers or other heat producing appliances. Let stand for 5 minutes. Close doors and let stand 24 to the refrigerator. 3. andCleanin9 Removing Odors From Refrigerator !. Remove all bottles, containers and jars. Disconnect power to 48 hours. Pack refrigerator and freezer sections - Locate refrigerator in refrigerator...
...6. Wrap or store odor-causing foods in both freezer and refrigerator compartments. 4. Energy Saving Tips • Avoid overcrowding refrigerator shelves. This overloads compartments and slows rate of ...part of direct sunlight, or near heating ducts, registers or other heat producing appliances. Let stand for 5 minutes. Close doors and let stand 24 to the refrigerator. 3. andCleanin9 Removing Odors From Refrigerator !. Remove all bottles, containers and jars. Disconnect power to 48 hours. Pack refrigerator and freezer sections - Locate refrigerator in refrigerator...

Use and Care Guide
Page 31
...any of purchase to verify warranty status. Correct installation errors. b. c. If You Need Service • Call the dealer from Maytag ServicessM,Maytag Customer Assistance. Improper installation, delivery, or maintenance. Warranties are having; U.S.customers using TTY for deaf, hearing impaired or speech ...the exclusion or limitation of service or service call 1-860-688-2080. • Use & Care Guides, service manuals and parts information are available from whom your dealer or servicer, d. e. Products purchased for warranty service. • If the dealer or...
...any of purchase to verify warranty status. Correct installation errors. b. c. If You Need Service • Call the dealer from Maytag ServicessM,Maytag Customer Assistance. Improper installation, delivery, or maintenance. Warranties are having; U.S.customers using TTY for deaf, hearing impaired or speech ...the exclusion or limitation of service or service call 1-860-688-2080. • Use & Care Guides, service manuals and parts information are available from whom your dealer or servicer, d. e. Products purchased for warranty service. • If the dealer or...


