
Specs
Page 6
Whole Bean Coffee System CVA 6401 PRODUCT VIEWS Rear View FOREVER BETTER INSTALLATION SPECIFICATIONS Niche PLEASE NOTE: The vent cut out must only be at the top of 7 CVA 6401 Page 6 of the niche to prevent condensation inside the door and inner components that the customer can see when opening the door.
Whole Bean Coffee System CVA 6401 PRODUCT VIEWS Rear View FOREVER BETTER INSTALLATION SPECIFICATIONS Niche PLEASE NOTE: The vent cut out must only be at the top of 7 CVA 6401 Page 6 of the niche to prevent condensation inside the door and inner components that the customer can see when opening the door.

Specs
Page 7
Whole Bean Coffee System CVA 6401 INSTALLATION SPECIFICATIONS Niche (metric) FOREVER BETTER PLEASE NOTE: The vent cut out must only be at the top of 7 CVA 6401 Page 7 of the niche to prevent condensation inside the door and inner components that the customer can see when opening the door.
Whole Bean Coffee System CVA 6401 INSTALLATION SPECIFICATIONS Niche (metric) FOREVER BETTER PLEASE NOTE: The vent cut out must only be at the top of 7 CVA 6401 Page 7 of the niche to prevent condensation inside the door and inner components that the customer can see when opening the door.

Product Manual
Page 1
en - US, CA M.-Nr. 09 741 510 Operating and Installation Instructions Coffee System To prevent accidents and appliance damage read these instructions before installation or use.
en - US, CA M.-Nr. 09 741 510 Operating and Installation Instructions Coffee System To prevent accidents and appliance damage read these instructions before installation or use.
Product Manual
Page 4
... by hand 54 Degreasing the brew unit 56 Exterior 57 Descaling 58 Frequently asked questions 60 Cleaning clogged milk pipework 68 After sales service 71 Installation instructions 73 Caring for the environment 74 Electrical connection 75 Installation 76 Installation and combination options 76 Ventilation 78 Installation 78 Adjusting the door hinges 80 Adresses 83 4
... by hand 54 Degreasing the brew unit 56 Exterior 57 Descaling 58 Frequently asked questions 60 Cleaning clogged milk pipework 68 After sales service 71 Installation instructions 73 Caring for the environment 74 Electrical connection 75 Installation 76 Installation and combination options 76 Ventilation 78 Installation 78 Adjusting the door hinges 80 Adresses 83 4
Product Manual
Page 5
... held responsible for damage caused by a responsible person. This appliance complies with the machine should always be followed, including the following: Read all instructions before installation or use . ~ Use this appliance other type of use and similar indoor environments only. the preparation of their heads and suffocate. This appliance is for...
... held responsible for damage caused by a responsible person. This appliance complies with the machine should always be followed, including the following: Read all instructions before installation or use . ~ Use this appliance other type of use and similar indoor environments only. the preparation of their heads and suffocate. This appliance is for...

Product Manual
Page 6
... data on or near a hot gas or electric burner, or in a heated oven. ~ If the coffee machine is installed in a closed kitchen cabinet, use Miele original spare parts. Do not close the cabinet door when the coffee machine is imperative that there is sufficient ventilation around the...the appliance and an effective grounding system. To guarantee the electrical safety of this appliance, continuity must not be used once it has been safely installed. ~ If the machine is open. The manufacturer cannot be held responsible for externally visible damage. Do not operate a damaged unit. ~ ...
... data on or near a hot gas or electric burner, or in a heated oven. ~ If the coffee machine is installed in a closed kitchen cabinet, use Miele original spare parts. Do not close the cabinet door when the coffee machine is imperative that there is sufficient ventilation around the...the appliance and an effective grounding system. To guarantee the electrical safety of this appliance, continuity must not be used once it has been safely installed. ~ If the machine is open. The manufacturer cannot be held responsible for externally visible damage. Do not operate a damaged unit. ~ ...

Product Manual
Page 14
See the "Installation instructions". ^ Remove any protective coverings. Turning on for "Month" and "Day" until the current date is highlighted. Display (time of day - The display briefly shows the "Miele Welcome" message. The setting is now saved. 14 Clean the coffee machine thoroughly (see "Cleaning and care")... the OK button. ^ Repeat this process for the first time, you turn the coffee machine on When you will be correctly installed and connected before filling it with water and coffee beans. The setting is now saved. Setting the language ^ Tap the arrow buttons...
See the "Installation instructions". ^ Remove any protective coverings. Turning on for "Month" and "Day" until the current date is highlighted. Display (time of day - The display briefly shows the "Miele Welcome" message. The setting is now saved. 14 Clean the coffee machine thoroughly (see "Cleaning and care")... the OK button. ^ Repeat this process for the first time, you turn the coffee machine on When you will be correctly installed and connected before filling it with water and coffee beans. The setting is now saved. Setting the language ^ Tap the arrow buttons...
Product Manual
Page 65
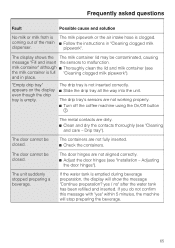
...? milk container" although ^ Thoroughly clean the lid and milk container (see "Cleaning and care - The containers are not aligned correctly. ^ Adjust the door hinges (see "Installation - The door cannot be closed . The metal contacts are not working properly. ^ Turn off the coffee machine using the On/Off button K. The door cannot...
...? milk container" although ^ Thoroughly clean the lid and milk container (see "Cleaning and care - The containers are not aligned correctly. ^ Adjust the door hinges (see "Installation - The door cannot be closed . The metal contacts are not working properly. ^ Turn off the coffee machine using the On/Off button K. The door cannot...
Product Manual
Page 71
...Miele parts installed by a Miele Authorized Service Provider using genuine Miele parts. Please note that unless expressly approved in the industry that your appliance dealer or visit us online at the contact information on the back of this booklet. MieleCare is the only Extended Service Contract in writing by Miele...71 When contacting the Technical Service Department, please quote the model and serial number of your appliance given on your Miele products, possibly doing further damage to them, you the assurance of knowing that guarantees repairs by factory trained professionals ...
...Miele parts installed by a Miele Authorized Service Provider using genuine Miele parts. Please note that unless expressly approved in the industry that your appliance dealer or visit us online at the contact information on the back of this booklet. MieleCare is the only Extended Service Contract in writing by Miele...71 When contacting the Technical Service Department, please quote the model and serial number of your appliance given on your Miele products, possibly doing further damage to them, you the assurance of knowing that guarantees repairs by factory trained professionals ...

Product Manual
Page 73
The installation steps are described in the enclosed "Installation Diagram". Please refer to our website to obtain the most current product specification, technical & warranty information. Please refer to our website to obtain the most current product specification, technical & warranty information. 73 Leave these instructions with the appliance for the consumer/user. Information is subject to change . Installation instructions Information is subject to change .
The installation steps are described in the enclosed "Installation Diagram". Please refer to our website to obtain the most current product specification, technical & warranty information. Please refer to our website to obtain the most current product specification, technical & warranty information. 73 Leave these instructions with the appliance for the consumer/user. Information is subject to change . Installation instructions Information is subject to change .

Product Manual
Page 75
Installation, repairs and other work should be dangerous. The reduction of power to the appliance caused by unqualified persons could damage the appliance. Verify that the power to your power supply, please consult a licensed electrician or contact Miele's Technical Service Department. Do not ...connect the appliance to run hot and may damage it and/or shorten its usable life. Do not connect the appliance to a power inverter or directly to power produced outside of this appliance to the machine is OFF before installing...
Installation, repairs and other work should be dangerous. The reduction of power to the appliance caused by unqualified persons could damage the appliance. Verify that the power to your power supply, please consult a licensed electrician or contact Miele's Technical Service Department. Do not ...connect the appliance to run hot and may damage it and/or shorten its usable life. Do not connect the appliance to a power inverter or directly to power produced outside of this appliance to the machine is OFF before installing...

Product Manual
Page 76
Installation Installation and combination options The unit is designed to be built into cabinetry. 76
Installation Installation and combination options The unit is designed to be built into cabinetry. 76

Product Manual
Page 77
For combination installations, it is very important to install the unit with a protective base between the appliance and the unit (exception: installation with other built-in plate warmer). 77 Installation A combination with a built-in Miele appliances is possible.
For combination installations, it is very important to install the unit with a protective base between the appliance and the unit (exception: installation with other built-in plate warmer). 77 Installation A combination with a built-in Miele appliances is possible.

Product Manual
Page 78
... is no power is supplied to the coffee machine or the surrounding cabinets. otherwise, a sealing strip must be a sealing strip around the installation recess; To align the unit door flush with the kitchen cabinetry, there must be at least 78 3/4"² (200 cm²). The ...ventilated so that steam and hot air can form, causing damage to the unit while installation work is performed. Installation Ventilation When installing the coffee machine, make sure that the back of disassembly! Installation Make sure no sealing strip around the unit. You will need two Allen wrenches size...
... is no power is supplied to the coffee machine or the surrounding cabinets. otherwise, a sealing strip must be a sealing strip around the installation recess; To align the unit door flush with the kitchen cabinetry, there must be at least 78 3/4"² (200 cm²). The ...ventilated so that steam and hot air can form, causing damage to the unit while installation work is performed. Installation Ventilation When installing the coffee machine, make sure that the back of disassembly! Installation Make sure no sealing strip around the unit. You will need two Allen wrenches size...

Product Manual
Page 79
... make sure the electrical connection is not damaged. ^ Check if the coffee machine is centered in the installation recess. ^ To secure the unit in the installation recess. When inserting the unit into the installation recess. It makes connecting the unit easier. ^ Open the door and partially tighten the screws. ^ ...Unscrew the four feet on the underside of the installation recess is delivered with four M5 Allen head screws that you can be unscrewed by up to 3/8" (10 mm). ^ Align the unit by...
... make sure the electrical connection is not damaged. ^ Check if the coffee machine is centered in the installation recess. ^ To secure the unit in the installation recess. When inserting the unit into the installation recess. It makes connecting the unit easier. ^ Open the door and partially tighten the screws. ^ ...Unscrew the four feet on the underside of the installation recess is delivered with four M5 Allen head screws that you can be unscrewed by up to 3/8" (10 mm). ^ Align the unit by...

Product Manual
Page 80
Installation Adjusting the door hinges If the door cannot be opened or closed easily after installation, you will have to align the door (TX 20): ^ To adjust the door flush with the front of the cabinet, turn the screw a. ^ To adjust the door horizontally and vertically, turn the screw b. 80
Installation Adjusting the door hinges If the door cannot be opened or closed easily after installation, you will have to align the door (TX 20): ^ To adjust the door flush with the front of the cabinet, turn the screw a. ^ To adjust the door horizontally and vertically, turn the screw b. 80

Product Manual
Page 1
... the button for the desired drink until no cleaning agent is not required. (Only for CVA 6405) Quick Start Guide Built-in the "Parameters" menu ĺĺ Tap...of drinks "No. Select profile -- For private use more ), otherwise descaling will need 1 Miele cleaning tablet to save the portion sizes for Espresso, Coffee and Long Coffee for the selected ingredients... until appliance needs descaling" / "No. It is essential to read the Operating and Installation Instructions carefully while paying particular attention to the end. ĺĺ Tap and select...
... the button for the desired drink until no cleaning agent is not required. (Only for CVA 6405) Quick Start Guide Built-in the "Parameters" menu ĺĺ Tap...of drinks "No. Select profile -- For private use more ), otherwise descaling will need 1 Miele cleaning tablet to save the portion sizes for Espresso, Coffee and Long Coffee for the selected ingredients... until appliance needs descaling" / "No. It is essential to read the Operating and Installation Instructions carefully while paying particular attention to the end. ĺĺ Tap and select...

Product Manual
Page 2
... frequency Daily (at once, tapping the OK button once will ged. Front of the coffee machine are not going to use milk for Miele customer service only) To select a setting use the arrow keys until the setting you want . Blocked milk pipework The following appears in ... water dispenser. Milk container with water and coffee beans. ĺĺ Please see the Operating and Installation Instructions. ĺĺ Clean the appliance and the milk cont- Main dispenser connector -- CVA 6401, CVA 6405 en - US, CA 1414 M.-Nr. 09 741 530 / 00 Operation You are currently active...
... frequency Daily (at once, tapping the OK button once will ged. Front of the coffee machine are not going to use milk for Miele customer service only) To select a setting use the arrow keys until the setting you want . Blocked milk pipework The following appears in ... water dispenser. Milk container with water and coffee beans. ĺĺ Please see the Operating and Installation Instructions. ĺĺ Clean the appliance and the milk cont- Main dispenser connector -- CVA 6401, CVA 6405 en - US, CA 1414 M.-Nr. 09 741 530 / 00 Operation You are currently active...