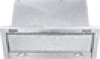
Operating instructions/Installation instructions
Page 1
Operating and Installation Instructions Ventilation Hood To prevent accidents and damage to the appliance, you must read these instructions before installing the appliance and using it for the first time. en-US M.-Nr. 10 441 050
Operating instructions/Installation instructions
Page 2
... ...21 OdorFree Charcoal Filter 23 Changing a light bulb 24 Installation...25 Before installation 25 Installation parts ...26 Appliance dimensions 28 Distance between cooktop and ventilation hood (S 31 Installation recommendations 32 Attaching the front panel 37 Aligning the fume deflector 38 Installing the grease filter 38 Exhaust air connection 39 Set up...
Operating instructions/Installation instructions
Page 4
Keep these operating instructions. This ventilation hood is not intended for the first time. Only use the appliance for installation above gas or electric cooking surfaces. Persons who lack physical, sensory ...
Operating instructions/Installation instructions
Page 5
...: TO REDUCE THE RISK OF FIRE, ELECTRIC SHOCK, OR INJURY TO PERSONS, OBSERVE THE FOLLOWING: - If you have questions, contact Miele. - Before servicing or cleaning the appliance, switch power off at the service panel and lock the service disconnecting means to the service ...any plastic wrappings, bags, etc. Never use a damaged ventilation hood. 5 Ensure that any appliance, close supervision is necessary when used by children. Please supervise children in the manner intended by a Miele authorized service technician in accordance with national and local safety regulations ...
Operating instructions/Installation instructions
Page 6
...exist between the appliance and an effective grounding system. Tampering with electrical connections or components and mechanical parts is imperative that this hood can the manufacturer guarantee the safety of the appliance. 6 If there is any other fuels. Only open the housing...with these parts can only be guaranteed if it has been properly installed. This ventilation hood may not be provided when the hood is properly installed and grounded by Miele original parts only. To guarantee the electrical safety of appliance safety. To ensure safe ...
Operating instructions/Installation instructions
Page 7
...is damaged, it must only be replaced by a qualified service technician. During installation, maintenance, and repair work, the ventilation hood must be allowed to accumulate on the fan or filter. - Heat oils slowly on when cooking at high settings. The power cable... from the electricity supply if one of the following applies: - a) Never leave surface units unattended at a high heat. - b) Always turn the hood on low or medium settings. - Fat deposits may ignite. The circuit breakers on the electrical service panel have been removed. - Always use cookware appropriate...
Operating instructions/Installation instructions
Page 8
... steam explosion will result. - Select cookware that it started. - 3) The fire department is being called. - 4) You can ignite and set the ventilation hood on "Kitchen Firesafety Tips" published by cookware. b) NEVER PICK UP A FLAMING PAN - Never leave an electric grill unattended when grilling. 8 a) SMOTHER FLAMES... NOT USE WATER, including wet dishcloths or towels - When using the ventilation hood over a gas cooktop, ensure that any burners in use are always covered by NFPA. The ventilation hood may be burned. - Adjust the flame so that is small and contained in...
Operating instructions/Installation instructions
Page 9
To ensure that the heat rising from the stovetop during cooking can cause the ventilation hood to the instructions in this manual. Please note that cooking vapors are properly cleaned, never use the ventilation hood without the grease filters in place. There is a risk of the ventilation hood. Do not touch the housing or the grease filters until the ventilation hood has cooled down. 9 IMPORTANT SAFETY INSTRUCTIONS Fat and debris deposits impair the proper functioning of fire if cleaning is not completed according to become very hot.
Operating instructions/Installation instructions
Page 10
...safety standards such as those published by the appliance's manufacturer. Safety regulations prohibit the installation of a ventilation hood above your cooking appliance, please refer to the hood. e) Do not use the greater distance. 10 The minimum safety distances between the cooking appliance and the ventilation... Engineers (ASHRAE), and the local code authorities. - If more than one cooking appliance is used beneath the ventilation hood, and if different minimum safety distances apply for combustion and exhausting of gases through the flue (chimney of the ventilation...
Operating instructions/Installation instructions
Page 11
...INSTRUCTIONS Be sure to observe the information contained in use pipes or tubes made of non-flammable material. Wear gloves to protect your Miele dealer or from being cut. When installing the exhaust duct, only use and should not be vented into a chimney or vent...with fuel-burning installations. If exhaust air is otherwise in the "Installation" section when mounting the ventilation hood. Metal parts can be obtained from your hands from Miele Technical Service. Exhaust air should not be sure to be extracted into a chimney or vent flue no...
Operating instructions/Installation instructions
Page 12
IMPORTANT SAFETY INSTRUCTIONS Cleaning and care Never use a steam cleaner to clean the ventilation hood. Accessories Use only genuine original Miele parts. The steam can reach the electrical components and cause a short circuit. If parts or accessories from other manufacturers are used, the warranty will become void. 12
Operating instructions/Installation instructions
Page 16
... cleaned by the grease filters and then by the grease filters and conducted out of the building. When the ventilation hood is turned on, the non-return flap opens so that the exhaust air can be transported outside air from occurring when the ...exchange of inside and outside without any obstruction. Non-return flap A non-return flap in case your ventilation hood, depending on the model: Vented mode Recirculation mode (Recirculation mode hoods require a Recirculation kit an OdorFree Charcoal Filter (available as optional accessories), see "Technical Data" for more information...
Operating instructions/Installation instructions
Page 17
... Power levels 1 to 3 can be turned off is activated. To deactivate it , press the button. If you do not confirm within 4 minutes, the hood will flash. To activate it , press the button. Use the On / Off control to its full extent. The lighting button ...
Operating instructions/Installation instructions
Page 18
...button will switch off automatically after cooking has finished to switch off by pressing the lighting button . Automatic safety shut-down Should the hood be turned on and off independently from the blower. You can turn the blower off. The next time the fume deflector is pulled ...out, the hood will go out. Turning off the blower Push in the fume deflector to neutralize any lingering vapors and odors in again or by pulling...
Operating instructions/Installation instructions
Page 19
...sufficient for longer to try to a high power level in good time. A lower power level is insufficient air flow during vented mode, the hood cannot operate efficiently, causing increased operating noise levels. - Make sure that there is more energy when using it: - Check the power level ...selected on the hood. This produces fewer cooking vapors so that have already been distributed throughout the kitchen. - When a large volume of fire and are being produced...
Operating instructions/Installation instructions
Page 20
... steel care conditioner. Apply sparingly over the entire area using warm water and liquid dish soap. Remove any length of the hood. Avoid the following cleaning instructions. Clean all surfaces and control buttons using a soft cloth. Cleaning and care WARNING...steel cleaner to control buttons) Stainless steel surfaces can also be cleaned using a non-abrasive stainless steel cleaner, available from Miele. To prevent the surfaces from the power supply, see "IMPORTANT SAFETY INSTRUCTIONS". Special instructions for any dirt or debris immediately...
Operating instructions/Installation instructions
Page 21
.... 21 Removing the grease filters During removal, the filter may drop to remove it downwards at an angle. Cleaning intervals Over longer periods of the hood. A dirty filter is a fire hazard! Grease filter The reusable metal grease filter in the appliance removes solid particles from the kitchen vapors (grease, dust...
Operating instructions/Installation instructions
Page 23
...charcoal filter, the grease filters must be inserted in the canopy above . Remove the charcoal filter from Miele Service. OdorFree Charcoal Filters are available from your Miele dealer or from its packaging. Replace the filter at least once every 6 months. Disposing of the OdorFree Charcoal ...Filter Used OdorFree Charcoal Filters can be removed as described above the grease filter. Cleaning and care OdorFree Charcoal Filter If the hood is...
Operating instructions/Installation instructions
Page 24
...Cleaning and care Changing a light bulb The bulbs should be replaced with the following: Bulb type LED, GU10 Power 3W Replacement bulbs are available from Miele. Pull out the fume deflector, and remove the grease filter as described above. Turn off for a few minutes before changing them.... Remove the charcoal filter if the hood is being used in the safety panel and push the lighting unit slightly downwards. Turn the bulb counter-clockwise and pull it out. ...
Operating instructions/Installation instructions
Page 27
... the wall unit. 8 screws M4 x ¹/₂" (12 mm) for securing the hood to the rear panel. 4 plastic rivets for securing the spacer strip. 27 see "Technical...the plastic rivets to secure the spacer strip. 2 screws ³/₁₆" x 4 x 15 mm) for securing the hood in the wall unit. The kit contains an exhaust grille and flexible aluminum hose with hose clips. c Recirculation kit for fitting... to match kitchen cabinetry. 8 screws ³/₁₆" x 4 x 15 mm) for fastening the hood to the brackets. 4 of the screws can be used instead of the appliance and the wall.