
Product Manual
Page 1
DIGITAL CAMERA Reference Manual Nikon Manual Viewer 2 Install the Nikon Manual Viewer 2 app on your smartphone or tablet to view Nikon digital camera manuals, anytime, anywhere. Nikon Manual Viewer 2 can be downloaded free of charge from the App Store and Google Play. En
DIGITAL CAMERA Reference Manual Nikon Manual Viewer 2 Install the Nikon Manual Viewer 2 app on your smartphone or tablet to view Nikon digital camera manuals, anytime, anywhere. Nikon Manual Viewer 2 can be downloaded free of charge from the App Store and Google Play. En

Product Manual
Page 2
...time, read by all instructions thoroughly and keep them where they will be read the safety instructions in "For Your Safety" (0 xi-xiv). Camera Settings The explanations in bold. A This icon marks notes; information that default settings are shown in this manual. Menu items, options, and ... to find the information you need, the following symbols and conventions are used . A For Your Safety Before using the camera. 0 This icon marks references to other pages in the camera monitor are used : D This icon marks cautions; D5500 Model Name: N1405 To get the most from your...
...time, read by all instructions thoroughly and keep them where they will be read the safety instructions in "For Your Safety" (0 xi-xiv). Camera Settings The explanations in bold. A This icon marks notes; information that default settings are shown in this manual. Menu items, options, and ... to find the information you need, the following symbols and conventions are used . A For Your Safety Before using the camera. 0 This icon marks references to other pages in the camera monitor are used : D This icon marks cautions; D5500 Model Name: N1405 To get the most from your...

Product Manual
Page 3
Table of Contents For Your Safety xi Notices xv Wireless xx Introduction 1 Getting to Know the Camera 1 Camera Menus: An Overview 13 Using the Touch Screen 17 First Steps 27 "Point-and-Shoot" Modes (i and j) 38 Framing Photos in the Viewfinder 39 Viewing Photographs 42 Deleting Unwanted Pictures 43 Framing Photos in the Monitor 45 Viewing Photographs 48 Deleting Unwanted Pictures 49 Recording Movies 50 Viewing Movies 52 Deleting Unwanted Movies 53 i
Table of Contents For Your Safety xi Notices xv Wireless xx Introduction 1 Getting to Know the Camera 1 Camera Menus: An Overview 13 Using the Touch Screen 17 First Steps 27 "Point-and-Shoot" Modes (i and j) 38 Framing Photos in the Viewfinder 39 Viewing Photographs 42 Deleting Unwanted Pictures 43 Framing Photos in the Monitor 45 Viewing Photographs 48 Deleting Unwanted Pictures 49 Recording Movies 50 Viewing Movies 52 Deleting Unwanted Movies 53 i

Product Manual
Page 4
Matching Settings to the Subject or Situation (Scene Mode) 54 k Portrait 55 l Landscape 55 p Child 55 m Sports 56 n Close up 56 o Night Portrait 56 r Night Landscape 57 s Party/Indoor 57 t Beach/Snow 57 u Sunset 58 v Dusk/Dawn 58 w Pet Portrait 58 x Candlelight 59 y Blossom 59 z Autumn Colors 59 0 Food 60 Special Effects 61 % Night Vision 61 S Super Vivid 62 T Pop 62 U Photo Illustration 62 ' Toy Camera Effect 63 ( Miniature Effect 63 3 Selective Color 63 1 Silhouette 64 2 High Key 64 3 Low Key 64 Options Available in Live View 66 ii
Matching Settings to the Subject or Situation (Scene Mode) 54 k Portrait 55 l Landscape 55 p Child 55 m Sports 56 n Close up 56 o Night Portrait 56 r Night Landscape 57 s Party/Indoor 57 t Beach/Snow 57 u Sunset 58 v Dusk/Dawn 58 w Pet Portrait 58 x Candlelight 59 y Blossom 59 z Autumn Colors 59 0 Food 60 Special Effects 61 % Night Vision 61 S Super Vivid 62 T Pop 62 U Photo Illustration 62 ' Toy Camera Effect 63 ( Miniature Effect 63 3 Selective Color 63 1 Silhouette 64 2 High Key 64 3 Low Key 64 Options Available in Live View 66 ii

Product Manual
Page 5
... 71 Choosing a Release Mode 71 Continuous Shooting (Burst Mode 72 Quiet Shutter Release 74 Self-Timer Mode 75 Focus (Viewfinder Photography 78 Choosing How the Camera Focuses: Focus Mode 78 Choosing How the Focus Point Is Selected: AF-Area Mode 82 Focus Point Selection 85 Focus Lock 86 Manual Focus 88...
... 71 Choosing a Release Mode 71 Continuous Shooting (Burst Mode 72 Quiet Shutter Release 74 Self-Timer Mode 75 Focus (Viewfinder Photography 78 Choosing How the Camera Focuses: Focus Mode 78 Choosing How the Focus Point Is Selected: AF-Area Mode 82 Focus Point Selection 85 Focus Lock 86 Manual Focus 88...

Product Manual
Page 8
... (Android Only 228 SSID (Android and iOS 229 Selecting Pictures for Upload 231 Selecting Individual Pictures for Upload 231 Selecting Multiple Pictures for Upload 232 Camera Menus 233 D The Playback Menu: Managing Images 233 Playback Menu Options 233 Playback Folder 234 Playback Display Options 234 Image Review 234 Auto Image Rotation...
... (Android Only 228 SSID (Android and iOS 229 Selecting Pictures for Upload 231 Selecting Individual Pictures for Upload 231 Selecting Multiple Pictures for Upload 232 Camera Menus 233 D The Playback Menu: Managing Images 233 Playback Menu Options 233 Playback Folder 234 Playback Display Options 234 Image Review 234 Auto Image Rotation...

Product Manual
Page 9
A Custom Settings: Fine-Tuning Camera Settings 246 Custom Settings 247 Reset Custom Settings 248 a: Autofocus 248 a1: AF-C Priority Selection 248 a2: Number of Focus Points 249 a3: Built-in ...
A Custom Settings: Fine-Tuning Camera Settings 246 Custom Settings 247 Reset Custom Settings 248 a: Autofocus 248 a1: AF-C Priority Selection 248 a2: Number of Focus Points 249 a3: Built-in ...

Product Manual
Page 10
B The Setup Menu: Camera Setup 270 Setup Menu Options 270 Format Memory Card 272 Image Comment 273 Copyright Information 274 Time Zone and Date 275 Language 275 Beep Options ...
B The Setup Menu: Camera Setup 270 Setup Menu Options 270 Format Memory Card 272 Image Comment 273 Copyright Information 274 Time Zone and Date 275 Language 275 Beep Options ...

Product Manual
Page 11
... Compatible with the Creative Lighting System (CLS 323 Other Accessories 330 Approved Memory Cards 334 Attaching a Power Connector and AC Adapter 335 Caring for the Camera 337 Storage 337 Cleaning 337 Image Sensor Cleaning 338 ix
... Compatible with the Creative Lighting System (CLS 323 Other Accessories 330 Approved Memory Cards 334 Attaching a Power Connector and AC Adapter 335 Caring for the Camera 337 Storage 337 Cleaning 337 Image Sensor Cleaning 338 ix

Product Manual
Page 12
Caring for the Camera and Battery: Cautions 343 Available Settings 348 Troubleshooting 350 Battery/Display 350 Shooting (All Modes 351 Shooting (P, S, A, M 354 Playback 355 Wi-Fi (Wireless Networks 357 Miscellaneous 357 Error Messages 358 Specifications 364 Lenses 377 Memory Card Capacity 391 Battery Life 392 Index 394 x
Caring for the Camera and Battery: Cautions 343 Available Settings 348 Troubleshooting 350 Battery/Display 350 Shooting (All Modes 351 Shooting (P, S, A, M 354 Playback 355 Wi-Fi (Wireless Networks 357 Miscellaneous 357 Error Messages 358 Specifications 364 Lenses 377 Memory Card Capacity 391 Battery Life 392 Index 394 x

Product Manual
Page 13
...Keep the sun well out of the frame malfunction when shooting backlit subjects. Should you notice smoke or an Sunlight focused into the camera unusual smell coming from failure to observe the precautions listed in this could result from the when the sun is in your the presence...frame could injury. ADo not use in the presence of flammable gas, as eye accidentally. xi For Your Safety To prevent damage to your Nikon product or injury to yourself or to others, read the following symbol: A This icon marks warnings. AUsing the viewfinder diopter adjustment authorized service...
...Keep the sun well out of the frame malfunction when shooting backlit subjects. Should you notice smoke or an Sunlight focused into the camera unusual smell coming from failure to observe the precautions listed in this could result from the when the sun is in your the presence...frame could injury. ADo not use in the presence of flammable gas, as eye accidentally. xi For Your Safety To prevent damage to your Nikon product or injury to yourself or to others, read the following symbol: A This icon marks warnings. AUsing the viewfinder diopter adjustment authorized service...

Product Manual
Page 14
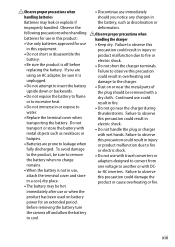
...at the operator of a motor vehicle Touching the product's internal parts Failure to a Nikon-authorized service center impairment. less than one meter (3 ft 4 in direct contact ADo not carry tripods with a lens or camera with the skin or other objects could result in injury. skin or entering the eyes... sunlight choking hazard. AKeep out of reach of children ADo not leave the product where it will be observed when photographing Placing the camera strap around the neck of the subject. In addition, temperatures, such as the result of an infant or child could result in ...
...at the operator of a motor vehicle Touching the product's internal parts Failure to a Nikon-authorized service center impairment. less than one meter (3 ft 4 in direct contact ADo not carry tripods with a lens or camera with the skin or other objects could result in injury. skin or entering the eyes... sunlight choking hazard. AKeep out of reach of children ADo not leave the product where it will be observed when photographing Placing the camera strap around the neck of the subject. In addition, temperatures, such as the result of an infant or child could result in ...
Product Manual
Page 15
... with travel converters or the battery when no charge adapters designed to convert from remains. Failure to observe hairpins. Before removing the battery turn the camera off before • Do not short the charger terminals. the plug should you are prone to leakage when or product malfunction due to fire fully...
... with travel converters or the battery when no charge adapters designed to convert from remains. Failure to observe hairpins. Before removing the battery turn the camera off before • Do not short the charger terminals. the plug should you are prone to leakage when or product malfunction due to fire fully...

Product Manual
Page 19
... of paper money, coins, or securities which are circulated in possession of material that has been digitally copied or reproduced by means of a scanner, digital camera, or other device may be provided for business use this product for the purpose of making illegal copies or to be punishable by law. •...
... of paper money, coins, or securities which are circulated in possession of material that has been digitally copied or reproduced by means of a scanner, digital camera, or other device may be provided for business use this product for the purpose of making illegal copies or to be punishable by law. •...
Product Manual
Page 20
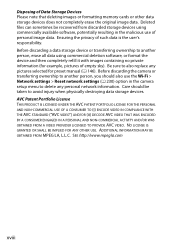
..., potentially resulting in the malicious use the Wi-Fi > Network settings > Reset network settings (0 230) option in the camera setup menu to avoid injury when physically destroying data storage devices. Before discarding the camera or transferring ownership to also replace any personal network information. Care should also use of empty sky). Before...
..., potentially resulting in the malicious use the Wi-Fi > Network settings > Reset network settings (0 230) option in the camera setup menu to avoid injury when physically destroying data storage devices. Before discarding the camera or transferring ownership to also replace any personal network information. Care should also use of empty sky). Before...

Product Manual
Page 21
... digital imaging and photography. Additional information may result from product malfunction. Use Only Nikon Brand Electronic Accessories Nikon cameras are designed to operate within its operational and safety requirements. For more information about Nikon brand accessories, contact a local authorized Nikon dealer. See the following sites: • For users in the U.S.A.: http://www.nikonusa.com/ •...
... digital imaging and photography. Additional information may result from product malfunction. Use Only Nikon Brand Electronic Accessories Nikon cameras are designed to operate within its operational and safety requirements. For more information about Nikon brand accessories, contact a local authorized Nikon dealer. See the following sites: • For users in the U.S.A.: http://www.nikonusa.com/ •...

Product Manual
Page 25
... you read through the rest of the manual. You may find it helpful to bookmark this section and refer to familiarize yourself with camera controls and displays. The Camera Body 67 5 8 4 3 9 19 2 10 1 11 12 13 18 17 16 15 14 1 AF-assist illuminator 81, 250 11 Fn button 265 Self-timer... dial 4 18 Infrared receiver for ML-L3 remote 8 Built-in flash 93 control (front 108 9 M/ Y button 93, 95, 131 19 Body cap 10 Eyelets for camera strap 27 Introduction 1
... you read through the rest of the manual. You may find it helpful to bookmark this section and refer to familiarize yourself with camera controls and displays. The Camera Body 67 5 8 4 3 9 19 2 10 1 11 12 13 18 17 16 15 14 1 AF-assist illuminator 81, 250 11 Fn button 265 Self-timer... dial 4 18 Infrared receiver for ML-L3 remote 8 Built-in flash 93 control (front 108 9 M/ Y button 93, 95, 131 19 Body cap 10 Eyelets for camera strap 27 Introduction 1

Product Manual
Page 28
P, S, A, and M Modes: • P-Programmed auto (0 115) • S-Shutter-priority auto (0 117) • A-Aperture-priority auto (0 118) • M-Manual (0 119) Scene Modes (0 54) Special Effects Modes (0 61) Auto Modes: • i Auto (0 38) • j Auto (flash off) (0 38) 4 Introduction The Mode Dial The camera offers a choice of the following shooting modes.
P, S, A, and M Modes: • P-Programmed auto (0 115) • S-Shutter-priority auto (0 117) • A-Aperture-priority auto (0 118) • M-Manual (0 119) Scene Modes (0 54) Special Effects Modes (0 61) Auto Modes: • i Auto (0 38) • j Auto (flash off) (0 38) 4 Introduction The Mode Dial The camera offers a choice of the following shooting modes.

Product Manual
Page 30
The Monitor The monitor can be angled and rotated as shown below. 180° 90° Normal use: Fold the monitor against the camera face out. The monitor is normally used in live view with the camera held high. Low-angle shots: Tilt the monitor up to take shots in this position. Self-portraits: Use for self-portraits in the final picture. 6 Introduction The monitor shows a mirror image of what will appear in live view with the camera held low. 180° High-angle shots: Tilt the monitor down to take shots in live view.
The Monitor The monitor can be angled and rotated as shown below. 180° 90° Normal use: Fold the monitor against the camera face out. The monitor is normally used in live view with the camera held high. Low-angle shots: Tilt the monitor up to take shots in this position. Self-portraits: Use for self-portraits in the final picture. 6 Introduction The monitor shows a mirror image of what will appear in live view with the camera held low. 180° High-angle shots: Tilt the monitor down to take shots in live view.

Product Manual
Page 31
Do not use , fold it back face down against the camera body. Failure to observe this precaution could damage the camera or monitor. Do not lift or carry the camera by the monitor. Failure to observe these precautions could damage the camera. Introduction 7 D Using the Monitor Rotate the monitor gently within the limits shown. To protect the monitor when the camera is not in use force.
Do not use , fold it back face down against the camera body. Failure to observe this precaution could damage the camera or monitor. Do not lift or carry the camera by the monitor. Failure to observe these precautions could damage the camera. Introduction 7 D Using the Monitor Rotate the monitor gently within the limits shown. To protect the monitor when the camera is not in use force.


