
Setup Guide for the PM4410
Page 5
...instructions in any kind into a grounded outlet. If you are a few basic precautions you put the printer in this manual carefully. Safety Your OKI printer has been carefully designed to give you clean it has been printing for future reference. • Read and follow all electrical equipment, ...vents may be blocked, causing it to overheat. • To protect your printer from overheating, make sure it is well ventilated. • The printhead can not plug it for a length of safe, reliable performance. do not use your printer on the back of enclosure, make sure no openings ...
...instructions in any kind into a grounded outlet. If you are a few basic precautions you put the printer in this manual carefully. Safety Your OKI printer has been carefully designed to give you clean it has been printing for future reference. • Read and follow all electrical equipment, ...vents may be blocked, causing it to overheat. • To protect your printer from overheating, make sure it is well ventilated. • The printhead can not plug it for a length of safe, reliable performance. do not use your printer on the back of enclosure, make sure no openings ...

Setup Guide for the PM4410
Page 7
... cps in High Speed Draft mode • Capable of handling 10-part carbonless forms up to 0.03 inch (0.79 mm) thick • Rugged, long-life printhead (400 million characters) • Wide, 136-column format • Network capable • Software selectable or auto-switched rear-
... cps in High Speed Draft mode • Capable of handling 10-part carbonless forms up to 0.03 inch (0.79 mm) thick • Rugged, long-life printhead (400 million characters) • Wide, 136-column format • Network capable • Software selectable or auto-switched rear-

Setup Guide for the PM4410
Page 11
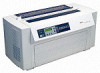
Installing the Printer Getting to Know the Pacemark 4410 Front View Rear-Feed Access Cover Tear Bar Cover Printhead Access Cover Control Panel Rear View Front Access Door Tear Bar Cover On/Off Switch Rear-Feed Access Cover Back Access Door Power Cord Port Network/Option Slot Pacemark 4410 Setup Guide Serial Port Port Access Cover Parallel Port E-9 Untitled-1 9 11/30/98, 1:25 PM
Installing the Printer Getting to Know the Pacemark 4410 Front View Rear-Feed Access Cover Tear Bar Cover Printhead Access Cover Control Panel Rear View Front Access Door Tear Bar Cover On/Off Switch Rear-Feed Access Cover Back Access Door Power Cord Port Network/Option Slot Pacemark 4410 Setup Guide Serial Port Port Access Cover Parallel Port E-9 Untitled-1 9 11/30/98, 1:25 PM

Setup Guide for the PM4410
Page 12
Press on the area(s) marked "PUSH" and open the printhead access cover. 3. Installation Remove the Shipping Restraints Save the shipping restraints and packing materials in place should you ever need to ship the printer. 1. Be sure to keep this restraint/screw: it is needed to lock the printhead in case you ever need to move or ship the printer. Remove the printhead shipping restraint and its retaining screw. Remove the pieces of shipping tape, then peel the protective plastic film off the digital display. 2. E-10 Untitled-1 Pacemark 4410 Setup Guide 10 11/30/98, 1:26 PM
Press on the area(s) marked "PUSH" and open the printhead access cover. 3. Installation Remove the Shipping Restraints Save the shipping restraints and packing materials in place should you ever need to ship the printer. 1. Be sure to keep this restraint/screw: it is needed to lock the printhead in case you ever need to move or ship the printer. Remove the printhead shipping restraint and its retaining screw. Remove the pieces of shipping tape, then peel the protective plastic film off the digital display. 2. E-10 Untitled-1 Pacemark 4410 Setup Guide 10 11/30/98, 1:26 PM

Setup Guide for the PM4410
Page 15
Install the ribbon cartridge in the printer: place the ribbon arms (1) over the metal tabs (2) at either end, then press down on the cartridge. 1 2 2 2 1 Pacemark 4410 Setup Guide Untitled-1 13 E-13 11/30/98, 1:28 PM Caution! Make sure the printer is turned off before proceeding. 1 2. Load the Cartridge 1. Move the printhead to the ribbon loading area (1).
Install the ribbon cartridge in the printer: place the ribbon arms (1) over the metal tabs (2) at either end, then press down on the cartridge. 1 2 2 2 1 Pacemark 4410 Setup Guide Untitled-1 13 E-13 11/30/98, 1:28 PM Caution! Make sure the printer is turned off before proceeding. 1 2. Load the Cartridge 1. Move the printhead to the ribbon loading area (1).

Setup Guide for the PM4410
Page 16
E-14 e4410_sg.p65 Pacemark 4410 Setup Guide 14 12/1/98, 5:20 PM 3. Feed the ribbon behind the printhead (1), threading it around the black guides (2) on either side of the molded-on arrows) to take up any slack in the direction of the printhead. Caution! Turn the blue knob counter clockwise (in the ribbon. Be careful not to jam. 5. Do NOT turn the knob clockwise: this can cause the ribbon to twist the ribbon: this can cause jams. 1 2 4. Close the printhead access cover.
E-14 e4410_sg.p65 Pacemark 4410 Setup Guide 14 12/1/98, 5:20 PM 3. Feed the ribbon behind the printhead (1), threading it around the black guides (2) on either side of the molded-on arrows) to take up any slack in the direction of the printhead. Caution! Turn the blue knob counter clockwise (in the ribbon. Be careful not to jam. 5. Do NOT turn the knob clockwise: this can cause the ribbon to twist the ribbon: this can cause jams. 1 2 4. Close the printhead access cover.

Setup Guide for the PM4410
Page 27
... the factory to 0.35 inch (9 mm) down from the top of the page. Press GROUP until Page Width appears on the platen and damaging the printhead.
... the factory to 0.35 inch (9 mm) down from the top of the page. Press GROUP until Page Width appears on the platen and damaging the printhead.

Setup Guide for the PM4410
Page 32
... set at the factory to Valid. 6. With the printer turned on the display. Valid will need to exit the menu mode. Press MENU. e. damaging the printhead. Press ITEM until Auto Path appears on the display. 5. Press MENU to set using your application, you will appear on the display. 4. Other paper widths...
... set at the factory to Valid. 6. With the printer turned on the display. Valid will need to exit the menu mode. Press MENU. e. damaging the printhead. Press ITEM until Auto Path appears on the display. 5. Press MENU to set using your application, you will appear on the display. 4. Other paper widths...

Setup Guide for the PM4410
Page 34
If you don't, the printhead could be sure that the printer is turned off. Make sure that continuous form paper at least 9 inches wide is changed from 13.6 inches to 8 inches before starting the Rolling ASCII test. Caution! Rolling ASCII Test To print a Rolling ASCII test: 1. Press and hold PATH/TOF (1) while turning the printer on. 1 To stop the test, press ON-LINE/RESET. If you are using is loaded and that the Page Width menu setting for the paper path you have 9-inch paper loaded, be damaged. 2. E-32 Untitled-1 Pacemark 4410 Setup Guide 32 11/30/98, 1:36 PM
If you don't, the printhead could be sure that the printer is turned off. Make sure that continuous form paper at least 9 inches wide is changed from 13.6 inches to 8 inches before starting the Rolling ASCII test. Caution! Rolling ASCII Test To print a Rolling ASCII test: 1. Press and hold PATH/TOF (1) while turning the printer on. 1 To stop the test, press ON-LINE/RESET. If you are using is loaded and that the Page Width menu setting for the paper path you have 9-inch paper loaded, be damaged. 2. E-32 Untitled-1 Pacemark 4410 Setup Guide 32 11/30/98, 1:36 PM

Setup Guide for the PM4410
Page 53
To move the TOF up ). 3. To set with the printhead access cover open. To move the TOF down ). 2. Setting the TOF The TOF can be set the TOF in fine increments over a limited area: 3 1 2 1. Resetting ...
To move the TOF up ). 3. To set with the printhead access cover open. To move the TOF down ). 2. Setting the TOF The TOF can be set the TOF in fine increments over a limited area: 3 1 2 1. Resetting ...

Users' Guide for the PM4410
Page 20
... I/F Parallel I/F Font Set-Up Set-Up Font Set-Up Font Serial I/F Set-Up 20 Caution!! Print Mode Sets the typeface used , the printhead will ignore all data after it receives the print suppress command. If you are using . Rcv. Ppr Out Override Paper Out Override: Senses when... : Utility, NLQ (Near letter Quality) Courier, NLQ (Near Letter Quality) Gothic, or HSD (High Speed Draft). Caution! This can damage the printhead. Print DEL Code Change to Yes if you wish to engage proportionally spaced printing. Buffer Sets the size of parity your system uses. Pin 18...
... I/F Parallel I/F Font Set-Up Set-Up Font Set-Up Font Serial I/F Set-Up 20 Caution!! Print Mode Sets the typeface used , the printhead will ignore all data after it receives the print suppress command. If you are using . Rcv. Ppr Out Override Paper Out Override: Senses when... : Utility, NLQ (Near letter Quality) Courier, NLQ (Near Letter Quality) Gothic, or HSD (High Speed Draft). Caution! This can damage the printhead. Print DEL Code Change to Yes if you wish to engage proportionally spaced printing. Buffer Sets the size of parity your system uses. Pin 18...

Users' Guide for the PM4410
Page 21
.... Set-Up Used to the setting) before exiting the menu. Press STORE to select the setting with the best alignment (asterisk appears next to limit printhead travel. Keep it is waiting for that setting. Symbol Sets 21 All cessing between portions of the paper. Select Mode 2 to cut off the end...
.... Set-Up Used to the setting) before exiting the menu. Press STORE to select the setting with the best alignment (asterisk appears next to limit printhead travel. Keep it is waiting for that setting. Symbol Sets 21 All cessing between portions of the paper. Select Mode 2 to cut off the end...

Users' Guide for the PM4410
Page 22
The printhead may be extremely HOT! 2. 2: Maintenance Replacing the Ribbon Remove the Old Ribbon 1. Caution! Move the printhead to the ribbon loading area (1). 22 Turn the printer off, then press on the area(s) marked PUSH and open the printhead access cover.
The printhead may be extremely HOT! 2. 2: Maintenance Replacing the Ribbon Remove the Old Ribbon 1. Caution! Move the printhead to the ribbon loading area (1). 22 Turn the printer off, then press on the area(s) marked PUSH and open the printhead access cover.

Users' Guide for the PM4410
Page 23
Unthread the ribbon from the printhead, then remove and discard the cartridge. Prepare the New Ribbon 1. Push in on the white plastic ribbon restraint at either end of the cartridge. 3. Pull out the red shipping restraint. 23 Open the new ribbon cartridge and swing out the ribbon arms at the right end of the ribbon cartridge until they snap into place. 2. 3.
Unthread the ribbon from the printhead, then remove and discard the cartridge. Prepare the New Ribbon 1. Push in on the white plastic ribbon restraint at either end of the cartridge. 3. Pull out the red shipping restraint. 23 Open the new ribbon cartridge and swing out the ribbon arms at the right end of the ribbon cartridge until they snap into place. 2. 3.

Users' Guide for the PM4410
Page 24
Install the New Ribbon 1. Caution! Be careful not to twist the ribbon: this can cause jams. 24 Feed the ribbon over the metal tabs at either end, then press down on either side of the printhead. Install the ribbon cartridge in the printer: place the ribbon arms over the back of the printhead, threading it into the black guides (1) on the cartridge. 2.
Install the New Ribbon 1. Caution! Be careful not to twist the ribbon: this can cause jams. 24 Feed the ribbon over the metal tabs at either end, then press down on either side of the printhead. Install the ribbon cartridge in the printer: place the ribbon arms over the back of the printhead, threading it into the black guides (1) on the cartridge. 2.

Users' Guide for the PM4410
Page 25
Turn the blue knob counter clockwise (in the direction of the molded arrows) to take up into the open position. 25 Do NOT turn the knob clockwise: this can cause the ribbon to retract the paper from the paper path. 2. Caution! Clearing Paper Jams Front Feed Jams To clear a front feed paper jam: 1. Turn the printer off. 3. Press PARK to jam! Pull the front access door out and lift it up any slack in the ribbon, then close the printhead access cover. 3.
Turn the blue knob counter clockwise (in the direction of the molded arrows) to take up into the open position. 25 Do NOT turn the knob clockwise: this can cause the ribbon to retract the paper from the paper path. 2. Caution! Clearing Paper Jams Front Feed Jams To clear a front feed paper jam: 1. Turn the printer off. 3. Press PARK to jam! Pull the front access door out and lift it up any slack in the ribbon, then close the printhead access cover. 3.

Users' Guide for the PM4410
Page 26
... and out into the print path. The sheet will feed into the printer, pulling any ripped pieces. 5. Be careful to load the paper into the printhead area. 4. If the paper continues to retract the paper from the paper path. 2.
... and out into the print path. The sheet will feed into the printer, pulling any ripped pieces. 5. Be careful to load the paper into the printhead area. 4. If the paper continues to retract the paper from the paper path. 2.

Users' Guide for the PM4410
Page 28
.... 3. Plug the printer back in the printer. 4. The sheet will feed into the printer, pulling any loose pieces through the path and out into the printhead area. 4. To correct this: 1. Open the rear-feed access cover. 3. Press FF/LOAD. Turn the fuse housing (1) to retract the paper from the outlet. 2. Turn...
.... 3. Plug the printer back in the printer. 4. The sheet will feed into the printer, pulling any loose pieces through the path and out into the printhead area. 4. To correct this: 1. Open the rear-feed access cover. 3. Press FF/LOAD. Turn the fuse housing (1) to retract the paper from the outlet. 2. Turn...

Users' Guide for the PM4410
Page 29
Caution! Press PARK to dust around inside the printer. Turn the printer off. 3. Use a clean, dry cloth to remove the paper from the print path. 2. Cleaning the Interior 1. Press on the cabinet: they could damage the housing. Remove any loose bits of operation). Never use solvents or strong detergents on the area(s) marked PUSH and open the printhead access cover. 4. Cleaning the Housing You should clean the housing every few months (or after about 300 hours of paper. 29
Caution! Press PARK to dust around inside the printer. Turn the printer off. 3. Use a clean, dry cloth to remove the paper from the print path. 2. Cleaning the Interior 1. Press on the cabinet: they could damage the housing. Remove any loose bits of operation). Never use solvents or strong detergents on the area(s) marked PUSH and open the printhead access cover. 4. Cleaning the Housing You should clean the housing every few months (or after about 300 hours of paper. 29

Users' Guide for the PM4410
Page 30
Open the rear-feed access cover and vacuum out any paper dust and loose bits of paper, then close the cover. 8. Cleaning the Exterior Use a damp cloth with a mild detergent to load paper back into the open position. 7. Pull out the front access cover and lift it into the print path. Vacuum out any paper dust and loose bits of paper, then close the cover. 9. Turn the printer back on and press FF/LOAD to wipe the printer's external housing clean. 30 Close the printhead access cover. 6. 5.
Open the rear-feed access cover and vacuum out any paper dust and loose bits of paper, then close the cover. 8. Cleaning the Exterior Use a damp cloth with a mild detergent to load paper back into the open position. 7. Pull out the front access cover and lift it into the print path. Vacuum out any paper dust and loose bits of paper, then close the cover. 9. Turn the printer back on and press FF/LOAD to wipe the printer's external housing clean. 30 Close the printhead access cover. 6. 5.


