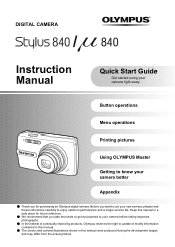
Stylus 840 Instruction Manual (English)
Page 1
Before you take test shots to get accustomed to your camera before taking important photographs. ( In the interest of continually improving products, Olympus reserves the right to enjoy optimum performance and a longer service life. DIGITAL CAMERA Instruction Manual Quick Start Guide Get started using your new camera, please read these instructions carefully to update or modify...
Stylus 840 Instruction Manual (English)
Page 2
...how to transfer and save pictures to know your camera more about the menus that control the functions and settings for basic operation. Contents Quick Start Guide P.3 Button operations Menu operations Printing pictures Using OLYMPUS Master Getting to a computer. Read about convenient functions... and safety precautions on how to use your camera better Appendix P.11 P.20 P.40 Test out the functions of the camera buttons by following along with the illustrations...
Stylus 840 Instruction Manual (English)
Page 3
Attach the strap Quick Start Guide Pull the strap tight so that it does not come loose. Gather these items (box contents) Digital Camera Strap Lithium Ion Battery (LI-42B) Battery Charger (LI-40C) USB cable AV Cable OLYMPUS Master 2 CD-ROM Items not shown: Instruction Manual (this manual), warranty card. EN 3 Contents may vary depending on purchase location.
Stylus 840 Instruction Manual (English)
Page 4
Insert the battery and an xD-Picture Card (optional) in the camera. 2 1 Quick Start Guide 4 EN Charging Indicator Light On (Red): Charging Light Off: Charging complete (Charging time: Approx. 5 hours) b. Charge the battery Power Cable Battery Charger Lithium Ion Battery 3 1 2 AC Wall Outlet Battery comes partially charged. Preparing the camera a.
Stylus 840 Instruction Manual (English)
Page 5
... remove the card, push it all the way in the direction of the arrow. Quick Start Guide Preparing the camera ( Insert the battery by putting in the marked side first, with this camera even without using an optional xDPicture CardTM (hereinafter referred to as shown in the illustration and insert it straight...
Stylus 840 Instruction Manual (English)
Page 6
... function allows you to h. Press the o button. Set the mode dial to shoot with 4 1243 in shooting mode. a. The camera automatically sets the optimum aperture value and shutter speed. When shooting still pictures (shooting mode) Quick Start Guide When shooting movies (shooting... mode) Still picture shooting modes h K This function allows you to the shooting condition. Turn the camera on This explains how to turn off the camera, press the o button once again. To turn on the camera in this screen will appear. b. X o button Y M D TIME Y M D CANCEL MENU...
Stylus 840 Instruction Manual (English)
Page 9
Shoot Shutter button (Pressed Completely) The card access lamp blinks. The shutter speed and aperture value are locked. c. Focus Shutter button (Pressed Halfway) AF target mark Place this mark over your subject. • The AF target mark lights in green when the focus and exposure are displayed. • If the AF target mark blinks in red, the focus is not adjusted properly. Try locking the focus again. Take a picture a. Hold the camera Horizontal grip Vertical grip Quick Start Guide b. EN 9
Stylus 840 Instruction Manual (English)
Page 11
.... The AF target mark lights in red, the focus is displayed. 1 o button Power on: Shooting mode • Lens extends • Monitor turns on Turning the camera on and off Playback mode • Monitor turns on 2 Shutter button Shooting pictures Shooting still pictures Set the mode dial to shoot a picture. Now, press...
Stylus 840 Instruction Manual (English)
Page 12
... modes Set the mode dial to another one • Press m and select [SCN] from the top menu. h Shooting pictures with automatic settings The camera determines the optimum settings for the brightness of each scene mode. Select a scene mode/change another scene mode to another scene mode, most settings will... the subject. Use the 12 to select a scene and press e. • By switching to the desired shooting or playback mode. Settings in the [CAMERA MENU] such as white balance and ISO sensitivity cannot be changed. K P(Program auto) Set the optimum aperture value and shutter speed The...
Stylus 840 Instruction Manual (English)
Page 13
Select one . • Functions set using the shooting guide will stop automatically. The camera automatically switches to shooting mode and allows you to preview a live, multi-frame window on the screen to set the target items. • Press m to ...
Stylus 840 Instruction Manual (English)
Page 14
... exit panorama playback, press m. Operations during pause, press m. and back to select a panoramic picture, and then press e. Viewing panorama pictures taken with [COMBINE IN CAMERA 1] [COMBINE IN CAMERA 2] (Panorama playback) • Use the arrow pad to 1x. Scroll to the right (or scroll up for a rotated picture)starts automatically. • Use the...
Stylus 840 Instruction Manual (English)
Page 15
... measuring the brightness of a subject" (P.28) Function Menu P WB AUTO ISO HIGH ESP 8M HIGH ISO AUTO AUTO H.AUTO 30 100 200 400 The current camera setting is also used during "My Favorite" playback to display the top menu, and then select [SLIDESHOW] or [ADD FAVORITE]. The functions you want to...
Stylus 840 Instruction Manual (English)
Page 17
... cm/23.6 in. (tele) from -2.0 EV to +2.0 EV. +0.7 +1.0 Use 43 to change the display. 9 3# button Press 3# in .from your subject. If the distance between the camera and the subject is taken. • To cancel the self-timer, press 2Y. Press e to select the frame with the desired brightness. de) • Self...
Stylus 840 Instruction Manual (English)
Page 18
... setting in shooting mode to switch to ensure proper exposure of monitor" (P.37) Button operations 18 EN OFF Shadow Adjustment Technology is connected to the camera, display the picture you want to print in shooting mode to keep. g "PERFECT FIX Editing images" (P.30) S Erasing pictures In playback mode, select the picture...
Stylus 840 Instruction Manual (English)
Page 19
Checking the time While the camera is off, press g/E to display the set alarm time (when [ALARM CLOCK] is set to n or g. *2 This is not displayed when a movie is set ) and ...
Stylus 840 Instruction Manual (English)
Page 20
MENU : Exits the menu. IMAGE QUALITY CAMERA RESET MENU SETUP PANORAMA SCN EXIT MENU SILENT MODE SET OK BACK EXIT SET MENU : Returns to navigate the menus. Operation guide m button e 20 EN ... the mode. Top menu (in still picture shooting mode) IMAGE QUALITY CAMERA RESET MENU SETUP PANORAMA SCN EXIT MENU SILENT MODE SET OK CAMERA MENU 1 WB 2 ISO DRIVE FINE ZOOM DIGITAL ZOOM EXIT MENU AUTO AUTO o OFF OFF SET OK • When [CAMERA MENU], [PLAYBACK MENU], [EDIT], [ERASE], or [SETUP] is selected, the menu...
Stylus 840 Instruction Manual (English)
Page 21
...AF MODE], and press e. • Some settings may not be available, depending on the shooting/scene mode. • When pressing 4 on the next page. CAMERA MENU 1 ESP/n ESP 2 AF MODE SPOT R OFF IMAGE STABILIZER ON EXIT MENU SET OK The selected item is displayed in a different color. 4 Use the ...menu item is set and the previous menu is one of the selections on the [CAMERA IMAGE QUALITY CAMERA RESET MENU SETUP MENU]. Press m repeatedly to display the top menu. CAMERA MENU 1 WB 2 ISO DRIVE FINE ZOOM DIGITAL ZOOM EXIT MENU AUTO AUTO o OFF OFF SET OK Page display: The page display ...
Stylus 840 Instruction Manual (English)
Page 22
... for printing pictures at high quality. Shooting mode menu 1 IMAGE QUALITY 2 CAMERA RESET MENU SETUP 3* SILENT PANORAMA SCN MODE EXIT MENU SET OK 4 K s n 5CAMERA MENU WB ESP/n 5 ISO DRIVE AF MODE R FINE ZOOM IMAGE STABILIZER / DIGITAL ZOOM DIS MOVIE MODE 6 * An OLYMPUS xD-Picture Card is required. • Some menu items are displayed...
Stylus 840 Instruction Manual (English)
Page 23
... (still picture/movie) OFF G /E P.18 P.22 COMPRESSION (still picture) P.22 FRAME RATE (movie) O P.22 WB AUTO P.26 ISO DRIVE FINE ZOOM DIGITAL ZOOM ESP/n AUTO o OFF OFF ESP P.26 P.27 P.27 P.27 P.28 AF MODE R IMAGE STABILIZER (still picture) SPOT OFF ON P.28 P.28 ... camera automatically combines pictures in the camera. 2 RESET Restoring default settings NO / YES It restores shooting functions back to the factory default settings Function F # Y & Factory default setting 0.0 AUTO OFF OFF Ref. The mode dial must not be set to be combined on a computer. • An Olympus ...
Stylus 840 Instruction Manual (English)
Page 24
...mark SAVE OK CANCEL MENU Pointer SAVE OK CANCEL MENU SAVE OK • Take the first picture. • When you pan the camera. Menu operations 24 EN To combine only two pictures, press e before shooting the third picture. • To cancel making the panoramic... picture during shooting, press m before pressing e. [COMBINE IN CAMERA 2] Pictures are manually shot, and the camera automatically combines pictures for a single panoramic picture in the camera.Only combined pictures are saved. 1st 2nd 3rd EXIT OK Connects pictures from left to ...