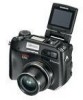
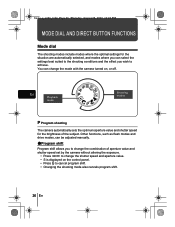
C-5060 Mode Dial - Olympus 5060 CAMEDIA Wide Zoom Digital Camera
C-5060 Mode Dial
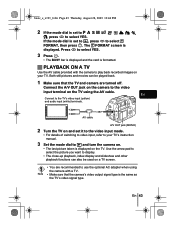
Related Manual Pages


Similar Questions

How To Set 12m Mode?
I was setting up the camera and figured out that 12M mode is not available.
I was setting up the camera and figured out that 12M mode is not available.
(Posted by jonzarmar 6 months ago)

Camera Settings Please Explain The Details For The Appature/shutter Sped Dial
Please explain the settings on the appature/shuetter sped dial
Please explain the settings on the appature/shuetter sped dial
(Posted by foodpro 7 years ago)

Usb Control Mode
How to change USB mode for control the camera via PC? In my camera (in camera SDK menu) the USB opti...
How to change USB mode for control the camera via PC? In my camera (in camera SDK menu) the USB opti...
(Posted by stollinm 12 years ago)