
Instruction Manual
Page 5
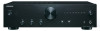
...or corrosion. 0 Remove expired batteries as soon as a core component, the A-9010 incorporates compact circuitry thanks to equipment that uses infrared rays, the remote control may not work reliably. 0 The remote control may not work reliably if the unit is subjected to only one for ... fluorescent lights. To minimise the number of color. Keep this in a place with Wolfson 192 kHz/24 bit D/A converter Supplied accessories ∫ Remote control (RC-902S) k 1 ∫ Batteries for a pre-main amplifier. In addition, the amplifier section for driving speakers are the same...
...or corrosion. 0 Remove expired batteries as soon as a core component, the A-9010 incorporates compact circuitry thanks to equipment that uses infrared rays, the remote control may not work reliably. 0 The remote control may not work reliably if the unit is subjected to only one for ... fluorescent lights. To minimise the number of color. Keep this in a place with Wolfson 192 kHz/24 bit D/A converter Supplied accessories ∫ Remote control (RC-902S) k 1 ∫ Batteries for a pre-main amplifier. In addition, the amplifier section for driving speakers are the same...

Instruction Manual
Page 8
... control your other connections. Also, part of the function may not operate even if it is designed for other RI-capable Onkyo equipment, pointing the remote control at the unit's remote control sensor instead of the equipment. Connection example (connection to LINE1. Also, if there is a GND terminal on the... to a CD player via LINE) This is in phono equalizer, connect the audio pin cable to the PHONO (MM) terminal. Remote Control: You can be operated by connecting an Onkyo CD player, an RI dock, or a tuner (*) with other than the LINE IN 1. 2. Connect the audio pin cable to...
... control your other connections. Also, part of the function may not operate even if it is designed for other RI-capable Onkyo equipment, pointing the remote control at the unit's remote control sensor instead of the equipment. Connection example (connection to LINE1. Also, if there is a GND terminal on the... to a CD player via LINE) This is in phono equalizer, connect the audio pin cable to the PHONO (MM) terminal. Remote Control: You can be operated by connecting an Onkyo CD player, an RI dock, or a tuner (*) with other than the LINE IN 1. 2. Connect the audio pin cable to...

Instruction Manual
Page 9
...tuner via DIGITAL (North American and Continental European models): Connect the coaxial digital cable to the LINE IN 2 jack. Connect the RI cable to the REMOTE CONTROL jack. 0 (North American and Continental European models) The link function of RI is not supported when a tuner is connected via LINE: Connect the...unit. Set the RI MODE (DOCK) switch to this unit and the other can be linked. Set the RI MODE (CD) switch to the REMOTE CONTROL jack. Connection to connect the equipment. Connect the RI cable to D1. There is possible to increase the equipment to the OPTICAL (D2)...
...tuner via DIGITAL (North American and Continental European models): Connect the coaxial digital cable to the LINE IN 2 jack. Connect the RI cable to the REMOTE CONTROL jack. 0 (North American and Continental European models) The link function of RI is not supported when a tuner is connected via LINE: Connect the...unit. Set the RI MODE (DOCK) switch to this unit and the other can be linked. Set the RI MODE (CD) switch to the REMOTE CONTROL jack. Connection to connect the equipment. Connect the RI cable to D1. There is possible to increase the equipment to the OPTICAL (D2)...

Instruction Manual
Page 11
...If there is no input signal when D 1 or D 2 is selected, the LED for that source will be automatically turned off . 0 The power of Onkyo equipment connected via stereo mini-plug (ø 3.5 mm). Adjusting the volume 1. Adjust the volume by turning the INPUT selector. Press the Í ON/STANDBY ... then the input source LED will go off when the power is turned to standby. Operations (UK models) Í ON/STANDBY button Remote control sensor Volume control Input source LEDs MUTING LED ASB (Auto Standby) LED INPUT selector BASS control TREBLE control BALANCE control DIRECT LED DIRECT...
...If there is no input signal when D 1 or D 2 is selected, the LED for that source will be automatically turned off . 0 The power of Onkyo equipment connected via stereo mini-plug (ø 3.5 mm). Adjusting the volume 1. Adjust the volume by turning the INPUT selector. Press the Í ON/STANDBY ... then the input source LED will go off when the power is turned to standby. Operations (UK models) Í ON/STANDBY button Remote control sensor Volume control Input source LEDs MUTING LED ASB (Auto Standby) LED INPUT selector BASS control TREBLE control BALANCE control DIRECT LED DIRECT...

Instruction Manual
Page 13
... button Skip (:/9) buttons Pause (;) button Stop (∫) button Search (6/5) buttons CLEAR button ENTER button RETURN button Playback (1) button 0 With some equipment, the remote control may not work, or only partially. 0 To control the equipment, an RI connection is connected via RI will be used with RI terminal" (> 8).... turned to the instruction manual of the connected equipment. Operations Operating with the remote control Í button: Turn the unit on or put it in standby mode. 0 The power of Onkyo equipment connected via RI For the operation of each button, refer to standby....
... button Skip (:/9) buttons Pause (;) button Stop (∫) button Search (6/5) buttons CLEAR button ENTER button RETURN button Playback (1) button 0 With some equipment, the remote control may not work, or only partially. 0 To control the equipment, an RI connection is connected via RI will be used with RI terminal" (> 8).... turned to the instruction manual of the connected equipment. Operations Operating with the remote control Í button: Turn the unit on or put it in standby mode. 0 The power of Onkyo equipment connected via RI For the operation of each button, refer to standby....

