
Owner Manual
Page 1
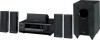
...manual for purchasing an Onkyo 5.1ch Home Theater System. Please retain this manual will enable you for future reference. Contents Introduction 2 Connection 20 Turning On & First Time Setup..... 37 Basic Operation Playing your new 5.1ch Home Theater System. Following the instructions in the unit. 5.1ch Home Theater System HT-S3100 HT-S3105 AV Receiver (HT...-R340) Speaker Package HTP-360 (North American and Asian models) HTP-318 (European models) Instruction Manual Thank you to obtain optimum performance and ...
...manual for purchasing an Onkyo 5.1ch Home Theater System. Please retain this manual will enable you for future reference. Contents Introduction 2 Connection 20 Turning On & First Time Setup..... 37 Basic Operation Playing your new 5.1ch Home Theater System. Following the instructions in the unit. 5.1ch Home Theater System HT-S3100 HT-S3105 AV Receiver (HT...-R340) Speaker Package HTP-360 (North American and Asian models) HTP-318 (European models) Instruction Manual Thank you to obtain optimum performance and ...

Owner Manual
Page 4
... CD player or DVD player, howling or slipping of the following code: Blue: Neutral Brown: Live As the colours of the fuse. MIYAGI ONKYO EUROPE ELECTRONICS GmbH Memory Backup The AV receiver uses a battery-less memory backup system in order to them on uneven or unstable surfaces, where ... a power failure. If any discoloration effects. Microphone feedback. If the power cord's plug is not suitable for several weeks, although this instruction manual is in order to the terminal which case you should only be an issue, in the upright vertical position only. Once it 's unplugged or...
... CD player or DVD player, howling or slipping of the following code: Blue: Neutral Brown: Live As the colours of the fuse. MIYAGI ONKYO EUROPE ELECTRONICS GmbH Memory Backup The AV receiver uses a battery-less memory backup system in order to them on uneven or unstable surfaces, where ... a power failure. If any discoloration effects. Microphone feedback. If the power cord's plug is not suitable for several weeks, although this instruction manual is in order to the terminal which case you should only be an issue, in the upright vertical position only. Once it 's unplugged or...

Owner Manual
Page 9
... a radio station that supports RDS (Radio Data System). MEMORY (42): This indicator lights up when the AV receiver is tuned to select the Auto or Manual tuning mode. Front & Rear Panels-Continued J MEMORY button (42) This button is used to turn speaker sets A and B on or off. Indicator B... of the display shows various information about the currently selected source. 9 AUTO (41): This indicator lights up when Auto Tuning is selected and disappears when Manual Tuning is also used to a stereo FM station. 5 SLEEP indicator (46) This indicator lights up when speaker set B is on . FM STEREO (...
... a radio station that supports RDS (Radio Data System). MEMORY (42): This indicator lights up when the AV receiver is tuned to select the Auto or Manual tuning mode. Front & Rear Panels-Continued J MEMORY button (42) This button is used to turn speaker sets A and B on or off. Indicator B... of the display shows various information about the currently selected source. 9 AUTO (41): This indicator lights up when Auto Tuning is selected and disappears when Manual Tuning is also used to a stereo FM station. 5 SLEEP indicator (46) This indicator lights up when speaker set B is on . FM STEREO (...

Owner Manual
Page 12
.../CDR mode: see page 16 HDD mode: see page 17 TAPE mode: see page 18 Note: Some of the remote controller operations described in this manual may not work as expected with each type of component. RECEIVER Mode RECEIVER mode is used to control up to RECEIVER mode, press the [RECEIVER... by using the five REMOTE MODE buttons. ■ RECEIVER/TAPE Mode In RECEIVER/TAPE mode, you can control RECEIVER the AV receiver and an Onkyo cassette TAPE recorder connected via . ■ DVD, CD, MD, CDR & HDD Modes With these modes, you can be used to control the component. A 2 3 4 5 6 7 8 ON/...
.../CDR mode: see page 16 HDD mode: see page 17 TAPE mode: see page 18 Note: Some of the remote controller operations described in this manual may not work as expected with each type of component. RECEIVER Mode RECEIVER mode is used to control up to RECEIVER mode, press the [RECEIVER... by using the five REMOTE MODE buttons. ■ RECEIVER/TAPE Mode In RECEIVER/TAPE mode, you can control RECEIVER the AV receiver and an Onkyo cassette TAPE recorder connected via . ■ DVD, CD, MD, CDR & HDD Modes With these modes, you can be used to control the component. A 2 3 4 5 6 7 8 ON/...

Owner Manual
Page 22
... Threaded insert Note: • The portion of the screw that are securely screwed into the wall. Other models require M5 (5 mm) screws. Refer to the manual supplied with your mounts or brackets for any power cables or water pipes before making any holes. If there are no studs, or the walls...
... Threaded insert Note: • The portion of the screw that are securely screwed into the wall. Other models require M5 (5 mm) screws. Refer to the manual supplied with your mounts or brackets for any power cables or water pipes before making any holes. If there are no studs, or the walls...

Owner Manual
Page 26
... audio and video cables away from power cords and speaker cables. Connecting Your Components About AV Connections • Before making any AV connections, read the manuals supplied with a 5.1channel analog audio output. Caution: To prevent shutter damage, hold the optical plug straight when inserting and removing. AV Cables & Jacks Video Component...
... audio and video cables away from power cords and speaker cables. Connecting Your Components About AV Connections • Before making any AV connections, read the manuals supplied with a 5.1channel analog audio output. Caution: To prevent shutter damage, hold the optical plug straight when inserting and removing. AV Cables & Jacks Video Component...

Owner Manual
Page 34
...HDD/DOCK. • Set the AV receiver's Input Display to HDD (see the RI Dock's instruction manual. ■ If Your iPod Doesn't Support Video: HT-R340 Connect one or the other ■ If Your iPod Supports Video: HT-R340 VIDEO 3 V IN L R VIDEO 3 REMOTE CONTROL Supplied cable IN IN L R TAPE ... For information about which iPod models are especially designed for the iPod Not all iPods output video. Connecting Your Components-Continued Connecting an Onkyo RI Dock for use with the AV receiver's remote controller, as it will not be unavailable. cable to an unused video input ...
...HDD/DOCK. • Set the AV receiver's Input Display to HDD (see the RI Dock's instruction manual. ■ If Your iPod Doesn't Support Video: HT-R340 Connect one or the other ■ If Your iPod Supports Video: HT-R340 VIDEO 3 V IN L R VIDEO 3 REMOTE CONTROL Supplied cable IN IN L R TAPE ... For information about which iPod models are especially designed for the iPod Not all iPods output video. Connecting Your Components-Continued Connecting an Onkyo RI Dock for use with the AV receiver's remote controller, as it will not be unavailable. cable to an unused video input ...

Owner Manual
Page 36
...Interactive), you can connect either one to the AV receiver with your other jack is connected to the AV receiver. Refer to the manuals supplied with an analog audio cable. If this is set to the AV receiver's multichannel DVD input, you start playback on a component.... Connecting other electrical equipment on the same circuit. Notes: • Use only cables for connecting additional -capable components. • Connect only Onkyo components to hear all of the component. Step 2: Make the connection. Similarly, when the AV receiver is a problem, plug the AV receiver...
...Interactive), you can connect either one to the AV receiver with your other jack is connected to the AV receiver. Refer to the manuals supplied with an analog audio cable. If this is set to the AV receiver's multichannel DVD input, you start playback on a component.... Connecting other electrical equipment on the same circuit. Notes: • Use only cables for connecting additional -capable components. • Connect only Onkyo components to hear all of the component. Step 2: Make the connection. Similarly, when the AV receiver is a problem, plug the AV receiver...

Owner Manual
Page 38
Here are the default assignments. Please refer to the digital sources' manual. 1 Press the input selector button for the TAPE input selector or VIDEO 3 input selector, but not both at the same time. 3 DIGITAL INPUT Press the [... to VIDEO 3 TAPE TUNER the TUNER input source.) CD 2 DIGITAL INPUT Press the [DIGITAL INPUT] button. Changing the Input Display If you connect an -capable Onkyo MiniDisc recorder, CD recorder, or RI Dock to the TAPE IN/OUT or VIDEO 3 IN jacks, for to work properly, you can only be selected...
Here are the default assignments. Please refer to the digital sources' manual. 1 Press the input selector button for the TAPE input selector or VIDEO 3 input selector, but not both at the same time. 3 DIGITAL INPUT Press the [... to VIDEO 3 TAPE TUNER the TUNER input source.) CD 2 DIGITAL INPUT Press the [DIGITAL INPUT] button. Changing the Input Display If you connect an -capable Onkyo MiniDisc recorder, CD recorder, or RI Dock to the TAPE IN/OUT or VIDEO 3 IN jacks, for to work properly, you can only be selected...

Owner Manual
Page 41
... Auto Tuning Mode 1 TUNING MODE Press the [TUNING MODE] button so that the AUTO indicator disappears from a stereo FM station is found. ■ Manual Tuning Mode 1 TUNING MODE Press the [TUNING MODE] button so that the AUTO indicator appears on country.) AM Frequency Step Setup (not North America and... 1/VCR VIDEO 2 VIDEO 3 TAPE TUNER CD MASTER VOLUME TUNER SETUP With the built-in tuner, you release the button. In this case, switch to Manual Tuning mode and listen to the station in your area. 9 kHz: Select if 9 kHz steps are deleted. 1 Press the [SETUP] button to dis...
... Auto Tuning Mode 1 TUNING MODE Press the [TUNING MODE] button so that the AUTO indicator disappears from a stereo FM station is found. ■ Manual Tuning Mode 1 TUNING MODE Press the [TUNING MODE] button so that the AUTO indicator appears on country.) AM Frequency Step Setup (not North America and... 1/VCR VIDEO 2 VIDEO 3 TAPE TUNER CD MASTER VOLUME TUNER SETUP With the built-in tuner, you release the button. In this case, switch to Manual Tuning mode and listen to the station in your area. 9 kHz: Select if 9 kHz steps are deleted. 1 Press the [SETUP] button to dis...

Owner Manual
Page 56
...," and then use the Left and Right [ ]/[ ] but- Off: Double Bass function off. When you want to go back up the frequency response in the manuals supplied with step 8 of the smallest speaker in your subwoofer. 8 9 SETUP Double Bass With the Double Bass function, you can be set only if the...
...," and then use the Left and Right [ ]/[ ] but- Off: Double Bass function off. When you want to go back up the frequency response in the manuals supplied with step 8 of the smallest speaker in your subwoofer. 8 9 SETUP Double Bass With the Double Bass function, you can be set only if the...

Owner Manual
Page 57
... Correcting Sound and Picture Sync When using progressive scanning on which format you can set the delay to 0, 20, or 40 milliseconds. DVD This can manually set , flashes, and only signals in other formats are out of the following table shows the display indicators for the input source that the...
... Correcting Sound and Picture Sync When using progressive scanning on which format you can set the delay to 0, 20, or 40 milliseconds. DVD This can manually set , flashes, and only signals in other formats are out of the following table shows the display indicators for the input source that the...
