

User Manual
Page 3
... is dangerous. Seek medical attention immediately if a memory card is accidentally swallowed. • Wrapping the strap around your nearest PENTAX Service Center. Placing them in mouth may cause an electrical shock. • Always use the AC adapter exclusively developed for this...may damage your special attention regarding items marked with the risk of the AC adapter. ABOUT THE CAMERA Warning • Do not disassemble or modify the camera. Continued use immediately, remove the batteries or the AC adapter, and contact your neck is the risk of electric shock. • To...
... is dangerous. Seek medical attention immediately if a memory card is accidentally swallowed. • Wrapping the strap around your nearest PENTAX Service Center. Placing them in mouth may cause an electrical shock. • Always use the AC adapter exclusively developed for this...may damage your special attention regarding items marked with the risk of the AC adapter. ABOUT THE CAMERA Warning • Do not disassemble or modify the camera. Continued use immediately, remove the batteries or the AC adapter, and contact your neck is the risk of electric shock. • To...
User Manual
Page 4
... end with a molded-on male attachment plug cap (with a specified NEMA configuration), and the other batteries can cause a fire or explosion. • Remove the batteries from the camera immediately if they become hot or begin to be useful if you experience problems abroad. Of the... the flash. Disassembling the batteries or attempting to charge non-rechargeable batteries could explode or catch fire. • Of the batteries that can be used in this camera (AA Ni-MH batteries, AA lithium batteries and AA alkaline batteries), only the Ni-MH batteries can be inserted correctly with...
... end with a molded-on male attachment plug cap (with a specified NEMA configuration), and the other batteries can cause a fire or explosion. • Remove the batteries from the camera immediately if they become hot or begin to be useful if you experience problems abroad. Of the... the flash. Disassembling the batteries or attempting to charge non-rechargeable batteries could explode or catch fire. • Of the batteries that can be used in this camera (AA Ni-MH batteries, AA lithium batteries and AA alkaline batteries), only the Ni-MH batteries can be inserted correctly with...

User Manual
Page 7
5 Contents FOR USING YOUR CAMERA SAFELY 1 ABOUT THE CAMERA 1 PRECAUTIONS FOR BATTERY USAGE 2 Care to be Taken During Handling 2 Contents 5 Composition of the Operating Manual 11 Before Using Your Camera 13 e/y Camera Characteristics 14 Checking the Contents of the Package 16 Names and Functions of Working Parts 17... Capacity and Playback Time (New Batteries 39 Using the AC Adapter (Optional 40 Inserting/Removing the SD Memory Card 42 Recorded Pixels and Quality Level 44 Attaching the Lens 46 Adjusting the Viewfinder Diopter 48 Turning the Camera On and Off 49 Initial Settings...
5 Contents FOR USING YOUR CAMERA SAFELY 1 ABOUT THE CAMERA 1 PRECAUTIONS FOR BATTERY USAGE 2 Care to be Taken During Handling 2 Contents 5 Composition of the Operating Manual 11 Before Using Your Camera 13 e/y Camera Characteristics 14 Checking the Contents of the Package 16 Names and Functions of Working Parts 17... Capacity and Playback Time (New Batteries 39 Using the AC Adapter (Optional 40 Inserting/Removing the SD Memory Card 42 Recorded Pixels and Quality Level 44 Attaching the Lens 46 Adjusting the Viewfinder Diopter 48 Turning the Camera On and Off 49 Initial Settings...

User Manual
Page 11
... ........225 Selecting the Video Output Format 225 Setting Auto Power Off 225 Setting the Battery Type 226 Setting the Operation of the Power Lamp 227 Using Pixel Mapping 228 Selecting Capture Mode Settings to Save in the Camera.......229 Resetting to Operate the Set-up Menu 212 Set-up Menu 232 Resetting...
... ........225 Selecting the Video Output Format 225 Setting Auto Power Off 225 Setting the Battery Type 226 Setting the Operation of the Power Lamp 227 Using Pixel Mapping 228 Selecting Capture Mode Settings to Save in the Camera.......229 Resetting to Operate the Set-up Menu 212 Set-up Menu 232 Resetting...
User Manual
Page 16
...precision viewing performance. • Uses AA lithium batteries, rechargeable AA Ni-MH batteries or AA alkaline batteries. • Features a help function that automatically adjusts aperture and shutter speed according to the set sensitivity. You can use digital filters like B&W or Soft while taking pictures...can also assign 4 other functions to adjust settings while previewing the edited image, enabling a wider range of the camera. You can be easily processed internally by the camera. • Features Sensitivity Priority mode K that lets you do not know how to use a certain function,...
...precision viewing performance. • Uses AA lithium batteries, rechargeable AA Ni-MH batteries or AA alkaline batteries. • Features a help function that automatically adjusts aperture and shutter speed according to the set sensitivity. You can use digital filters like B&W or Soft while taking pictures...can also assign 4 other functions to adjust settings while previewing the edited image, enabling a wider range of the camera. You can be easily processed internally by the camera. • Features Sensitivity Priority mode K that lets you do not know how to use a certain function,...

User Manual
Page 18
16 Checking the Contents of the Package The following accessories are included. 1 Hot shoe cover FK (Installed on camera) Eyecup FQ (Installed on camera) Body mount cover (Installed on camera) Before Using Your Camera USB cable I-USB7 Strap O-ST84 Software (CD-ROM) S-SW84 Four AA lithium batteries Operating Manual (this manual) Quick Guide PENTAX PHOTO Browser 3/ PENTAX PHOTO Laboratory 3 Operating Manual Check that all accessories are packaged with your camera.
16 Checking the Contents of the Package The following accessories are included. 1 Hot shoe cover FK (Installed on camera) Eyecup FQ (Installed on camera) Body mount cover (Installed on camera) Before Using Your Camera USB cable I-USB7 Strap O-ST84 Software (CD-ROM) S-SW84 Four AA lithium batteries Operating Manual (this manual) Quick Guide PENTAX PHOTO Browser 3/ PENTAX PHOTO Laboratory 3 Operating Manual Check that all accessories are packaged with your camera.

User Manual
Page 19
Names and Functions of Working 17 Parts Before Using Your Camera Power lamp Self-timer lamp/ Remote control receiver Card cover Lens mount index (red dot) MF AF Lens unlock button Built-in flash UP USB/Video terminal Terminal cover Hot shoe 1 Strap lug Mirror AF coupler Lens information contacts Diopter adjustment lever Viewfinder Card access lamp Monitor Tripod socket Battery cover unlock lever Battery cover * In the second illustration, the camera is shown with the Eyecup FQ removed.
Names and Functions of Working 17 Parts Before Using Your Camera Power lamp Self-timer lamp/ Remote control receiver Card cover Lens mount index (red dot) MF AF Lens unlock button Built-in flash UP USB/Video terminal Terminal cover Hot shoe 1 Strap lug Mirror AF coupler Lens information contacts Diopter adjustment lever Viewfinder Card access lamp Monitor Tripod socket Battery cover unlock lever Battery cover * In the second illustration, the camera is shown with the Eyecup FQ removed.

User Manual
Page 25
...Using Your Camera 1/1 0 0 0 12345 F 11 +1.3 AWB AISUOTO3200 1.0 AF.A OK OFF JPEG 10M 1 23 4 5 6 7 8 9 11 13 14 10 12 15 16 17 18 23 19 20 21 22 4 M Scene mode Night Scene AWB AISUOTO3200 1.0 AF.A OFF JPEG 10M 1 Capture mode (p.80) 2 AE lock icon (p.105) 3 World Time (p.216) 4 Battery level (p....76) 14 White Balance (p.159) 15 Custom Image (p.157) 16 Focus mode (p.109) 17 AE metering (p.101) 18 Shake Reduction (p.121) 19 Digital Filter (p.132) 20 File format (p.152) 21 JPEG recorded pixels (p.150) 22 JPEG quality (p.151) 23 Guide key 24 Explanation of the selected ...
...Using Your Camera 1/1 0 0 0 12345 F 11 +1.3 AWB AISUOTO3200 1.0 AF.A OK OFF JPEG 10M 1 23 4 5 6 7 8 9 11 13 14 10 12 15 16 17 18 23 19 20 21 22 4 M Scene mode Night Scene AWB AISUOTO3200 1.0 AF.A OFF JPEG 10M 1 Capture mode (p.80) 2 AE lock icon (p.105) 3 World Time (p.216) 4 Battery level (p....76) 14 White Balance (p.159) 15 Custom Image (p.157) 16 Focus mode (p.109) 17 AE metering (p.101) 18 Shake Reduction (p.121) 19 Digital Filter (p.132) 20 File format (p.152) 21 JPEG recorded pixels (p.150) 22 JPEG quality (p.151) 23 Guide key 24 Explanation of the selected ...

User Manual
Page 35
...button. Mode 3], [Q Playback 1], JPEG Quality RAW file format Color Space PEF sRGB 1 [Q Playback 2] , [R Set-up menu if there is on). The camera returns to choose an item. Press the four-way controller (5) to move to the pop-up 1] ··· MENU Exit [A Custom Setting 4]. Even ...controller (5). 123 Custom Image Each time the four-way controller is Digital Filter File Format OFF JPEG pressed, the menu will not be saved if the camera is turned off improperly (such as by removing the battery while the camera is one. 5 Use the four-way controller (23) 123...
...button. Mode 3], [Q Playback 1], JPEG Quality RAW file format Color Space PEF sRGB 1 [Q Playback 2] , [R Set-up menu if there is on). The camera returns to choose an item. Press the four-way controller (5) to move to the pop-up 1] ··· MENU Exit [A Custom Setting 4]. Even ...controller (5). 123 Custom Image Each time the four-way controller is Digital Filter File Format OFF JPEG pressed, the menu will not be saved if the camera is turned off improperly (such as by removing the battery while the camera is one. 5 Use the four-way controller (23) 123...

User Manual
Page 37
Attaching the Strap 36 Inserting the Batteries 37 Inserting/Removing the SD Memory Card ......... 42 Attaching the Lens 46 Adjusting the Viewfinder Diopter 48 Turning the Camera On and Off 49 Initial Settings 50 Be sure to taking pictures. 2 Getting Started This chapter explains your first steps from purchasing the camera to read it and follow the instructions.
Attaching the Strap 36 Inserting the Batteries 37 Inserting/Removing the SD Memory Card ......... 42 Attaching the Lens 46 Adjusting the Viewfinder Diopter 48 Turning the Camera On and Off 49 Initial Settings 50 Be sure to taking pictures. 2 Getting Started This chapter explains your first steps from purchasing the camera to read it and follow the instructions.

User Manual
Page 39
... used in cold climates. Inserting the Batteries 37 Getting Started Insert batteries into the camera. This camera is required. Otherwise, malfunctions, such as the batteries' voltage characteristics may cause a malfunction. • AA lithium batteries and AA alkaline batteries that is compatible with the batteries is packaged with AA lithium batteries for checking the camera functionality but they may occur. Use...
... used in cold climates. Inserting the Batteries 37 Getting Started Insert batteries into the camera. This camera is required. Otherwise, malfunctions, such as the batteries' voltage characteristics may cause a malfunction. • AA lithium batteries and AA alkaline batteries that is compatible with the batteries is packaged with AA lithium batteries for checking the camera functionality but they may occur. Use...

User Manual
Page 40
... 3 Press down on if the battery cover is open . 2 2 2 Insert the batteries according to fully close the battery cover. The camera will not turn on the batteries with the battery cover (1) and slide it as shown in the illustration (1), slide the 1 battery cover toward the lens (2) and ... Use the AC adapter kit K-AC84 (optional) when using the camera for a prolonged period. (p.40) • Check the battery orientation if the camera does not operate properly after replacing the batteries. 38 1 Push and hold the battery cover unlock lever as shown in the illustration (2) to close....
... 3 Press down on if the battery cover is open . 2 2 2 Insert the batteries according to fully close the battery cover. The camera will not turn on the batteries with the battery cover (1) and slide it as shown in the illustration (1), slide the 1 battery cover toward the lens (2) and ... Use the AC adapter kit K-AC84 (optional) when using the camera for a prolonged period. (p.40) • Check the battery orientation if the camera does not operate properly after replacing the batteries. 38 1 Push and hold the battery cover unlock lever as shown in the illustration (2) to close....

User Manual
Page 41
... figures may appear even when the battery level is sufficient if the camera is based on measuring conditions in actual use the camera. If { appears, you can confirm remaining battery level by checking the { displayed in the status screen. { lit ¶ : Battery is full. } lit : Battery is almost empty. 39 Battery Level Indicator You can use depending...
... figures may appear even when the battery level is sufficient if the camera is based on measuring conditions in actual use the camera. If { appears, you can confirm remaining battery level by checking the { displayed in the status screen. { lit ¶ : Battery is full. } lit : Battery is almost empty. 39 Battery Level Indicator You can use depending...

User Manual
Page 42
...side of pictures. 2 Using the AC Adapter (Optional) We recommend using the AC adapter kit K-AC84 (optional) when using the camera in cold climates, have extra batteries at hand and keep them warm in cold climates, or when you will be taking pictures in your computer. 1 Make sure ...the camera is turned off. Getting Started 40 • Battery performance temporarily decreases as the temperature decreases. When using the monitor for a long time or when connecting to room temperature...
...side of pictures. 2 Using the AC Adapter (Optional) We recommend using the AC adapter kit K-AC84 (optional) when using the camera in cold climates, have extra batteries at hand and keep them warm in cold climates, or when you will be taking pictures in your computer. 1 Make sure ...the camera is turned off. Getting Started 40 • Battery performance temporarily decreases as the temperature decreases. When using the monitor for a long time or when connecting to room temperature...

User Manual
Page 43
... adapter. Getting Started 41 4 Pull out the DC coupler's electric cable as shown in the illustration. 2 5 Close the battery cover. SD Memory Card and data will be corrupted if disconnected while the camera is turned off before connecting or disconnecting the AC adapter. • Make sure connections are secure between the terminals.... Be sure to the AC adapter. 8 Plug the AC cord into the power outlet. • Make sure the camera is recording or reading data. • Close the electric cable cover when not using the AC adapter.
... adapter. Getting Started 41 4 Pull out the DC coupler's electric cable as shown in the illustration. 2 5 Close the battery cover. SD Memory Card and data will be corrupted if disconnected while the camera is turned off before connecting or disconnecting the AC adapter. • Make sure connections are secure between the terminals.... Be sure to the AC adapter. 8 Plug the AC cord into the power outlet. • Make sure the camera is recording or reading data. • Close the electric cable cover when not using the AC adapter.

User Manual
Page 45
...Memory Card is not used for a long time. (4) the SD Memory Card is ejected or the battery is removed while the data on the card is being recorded on a computer. • Avoid using the camera because the card may become unreadable. 3 Close the card cover (1) and then slide it in the...LOCK prevents new data from high temperatures. • Do not remove the SD Memory Card during formatting. Keep it to the card, or the camera is equipped with the USB cable. Setting the switch to static electricity or electrical interference. (3) the SD Memory Card has not been used for data...
...Memory Card is not used for a long time. (4) the SD Memory Card is ejected or the battery is removed while the data on the card is being recorded on a computer. • Avoid using the camera because the card may become unreadable. 3 Close the card cover (1) and then slide it in the...LOCK prevents new data from high temperatures. • Do not remove the SD Memory Card during formatting. Keep it to the card, or the camera is equipped with the USB cable. Setting the switch to static electricity or electrical interference. (3) the SD Memory Card has not been used for data...

User Manual
Page 131
...to stop the remote control operation after the shutter release button is pressed. Pop up automatically even when set to replace the battery (this will be released immediately after the shutter release 4 button is set . • The remote control may be released in [...Memory] (p.229) of the camera and press the shutter release button on the remote control. Contact PENTAX Service Center to g (Auto discharge). Shooting Functions • You cannot focus with the remote control. Mode 3]...
...to stop the remote control operation after the shutter release button is pressed. Pop up automatically even when set to replace the battery (this will be released immediately after the shutter release 4 button is set . • The remote control may be released in [...Memory] (p.229) of the camera and press the shutter release button on the remote control. Contact PENTAX Service Center to g (Auto discharge). Shooting Functions • You cannot focus with the remote control. Mode 3]...
User Manual
Page 205
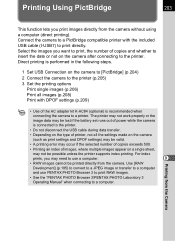
The printer may not work properly or the image data may be lost if the battery set runs out of power while the camera is connected to the printer. • Do not disconnect the USB cable during data transfer. • Depending on the type of printer,... images appear on a single sheet, may need to use PENTAX PHOTO Browser 3 to print RAW images. • See the "PENTAX PHOTO Browser 3/PENTAX PHOTO Laboratory 3 Operating Manual" when connecting to a computer. Select the images you print images directly from the camera without using a computer (direct printing). For index prints, you...
The printer may not work properly or the image data may be lost if the battery set runs out of power while the camera is connected to the printer. • Do not disconnect the USB cable during data transfer. • Depending on the type of printer,... images appear on a single sheet, may need to use PENTAX PHOTO Browser 3 to print RAW images. • See the "PENTAX PHOTO Browser 3/PENTAX PHOTO Laboratory 3 Operating Manual" when connecting to a computer. Select the images you print images directly from the camera without using a computer (direct printing). For index prints, you...

User Manual
Page 206
The setting is changed. 5 Press the 3 button. The screen that was displayed before selecting the menu appears again. 9 Printing from the Camera A pop-up 2] menu. 2 Press the four-way controller (5). 204 Setting USB Connection 1 Select [USB Connection] in the [R Set-up menu appears. 3 Use the four-way controller (23) to select [PictBridge]. 123 Brightness Level LCD Color Tuning Video Output USB Connection Auto Power Off Select battery Reset MENU Cancel ±0 NTSC PC PictBridge AUTO OK OK 4 Press the 4 button.
The setting is changed. 5 Press the 3 button. The screen that was displayed before selecting the menu appears again. 9 Printing from the Camera A pop-up 2] menu. 2 Press the four-way controller (5). 204 Setting USB Connection 1 Select [USB Connection] in the [R Set-up menu appears. 3 Use the four-way controller (23) to select [PictBridge]. 123 Brightness Level LCD Color Tuning Video Output USB Connection Auto Power Off Select battery Reset MENU Cancel ±0 NTSC PC PictBridge AUTO OK OK 4 Press the 4 button.

User Manual
Page 214
...button in the [R Set-up 1-3] menu. p.224 Beep Switches the beep tone on the monitor when traveling overseas. p.225 Select battery Selects the type of batteries inserted in which menus and messages appear. p.226 Reset Resets all settings. p.220 Folder Name Sets the method used to the ...AV device. p.232 Menu Item Function Page Language/ Changes the language in the camera. p.225 R2 USB Connection Sets the USB...
...button in the [R Set-up 1-3] menu. p.224 Beep Switches the beep tone on the monitor when traveling overseas. p.225 Select battery Selects the type of batteries inserted in which menus and messages appear. p.226 Reset Resets all settings. p.220 Folder Name Sets the method used to the ...AV device. p.232 Menu Item Function Page Language/ Changes the language in the camera. p.225 R2 USB Connection Sets the USB...
