

User Manual
Page 2
...PictBridge PictBridge allows the user to connect the printer and digital camera directly, using the camera in the Copyright Act. Keep this camera are not PRINT Image Matching III compliant. To use... they should be a valuable tool in the United States and/or other lens or accessory, see p.46 and p.240. You can be erased or that 0.01% or...according to their respective companies. However, this camera • There is a trademark of Seiko Epson Corporation. Regarding trademarks PENTAX, K-m/K2000 and smc PENTAX are trademarks of HOYA CORPORATION. Please read this...
...PictBridge PictBridge allows the user to connect the printer and digital camera directly, using the camera in the Copyright Act. Keep this camera are not PRINT Image Matching III compliant. To use... they should be a valuable tool in the United States and/or other lens or accessory, see p.46 and p.240. You can be erased or that 0.01% or...according to their respective companies. However, this camera • There is a trademark of Seiko Epson Corporation. Regarding trademarks PENTAX, K-m/K2000 and smc PENTAX are trademarks of HOYA CORPORATION. Please read this...

User Manual
Page 12
Using Aperture Ring 241 Cleaning the CCD 243 Removing Dust by Shaking the CCD (Dust Removal 243 Detecting Dust on [19. 10 Appendix 235 Default Settings 236 Functions Available with Various Lens Combinations...........240 Notes on the CCD (Dust Alert 244 Removing Dust with a Blower 246 Optional Accessories 248 Error Messages 252 Troubleshooting 255 Main Specifications 258 Glossary 262 Index 267 WARRANTY POLICY 272
Using Aperture Ring 241 Cleaning the CCD 243 Removing Dust by Shaking the CCD (Dust Removal 243 Detecting Dust on [19. 10 Appendix 235 Default Settings 236 Functions Available with Various Lens Combinations...........240 Notes on the CCD (Dust Alert 244 Removing Dust with a Blower 246 Optional Accessories 248 Error Messages 252 Troubleshooting 255 Main Specifications 258 Glossary 262 Index 267 WARRANTY POLICY 272
User Manual
Page 13
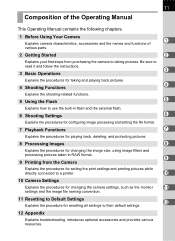
...This Operating Manual contains the following chapters. 1 Before Using Your Camera 1 Explains camera characteristics, accessories and the names and functions of various parts. 2 Getting Started 2 Explains your first steps from the Camera Explains the procedures for setting the print settings and printing pictures... 5 Explains how to use the built-in RAW format. 9 9 Printing from purchasing the camera to their default settings. 12 Appendix Explains troubleshooting, introduces optional accessories and provides various resources. Be sure to read it and follow the instructions. 3 3 Basic...
...This Operating Manual contains the following chapters. 1 Before Using Your Camera 1 Explains camera characteristics, accessories and the names and functions of various parts. 2 Getting Started 2 Explains your first steps from the Camera Explains the procedures for setting the print settings and printing pictures... 5 Explains how to use the built-in RAW format. 9 9 Printing from purchasing the camera to their default settings. 12 Appendix Explains troubleshooting, introduces optional accessories and provides various resources. Be sure to read it and follow the instructions. 3 3 Basic...

User Manual
Page 18
16 Checking the Contents of the Package The following accessories are included. 1 Hot shoe cover FK (Installed on camera) Eyecup FQ (Installed on camera) Body mount cover (Installed on camera) Before Using Your Camera USB cable I-USB7 Strap O-ST84 Software (CD-ROM) S-SW84 Four AA lithium batteries Operating Manual (this manual) Quick Guide PENTAX PHOTO Browser 3/ PENTAX PHOTO Laboratory 3 Operating Manual Check that all accessories are packaged with your camera.
16 Checking the Contents of the Package The following accessories are included. 1 Hot shoe cover FK (Installed on camera) Eyecup FQ (Installed on camera) Body mount cover (Installed on camera) Before Using Your Camera USB cable I-USB7 Strap O-ST84 Software (CD-ROM) S-SW84 Four AA lithium batteries Operating Manual (this manual) Quick Guide PENTAX PHOTO Browser 3/ PENTAX PHOTO Laboratory 3 Operating Manual Check that all accessories are packaged with your camera.

User Manual
Page 48
...8226; When lenses described in (b) are used in a position other lenses and accessories. Using aperture ring] in the [A Custom Setting 3] menu to [Permitted] to check that the camera is locked in the 2 s position Turn the camera off . 2 Remove the body mount cover (1) and lens mount cover (2). See...the lens, and secure by turning the lens clockwise until it clicks. Set [19. Using Aperture Ring]" (p.241). • With factory default settings, the camera will be available. (a) DA, DA L, D FA, FA J lenses (b) Lenses with an Aperture s (Auto) position, when used in place. 46...
...8226; When lenses described in (b) are used in a position other lenses and accessories. Using aperture ring] in the [A Custom Setting 3] menu to [Permitted] to check that the camera is locked in the 2 s position Turn the camera off . 2 Remove the body mount cover (1) and lens mount cover (2). See...the lens, and secure by turning the lens clockwise until it clicks. Set [19. Using Aperture Ring]" (p.241). • With factory default settings, the camera will be available. (a) DA, DA L, D FA, FA J lenses (b) Lenses with an Aperture s (Auto) position, when used in place. 46...

User Manual
Page 149
Connect an external flash and the Hot Shoe Adapter F (optional) to the Off-Camera Shoe Adapter F (optional) and then connect another Off-Camera Shoe Adapter F with external flash using multiple external flashes or an external flash with the built-in the illustration below. Using the Flash...may cause equipment breakdown. You can connect AF360FGZ or AF200FG units as shown in flash, P-TTL is used for details. • Do not combine with accessories that have a different number of contacts such as a Hot Shoe Grip as a malfunction may occur. • Combining with the built-in flash. 147...
Connect an external flash and the Hot Shoe Adapter F (optional) to the Off-Camera Shoe Adapter F (optional) and then connect another Off-Camera Shoe Adapter F with external flash using multiple external flashes or an external flash with the built-in the illustration below. Using the Flash...may cause equipment breakdown. You can connect AF360FGZ or AF200FG units as shown in flash, P-TTL is used for details. • Do not combine with accessories that have a different number of contacts such as a Hot Shoe Grip as a malfunction may occur. • Combining with the built-in flash. 147...

User Manual
Page 150
...built-in flash, the flash output ratio is 2 (external flash) : 1 (built-in flash). • When using PENTAX automatic flashes. 1 Connect the external flash to the camera indirectly. (p.146) 2 Set the sync mode for flash control. 148 Contrast-Control-Sync Flash Combining two or more external flashes...Combining with flashes from multiple units. • The AF200FG must be combined with the AF540FGZ or AF360FGZ. • Do not combine with accessories that both the external flash and built-in flash are fully charged and then take a picture. We recommend using multiple external flashes or...
...built-in flash, the flash output ratio is 2 (external flash) : 1 (built-in flash). • When using PENTAX automatic flashes. 1 Connect the external flash to the camera indirectly. (p.146) 2 Set the sync mode for flash control. 148 Contrast-Control-Sync Flash Combining two or more external flashes...Combining with flashes from multiple units. • The AF200FG must be combined with the AF540FGZ or AF360FGZ. • Do not combine with accessories that both the external flash and built-in flash are fully charged and then take a picture. We recommend using multiple external flashes or...

User Manual
Page 237
12Appendix Default Settings 236 Functions Available with Various Lens Combinations 240 Cleaning the CCD 243 Optional Accessories 248 Error Messages 252 Troubleshooting 255 Main Specifications 258 Glossary 262 Index 267 WARRANTY POLICY 272
12Appendix Default Settings 236 Functions Available with Various Lens Combinations 240 Cleaning the CCD 243 Optional Accessories 248 Error Messages 252 Troubleshooting 255 Main Specifications 258 Glossary 262 Index 267 WARRANTY POLICY 272

User Manual
Page 243
... position is attached. FA prime lenses (non-zoom lenses), DA or DA L lenses without an s position or accessories such as shown below. 19. All camera exposure modes are used , the camera does not operate unless [19. Using Aperture Ring] When [19. 241 Lens names and mount names DA lenses ...) position, pre A lenses or soft focus lenses are available when using DA/DA L/FA J or lenses with a power zoom function. Lenses and accessories that apply. However, the features will be used with this camera is not set to "Notes on [19. DA lenses with power zoom use the KAF mount.
... position is attached. FA prime lenses (non-zoom lenses), DA or DA L lenses without an s position or accessories such as shown below. 19. All camera exposure modes are used , the camera does not operate unless [19. Using Aperture Ring] When [19. 241 Lens names and mount names DA lenses ...) position, pre A lenses or soft focus lenses are available when using DA/DA L/FA J or lenses with a power zoom function. Lenses and accessories that apply. However, the features will be used with this camera is not set to "Notes on [19. DA lenses with power zoom use the KAF mount.

User Manual
Page 244
In the viewfinder, [F--] appears for the aperture indicator. The camera operates in c (Aperture Priority) mode regardless of the aperture ring position. In the viewfinder, [F--] appears for the aperture indicator. In the viewfinder,...specified aperture value but an exposure error may occur. The shutter speed changes in the manual aperture range. D FA, FA, F, A, M, S (with diaphragm accessories such as extension tube K) c (Aperture Priority) mode Manual diaphragm lens such as auto extension tube K) c (Aperture Priority) mode The aperture remains open aperture but...
In the viewfinder, [F--] appears for the aperture indicator. The camera operates in c (Aperture Priority) mode regardless of the aperture ring position. In the viewfinder, [F--] appears for the aperture indicator. In the viewfinder,...specified aperture value but an exposure error may occur. The shutter speed changes in the manual aperture range. D FA, FA, F, A, M, S (with diaphragm accessories such as extension tube K) c (Aperture Priority) mode Manual diaphragm lens such as auto extension tube K) c (Aperture Priority) mode The aperture remains open aperture but...

User Manual
Page 250
... D-AC76, DC COUPLER D-DC84 and AC plug cord(*).) Lets you power your camera with the outlet when combined with a maximum guide number of dedicated accessories are available for details regarding accessories. AF540FGZ AF360FGZ 12 Appendix Please contact a PENTAX Service Center for this camera. Their features include slave-sync flash, contrast-control-sync flash, auto flash...
... D-AC76, DC COUPLER D-DC84 and AC plug cord(*).) Lets you power your camera with the outlet when combined with a maximum guide number of dedicated accessories are available for details regarding accessories. AF540FGZ AF360FGZ 12 Appendix Please contact a PENTAX Service Center for this camera. Their features include slave-sync flash, contrast-control-sync flash, auto flash...

User Manual
Page 252
...to see the entire view by simply flipping up the accessory from within 5 m of the front of the viewfinder 2×. 250 For Viewfinder Magnifier FB This viewfinder accessory is an accessory that changes the viewfinder viewing angle at 90° intervals...accessory adjusts the diopter. Eyecup FQ (*) Ref-converter A Diopter correction lens adapter M Remote Control F Lets you shoot pictures from the eyepiece, as it is difficult to +3 m-1 (per meter). Install it is a hinge-type magnifier. If it on the viewfinder. Ref-converter A This is for magnifying the central area of the camera...
...to see the entire view by simply flipping up the accessory from within 5 m of the front of the viewfinder 2×. 250 For Viewfinder Magnifier FB This viewfinder accessory is an accessory that changes the viewfinder viewing angle at 90° intervals...accessory adjusts the diopter. Eyecup FQ (*) Ref-converter A Diopter correction lens adapter M Remote Control F Lets you shoot pictures from the eyepiece, as it is difficult to +3 m-1 (per meter). Install it is a hinge-type magnifier. If it on the viewfinder. Ref-converter A This is for magnifying the central area of the camera...

User Manual
Page 263
PictBridge Dimensions and Weight Accessories Languages Compatible printer: PictBridge-compatible printer Print mode: Single Image, All Images, DPOF AUTOPRINT Approx. 122.5 mm (W) × 91.5 mm (H) × 67.5 mm ...Hot shoe cover FK, Eyecup FQ, Body mount cover, USB Cable IUSB7, Software (CD-ROM) S-SW84 (PENTAX PHOTO Browser 3/PENTAX PHOTO Laboratory 3), Strap O-ST84, AA lithium batteries (four), Operating Manual (this book), Quick Guide, PENTAX PHOTO Browser 3/PENTAX PHOTO Laboratory 3 Operating Manual English, French, German, Spanish, Portuguese, Italian, Dutch, Danish, Swedish, Finnish,...
PictBridge Dimensions and Weight Accessories Languages Compatible printer: PictBridge-compatible printer Print mode: Single Image, All Images, DPOF AUTOPRINT Approx. 122.5 mm (W) × 91.5 mm (H) × 67.5 mm ...Hot shoe cover FK, Eyecup FQ, Body mount cover, USB Cable IUSB7, Software (CD-ROM) S-SW84 (PENTAX PHOTO Browser 3/PENTAX PHOTO Laboratory 3), Strap O-ST84, AA lithium batteries (four), Operating Manual (this book), Quick Guide, PENTAX PHOTO Browser 3/PENTAX PHOTO Laboratory 3 Operating Manual English, French, German, Spanish, Portuguese, Italian, Dutch, Danish, Swedish, Finnish,...

User Manual
Page 272
... 82 SD Memory Card 42 Select battery 226 Select&Delete 180 Self-timer 125 Sensitivity 87 Sensitivity Priority Mode K ...92 Sensor Cleaning 246 Sepia (Digital Filter 192 [R Set-up] Menu ..........212, 238 Shade (White Balance) ........159 Shadow Compensation ..78, 239 Shake Reduction 121 Sharpness 157 Shutter ... Snap l 82 Ni-MH 37 Ni-MH rechargeable batteries 37 Nine-Image Display 169 Noise Reduction 89 NTSC 225 O 4 button 19, 21 Optional Accessories 248 P e (Program) Mode 90 PAL 225 Pet Y 82 PictBridge 203 Picture mode 81 Pixel Mapping 228 Pixels 150 Playback 24, 72 Q ...
... 82 SD Memory Card 42 Select battery 226 Select&Delete 180 Self-timer 125 Sensitivity 87 Sensitivity Priority Mode K ...92 Sensor Cleaning 246 Sepia (Digital Filter 192 [R Set-up] Menu ..........212, 238 Shade (White Balance) ........159 Shadow Compensation ..78, 239 Shake Reduction 121 Sharpness 157 Shutter ... Snap l 82 Ni-MH 37 Ni-MH rechargeable batteries 37 Nine-Image Display 169 Noise Reduction 89 NTSC 225 O 4 button 19, 21 Optional Accessories 248 P e (Program) Mode 90 PAL 225 Pet Y 82 PictBridge 203 Picture mode 81 Pixel Mapping 228 Pixels 150 Playback 24, 72 Q ...