

Owner's Manual
Page 2
... valuable tips to help you at any sewing problems, picce conaci your machine can sew a large number of beautiful decorative designs completely automatically. PFAFF AG Karisruhe-Durlach Branch Follow these simple instructions and familiarize yourself with the exclusive features of a Pfaff Automatic 92, the sewing machine which will find sewing exciting on your machine. G. Your are an experienced seamstress, you...
... valuable tips to help you at any sewing problems, picce conaci your machine can sew a large number of beautiful decorative designs completely automatically. PFAFF AG Karisruhe-Durlach Branch Follow these simple instructions and familiarize yourself with the exclusive features of a Pfaff Automatic 92, the sewing machine which will find sewing exciting on your machine. G. Your are an experienced seamstress, you...

Owner's Manual
Page 4
... auto • Always bring and after you take .up . under the sewing foot before you have to slip out of the with the take -up lever to observe this needle eye. Also, it toward you • Make ... you have (counter-clockwise as to turn it is guide the work to do material under the • Place both threads back fabric into the machine. machine unless you begin sewing. rule may easier to cause the thread remove the work . t /Uat.411W- OR 050 • Whenever you put The...
... auto • Always bring and after you take .up . under the sewing foot before you have to slip out of the with the take -up lever to observe this needle eye. Also, it toward you • Make ... you have (counter-clockwise as to turn it is guide the work to do material under the • Place both threads back fabric into the machine. machine unless you begin sewing. rule may easier to cause the thread remove the work . t /Uat.411W- OR 050 • Whenever you put The...

Owner's Manual
Page 5
...To switch on the sewlight, push button on bock of machine, and plug 3 at other end of card into the wall outlet. Disengaging the Sewing Mechanism Hold balance wheel and turn stop motion knob counter-clockwise (toward you drop the machine, remove the belt from the stand wheel, pulling it to... the foot control. Cord 4 leads to the right. 4 \ 1 OR 506 o6 Qjetion icti $winy ,Madine Engaging the Sewing Mechanism .4 Hold balance wheel and turn stop motion knob clockwise...
...To switch on the sewlight, push button on bock of machine, and plug 3 at other end of card into the wall outlet. Disengaging the Sewing Mechanism Hold balance wheel and turn stop motion knob counter-clockwise (toward you drop the machine, remove the belt from the stand wheel, pulling it to... the foot control. Cord 4 leads to the right. 4 \ 1 OR 506 o6 Qjetion icti $winy ,Madine Engaging the Sewing Mechanism .4 Hold balance wheel and turn stop motion knob clockwise...

Owner's Manual
Page 6
... Wide speed zwihgizcahgisstoitbcthaeisneadndbyAduetpormesastiincgemthberofoidoet rcyonwtroorlk require o lower only slightly. cord can be passed through Sewing Speed The Pfoff a minute. Motor Disengaging Mechanism pftwPoloiohcswikicittheisotrh-nsted.oerrpilvveeevpsneorstmoidtioaoscwwnhniinn.igenAs ftohtfereedraetmyurorouettoohar artevloeteuvriectnsromouthpnpeedlereatrmetnidoveta&...rotary hook enables you press, 1j On the some sewing cabinets, the foot control opening in the bedplate extension. R7132 5 I all machines set up on Foot Control 4 Place the foot ...
... Wide speed zwihgizcahgisstoitbcthaeisneadndbyAduetpormesastiincgemthberofoidoet rcyonwtroorlk require o lower only slightly. cord can be passed through Sewing Speed The Pfoff a minute. Motor Disengaging Mechanism pftwPoloiohcswikicittheisotrh-nsted.oerrpilvveeevpsneorstmoidtioaoscwwnhniinn.igenAs ftohtfereedraetmyurorouettoohar artevloeteuvriectnsromouthpnpeedlereatrmetnidoveta&...rotary hook enables you press, 1j On the some sewing cabinets, the foot control opening in the bedplate extension. R7132 5 I all machines set up on Foot Control 4 Place the foot ...
Owner's Manual
Page 7
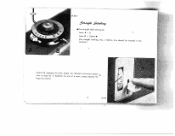
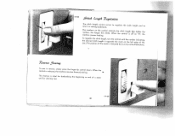
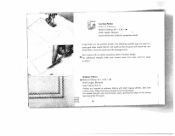
I: 6 F F F [. For detailed instructions please refer to page 20. To backtock the end of a seam, simply depress the finger-tip control. 4 For troighi-stitch sewing set: Lever A = 0 Lever B = Center+ (For straight machine.) stitching, too, a fashion disc should be inserted in the F: Control G regulates the stitch length.
I: 6 F F F [. For detailed instructions please refer to page 20. To backtock the end of a seam, simply depress the finger-tip control. 4 For troighi-stitch sewing set: Lever A = 0 Lever B = Center+ (For straight machine.) stitching, too, a fashion disc should be inserted in the F: Control G regulates the stitch length.

Owner's Manual
Page 12
...or place it in bobbin. Since the upper thread is passed through both front holes of spindle enters slot in the carrying case (portable machines) the spool pins should be swung forward to highest position. DR 549 11 Raise the spool pins to the bobbin on bobbin winder ...that the key at base of thread retainer 2 and thece to the vertical position. Threading the Machine Pass the thread from a second spool without unthreading the needle. iOmn?tnj th 7 3 c 6 tn 6 Disengage the sewing mechanism (see page 4) and flick presser bar lifter to the horizontal position. Before you can ...
...or place it in bobbin. Since the upper thread is passed through both front holes of spindle enters slot in the carrying case (portable machines) the spool pins should be swung forward to highest position. DR 549 11 Raise the spool pins to the bobbin on bobbin winder ...that the key at base of thread retainer 2 and thece to the vertical position. Threading the Machine Pass the thread from a second spool without unthreading the needle. iOmn?tnj th 7 3 c 6 tn 6 Disengage the sewing mechanism (see page 4) and flick presser bar lifter to the horizontal position. Before you can ...
Owner's Manual
Page 21
... the stitch length and to The numbers on "0", the the stThlooet.red(geTsuhielraetpdeostsihttieitocsnhtitoclfehnthgleethngmitshar,kotpuiprsnoisntihdteeiccatohtenedtrmoblyaruaknntioalnrrthotewheninulmethftbeeeirldliugnsedtriaoctafiotitnnh)ge. To sew control in sewing backwards. the stitch length the control is ideal for and for darning rips. Fi. When machine ceases feeding. When the This feature is (te higher set on the control indicate number, the longer...
... the stitch length and to The numbers on "0", the the stThlooet.red(geTsuhielraetpdeostsihttieitocsnhtitoclfehnthgleethngmitshar,kotpuiprsnoisntihdteeiccatohtenedtrmoblyaruaknntioalnrrthotewheninulmethftbeeeirldliugnsedtriaoctafiotitnnh)ge. To sew control in sewing backwards. the stitch length the control is ideal for and for darning rips. Fi. When machine ceases feeding. When the This feature is (te higher set on the control indicate number, the longer...

Owner's Manual
Page 25
Ca an /i1aIntenanc Longevity and smooth machine performance are dependent on the underside Qf the machine base, and remove the base. In replacing the machine base, tighten thumb screw lightly. If you have a portable machine, tilt it back, loosen the large thumb screw on regular and proper cleaning ...and oiling. For removing the face cover see page 26. All moving and rotating parts require regular lubricatioii. Use Pfaff sewing machine oil only. Never lubricate maiine with animal or vegetable oils. A From time to time, lubricate the needle bar frame bearings in ...
Ca an /i1aIntenanc Longevity and smooth machine performance are dependent on the underside Qf the machine base, and remove the base. In replacing the machine base, tighten thumb screw lightly. If you have a portable machine, tilt it back, loosen the large thumb screw on regular and proper cleaning ...and oiling. For removing the face cover see page 26. All moving and rotating parts require regular lubricatioii. Use Pfaff sewing machine oil only. Never lubricate maiine with animal or vegetable oils. A From time to time, lubricate the needle bar frame bearings in ...

Owner's Manual
Page 28
Machine threaded improperly. Remedy: Push needle up as far as instructed. Choose the carrect needle from you. Remedy: See remedies listed under 1. Wrong needle. Check and correct threading as instructed on page 14. (For ordinary sewing, use System 130 R needles.) Insert new needle. Poor, knotty or rotten thread used. Hook raceway is jammed... quality threads only. Use correct needle and thread (see chart on needle plate slot. 1. Clean and oil hook raceway. above mentioned may cause thread breakage. Machine Sldps Stitches Cause: Needle incorrectly inseçted.
Machine threaded improperly. Remedy: Push needle up as far as instructed. Choose the carrect needle from you. Remedy: See remedies listed under 1. Wrong needle. Check and correct threading as instructed on page 14. (For ordinary sewing, use System 130 R needles.) Insert new needle. Poor, knotty or rotten thread used. Hook raceway is jammed... quality threads only. Use correct needle and thread (see chart on needle plate slot. 1. Clean and oil hook raceway. above mentioned may cause thread breakage. Machine Sldps Stitches Cause: Needle incorrectly inseçted.

Owner's Manual
Page 29
...teeth. Needle too thin or thread too heovy. Don't force the feeding motion. the correct size for the needle and fabric. Machine Feeds Improperly Cause: Machine does not feed because stitch lenqth control set on "0". Remedy: Regulate stitch length, as instructed. Bobbin case inserted incorrectly. Use ... when winding the bobbin, but lead it snap into place. 4. Bobbin unevenly wound. Needle Breaks Cause: Bent needle strikes point of sewing hook. Thread too heavy, knotty or hard. Fabric pulls needle so it bends and strikes needle plate. Take off needle plate and remove...
...teeth. Needle too thin or thread too heovy. Don't force the feeding motion. the correct size for the needle and fabric. Machine Feeds Improperly Cause: Machine does not feed because stitch lenqth control set on "0". Remedy: Regulate stitch length, as instructed. Bobbin case inserted incorrectly. Use ... when winding the bobbin, but lead it snap into place. 4. Bobbin unevenly wound. Needle Breaks Cause: Bent needle strikes point of sewing hook. Thread too heavy, knotty or hard. Fabric pulls needle so it bends and strikes needle plate. Take off needle plate and remove...

Owner's Manual
Page 30
... raceway, the jam, even power of thread. Thread Jamming The Pfaff rotary hook will be improperly. Machine Works Heavily Couse: Hook raceway locks oil or is obstructed by inferior oil. Machine Fails to overcome hard working whfle sewing. If thread should be inserted in most instances will happen to ... hook raceway, jerk the balance wheel back, then rock it back and forth. 29 4 j,.. 4 tIl ' J JiLl Use only Pfoff sewing machine oil - If this action should be handled the motor in the machine (see page 5). Stop bobbin winder. 7. never salod oil or glycerine.
... raceway, the jam, even power of thread. Thread Jamming The Pfaff rotary hook will be improperly. Machine Works Heavily Couse: Hook raceway locks oil or is obstructed by inferior oil. Machine Fails to overcome hard working whfle sewing. If thread should be inserted in most instances will happen to ... hook raceway, jerk the balance wheel back, then rock it back and forth. 29 4 j,.. 4 tIl ' J JiLl Use only Pfoff sewing machine oil - If this action should be handled the motor in the machine (see page 5). Stop bobbin winder. 7. never salod oil or glycerine.

Owner's Manual
Page 31
... DR 003 Use right edge of the fabric. V Edge Stitching 84 Machine Setting: A 0 to right side. B -. B * Edge stitcher No.847600 used with the long thumb screw. Run a straight seam close to the machine bed with the quilting gauge sews parallel F rows of stitching at various distances from the fabric edge by ...using no edge guide.) DR 032 r Quilting Machine Setting: A 0; Sew parallel rows of zipper; The seam guide is fastened to left edge of straight or zigzag stitches at any distance over the entire...
... DR 003 Use right edge of the fabric. V Edge Stitching 84 Machine Setting: A 0 to right side. B -. B * Edge stitcher No.847600 used with the long thumb screw. Run a straight seam close to the machine bed with the quilting gauge sews parallel F rows of stitching at various distances from the fabric edge by ...using no edge guide.) DR 032 r Quilting Machine Setting: A 0; Sew parallel rows of zipper; The seam guide is fastened to left edge of straight or zigzag stitches at any distance over the entire...

Owner's Manual
Page 34
... necessary, ease the upper and lower tensions somewhat. To finish the edge of oil to the sewing foot, apply a are sewn with which can be adhered various sections of to in the laundry. .1• Plastic Sheets Machine Setting: A = 0 to avoid shrinking curtains, proceed as are used in kitchens and bathrooms, Place a piece... drop of syntetic curtain fabrics, such as Diolen, use a matching synthetic thread. or cotton after the and a fine needle. and the fabric in order to 2; sewing. To prevent 33
... necessary, ease the upper and lower tensions somewhat. To finish the edge of oil to the sewing foot, apply a are sewn with which can be adhered various sections of to in the laundry. .1• Plastic Sheets Machine Setting: A = 0 to avoid shrinking curtains, proceed as are used in kitchens and bathrooms, Place a piece... drop of syntetic curtain fabrics, such as Diolen, use a matching synthetic thread. or cotton after the and a fine needle. and the fabric in order to 2; sewing. To prevent 33

Owner's Manual
Page 35
...the remaining pieces of sheet. 34 F Use a long wide zigzag stitch and sew edge with close, wide zigzag stitches to 4; I 838 954 Butt Seaming Machine Setting: A 3or4; Hem raw edges of sheet under the sewing foot so that the abutted edges are joined. Cut out worn center strip.... - 838 954 OR 037 Overcasting Edges Machine Setting: A = 2 to obtain a neat and flat seam....
...the remaining pieces of sheet. 34 F Use a long wide zigzag stitch and sew edge with close, wide zigzag stitches to 4; I 838 954 Butt Seaming Machine Setting: A 3or4; Hem raw edges of sheet under the sewing foot so that the abutted edges are joined. Cut out worn center strip.... - 838 954 OR 037 Overcasting Edges Machine Setting: A = 2 to obtain a neat and flat seam....
Owner's Manual
Page 37
... nd other elastic fabrics. Cut patch so that , proceed as instructed above. For additional strength, stitch over the damaged area. Turn over corners twice. Sew over and trim close to seams. Ordinary Fabrics Machine Setting: A 2; 8 r Stitch Length: Minimum Insert fashion disc A. DR582 DR 581 08566 36 r u838 954 Inserting Patches Elastic Fabrics...
... nd other elastic fabrics. Cut patch so that , proceed as instructed above. For additional strength, stitch over the damaged area. Turn over corners twice. Sew over and trim close to seams. Ordinary Fabrics Machine Setting: A 2; 8 r Stitch Length: Minimum Insert fashion disc A. DR582 DR 581 08566 36 r u838 954 Inserting Patches Elastic Fabrics...

Owner's Manual
Page 39
...,efplf.risfeitnciTfrreomiaslreplsyfattmmrdwetovoanoritegevsetaerhobinpaeflrlneoc.fmooIbttnooitunot.mtentponTaltnmkoahicanbogetguleeetrttasbioatunhlitpnhetibooeetnlccrethoiewscor,oreloeteepcfsnuatlnitltnisdhstiesastucokfehfnfatiibltllporeefrairnacpglbeoctlrhraooic,yrsdseeus,lrneystwd.ihnwersroooeunrvttgehhnaea I 9'IOO79 Bpguruortpotoovnseheoolfseestwheimncgalyeaforb-oveti.emwPlaasdcheeoetw.hie. Atboettgabicunhnttiobnnguhttooolfnehfiolrelsnetgstfheoaomdt eNsrieorae. Sewing Buttonholes Machine Setting A = 12V (first notch); When you follow the procedure on at each end of cord...
...,efplf.risfeitnciTfrreomiaslreplsyfattmmrdwetovoanoritegevsetaerhobinpaeflrlneoc.fmooIbttnooitunot.mtentponTaltnmkoahicanbogetguleeetrttasbioatunhlitpnhetibooeetnlccrethoiewscor,oreloeteepcfsnuatlnitltnisdhstiesastucokfehfnfatiibltllporeefrairnacpglbeoctlrhraooic,yrsdseeus,lrneystwd.ihnwersroooeunrvttgehhnaea I 9'IOO79 Bpguruortpotoovnseheoolfseestwheimncgalyeaforb-oveti.emwPlaasdcheeoetw.hie. Atboettgabicunhnttiobnnguhttooolfnehfiolrelsnetgstfheoaomdt eNsrieorae. Sewing Buttonholes Machine Setting A = 12V (first notch); When you follow the procedure on at each end of cord...

Owner's Manual
Page 43
DR 033 838 954 Applique Work Machine Setting: A 1/2 to the left and satin-stitch over edges of applique with a narrow zigzag stitch - Applique is desired. Applique is very effective on right side. ... you want to give the design a plastic effect, use buttonhole foot Nr. 847 66 or all-purpose sewing foot, flick lever B to 2; Fill out small, but essential sections of contrasting material to the seam and sew over a filler thread (see also page 38). V Trim excess material close to right side. Outline design...
DR 033 838 954 Applique Work Machine Setting: A 1/2 to the left and satin-stitch over edges of applique with a narrow zigzag stitch - Applique is desired. Applique is very effective on right side. ... you want to give the design a plastic effect, use buttonhole foot Nr. 847 66 or all-purpose sewing foot, flick lever B to 2; Fill out small, but essential sections of contrasting material to the seam and sew over a filler thread (see also page 38). V Trim excess material close to right side. Outline design...

Owner's Manual
Page 44
... little practice. The fabric should be held taut in the hoops and the presser bar lifter lowered. Attach all-purpose sewing foot and set machine for monogram embroidery without a sewing foot. Let the needle stitch into the fabric at the beginnin' of letters. 43 DRO31 To give your design and... draw bobbin thread up through the fabric. Hold both thread ends and sew over outline, moving hoops slowly and evenly. Set needle plate so that seams do not overlap at a uniform rate. DR 038 Monogram Embroidery Machine Setting: A = 3 to 3; You will soon enjoy creative embroidery once ...
... little practice. The fabric should be held taut in the hoops and the presser bar lifter lowered. Attach all-purpose sewing foot and set machine for monogram embroidery without a sewing foot. Let the needle stitch into the fabric at the beginnin' of letters. 43 DRO31 To give your design and... draw bobbin thread up through the fabric. Hold both thread ends and sew over outline, moving hoops slowly and evenly. Set needle plate so that seams do not overlap at a uniform rate. DR 038 Monogram Embroidery Machine Setting: A = 3 to 3; You will soon enjoy creative embroidery once ...
Owner's Manual
Page 51
Two-Needle Decorative Sewing Machine Setting: A up to G, Automatic embroidery designs are The distance between both needles tions on page 45). particularly attractive must not exceed 5/64 when sewn with ...
Two-Needle Decorative Sewing Machine Setting: A up to G, Automatic embroidery designs are The distance between both needles tions on page 45). particularly attractive must not exceed 5/64 when sewn with ...
Owner's Manual
Page 52
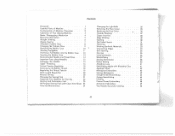
...of Machine 2 Removing the Face Cover 26 Fundamentals of Machine Ooeration 3 Replacing the Face Cover ., 26 Operation of Your Sewing Machine 4 Trouble Shooting 27 Motor Disengaging Mechanism . 4 Zipper Insertion 30 Electrical Information 5 Edge Stitching 30 Straight Stitching 6 Quilting 30 Zigzag Sewing 7... 19 Monogram Embroidery 43 Stitch Length Regulation Reverse Sewing 20 Sewing Monograms 20 Straight-Stitch Hemstitching 43 L 44 Changing the Sewing Foot 21 Zigzag Hemstitching 44 Preparing Your Machine for Darning 22 Cording 45 Darning and Embroidery...
...of Machine 2 Removing the Face Cover 26 Fundamentals of Machine Ooeration 3 Replacing the Face Cover ., 26 Operation of Your Sewing Machine 4 Trouble Shooting 27 Motor Disengaging Mechanism . 4 Zipper Insertion 30 Electrical Information 5 Edge Stitching 30 Straight Stitching 6 Quilting 30 Zigzag Sewing 7... 19 Monogram Embroidery 43 Stitch Length Regulation Reverse Sewing 20 Sewing Monograms 20 Straight-Stitch Hemstitching 43 L 44 Changing the Sewing Foot 21 Zigzag Hemstitching 44 Preparing Your Machine for Darning 22 Cording 45 Darning and Embroidery...


