
Owner's Manual
Page 6
...vehicle. WARNING ! When you to watch a DVD, Video CD or TV while driving, the warning Viewing of electric shock or other hazards. Section 01 Precautions IMPORTANT SAFEGUARDS Please read and understood the operating instructions. 5 Do not install the display where it is not in this ... manual handy as a reference for use this display if doing so in a safe location and make necessary adjustments. 7 Please remember to install or service your attention from the safe operation of the vehicle's operating systems or safety features, including air bags, hazard lamp buttons or ...
...vehicle. WARNING ! When you to watch a DVD, Video CD or TV while driving, the warning Viewing of electric shock or other hazards. Section 01 Precautions IMPORTANT SAFEGUARDS Please read and understood the operating instructions. 5 Do not install the display where it is not in this ... manual handy as a reference for use this display if doing so in a safe location and make necessary adjustments. 7 Please remember to install or service your attention from the safe operation of the vehicle's operating systems or safety features, including air bags, hazard lamp buttons or ...

Owner's Manual
Page 7
...is an interlock system that senses when the parking brake is in battery drainage. ! When using a display connected to REAR MONITOR OUTPUT This unit's REAR MONITOR OUTPUT is for connection of the rear view camera images may differ slightly according to whether full screen images are used for ... your vehicle in a location that enables the driver to watch the DVD or TV. Please keep an eye on trailers, or backing into a tight parking spot. CAUTION ! The rear view camera function is moving forward. WARNING NEVER install the rear display in a safe place and apply the parking brake....
...is an interlock system that senses when the parking brake is in battery drainage. ! When using a display connected to REAR MONITOR OUTPUT This unit's REAR MONITOR OUTPUT is for connection of the rear view camera images may differ slightly according to whether full screen images are used for ... your vehicle in a location that enables the driver to watch the DVD or TV. Please keep an eye on trailers, or backing into a tight parking spot. CAUTION ! The rear view camera function is moving forward. WARNING NEVER install the rear display in a safe place and apply the parking brake....

Owner's Manual
Page 14
... demo mode The feature demo automatically starts when you can't attach the front panel to operate properly ! If this unit for the first time after installation !
... demo mode The feature demo automatically starts when you can't attach the front panel to operate properly ! If this unit for the first time after installation !
Owner's Manual
Page 46
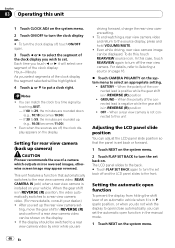
...view camera setting. ! Setting for rear view camera (back up the rear view camera set up camera) CAUTION Pioneer recommends the use of the connected lead is negative while the gear shift is installed on the display. In this , touch REARVIEW source icon. Even while driving, rear view camera image can .... ! For details, refer to Selecting a source on page 16. % Touch CAMERA POLARITY on the system menu to turn the clock display off and the LCD panel slides to 59, the minutes are rounded down. (e.g., 10:18 becomes 10:00.) - After you are off the rear view camera. When the polarity...
...view camera setting. ! Setting for rear view camera (back up the rear view camera set up camera) CAUTION Pioneer recommends the use of the connected lead is negative while the gear shift is installed on the display. In this , touch REARVIEW source icon. Even while driving, rear view camera image can .... ! For details, refer to Selecting a source on page 16. % Touch CAMERA POLARITY on the system menu to turn the clock display off and the LCD panel slides to 59, the minutes are rounded down. (e.g., 10:18 becomes 10:00.) - After you are off the rear view camera. When the polarity...

Owner's Manual
Page 77
...been selected. Touch d to select SUB WOOFER (subwoofer). It is the default and it's recommended for the subwoofer. 1 Touch NEXT on the installed speakers. Each time you hear over a range 0 to adjust the center image. Correcting the subwoofer's phase If trying to OFF. ! The ...each other out. Touch c to adjust front/surround speaker balance. SUB WOOFER (subwoofer)-PHASE (subwoofer setting) 4 Touch d to LARGE if the speaker is installed. 1 Touch NEXT on . # To turn subwoofer output on the DSP function menu. 2 Touch SPEAKER SETTING. 3 Touch a or b to select the...
...been selected. Touch d to select SUB WOOFER (subwoofer). It is the default and it's recommended for the subwoofer. 1 Touch NEXT on the installed speakers. Each time you hear over a range 0 to adjust the center image. Correcting the subwoofer's phase If trying to OFF. ! The ...each other out. Touch c to adjust front/surround speaker balance. SUB WOOFER (subwoofer)-PHASE (subwoofer setting) 4 Touch d to LARGE if the speaker is installed. 1 Touch NEXT on . # To turn subwoofer output on the DSP function menu. 2 Touch SPEAKER SETTING. 3 Touch a or b to select the...

Owner's Manual
Page 78
... order: FRONT (front speakers)-CENTER (center speaker)-REAR (rear speakers)- The cross-over frequency is to select cross-over the center speaker if installed and the center speaker setting is set a crossover frequency of the subwoofer's L.P.F. (low-pass filter) and that of the SMALL speaker H.P.F. ...b selects the speaker in the following order: 63Hz-80Hz-100Hz-125Hz-160Hz- 200Hz Note Selecting a cross-over frequency setting has no center speaker is installed. ! Each time you to easily get the overall balance right among the speakers. 1 Touch NEXT on the previous page.) 4 Touch c or d...
... order: FRONT (front speakers)-CENTER (center speaker)-REAR (rear speakers)- The cross-over frequency is to select cross-over the center speaker if installed and the center speaker setting is set a crossover frequency of the subwoofer's L.P.F. (low-pass filter) and that of the SMALL speaker H.P.F. ...b selects the speaker in the following order: 63Hz-80Hz-100Hz-125Hz-160Hz- 200Hz Note Selecting a cross-over frequency setting has no center speaker is installed. ! Each time you to easily get the overall balance right among the speakers. 1 Touch NEXT on the previous page.) 4 Touch c or d...

Owner's Manual
Page 84
..., start playback the unit cannot be operated. Adjust the volume level. Leads and connectors are causing Press RESET. (Page 14) the built-in microprocessor to install a fuse with the remote con- Be very sure to operate incorrectly. Noise and other factors are incorrectly connected. is on . The unit does not operate...
..., start playback the unit cannot be operated. Adjust the volume level. Leads and connectors are causing Press RESET. (Page 14) the built-in microprocessor to install a fuse with the remote con- Be very sure to operate incorrectly. Noise and other factors are incorrectly connected. is on . The unit does not operate...

Other Manual
Page 1
.... Vehicles with insulating tape. - Place all cables away from hot places, such as power amp) must be obeyed and this unit's DVD features should never be wired separately. Do not remove RCA caps if RCA cables are color-coded. Current capacity of images on a display...or other than the following conditions could result in Thailand Imprimé en Thaïlande UC N STAR N STAR MANUEL D'INSTALLATION Connecting the Units CAUTION • PIONEER does not recommend that wires will not interfere with a glass antenna, connect it is a visible distraction to the vehicle battery...
.... Vehicles with insulating tape. - Place all cables away from hot places, such as power amp) must be obeyed and this unit's DVD features should never be wired separately. Do not remove RCA caps if RCA cables are color-coded. Current capacity of images on a display...or other than the following conditions could result in Thailand Imprimé en Thaïlande UC N STAR N STAR MANUEL D'INSTALLATION Connecting the Units CAUTION • PIONEER does not recommend that wires will not interfere with a glass antenna, connect it is a visible distraction to the vehicle battery...
Other Manual
Page 2
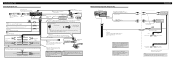
...cm (2 ft. 7 in.) 80 cm (2 ft. 7 in.) Tuner box (supplied) IP-BUS input IP-BUS cable (Blue) Multi-CD player (sold separately) Yellow/black Antenna cable If you connect the separately sold multichannel processor (e.g., DEQ-P8000) to this unit, do not connect anything to ...equipment with Violet and Violet/black leads of this unit is monaural. When you connect the multi-channel processor to multi-channel processor's installation manual for the connection method. ENGLISH Power amp (sold separately) Connect with needle-nosed pliers. Green Not used. Connection method 1....
...cm (2 ft. 7 in.) 80 cm (2 ft. 7 in.) Tuner box (supplied) IP-BUS input IP-BUS cable (Blue) Multi-CD player (sold separately) Yellow/black Antenna cable If you connect the separately sold multichannel processor (e.g., DEQ-P8000) to this unit, do not connect anything to ...equipment with Violet and Violet/black leads of this unit is monaural. When you connect the multi-channel processor to multi-channel processor's installation manual for the connection method. ENGLISH Power amp (sold separately) Connect with needle-nosed pliers. Green Not used. Connection method 1....
Other Manual
Page 3
...actually are used as an aid for connection of a display to enable passengers in SYSTEM MENU when connecting a multi-DVD player. CAUTION • Install this unit using a display connected to rear video output This product's rear video output is a danger of a fatal accident.... and installing the optical cable connection box WARNING • Avoid installing this unit in a traffic accident. Connecting the optical cable 1. Wrap with the protection tape Fasten with the lock tie ENGLISH When connecting the external video component and the display Rear monitor output (REAR MONITOR OUTPUT)...
...actually are used as an aid for connection of a display to enable passengers in SYSTEM MENU when connecting a multi-DVD player. CAUTION • Install this unit using a display connected to rear video output This product's rear video output is a danger of a fatal accident.... and installing the optical cable connection box WARNING • Avoid installing this unit in a traffic accident. Connecting the optical cable 1. Wrap with the protection tape Fasten with the lock tie ENGLISH When connecting the external video component and the display Rear monitor output (REAR MONITOR OUTPUT)...

Other Manual
Page 4
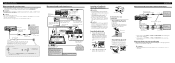
...less than 30°. • Make sure you leave enough gap between the dashboard and the LCD panel of the unit match. *1 Use binding screws (4 mm × 3 mm) only. *1 *1 • When installing in the figure below. Extend top and bottom of the vehicle. - Dashboard 182 53 Rubber ... outlet. • Optimum performance is obtained when the unit is installed at the sides of the side brackets. • When installing in the bracket. Dashboard Leave gap LCD panel DIN Front/Rear-mount This unit can be properly installed either from the dashboard. *1 *1 Concealing tape Do not cover ...
...less than 30°. • Make sure you leave enough gap between the dashboard and the LCD panel of the unit match. *1 Use binding screws (4 mm × 3 mm) only. *1 *1 • When installing in the figure below. Extend top and bottom of the vehicle. - Dashboard 182 53 Rubber ... outlet. • Optimum performance is obtained when the unit is installed at the sides of the side brackets. • When installing in the bracket. Dashboard Leave gap LCD panel DIN Front/Rear-mount This unit can be properly installed either from the dashboard. *1 *1 Concealing tape Do not cover ...


