
Quick Setup Guide (English)
Page 1
...guide de l'utilisateur. • Pour une performance optimale, vérifier que l'ordinateur portatif ou le PC dispose de ports USB 3.0. RF-HD3035 QUICK SETUP GUIDE • GUIDE D'INSTALLATION RAPIDE • 5 Attach the four rubber pads to the back of the enclosure to agree...Click the Erase tab. 4 Choose a volume format and assign a name to install the software. One-year limited warranty Visit www.rocketfishproducts.com for more information. The introductory screen appears automatically. ROCKETFISH is a trademark of BBY Solutions, Inc. If your computer does not have set up...
...guide de l'utilisateur. • Pour une performance optimale, vérifier que l'ordinateur portatif ou le PC dispose de ports USB 3.0. RF-HD3035 QUICK SETUP GUIDE • GUIDE D'INSTALLATION RAPIDE • 5 Attach the four rubber pads to the back of the enclosure to agree...Click the Erase tab. 4 Choose a volume format and assign a name to install the software. One-year limited warranty Visit www.rocketfishproducts.com for more information. The introductory screen appears automatically. ROCKETFISH is a trademark of BBY Solutions, Inc. If your computer does not have set up...
User Manual (English)
Page 2
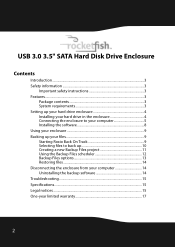
...contents 3 System requirements 3 Setting up your hard drive enclosure 4 Installing your hard drive in the enclosure 4 Connecting the enclosure to your computer 5 Installing the software 8 Using your enclosure 9 Backing up your files 9 Starting Roxio Back On Track 9 Selecting files to back up 10 Creating a new Backup Files project 11...the Backup Files scheduler 12 Backup Files options 13 Restoring files 14 Disconnecting the enclosure from your computer 14 Uninstalling the backup software 14 Troubleshooting 15 Specifications...15 Legal notices ...15 One-year limited warranty 17 2
...contents 3 System requirements 3 Setting up your hard drive enclosure 4 Installing your hard drive in the enclosure 4 Connecting the enclosure to your computer 5 Installing the software 8 Using your enclosure 9 Backing up your files 9 Starting Roxio Back On Track 9 Selecting files to back up 10 Creating a new Backup Files project 11...the Backup Files scheduler 12 Backup Files options 13 Restoring files 14 Disconnecting the enclosure from your computer 14 Uninstalling the backup software 14 Troubleshooting 15 Specifications...15 Legal notices ...15 One-year limited warranty 17 2
User Manual (English)
Page 3
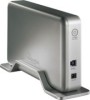
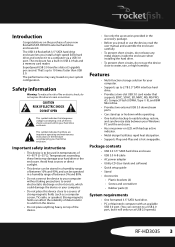
...contents • USB 3.0 3.5" SATA hard drive enclosure • USB 3.0 A-B cable • AC power adapter • Utility CD (User Guide and software) • Quick setup guide • Stand • Accessories • Plastic brackets (2) • Screws and screwdriver • Rubber pads (4) System requirements ... be used in temperatures of the device. • Use only the accessories provided in the literature accompanying your new Rocketfish RF-HD3035 external hard drive enclosure kit. Introduction Congratulations on the purchase of between your Windows PC and the enclosure. •...
...contents • USB 3.0 3.5" SATA hard drive enclosure • USB 3.0 A-B cable • AC power adapter • Utility CD (User Guide and software) • Quick setup guide • Stand • Accessories • Plastic brackets (2) • Screws and screwdriver • Rubber pads (4) System requirements ... be used in temperatures of the device. • Use only the accessories provided in the literature accompanying your new Rocketfish RF-HD3035 external hard drive enclosure kit. Introduction Congratulations on the purchase of between your Windows PC and the enclosure. •...

User Manual (English)
Page 7
...USB hubs on the memory card, right-click the memory card icon, and click Eject. 5 Remove the memory card. Caution: Make sure that software drivers be installed before connecting them to a computer. Formatting a memory card If your computer has trouble recognizing a new memory card, format the memory...MMC) • Sony® Memory stick (MS, MS PRO) • xD picture cards Note: A memory card adapter is inserted into the appropriate slot. RF-HD3035 7 3 Double-click Drive Setup. 4 In the list of hard drive storage space. 1 Click Custom Setup. 2 Select the Type menu in the Volume Info ...
...USB hubs on the memory card, right-click the memory card icon, and click Eject. 5 Remove the memory card. Caution: Make sure that software drivers be installed before connecting them to a computer. Formatting a memory card If your computer has trouble recognizing a new memory card, format the memory...MMC) • Sony® Memory stick (MS, MS PRO) • xD picture cards Note: A memory card adapter is inserted into the appropriate slot. RF-HD3035 7 3 Double-click Drive Setup. 4 In the list of hard drive storage space. 1 Click Custom Setup. 2 Select the Type menu in the Volume Info ...
User Manual (English)
Page 8
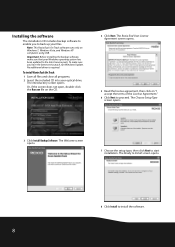
...proceed. No additional driver is required. The introductory screen opens. Note: This Roxio Back On Track software runs only on the CD. 4 Click Next. Important: Before installing the backup software, make sure you to back up your optical drive. To install Roxio Back On Track: 1 ... screen opens. 7 Choose the setup type, then click Next to install the software. 8 The Ready to Install screen opens. 8 Click Install to start installation. Installing the software The installation CD includes backup software to enable you have the latest service pack, run Windows Update. Or, if...
...proceed. No additional driver is required. The introductory screen opens. Note: This Roxio Back On Track software runs only on the CD. 4 Click Next. Important: Before installing the backup software, make sure you to back up your optical drive. To install Roxio Back On Track: 1 ... screen opens. 7 Choose the setup type, then click Next to install the software. 8 The Ready to Install screen opens. 8 Click Install to start installation. Installing the software The installation CD includes backup software to enable you have the latest service pack, run Windows Update. Or, if...
User Manual (English)
Page 9
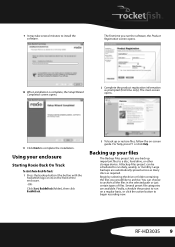
... Track To start Roxio Back On Track: 1 Press the backup button (the button with the Rocketfish logo on it) on the front of files. Several preset file categories are automatically spread across ... as prompted (first time only). The main screen opens. 11 Click Finish to install the software. Begin by selecting the drive or folder containing the files you back up or restore files,...F1 or click Help. You can be scheduled to a disc, hard drive, or other storage device. RF-HD3035 9 9 It may take several minutes to complete the installation. A Backup Files project can choose to ...
... Track To start Roxio Back On Track: 1 Press the backup button (the button with the Rocketfish logo on it) on the front of files. Several preset file categories are automatically spread across ... as prompted (first time only). The main screen opens. 11 Click Finish to install the software. Begin by selecting the drive or folder containing the files you back up or restore files,...F1 or click Help. You can be scheduled to a disc, hard drive, or other storage device. RF-HD3035 9 9 It may take several minutes to complete the installation. A Backup Files project can choose to ...
User Manual (English)
Page 12
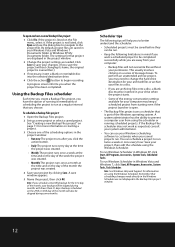
To open . • The Backup Files project uses a scheduler that is not listed, click Open and use your Windows scheduling software to a disc. • If you are archiving files onto a disc, a blank disc must be saved before they can schedule a project to be skipped during months ...
To open . • The Backup Files project uses a scheduler that is not listed, click Open and use your Windows scheduling software to a disc. • If you are archiving files onto a disc, a blank disc must be saved before they can schedule a project to be skipped during months ...
User Manual (English)
Page 13
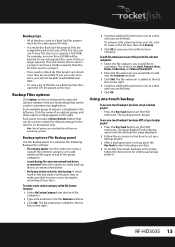
... into the Extension text box. 3 Click Add. Using one-touch backup To use one at a time until you are finished. 5 Click OK. The Roxio BackOnTrack software opens with the Backup Files page displayed. 2 Follow the on-screen instructions to the list box on the right. 4 Continue adding file extensions one -touch... extensions one -touch backup if you have a smaller capacity than 650 MB will not be able to open the .RFI file placed on the disc. RF-HD3035 13
... into the Extension text box. 3 Click Add. Using one-touch backup To use one at a time until you are finished. 5 Click OK. The Roxio BackOnTrack software opens with the Backup Files page displayed. 2 Follow the on-screen instructions to the list box on the right. 4 Continue adding file extensions one -touch... extensions one -touch backup if you have a smaller capacity than 650 MB will not be able to open the .RFI file placed on the disc. RF-HD3035 13
User Manual (English)
Page 14
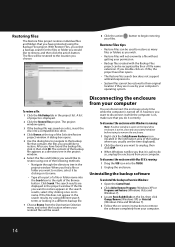
...of the Browse button. After you have protected using the Backup Files project. When you find a file or folder you want to remove the software completely from your computer. If the file does not appear in the search results, try using one of a file or folder name into ...the Search box to restore as many files or folders as a directory tree in the project window. Uninstalling the backup software To uninstall the backup software in Windows: 1 Open the Control Panel. 2 Click Add or Remove Programs (Windows XP) or Programs and Features (Windows Vista and Windows 7). ...
...of the Browse button. After you have protected using the Backup Files project. When you find a file or folder you want to remove the software completely from your computer. If the file does not appear in the search results, try using one of a file or folder name into ...the Search box to restore as many files or folders as a directory tree in the project window. Uninstalling the backup software To uninstall the backup software in Windows: 1 Open the Control Panel. 2 Click Add or Remove Programs (Windows XP) or Programs and Features (Windows Vista and Windows 7). ...
User Manual (English)
Page 15
5 After the software is bent. Look to see the enclosure/additional drive in the toolbar when Windows was booting. Straighten bent pins with a lint-free cloth and small ... Part 15 This device complies with the instructions, may cause undesired operation. This equipment generates, uses, and can 't find the hard disk in a particular installation. RF-HD3035 15 Specifications Hard drive type 3.5" SATA HDD, up to 2 TB Dimensions 1.67 × 8.74 × 5.19 inches (42.5 × 222 × 132 mm) Interface to...
5 After the software is bent. Look to see the enclosure/additional drive in the toolbar when Windows was booting. Straighten bent pins with a lint-free cloth and small ... Part 15 This device complies with the instructions, may cause undesired operation. This equipment generates, uses, and can 't find the hard disk in a particular installation. RF-HD3035 15 Specifications Hard drive type 3.5" SATA HDD, up to 2 TB Dimensions 1.67 × 8.74 × 5.19 inches (42.5 × 222 × 132 mm) Interface to...