
Owners Manual
Page 9
SPECIFICATIONS ...107 PROJECTOR SPECIFICATIONS...107 Optical Specifications ...107 Electrical Specifications ...108 Mechanical Specifications ...109 Environmental Considerations ...109 Regulations ...109 Optional Parts ...110 CABINET DIMENSIONS...111 PIN ASSIGNMENTS OF MINI D-SUB 15 PIN INPUT CONNECTOR...... a Browser 118 Configuring Network Settings...119 Structure of Contents Lamp Problems ...105 Remote Control Problems ...106 Audio Problems ...106 HAVING THE PROJECTOR SERVICED ...106 8. TROUBLESHOOTING CHECK LIST ...124 vii Table of the HTTP Server...121 15 PIN GPIO CONTROL ...123 9.
SPECIFICATIONS ...107 PROJECTOR SPECIFICATIONS...107 Optical Specifications ...107 Electrical Specifications ...108 Mechanical Specifications ...109 Environmental Considerations ...109 Regulations ...109 Optional Parts ...110 CABINET DIMENSIONS...111 PIN ASSIGNMENTS OF MINI D-SUB 15 PIN INPUT CONNECTOR...... a Browser 118 Configuring Network Settings...119 Structure of Contents Lamp Problems ...105 Remote Control Problems ...106 Audio Problems ...106 HAVING THE PROJECTOR SERVICED ...106 8. TROUBLESHOOTING CHECK LIST ...124 vii Table of the HTTP Server...121 15 PIN GPIO CONTROL ...123 9.

Owners Manual
Page 113
...proceeding to the problemspecific solutions. • Use some other electrical device to confirm that the electrical outlet is working. • Ensure the projector is turned on. • Ensure all connections are securely attached. • Ensure the attached device is turned on to solve the problem... Ensure a connected PC is not in the order suggested. ing an Fn-key combination on the notebook.) Tips for Troubleshooting In each problem-specific section, try the steps in suspend mode. • Ensure a connected notebook computer is configured for assistance. Try to pinpoint the problem to...
...proceeding to the problemspecific solutions. • Use some other electrical device to confirm that the electrical outlet is working. • Ensure the projector is turned on. • Ensure all connections are securely attached. • Ensure the attached device is turned on to solve the problem... Ensure a connected PC is not in the order suggested. ing an Fn-key combination on the notebook.) Tips for Troubleshooting In each problem-specific section, try the steps in suspend mode. • Ensure a connected notebook computer is configured for assistance. Try to pinpoint the problem to...

Owners Manual
Page 116
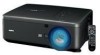
8. Optical Specifications ITEM DESCRIPTION Projection system Single DLP® chip, 4 segment color wheel Resolution Lamp Image size (diagonal) Lens options Lens shift 1280 x 768 pixels* (up to UXGA @ 60 Hz, up to SXGA+ @ ... 4.43-8.3:1, F2.2-3.1, f=63.5-117.4 mm Vertical + 0.5V, Horizontal +/- 0.1H (LNS-W40, LNS-S40, LNS-T40, LNS-T41) *Effective pixels are more than 99.99% 107 Specifications Projector Specifications This section provides technical information about the...
8. Optical Specifications ITEM DESCRIPTION Projection system Single DLP® chip, 4 segment color wheel Resolution Lamp Image size (diagonal) Lens options Lens shift 1280 x 768 pixels* (up to UXGA @ 60 Hz, up to SXGA+ @ ... 4.43-8.3:1, F2.2-3.1, f=63.5-117.4 mm Vertical + 0.5V, Horizontal +/- 0.1H (LNS-W40, LNS-S40, LNS-T40, LNS-T41) *Effective pixels are more than 99.99% 107 Specifications Projector Specifications This section provides technical information about the...

Owners Manual
Page 117
8. Specifications Electrical Specifications ITEM Inputs DESCRIPTION 1 Analog RGB (Mini D-Sub 15P), 1 Analog RGB R/Cr, G/Y, B/Cb, H, V (BNC x 5), 1 Digital RGB (DVI-D 24P), 1 Component Y, Cb/Pb, Cr/Pr (RCA x 3), 1 Component (Mini D-...
8. Specifications Electrical Specifications ITEM Inputs DESCRIPTION 1 Analog RGB (Mini D-Sub 15P), 1 Analog RGB R/Cr, G/Y, B/Cb, H, V (BNC x 5), 1 Digital RGB (DVI-D 24P), 1 Component Y, Cb/Pb, Cr/Pr (RCA x 3), 1 Component (Mini D-...

Owners Manual
Page 118
... mode 350W in Single Lamp Normal mode / 315W in Single Lamp Eco mode < 30W in Standby mode Normal < 5W in Standby mode Power saving Mechanical Specifications ITEM DESCRIPTION Dimensions 19.9" (W) x 7.6" (H) x 15.2" (D) 505 mm (W) x 192 mm (H) x 385 mm (D) (not including protrusions) Weight 36.3 lbs/16.5 kg Environmental Considerations ITEM DESCRIPTION Operational Temperatures...
... mode 350W in Single Lamp Normal mode / 315W in Single Lamp Eco mode < 30W in Standby mode Normal < 5W in Standby mode Power saving Mechanical Specifications ITEM DESCRIPTION Dimensions 19.9" (W) x 7.6" (H) x 15.2" (D) 505 mm (W) x 192 mm (H) x 385 mm (D) (not including protrusions) Weight 36.3 lbs/16.5 kg Environmental Considerations ITEM DESCRIPTION Operational Temperatures...

Owners Manual
Page 119
8. Specifications Optional Parts The parts listed below are optionally available. to the sales dealer. Standard Zoom Lens : LNS-S40 Long Zoom Lens : LNS-T40 Ultra Long Zoom Lens : LNS-T41 Short Zoom Lens : LNS-W40 Fixed Short Zoom Lens : LNS-W41 Six-segment Color Wheel : POA-CW01 Wired Remote Cable (30m) : POA-CA-RC30 110 When ordering those parts, specify the item name and Model No.
8. Specifications Optional Parts The parts listed below are optionally available. to the sales dealer. Standard Zoom Lens : LNS-S40 Long Zoom Lens : LNS-T40 Ultra Long Zoom Lens : LNS-T41 Short Zoom Lens : LNS-W40 Fixed Short Zoom Lens : LNS-W41 Six-segment Color Wheel : POA-CW01 Wired Remote Cable (30m) : POA-CA-RC30 110 When ordering those parts, specify the item name and Model No.

Owners Manual
Page 122
Specifications q Compatible Input Signal List The following table shows compatible signal types, their resolution and frequency refresh rates. Horizontal: 15kHz, 31kHz to 90 kHz Vertical: 50 ...
Specifications q Compatible Input Signal List The following table shows compatible signal types, their resolution and frequency refresh rates. Horizontal: 15kHz, 31kHz to 90 kHz Vertical: 50 ...

Owners Manual
Page 123
Specifications 1366 x 768 48.36 60 -- 1376 x 768 48.36 60 -- DMT 1400 x 1050 64.7 60.0 -- D-1080p/24 1920 x 1080 27 24 -- 1080P/50 1920 x 1080 ... 1024 x 768 49.7 74.5 -- 60.2 74.9 -- 1152 x 870 68.7 75.1 -- NTSC/NTSC4.43 Chroma Sub-carrier Frequency, 3.58 MHz & 4.43 MHz -- Signals other than the projector's native resolution (1280 x 768) will be displayed correctly. 8. Refer to the Display Properties help section of displayed dots stands for procedures. 114 D-1080p/30 1920...
Specifications 1366 x 768 48.36 60 -- 1376 x 768 48.36 60 -- DMT 1400 x 1050 64.7 60.0 -- D-1080p/24 1920 x 1080 27 24 -- 1080P/50 1920 x 1080 ... 1024 x 768 49.7 74.5 -- 60.2 74.9 -- 1152 x 870 68.7 75.1 -- NTSC/NTSC4.43 Chroma Sub-carrier Frequency, 3.58 MHz & 4.43 MHz -- Signals other than the projector's native resolution (1280 x 768) will be displayed correctly. 8. Refer to the Display Properties help section of displayed dots stands for procedures. 114 D-1080p/30 1920...

Owners Manual
Page 124
... Table COMMAND C00 C01 C05 C06 C07 C08 C09 C0A C0B C0C C0D C0E C0F C10 C1C C1D C33 C34 FUNCTION Turn the projector ON Turn the projector OFF (immediately OFF) Selects Computer 1 Selects Computer 2 Selects Computer 3 Selects Component Volume UP Volume DOWN Audio mute ON Audio ...Adj. Connect a RS-232C serial cross cable to control and monitor the projector's operations by using the RS-232C serial port. 1. Specifications PC Control Codes and Cable Connections This projector provides a function to SERIAL PORT IN on the projector and serial port on the PC. 2. Example When you want to ...
... Table COMMAND C00 C01 C05 C06 C07 C08 C09 C0A C0B C0C C0D C0E C0F C10 C1C C1D C33 C34 FUNCTION Turn the projector ON Turn the projector OFF (immediately OFF) Selects Computer 1 Selects Computer 2 Selects Computer 3 Selects Component Volume UP Volume DOWN Audio mute ON Audio ...Adj. Connect a RS-232C serial cross cable to control and monitor the projector's operations by using the RS-232C serial port. 1. Specifications PC Control Codes and Cable Connections This projector provides a function to SERIAL PORT IN on the projector and serial port on the PC. 2. Example When you want to ...

Owners Manual
Page 125
Pin 1, 4, 6 and 9 are not used. 2. For long cables, it is recommended to set communication speed within projector menus to simplify the cable connection. 3. Jumper "Request to Send" and "Clear to Send" together on both ends of the cable to 9600 bps. 116 Specifications Status Read Command Table COMMAND CR0 CR6 FUNCTION Status Read Temperature Read PC Control Connector (DIN-9P) Note: 1. 8.
Pin 1, 4, 6 and 9 are not used. 2. For long cables, it is recommended to set communication speed within projector menus to simplify the cable connection. 3. Jumper "Request to Send" and "Clear to Send" together on both ends of the cable to 9600 bps. 116 Specifications Status Read Command Table COMMAND CR0 CR6 FUNCTION Status Read Temperature Read PC Control Connector (DIN-9P) Note: 1. 8.

Owners Manual
Page 126
Specifications Screen Trigger When the projector is powered OFF the screen trigger stops sending a low voltage trigger to the screen controller and the screen will go up. Connecting the wired remote .... Note: Do not use this feature, you must turn on page 85 for anything other than intended use this jack for more information. When the projector is powered ON the screen trigger output sends a low voltage trigger to the remote control. 117 Note: To use . 8. See Screen Trigger on the Screen...
Specifications Screen Trigger When the projector is powered OFF the screen trigger stops sending a low voltage trigger to the screen controller and the screen will go up. Connecting the wired remote .... Note: Do not use this feature, you must turn on page 85 for anything other than intended use this jack for more information. When the projector is powered ON the screen trigger output sends a low voltage trigger to the remote control. 117 Note: To use . 8. See Screen Trigger on the Screen...

Owners Manual
Page 127
...can be slowed down or operation may not respond if its buttons are repeatedly pressed in the entry column of your software). The projector may not be accepted depending the settings of the URL: http:// /lanconf.html Note: The display or button responses can be ...used . The setting method will allow control of the projector from the browser may not be displayed depending on the projector. Specifications Operation Using HTTP Browser Overview The use "Microsoft Internet Explorer 4.x" or a higher version for Operation by specifying...
...can be slowed down or operation may not respond if its buttons are repeatedly pressed in the entry column of your software). The projector may not be accepted depending the settings of the URL: http:// /lanconf.html Note: The display or button responses can be ...used . The setting method will allow control of the projector from the browser may not be displayed depending on the projector. Specifications Operation Using HTTP Browser Overview The use "Microsoft Internet Explorer 4.x" or a higher version for Operation by specifying...

Owners Manual
Page 128
Configuring Network Settings The Network Settings screen is displayed as follows: http://
Configuring Network Settings The Network Settings screen is displayed as follows: http://

Owners Manual
Page 129
Specifications Test Mail Send a test mail to set . Sample of a message sent from the projector: Projector Name: X X X X Lamp 1 or 2 Hours Used: xxxx [H] The lamp is at the end of the [Sender's Address], [SMTP Server's Name] or [Recipient's Address 1-3] is selected, [Test Mail] is a standardization of protocol used for controlling projectors...option allows you use the PJLink feature. Password: Enter a password (up to 32 characters) Note: PJLink is not available. PROJECTOR INPUT PJLINK INPUT PARAMETER Computer 1 RGB 1 11 Computer 2 RGB 2 12 Video VIDEO 1 21 S-Video VIDEO 2 22 ...
Specifications Test Mail Send a test mail to set . Sample of a message sent from the projector: Projector Name: X X X X Lamp 1 or 2 Hours Used: xxxx [H] The lamp is at the end of the [Sender's Address], [SMTP Server's Name] or [Recipient's Address 1-3] is selected, [Test Mail] is a standardization of protocol used for controlling projectors...option allows you use the PJLink feature. Password: Enter a password (up to 32 characters) Note: PJLink is not available. PROJECTOR INPUT PJLINK INPUT PARAMETER Computer 1 RGB 1 11 Computer 2 RGB 2 12 Video VIDEO 1 21 S-Video VIDEO 2 22 ...

Owners Manual
Page 130
8. http:// Specifications Structure of the HTTP Server Once the projector is connected to a network and configured correctly, the following screen is displayed through the web browser.
8. http:// Specifications Structure of the HTTP Server Once the projector is connected to a network and configured correctly, the following screen is displayed through the web browser.

Owners Manual
Page 131
... displays the status of hours Lamp 2 has been used PJ time - Switches to the S-VIDEO IN connector Projector Status Panel Refresh - Specifications FUNCTION SETTING Input Select Panel Computer1 - Switches to the COMPUTER 1 IN connector Computer2 - Switches to the COMPONENT IN connectors Video - Displays the number of Lamp 1 ...
... displays the status of hours Lamp 2 has been used PJ time - Switches to the S-VIDEO IN connector Projector Status Panel Refresh - Specifications FUNCTION SETTING Input Select Panel Computer1 - Switches to the COMPUTER 1 IN connector Computer2 - Switches to the COMPONENT IN connectors Video - Displays the number of Lamp 1 ...

Owners Manual
Page 132
Specifications 15 Pin GPIO Control Type: 15Pin D-SUB black female type PIN NO. 14 5 10 3 4, 8, 12, 11 SHORT/OPEN SHORT OPEN SHORT OPEN SHORT OPEN SHORT ...
Specifications 15 Pin GPIO Control Type: 15Pin D-SUB black female type PIN NO. 14 5 10 3 4, 8, 12, 11 SHORT/OPEN SHORT OPEN SHORT OPEN SHORT OPEN SHORT ...