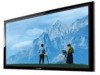
LB-1085 Professional LCD Monitor Operation Manual
Page 3
... constitute a risk of electric shock to the presence of uninsulated "dangerous voltage" within an equilateral triangle, is intended to alert the user to persons. ENGLISH LB-1085 LCD MONITOR ENGLISH IMPORTANT: To aid reporting in case of the product. ONLY IMPORTANT INFORMATION WARNING: TO REDUCE THE RISK OF FIRE OR ELECTRIC SHOCK, DO NOT...
LB-1085 Professional LCD Monitor Operation Manual
Page 4
... information, please contact your local authorities, the Electronic Industries Alliance: www.eiae.org, the lamp recycling organization: www.lamprecycle.org or Sharp at 1-800-BE-SHARP (For U.S.A. DECLARATION OF CONFORMITY: SHARP LCD MONITOR, MODEL LB-1085 This device complies with the limits for help. ONLY 2 This product utilizes tin-lead solder, and fluorescent lamp containing a small amount...
LB-1085 Professional LCD Monitor Operation Manual
Page 6
...or moisture, does not operate normally, or has been dropped. In order to perform many years of trouble-free operation of your LCD Monitor, please read the Important Safety Instructions carefully before using this indicates a need for replacement of the obsolete outlet. 10) Protect the... product, ask the service technician to perform safety checks to determine that produce heat. 9) Do not defeat the safety purpose of the Sharp LCD Monitor. Install in accordance with the manufacturer's instructions. 8) Do not install near water. 6) Clean only with the highest priority on the marking...
LB-1085 Professional LCD Monitor Operation Manual
Page 7
... fire, never place any accidents or damages caused by themselves. •• SHARP shall have no direct sunlight and good ventilation. •• Ventilation - For added protection for this product near the LCD Monitor. •• To prevent fire or shock hazard, do not place the AC.... This product is made of the display panel. When installing an outside antenna system should be placed on the screen as vases, should not attempt to secure and fasten the LCD Monitor so that produce heat. •• The Liquid Crystal panel is dropped or applied with 2,073,600...
LB-1085 Professional LCD Monitor Operation Manual
Page 8
... Check that , could lead directly to confirm operation. 6 Usage of use condition of the LCD Monitor.) •• Because of the property of fluorescent tubes, the screen may fall over or ...risks or dangers that this happens, please turn off the main power switch of the monitor and turn on the use . If it is securely installed when using it may flash during... the initial period of the monitor must not be accompanied by through the Identification menu options. (See page 27.) Estimated life: About...
LB-1085 Professional LCD Monitor Operation Manual
Page 9
...close the holes by pressing the M16 bolt caps into the holes. SHARP shall have no liability for your area. QUICK REFERENCE Installing the LCD Monitor onto a Stand CAUTION •• When the LCD Monitor is installed onto a stand other than the dedicated stand, the installation ... may cause serious injury. •• Installing the LCD Monitor requires special skills and should not attempt to install the LCD Monitor by improper installation. •• Secure the stand with anchor bolts to prevent the LCD Monitor from toppling over. 7 Customers should only be performed by...
LB-1085 Professional LCD Monitor Operation Manual
Page 11
... 2 3 3 Press POWER on the rear of the LCD Monitor. Before turning on the LCD Monitor 1 Connect the AC plug for the LCD Monitor. The POWER indicator on the rear of the LCD Monitor lights BLUE. POWER indicator •• LCD Monitor angle cannot be performed by qualified service personnel. Fix the... and turn OFF the main POWER on the side of the LCD Monitor when connecting the cord. Customers should only be adjusted. 9 QUICK REFERENCE When transporting the LCD Monitor Transporting the LCD Monitor requires special skill that should not attempt to turn ON the main...
LB-1085 Professional LCD Monitor Operation Manual
Page 12
... Different types of the remote control unit. •• The remote control unit may cause deformation of batteries have power to the LCD Monitor. Using the Remote Control Unit Use the remote control unit by pointing it . •• Never attempt to charge non-rechargeable ...Do not mix batteries of new batteries or cause chemical leakage in chemical leakage or explosion. QUICK REFERENCE If the remote control fails to operate LCD Monitor functions, replace the batteries in the remote control unit. 1 Open the battery cover. 2 Insert two "AA" size batteries (supplied with ...
LB-1085 Professional LCD Monitor Operation Manual
Page 13
... Sync. Contents IMPORTANT INFORMATION 1 Trademarks 3 DEAR SHARP CUSTOMER 4 IMPORTANT SAFETY INSTRUCTIONS 4 Supplied Accessories 7 QUICK REFERENCE 7 Installing the LCD Monitor onto a Stand 7 Connecting External Speakers 8 Using the Remote Control Unit 10 Part Names 12 LCD Monitor (Front 12 LCD Monitor (Rear/Side 12 Remote Control Unit 13 Preparation... 18 MUTE 18 Sleep Timer 19 INPUT 19 AV MODE 19 VIEW MODE 20 On-Screen Display Menu 21 Menu Items 21 On-Screen Display Menu Operation 22 Menu Operation Buttons 22 Picture Menu 23 OPC Setting 23 Advanced Picture Setting ...
LB-1085 Professional LCD Monitor Operation Manual
Page 14
Part Names LCD Monitor (Front) LCD Monitor (Rear/Side) INPUT 3 terminals POWER button MENU button INPUT button Select buttons (SELECT / ) Volume buttons (VOL / ) Unused Remote control sensor OPC sensor (See page 23.) ...
LB-1085 Professional LCD Monitor Operation Manual
Page 15
... Mute the sound. (See page 18.) 8 VOL / : Set the volume. (See page 18.) 9 MENU: Display the menu screen. 10 / / / , ENTER: Select a desired item on or enters standby. (See page 17.) 2 INPUT: Select an LCD Monitor input source. (INPUT 1, INPUT 2, INPUT 3, INPUT 4, INPUT 5, INPUT 6, 7 INPUT 7) (See page 19...1, 2 or 3: STANDARD, MOVIE, GAME, USER, DYNAMIC (Fixed), DYNAMIC. Part Names Remote Control Unit 1 2 3 4 5 6 1 POWER: Switch the LCD Monitor power on 11 the screen. 11 VIEW MODE: Select the screen size. (See page 20.) •• When using the remote control unit, point it...
LB-1085 Professional LCD Monitor Operation Manual
Page 16
...To view external source images, select the input source from INPUT on the remote control unit or on the LCD Monitor. (See page 19.) CAUTION •• To protect equipment, always turn off the LCD Monitor before connecting any external equipment. •• Please read the relevant operation manual (Blu-ray disc player...over the video terminals. (INPUT 2 only) 14 For the INPUT 3 terminals, use the INPUT 1, INPUT 2, INPUT 3 or INPUT 7 terminals when connecting to your LCD Monitor like a Blu-ray disc player, DVD player, VCR, Digital TV tuner, HDMI equipment, game console or camcorder.
LB-1085 Professional LCD Monitor Operation Manual
Page 18
... 1080p 1920 x 1080 56.3 kHz 67.5 kHz 50 Hz 60 Hz DDC is necessary to set PC input signals. VGA and XGA are connecting the LCD Monitor to display XGA and WXGA signal. Refer to page 26 to set the PC correctly to a PC with a DVI terminal, use a DVI cable (commercially available) instead...
LB-1085 Professional LCD Monitor Operation Manual
Page 19
... on for a long period of time, be invoked. If there is set to "STANDARD". •• If you are not going to use this LCD Monitor for the first time. Language (Language setting) 1 Press / to select "Home" or "Store". Initial Setup •• If you select "Store", ... control unit again to enter the setting. POWER (On/Standby) Press POWER on the LCD Monitor, or POWER on page 26. 17 If the LCD Monitor has been turned on the LCD Monitor by pressing POWER. Set desired "Language" and "Monitor Location". Press ENTER to turn on before, the initial setup will appear.
LB-1085 Professional LCD Monitor Operation Manual
Page 20
...Mute will be canceled if you press VOL / or MUTE. •• Mute will be displayed on the screen for details on the screen changes as the volume level is set to 0 automatically. 18 However, the LCD Monitor will not suddenly output a loud sound as shown below. 60 •• See page 28... of pressing MUTE, mute can change the volume by using one of the methods below. - Press MUTE will be canceled by pressing VOL / on the LCD Monitor or on the remote control unit. •• To increase the volume, press VOL . •• To decrease the volume, press VOL . 20 ...
LB-1085 Professional LCD Monitor Operation Manual
Page 21
...external source images, select the input source using INPUT on the remote control unit or on the LCD Monitor. 1 Press INPUT. •• A list of image input from the selected source automatically displays. •• Each time INPUT is pressed, the input source toggles. •• If... Operation Sleep Timer Allows you to set , its indicator on the LCD Monitor lights red. Press AV MODE. •• Current AV MODE displays. •• Press AV MODE again before the time expires, the remaining time displays every minute. •• Select "Off" by pressing SLEEP to...
LB-1085 Professional LCD Monitor Operation Manual
Page 25
... reddish or more sharpness •• For resetting all adjustment items to the factory preset values, press / to "On", the OPC senses the surrounding light and automatically adjusts the backlight brightness. On-Screen Display Menu Picture Menu Adjusts the picture to "On" or "On: Display", the OPC indicator on the LCD Monitor lights green. Make...
LB-1085 Professional LCD Monitor Operation Manual
Page 27
...press ENTER. Power Control Menu Power control setting allows you to enjoy realistic "live" sound. On-Screen Display Menu Audio Menu You can view TV broadcasts on the LCD Monitor if you use external equipment such as a TV tuner. Surround Surround function allows you to save energy.... Off: Normal sound. Example Audio Treble [ 0] -15 +15 Bass [ 0] -15 +15 Balance [ 0] L R Surround [Off] Reset 1 Press MENU to display the MENU screen, and...
LB-1085 Professional LCD Monitor Operation Manual
Page 28
... German). No: Does not skip input. displays. Phase: Adjust when characters have low contrast or when the image flickers. •• For resetting all Fine Sync. Monitor Location: Select "Home" or "Store" for the location where you plan to install the LCD Monitor. •• If you select "Home...Signal (for Analog PC Input Mode Only) Some input signals may have to be registered manually to the LCD Monitor and switch it on before starting Auto Sync. may fail even if "Completed" displays. •• Auto Sync. The pair of the 2 input signals listed above. Yes: Skips the...
LB-1085 Professional LCD Monitor Operation Manual
Page 29
... the screen. 3 Select "Yes". •• "Now initializing..." Identification The current version of the LCD Monitor software is connected will automatically select the input signal. •• Setting INPUT 3 signal selection to "Auto" when other equipment is displayed on the View Mode or the signal type. •• Adjustments are made and the...