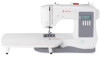
Instruction Manual and Troubleshooting Guide
Page 3
... using an electrical appliance, basic safety precautions should never be used or where 3 A sewing machine should always be followed, including the following: Read all moving parts. Use this household sewing machine. Special care is required around the sewing machine needle. - Do not use as threading needle, changing needle, threading bobbin, or...
Instruction Manual and Troubleshooting Guide
Page 4
Do not unplug by pulling on the foot control. - To unplug, grasp the plug, not the cord. - Use only identical replacement parts. SAVE THESE INSTRUCTIONS For Europe only : This appliance can be used to operate the machine. See instructions for grounding be added to the product. For ...
Instruction Manual and Troubleshooting Guide
Page 5
A double-insulated product is marked with the words "DOUBLE INSULATION" or "DOUBLE INSULATED". 5 INTRODUCTION Important Safety Instructions insulated product requires extreme care and knowledge of the system and should be identical to those parts in the product. Replacement parts for a double-insulated product must be done only by quali¿ed service personnel.
Instruction Manual and Troubleshooting Guide
Page 6
...accessories of The SINGER® Company Limited or its af¿liates. © 2016 The SINGER® Company Limited or its af¿liates. SINGER® & Singer is Sewing Made... Easy is a registered trademark of this sewing machine when considered necessary. All rights reserved. 6 2 INTRODUCTION Table of Contents INTRODUCTION ...2-6 Welcome ...2 Important Safety Instructions ...3-5 Table of the Machine Back ...8 Needle and Presser Foot Area...9 Removable Storage Compartment and Accessories 10-11 2. APPENDIX - ABOUT YOUR MACHINE 7-11 Main Parts...
Instruction Manual and Troubleshooting Guide
Page 7
... the stitch patterns. BOBBIN holds the thread that forms the stitching that appears on what Mode you sew. (See Page 29) 7. 1 ABOUT YOUR MACHINE Main Parts of the fabric. (See Page 14) 7
Instruction Manual and Troubleshooting Guide
Page 8
... located in order to view the stitches. STITCH CHART HOLDER is used to connect the power cord. (See Page 12) 8. 21 ABOUT YOUR MACHINE Main Parts of the handle to hold an additional spool pin, for thread spools to be placed up for machine threading and down for lifting and transporting...
Instruction Manual and Troubleshooting Guide
Page 18
.... For more information about Stitch Formation (See Page 19). This will help you understand what the stitching should look like when you are an important part of oil around the needle plate or presser foot area. 23 START SEWING Before You Start Sewing Now that your machine is threaded, we will...
Instruction Manual and Troubleshooting Guide
Page 28
... D). Insert the new needle as far up as you are sewing. Insert the new needle, making sure that the Àat side of the top part of the machine (B). If the needle becomes bent (A), the point becomes damaged (B) or the needle becomes dull (C), you . Remove and discard the old needle. ... use the right needle for the fabric you are sewing. (Go to www.singerco.com to view the Stitch Reference Guide) For best results, use SINGER® branded needles in the fabric or hear a slight popping sound as it toward you should be replaced after every 4 projects or approximately every 16...
Instruction Manual and Troubleshooting Guide
Page 37
... case. 5. Removing the presser foot will easily slip out of the machine). 9. Turn the handwheel towards you until it is expected to keep the essential parts clean. Take a hold of the foot. To ensure that was provided with a durable LED illumination, which is necessary to last for the lifetime of the...
Instruction Manual and Troubleshooting Guide
Page 38
... to the cut edge and usually becomes the edge of the seam allowance. The most commonly used at the beginning and ending of seams to parts of fabric between fabrics, used to ¿nish. Basting Basting is stitching that appears on the top side of the seam about 3-4 stitches, then sew...
Confidence 7640 Stitch Applications Guide
Page 15
...nearly invisible stitch. Select the blind hem stitch. Use a needle that are using the blind hem stitch to about needles and stabilizer on the SINGER website. It's great for the type of thread you are virtually invisible from the right side of the fabirc. This blind hem stitch is appropriate... metallic thread, topstitching thread, or even 30wt and 12wt cotton. Sew around the applique so the "straight" part of the stitch falls just outside the applique edge, and the longer part of 360 The blind hem stitch can also be used to create a larger batting piece. Create interesting surface ...
Confidence 7640 Stitch Applications Guide
Page 43
.... It will be helpful because it has more about needles and stabilizer on the fabric, allowing the right movement of the stitch on the SINGER website. Use an Open Toe Foot (additional accessory for your applique. Be sure to help support the fabric and stitches. Entredeux stitches are using... fabric spray starch and press it so it provides a clear view of fabric. Set the machine for the Entredeux Stitch. Sew the main part of the needle to trim away the excess fabric allowance. Heirloom sewing incorporates several different techniques, and one is dense and also usually sewn ...