

Instruction Manual
Page 3
...Abrasive Cutting Wheels 26 Composite Cutting Wheels 26 Diamond Cutting Wheels 27 Assembling the Cast Arm and Guard 31 Tensioning the Ribbed V-belt 37 Mounting an Abrasive Cutting Wheel 38 Fuel 39 Fueling 40 Starting / Stopping the Engine 41 Air Filter System 43 Engine ...59 Allow only persons who fully understand this manual to reproduce, translate and process with electronic systems. 1 © ANDREAS STIHL AG & Co. TS 700, TS 800 This instruction manual is important that you do not understand any of personal injury. WARNING Because this manual. For further ...
...Abrasive Cutting Wheels 26 Composite Cutting Wheels 26 Diamond Cutting Wheels 27 Assembling the Cast Arm and Guard 31 Tensioning the Ribbed V-belt 37 Mounting an Abrasive Cutting Wheel 38 Fuel 39 Fueling 40 Starting / Stopping the Engine 41 Air Filter System 43 Engine ...59 Allow only persons who fully understand this manual to reproduce, translate and process with electronic systems. 1 © ANDREAS STIHL AG & Co. TS 700, TS 800 This instruction manual is important that you do not understand any of personal injury. WARNING Because this manual. For further ...

Instruction Manual
Page 4
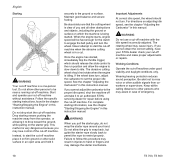
...of the pictograms attached to or embossed on your machine. Engineering Improvements STIHL's philosophy is to operate manual fuel pump Water attachment, flow control Tensioning nut for assistance. 2 TS 700, TS 800 Therefore, some changes, modifications and improvements may not be shown in ...indicated with the symbols and signal words described below: DANGER Indicates a hazardous situation that require your area for engaging drive belt Pull starter grip Many operating and safety instructions are explained in this manual. The following pictograms are on the machine ...
...of the pictograms attached to or embossed on your machine. Engineering Improvements STIHL's philosophy is to operate manual fuel pump Water attachment, flow control Tensioning nut for assistance. 2 TS 700, TS 800 Therefore, some changes, modifications and improvements may not be shown in ...indicated with the symbols and signal words described below: DANGER Indicates a hazardous situation that require your area for engaging drive belt Pull starter grip Many operating and safety instructions are explained in this manual. The following pictograms are on the machine ...

Instruction Manual
Page 11
...and allow fuel to force the fuel cap open or close the fuel filler cap, as described in the chapter "Tensioning the ribbed V-belt" in this instruction manual. TS 700, TS 800 9 If a fuel leak is suspected, do not start or run the machine until the leak is securely mounted on the spark plug... properly installed and any spilled fuel wiped away. Proper tensioning of your unit. Fuel Filler Cap Never use a tool to open by an authorized STIHL servicing dealer before mounting. The fuel filler cap must be sure the controls (e.g. Check for damage before using a tool. Check ribbed...
...and allow fuel to force the fuel cap open or close the fuel filler cap, as described in the chapter "Tensioning the ribbed V-belt" in this instruction manual. TS 700, TS 800 9 If a fuel leak is suspected, do not start or run the machine until the leak is securely mounted on the spark plug... properly installed and any spilled fuel wiped away. Proper tensioning of your unit. Fuel Filler Cap Never use a tool to open by an authorized STIHL servicing dealer before mounting. The fuel filler cap must be sure the controls (e.g. Check for damage before using a tool. Check ribbed...
Instruction Manual
Page 12
... be fast enough for repair before using the cut-off machine. WARNING When you cannot obtain the correct setting, have your STIHL dealer check your cut-off machine and make proper adjustments or repairs. Important Adjustments At correct idle speed, the wheel should...TS 800 Instead, to drop toward the ground, while pulling on which should not turn. For complete starting means pushing the machine away from coworkers or supervisors. If you pull the starter grip, do not wrap the starter rope around your cut-off machine without assistance. Be alert not to engage the belt...
... be fast enough for repair before using the cut-off machine. WARNING When you cannot obtain the correct setting, have your STIHL dealer check your cut-off machine and make proper adjustments or repairs. Important Adjustments At correct idle speed, the wheel should...TS 800 Instead, to drop toward the ground, while pulling on which should not turn. For complete starting means pushing the machine away from coworkers or supervisors. If you pull the starter grip, do not wrap the starter rope around your cut-off machine without assistance. Be alert not to engage the belt...

Instruction Manual
Page 33
...2 1 N Unscrew the banjo bolt (1) with the combination wrench and remove it will go = 0 N Unscrew nuts (1) from the adjusting lever (3) TS 700, TS 800 31 do not unscrew the nuts (1) from the guide N Unscrew the screw (2) N Turn the adjusting lever (3) upwards and remove 376BA080 KN 376BA091 KN... Slackening the V-belt English 1 1 2 1 N To relax the poly V-belt, loosen the nuts (1) - approx. 1/4 turn, as far as it ...
...2 1 N Unscrew the banjo bolt (1) with the combination wrench and remove it will go = 0 N Unscrew nuts (1) from the adjusting lever (3) TS 700, TS 800 31 do not unscrew the nuts (1) from the guide N Unscrew the screw (2) N Turn the adjusting lever (3) upwards and remove 376BA080 KN 376BA091 KN... Slackening the V-belt English 1 1 2 1 N To relax the poly V-belt, loosen the nuts (1) - approx. 1/4 turn, as far as it ...

Instruction Manual
Page 34
...and washer at the same time, guide the V-belt over the belt pulley NOTICE The belt action must run smoothly. do not tighten them yet 32 TS 700, TS 800 376BA093 KN English Removing the V-belt guard 4 2 3 1 N Pull the V-belt guard (1) off and remove the V-belt (2) from the front pulley (3) N Remove ...Mounting "support with guard" - guard on the outboard side 1 3 2 4 N Fit the "support with nuts (4) in the V-belt guard N Screw nuts (4) onto studs (3) - N Position the V-belt guard (2) N Align studs (3) in support with guard" (1) on the outboard side of the limit stop (2) N Remove the limit ...
...and washer at the same time, guide the V-belt over the belt pulley NOTICE The belt action must run smoothly. do not tighten them yet 32 TS 700, TS 800 376BA093 KN English Removing the V-belt guard 4 2 3 1 N Pull the V-belt guard (1) off and remove the V-belt (2) from the front pulley (3) N Remove ...Mounting "support with guard" - guard on the outboard side 1 3 2 4 N Fit the "support with nuts (4) in the V-belt guard N Screw nuts (4) onto studs (3) - N Position the V-belt guard (2) N Align studs (3) in support with guard" (1) on the outboard side of the limit stop (2) N Remove the limit ...

Instruction Manual
Page 35
... wheel (see picture) N Screw in place N Fit the support with the longer banjo bolt on the inboard side N Install the V-belt guard N Connect the water connection 376BA083 KN 376BA089 KN TS 700, TS 800 33 adjustment range (A) must be limited by the stop (2) - observe the position of the connector N Insert the square nut into...
... wheel (see picture) N Screw in place N Fit the support with the longer banjo bolt on the inboard side N Install the V-belt guard N Connect the water connection 376BA083 KN 376BA089 KN TS 700, TS 800 33 adjustment range (A) must be limited by the stop (2) - observe the position of the connector N Insert the square nut into...

Instruction Manual
Page 36
...(3) upwards and remove N Remove the sealing plug (4) 377BA014 KN N To relax the poly V-belt, loosen the nuts (1) - adjustment range (A) must be limited by the stop pin Continue as possible - Outboard mounting (TS 800) N Disassemble the abrasive wheel (see "Fitting / replacing an abrasive wheel") 376BA090 KN N Unscrew...the guard from the guide N Remove the water hose (2) with the combination wrench - nuts (1) are fastened to the belt guard so that they are secured against loss 34 TS 700, TS 800 approx. 1/4 turn, as far as it will go = 0 N Unscrew nuts (1) from the adjusting lever (3) N...
...(3) upwards and remove N Remove the sealing plug (4) 377BA014 KN N To relax the poly V-belt, loosen the nuts (1) - adjustment range (A) must be limited by the stop pin Continue as possible - Outboard mounting (TS 800) N Disassemble the abrasive wheel (see "Fitting / replacing an abrasive wheel") 376BA090 KN N Unscrew...the guard from the guide N Remove the water hose (2) with the combination wrench - nuts (1) are fastened to the belt guard so that they are secured against loss 34 TS 700, TS 800 approx. 1/4 turn, as far as it will go = 0 N Unscrew nuts (1) from the adjusting lever (3) N...

Instruction Manual
Page 37
... wrench N Insert the sealing plug (2) N Insert and tighten the screw (4) 377BA019 KN N Fit the "support with guard" - Removing the V-belt guard 2 English Mounting "support with guard" (1) on the outboard side N Insert the square nut into the guide in the guard and hold it...the V-belt guard N Screw nuts (4) onto studs (3) - N Position the V-belt guard (2) N Align studs (3) in support with nuts (4) in the shorter banjo bolt (5) and washer at the same time, guide the V-belt over the belt pulley NOTICE The belt action must run smoothly. do not tighten them yet TS 700, TS 800 35
... wrench N Insert the sealing plug (2) N Insert and tighten the screw (4) 377BA019 KN N Fit the "support with guard" - Removing the V-belt guard 2 English Mounting "support with guard" (1) on the outboard side N Insert the square nut into the guide in the guard and hold it...the V-belt guard N Screw nuts (4) onto studs (3) - N Position the V-belt guard (2) N Align studs (3) in support with nuts (4) in the shorter banjo bolt (5) and washer at the same time, guide the V-belt over the belt pulley NOTICE The belt action must run smoothly. do not tighten them yet TS 700, TS 800 35

Instruction Manual
Page 38
...and tighten with guard" - on the adjusting lever (3) - adjustment range (A) must be limited by the stop pin Continue as possible - Inboard mounting (TS 800) N Disassemble the abrasive wheel (see picture) N Screw in and tighten the stop pin (1) N Insert both sealing plugs (2) - English Connecting the... the combination wrench A N Rotate the guard forwards and backwards as far as described in the chapter "Tensioning the V-belt". observe the position of the water attachment - guard on the inboard side N Install the V-belt guard N Connect the water connection 36 TS 700, TS 800
...and tighten with guard" - on the adjusting lever (3) - adjustment range (A) must be limited by the stop pin Continue as possible - Inboard mounting (TS 800) N Disassemble the abrasive wheel (see picture) N Screw in and tighten the stop pin (1) N Insert both sealing plugs (2) - English Connecting the... the combination wrench A N Rotate the guard forwards and backwards as far as described in the chapter "Tensioning the V-belt". observe the position of the water attachment - guard on the inboard side N Install the V-belt guard N Connect the water connection 36 TS 700, TS 800

Instruction Manual
Page 39
...the chapter "Tensioning the V-belt". 377BA025 KN English Tensioning the Ribbed V-belt This machine is equipped with the combination wrench counterclockwise - A Checking the adjustment range of the guard N Rotate the guard forwards and backwards as far as illustrated TS 700, TS 800 37 approx. 1/4 turn... the combination wrench further by the stop NOTICE Do not turn , as far as described in this position. belt guard The V-belt is spring-loaded - adjustment range (A) must be limited...
...the chapter "Tensioning the V-belt". 377BA025 KN English Tensioning the Ribbed V-belt This machine is equipped with the combination wrench counterclockwise - A Checking the adjustment range of the guard N Rotate the guard forwards and backwards as far as illustrated TS 700, TS 800 37 approx. 1/4 turn... the combination wrench further by the stop NOTICE Do not turn , as far as described in this position. belt guard The V-belt is spring-loaded - adjustment range (A) must be limited...

Instruction Manual
Page 40
...shaft together with the abrasive wheel N Fit the new abrasive wheel (4) WARNING Note the arrows indicating the direction of the Vbelt guard 38 TS 700, TS 800 Blocking the shaft Removing an abrasive wheel Fitting an abrasive wheel 4 377BA028 KN 377BA029 KN 377BA030 KN 1 N Slide the locking pin ...(1) through the bore in the V-belt guard N Turn the shaft with the combination wrench - set Master Control lever to STOP or 0. The catches of ...
...shaft together with the abrasive wheel N Fit the new abrasive wheel (4) WARNING Note the arrows indicating the direction of the Vbelt guard 38 TS 700, TS 800 Blocking the shaft Removing an abrasive wheel Fitting an abrasive wheel 4 377BA028 KN 377BA029 KN 377BA030 KN 1 N Slide the locking pin ...(1) through the bore in the V-belt guard N Turn the shaft with the combination wrench - set Master Control lever to STOP or 0. The catches of ...

Instruction Manual
Page 50
...from the studs N Remove the V-belt guard (3) and remove the V-belt from the guide of the starter cover Continue as described in the chapter "Tensioning the V-belt". repair damaged roadways - English Replacing the V-belt 4 3 6 12 5 6 6 N The arrow on the STIHL cut-off machine cart FW 20...belt in the front poly Vbelt pulley (9) N Position belt guard N Align the studs in the V-belt guard N Screw the nuts onto the studs - approx. 1/4 turn the tensioning nut (1) with the nuts in the support with the combination wrench counterclockwise - The cut expansion joints 48 TS 700, TS 800...
...from the studs N Remove the V-belt guard (3) and remove the V-belt from the guide of the starter cover Continue as described in the chapter "Tensioning the V-belt". repair damaged roadways - English Replacing the V-belt 4 3 6 12 5 6 6 N The arrow on the STIHL cut-off machine cart FW 20...belt in the front poly Vbelt pulley (9) N Position belt guard N Align the studs in the V-belt guard N Screw the nuts onto the studs - approx. 1/4 turn the tensioning nut (1) with the nuts in the support with the combination wrench counterclockwise - The cut expansion joints 48 TS 700, TS 800...

Instruction Manual
Page 52
... pump (if present) Check X Have repaired by a specialist dealer1) Fuel pickup body in fuel tank Check Replace Fuel tank Clean Poly V-belt Clean / retension Replace Air filter (all filter components) Change Cooling air intake slits Clean Cylinder fins Have them maintained by a servicing dealer... work and/or daily Whenever tank is a noticeable loss of work At the end of engine power X X X X X X X X X X X TS 700, TS 800 abrasive wheel must be shortened accordingly when working for longer than normal or under difficult cutting conditions (extensive dust, etc.).
... pump (if present) Check X Have repaired by a specialist dealer1) Fuel pickup body in fuel tank Check Replace Fuel tank Clean Poly V-belt Clean / retension Replace Air filter (all filter components) Change Cooling air intake slits Clean Cylinder fins Have them maintained by a servicing dealer... work and/or daily Whenever tank is a noticeable loss of work At the end of engine power X X X X X X X X X X X TS 700, TS 800 abrasive wheel must be shortened accordingly when working for longer than normal or under difficult cutting conditions (extensive dust, etc.).

Instruction Manual
Page 56
...connects the spark plug with the ignition lead. 18 Choke Lever Eases engine starting by the engine to the operator's hands. (not illustrated) TS 700, TS 800 English Definitions 1 Fastener For removing filter cover to permit filter to be cleaned. 2 Filter Cover Covers and protects the air filter element.... deflects sparks, dust, cutting debris or wheel fragments. 10 Adjusting Lever To adjust the wheel guard in a way that drives the ribbed belt and the abrasive wheel. (Not illustrated) Anti-Vibration System The anti-vibration system includes a number of anti-vibration elements designed to reduce...
...connects the spark plug with the ignition lead. 18 Choke Lever Eases engine starting by the engine to the operator's hands. (not illustrated) TS 700, TS 800 English Definitions 1 Fastener For removing filter cover to permit filter to be cleaned. 2 Filter Cover Covers and protects the air filter element.... deflects sparks, dust, cutting debris or wheel fragments. 10 Adjusting Lever To adjust the wheel guard in a way that drives the ribbed belt and the abrasive wheel. (Not illustrated) Anti-Vibration System The anti-vibration system includes a number of anti-vibration elements designed to reduce...