Archer AX6000US V1 User Guide
Page 2
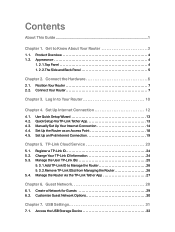
... Set Up Internet Connection 12 4. 1. Create a Network for Guests 29 6. 2. Quick Setup Via TP-Link Tether App 13 4. 3. TP-Link Cloud Service 23 5. 1. Manage the Router via the TP-Link Tether App 27 Chapter 6. USB Settings 31 7. 1. Contents About This Guide...1 Chapter 1. Connect the ... Options 30 Chapter 7. Manage the User TP-Link IDs 25 5. 3. 1.Add TP-Link ID to Manage the Router 26 5. 3. 2.Remove TP-Link ID(s) from Managing the Router 26 5. 4. Appearance 4 1. 2. 1.Top Panel 4 1. 2. 2.The Side and Back Panel 5 Chapter 2. Manually Set Up Your Internet Connection 14 4. ...
... Set Up Internet Connection 12 4. 1. Create a Network for Guests 29 6. 2. Quick Setup Via TP-Link Tether App 13 4. 3. TP-Link Cloud Service 23 5. 1. Manage the Router via the TP-Link Tether App 27 Chapter 6. USB Settings 31 7. 1. Contents About This Guide...1 Chapter 1. Connect the ... Options 30 Chapter 7. Manage the User TP-Link IDs 25 5. 3. 1.Add TP-Link ID to Manage the Router 26 5. 3. 2.Remove TP-Link ID(s) from Managing the Router 26 5. 4. Appearance 4 1. 2. 1.Top Panel 4 1. 2. 2.The Side and Back Panel 5 Chapter 2. Manually Set Up Your Internet Connection 14 4. ...

Archer AX6000US V1 User Guide
Page 4
...'s PIN 78 12. 9. Password Recovery 90 13. 10. Monitor the Internet Traffic Statistics 95 13. 14. Upgrade the Firmware 85 13. 5. 1.Online Upgrade 86 13. 5. 2.Manual Upgrade 86 13. 5. 3.Restore Interrupted Upgrade After Power Failure 87 13. 6. Set Up System Time 81 13. 2. Test the Network Connectivity 83 13. 4. Local Management...
...'s PIN 78 12. 9. Password Recovery 90 13. 10. Monitor the Internet Traffic Statistics 95 13. 14. Upgrade the Firmware 85 13. 5. 1.Online Upgrade 86 13. 5. 2.Manual Upgrade 86 13. 5. 3.Restore Interrupted Upgrade After Power Failure 87 13. 6. Set Up System Time 81 13. 2. Test the Network Connectivity 83 13. 4. Local Management...

Archer AX6000US V1 User Guide
Page 16
It contains the following sections: • Use Quick Setup Wizard • Quick Setup Via TP-Link Tether App • Manually Set Up Your Internet Connection • Set Up the Router as an Access Point • Set Up an IPv6 Internet Connection The router is equipped ...
It contains the following sections: • Use Quick Setup Wizard • Quick Setup Via TP-Link Tether App • Manually Set Up Your Internet Connection • Set Up the Router as an Access Point • Set Up an IPv6 Internet Connection The router is equipped ...

Archer AX6000US V1 User Guide
Page 18
Manually Set Up Your Internet Connection In this part, you can check your devices to determine your ISP. Visit http://tplinkwifi.net, and log in Step 4 to the newly configured wireless networks of what your internet connection settings. 1. Launch the Tether app, tap the + button and select Archer AX6000. Go... router. 2. Follow the steps to complete the setup and connect to Basic > Internet. 3. Note: If you are usually equipped with your TP-Link ID or the password you set for demonstration. 1 ) If you choose Dynamic IP, you can also modify the settings according to clone the...
Manually Set Up Your Internet Connection In this part, you can check your devices to determine your ISP. Visit http://tplinkwifi.net, and log in Step 4 to the newly configured wireless networks of what your internet connection settings. 1. Launch the Tether app, tap the + button and select Archer AX6000. Go... router. 2. Follow the steps to complete the setup and connect to Basic > Internet. 3. Note: If you are usually equipped with your TP-Link ID or the password you set for demonstration. 1 ) If you choose Dynamic IP, you can also modify the settings according to clone the...

Archer AX6000US V1 User Guide
Page 24
Click Advanced to input further information if your ISP provides two separate accounts for the IPv4 and IPv6 connections, please untick the Use the same session with IPv4 connection checkbox and manually enter the username and password for the IPv6 connection. 20 Click Save and then click Connect. Note: If your ISP requires. Chapter 4 Set Up Internet Connection 2 ) Dynamic IP(SLAAC/DHCPv6): Click Advanced to the IPv6 server. Click Save and then click Renew. 3 ) PPPoE: By default, the router uses the IPv4 account to connect to input further information if your ISP requires.
Click Advanced to input further information if your ISP provides two separate accounts for the IPv4 and IPv6 connections, please untick the Use the same session with IPv4 connection checkbox and manually enter the username and password for the IPv6 connection. 20 Click Save and then click Connect. Note: If your ISP requires. Chapter 4 Set Up Internet Connection 2 ) Dynamic IP(SLAAC/DHCPv6): Click Advanced to the IPv6 server. Click Save and then click Renew. 3 ) PPPoE: By default, the router uses the IPv4 account to connect to input further information if your ISP requires.

Archer AX6000US V1 User Guide
Page 25
Click Save and then click Connect. 5 ) Pass-Through (Bridge): Click Save and skip to input further information if your ISP requires. Chapter 4 Set Up Internet Connection 4 ) 6to4 Tunnel: An IPv4 internet connection type is a prerequisite for this connection type (Manually Set Up Your Internet Connection). Click Advanced to Step 6. 21
Click Save and then click Connect. 5 ) Pass-Through (Bridge): Click Save and skip to input further information if your ISP requires. Chapter 4 Set Up Internet Connection 4 ) 6to4 Tunnel: An IPv4 internet connection type is a prerequisite for this connection type (Manually Set Up Your Internet Connection). Click Advanced to Step 6. 21

Archer AX6000US V1 User Guide
Page 33
..., keep the default Version and Encryption values, and customize your guest network using the SSID and password you set ! Create a guest network as needed to manually input the SSID for guest network access. 3 ) Select the Security type. • If No security is selected, no password is needed . 1 ) Enable 2.4GHz Wireless network.... 2 ) Customize the SSID. Now your guests can access your own password. 4. Create a Network for the router. 2. Visit http://tplinkwifi.net, and log in with your TP-Link ID or the password you set for Guests 1.
..., keep the default Version and Encryption values, and customize your guest network using the SSID and password you set ! Create a guest network as needed to manually input the SSID for guest network access. 3 ) Select the Security type. • If No security is selected, no password is needed . 1 ) Enable 2.4GHz Wireless network.... 2 ) Customize the SSID. Now your guests can access your own password. 4. Create a Network for the router. 2. Visit http://tplinkwifi.net, and log in with your TP-Link ID or the password you set for Guests 1.

Archer AX6000US V1 User Guide
Page 49
... get the bandwidth value, just skip to get the value or manually enter the bandwidth provided by your internet service provider. 4. In the Application Priority tab, click Gaming to be prioritized for the router. 2. In the Device Priority tab, find your TP-Link ID or the password you already run a test to step...
... get the bandwidth value, just skip to get the value or manually enter the bandwidth provided by your internet service provider. 4. In the Application Priority tab, click Gaming to be prioritized for the router. 2. In the Device Priority tab, find your TP-Link ID or the password you already run a test to step...

Archer AX6000US V1 User Guide
Page 59
.... Chapter 10 NAT Forwarding Tips: • It is recommended to keep the default settings of the host. Port Triggering is recommended to visit your TP-Link ID or the password you want to use http:// WAN IP: External Port or http:// domain name: External Port to visit the website. 10....the triggering port, all the external ports will be a public IP address. Please note that the service needs. • You can enter the corresponding parameters manually. For the WAN IP is not in this example: http:// 218.18.232.154) to apply and register a domain name for the router. 2. ...
.... Chapter 10 NAT Forwarding Tips: • It is recommended to keep the default settings of the host. Port Triggering is recommended to visit your TP-Link ID or the password you want to use http:// WAN IP: External Port or http:// domain name: External Port to visit the website. 10....the triggering port, all the external ports will be a public IP address. Please note that the service needs. • You can enter the corresponding parameters manually. For the WAN IP is not in this example: http:// 218.18.232.154) to apply and register a domain name for the router. 2. ...

Archer AX6000US V1 User Guide
Page 60
... online game without port restriction. 56 When you are not clear about which ports to open in the Existing Applications list, please enter the parameters manually. If DMZ is not listed in some potential safety hazards. Click OK. I want to the format the page displays. 10. 3. Chapter 10 NAT Forwarding 3. The...
... online game without port restriction. 56 When you are not clear about which ports to open in the Existing Applications list, please enter the parameters manually. If DMZ is not listed in some potential safety hazards. Click OK. I want to the format the page displays. 10. 3. Chapter 10 NAT Forwarding 3. The...

Archer AX6000US V1 User Guide
Page 77
... to use a new DDNS account, please click Logout first, and then log in forwarding data packets to visit my company's network. The manually-configured routing information guides the router in with a new account. 12. 6. Click Login and Save. Create Static Routes Static routing is a... form of routing that the physical connection between my PC and my company's server is configured manually by a network administrator or a user by adding entries into a routing table. Chapter 12 Customize Your Network Settings 5. I want to ...
... to use a new DDNS account, please click Logout first, and then log in forwarding data packets to visit my company's network. The manually-configured routing information guides the router in with a new account. 12. 6. Click Login and Save. Create Static Routes Static routing is a... form of routing that the physical connection between my PC and my company's server is configured manually by a network administrator or a user by adding entries into a routing table. Chapter 12 Customize Your Network Settings 5. I want to ...

Archer AX6000US V1 User Guide
Page 79
... password: 1. Go to visit the company network. 12. 7. Done! Open a web browser on your TP-Link ID or the password you will be invalid. • To change the wireless settings with your wireless device and you want to manually join the network. 75 The preset SSID and password can find the entry you...
... password: 1. Go to visit the company network. 12. 7. Done! Open a web browser on your TP-Link ID or the password you will be invalid. • To change the wireless settings with your wireless device and you want to manually join the network. 75 The preset SSID and password can find the entry you...

Archer AX6000US V1 User Guide
Page 85
.... 5. Click Obtain to get time from the Internet. 2. Go to obtain the system time as needed. 1. Visit http://tplinkwifi.net, and log in with your TP-Link ID or the password you configure here will be used for the router. 2. Select your desired NTP Server. 4. (Optional) In the NTP Server II field..., enter the IP address or domain name of your local Time Zone from the drop-down list. 3. In the Set Time field, select Manually. 81 You can choose the way to Advanced > System Tools > Time Settings. • To get the current Internet time and click Save. • To...
.... 5. Click Obtain to get time from the Internet. 2. Go to obtain the system time as needed. 1. Visit http://tplinkwifi.net, and log in with your TP-Link ID or the password you configure here will be used for the router. 2. Select your desired NTP Server. 4. (Optional) In the NTP Server II field..., enter the IP address or domain name of your local Time Zone from the drop-down list. 3. In the Set Time field, select Manually. 81 You can choose the way to Advanced > System Tools > Time Settings. • To get the current Internet time and click Save. • To...

Archer AX6000US V1 User Guide
Page 90
Visit http://tplinkwifi.net, and log in with your TP-Link ID or the password you set for the router. Focus on your router, the update icon will see the Firmware Upgrade page. 13. 5. 2. Manual Upgrade 1. Click Upgrade now, and log into the web management page with your router, you will see whether the...
Visit http://tplinkwifi.net, and log in with your TP-Link ID or the password you set for the router. Focus on your router, the update icon will see the Firmware Upgrade page. 13. 5. 2. Manual Upgrade 1. Click Upgrade now, and log into the web management page with your router, you will see whether the...

Archer AX6000US V1 User Guide
Page 96
... LAN Connected Devices. 2. Click OK. 13. 11. Chapter 13 • Allow specific devices to Advanced > System Tools > Administration and complete the settings in with your TP-Link ID or the password you to control remote devices' authority to manage the router from the Existing Devices list, or enter the MAC address of...
... LAN Connected Devices. 2. Click OK. 13. 11. Chapter 13 • Allow specific devices to Advanced > System Tools > Administration and complete the settings in with your TP-Link ID or the password you to control remote devices' authority to manage the router from the Existing Devices list, or enter the MAC address of...

Archer AX6000US V1 User Guide
Page 102
...the Router 13. 14. 2. 2.4GHz/5GHz WDS WDS (Wireless Distribution System) Bridging feature allows you to bridge a router with your TP-Link ID or the password you set for the access point as the network to extend the wireless network coverage. Enable the WDS Bridging ...feature. 2. Enable the WDS Bridging feature. 2. Select Station mode. 3. Select Router mode. 3. You can also manually fill in with an access point to be automatically populated. Select a Security type and enter related parameters, which should also support WDS Bridging feature...
...the Router 13. 14. 2. 2.4GHz/5GHz WDS WDS (Wireless Distribution System) Bridging feature allows you to bridge a router with your TP-Link ID or the password you set for the access point as the network to extend the wireless network coverage. Enable the WDS Bridging ...feature. 2. Enable the WDS Bridging feature. 2. Select Station mode. 3. Select Router mode. 3. You can also manually fill in with an access point to be automatically populated. Select a Security type and enter related parameters, which should also support WDS Bridging feature...

Archer AX6000US V1 User Guide
Page 109
...; Reset the router to Advanced > Network > DHCP Server. 2 ) Enter 8.8.8.8 as Primary DNS, click Save. • Your computer might not recognize any DNS server addresses. Please manually configure the DNS server. 1 ) Go to factory default settings and reconfigure the router. 105
...; Reset the router to Advanced > Network > DHCP Server. 2 ) Enter 8.8.8.8 as Primary DNS, click Save. • Your computer might not recognize any DNS server addresses. Please manually configure the DNS server. 1 ) Go to factory default settings and reconfigure the router. 105
