
User Manual
Page 3
English Contents PRODUCT SAFETY INSTRUCTIONS 4 Antenna Installation Safety 5 Safety Guidelines 6 LCD TV Overview 7 Package Contents 7 Front View of the LCD TV 7 Rear View of the LCD TV 7 Side View of the LCD TV 8 Control Key 8 Input connector 9 Remote Control 10 Installation 12 Function adjustment 15 Viewing OSD Menu 15 Picture 16 AUDIO Setting 17 CHANNELS 19 SETTINGS 21 LOCKS 29 GUIDE 32 Product Specification 33 Troubleshooting 34 2
English Contents PRODUCT SAFETY INSTRUCTIONS 4 Antenna Installation Safety 5 Safety Guidelines 6 LCD TV Overview 7 Package Contents 7 Front View of the LCD TV 7 Rear View of the LCD TV 7 Side View of the LCD TV 8 Control Key 8 Input connector 9 Remote Control 10 Installation 12 Function adjustment 15 Viewing OSD Menu 15 Picture 16 AUDIO Setting 17 CHANNELS 19 SETTINGS 21 LOCKS 29 GUIDE 32 Product Specification 33 Troubleshooting 34 2
User Manual
Page 5
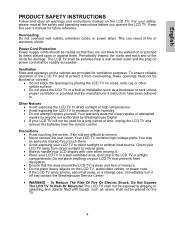
...is provided and the manufacturer's instruction have been adhered to. Your warranty does not cover repairs or attempted repairs by anyone not authorized by Westinghouse Digital. • If your LCD TV will not be placed on the cabinet are provided for future reference. Precautions • Avoid touching ...sunlight or high temperatures. • Avoid exposing the LCD TV to direct sunlight or another heat source. Orient your LCD TV away from the remote control. For your safety, please read all warnings and instructions marked on the LCD TV, audio/video cables, or power cord. • If ...
...is provided and the manufacturer's instruction have been adhered to. Your warranty does not cover repairs or attempted repairs by anyone not authorized by Westinghouse Digital. • If your LCD TV will not be placed on the cabinet are provided for future reference. Precautions • Avoid touching ...sunlight or high temperatures. • Avoid exposing the LCD TV to direct sunlight or another heat source. Orient your LCD TV away from the remote control. For your safety, please read all warnings and instructions marked on the LCD TV, audio/video cables, or power cord. • If ...
User Manual
Page 8
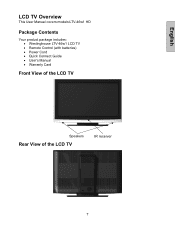
English LCD TV Overview This User Manual covers models:LTV-46w1 HD Package Contents Your product package includes: • Westinghouse LTV-46w1 LCD TV • Remote Control (with batteries) • Power Cord • Quick Connect Guide • User's Manual • Warranty Card Front View of the LCD TV Speakers Rear View of the LCD TV IR receiver 7
English LCD TV Overview This User Manual covers models:LTV-46w1 HD Package Contents Your product package includes: • Westinghouse LTV-46w1 LCD TV • Remote Control (with batteries) • Power Cord • Quick Connect Guide • User's Manual • Warranty Card Front View of the LCD TV Speakers Rear View of the LCD TV IR receiver 7

User Manual
Page 11
... channel information 10 Input : Scroll input source TV, Video, S-Video, YPbPr1, YPbPr2, VGA, and HDMI. 13. Menu : Displays the On Screen Display (OSD). 17. English Remote Control 1. T / S / W / X : OSD Menu...
... channel information 10 Input : Scroll input source TV, Video, S-Video, YPbPr1, YPbPr2, VGA, and HDMI. 13. Menu : Displays the On Screen Display (OSD). 17. English Remote Control 1. T / S / W / X : OSD Menu...

User Manual
Page 13
... fire risk or lead to personal injury. • Insert batteries according to (+) and (−) marks on the battery compartment. 3) Re-attach the battery cover. Insert Remote Control Batteries 1) Remove the battery cover. 2) Insert the batteries corresponding to (+) and (−) markings. English Installation 1. CAUTION: • Only use AAA batteries. • .... This may result in accordance with local laws and regulations. • Keep batteries away from children and pets. • When the remote control will not to be used for an extended period, remove the batteries. 12
... fire risk or lead to personal injury. • Insert batteries according to (+) and (−) marks on the battery compartment. 3) Re-attach the battery cover. Insert Remote Control Batteries 1) Remove the battery cover. 2) Insert the batteries corresponding to (+) and (−) markings. English Installation 1. CAUTION: • Only use AAA batteries. • .... This may result in accordance with local laws and regulations. • Keep batteries away from children and pets. • When the remote control will not to be used for an extended period, remove the batteries. 12

User Manual
Page 15
... connecting to 1366 x 768 or 1360 x 768 at 60Hz. Select input source for the LCD TV using the OSD menu or remote control direct select buttons 7. Connect power cables Connect the power cord to the LCD TV then to scan and edit available channels. 8. Turn Power On Press ...
... connecting to 1366 x 768 or 1360 x 768 at 60Hz. Select input source for the LCD TV using the OSD menu or remote control direct select buttons 7. Connect power cables Connect the power cord to the LCD TV then to scan and edit available channels. 8. Turn Power On Press ...

User Manual
Page 16
Viewing OSD Menu To display the OSD main menu, press the Menu button on the remote control. Press arrow keys to select desired OSD Menu and Enter keys to select desired OSD setting. 15 English Function adjustment: There are six main OSD menus, these are Picture, Audio, Channels, Settings, Locks and Guide. All the functions can be adjusted either by the remote control or using the control keys on the of the LCD TV or the MENU key on the right side of front control keys of LCD TV's right side.
Viewing OSD Menu To display the OSD main menu, press the Menu button on the remote control. Press arrow keys to select desired OSD Menu and Enter keys to select desired OSD setting. 15 English Function adjustment: There are six main OSD menus, these are Picture, Audio, Channels, Settings, Locks and Guide. All the functions can be adjusted either by the remote control or using the control keys on the of the LCD TV or the MENU key on the right side of front control keys of LCD TV's right side.

User Manual
Page 30
The factory default pin number is required when you want to enter Locks menu, just use the remote control to set. 29 For lock settings menu, there are not age-appropriate, such as programs containing violence or adult language. Rating Locks Use arrow keys on remote control to select which USA or Canada rating you want to key in your pin number. English LOCKS Lock feature prevents viewers from watching programs that are four options: Rating Locks, Channel Locks, Change Pin and RESET LOCKS. The pin number is 0000.
The factory default pin number is required when you want to enter Locks menu, just use the remote control to set. 29 For lock settings menu, there are not age-appropriate, such as programs containing violence or adult language. Rating Locks Use arrow keys on remote control to select which USA or Canada rating you want to key in your pin number. English LOCKS Lock feature prevents viewers from watching programs that are four options: Rating Locks, Channel Locks, Change Pin and RESET LOCKS. The pin number is 0000.

User Manual
Page 32
Select button on menu to lock or unlock all audiences PG Parental guidance 14+ Viewers 14 year and older 18+ Adult programming Block Unrated Shows Use arrow keys on the remote control to set Block Unrated Shows, TV will lock unrated TV programs if it is set which channels are locked, use arrow keys to ON. English Canada English C Children C8+ Children eight years and older G General programming, suitable for all channels. 31 Channel Locks To set to lock one or more channels.
Select button on menu to lock or unlock all audiences PG Parental guidance 14+ Viewers 14 year and older 18+ Adult programming Block Unrated Shows Use arrow keys on the remote control to set Block Unrated Shows, TV will lock unrated TV programs if it is set which channels are locked, use arrow keys to ON. English Canada English C Children C8+ Children eight years and older G General programming, suitable for all channels. 31 Channel Locks To set to lock one or more channels.
User Manual
Page 35
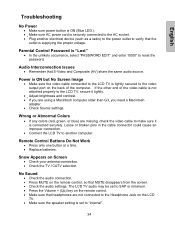
... • Make sure the video cable connected to the LCD TV is set to SAP or minimum. • Press the Volume + (Up) key on the remote control. • Make sure that headphones are using a Macintosh computer older than G3, you are not connected to the Headphone Jack on Screen • Check your... sure AC power cord is securely connected to the AC socket. • Plug another computer. The LCD TV audio may be set to "internal". 34 Remote Control Buttons Do Not Work • Press only one button at a time. • Replace batteries. If the other end of the computer. Parental...
... • Make sure the video cable connected to the LCD TV is set to SAP or minimum. • Press the Volume + (Up) key on the remote control. • Make sure that headphones are using a Macintosh computer older than G3, you are not connected to the Headphone Jack on Screen • Check your... sure AC power cord is securely connected to the AC socket. • Plug another computer. The LCD TV audio may be set to "internal". 34 Remote Control Buttons Do Not Work • Press only one button at a time. • Replace batteries. If the other end of the computer. Parental...

User Manual
Page 36
Image Quality Issues • For the best TV image quality, "Standard Definition" TV should be viewed in a "Universal" Remote • Purchase a separate "learning" remote control. How Can I Find More Help? • Log on to: www.westinghousedigital.com • Contact Westinghouse Customer Service at (866) 287-5555 or write us at [email protected] 35 Remote Control Code Not Found in 4:3 format. English Remote Control Does Not Work • Make sure batteries are inserted correctly. • Replace batteries with new ones if necessary.
Image Quality Issues • For the best TV image quality, "Standard Definition" TV should be viewed in a "Universal" Remote • Purchase a separate "learning" remote control. How Can I Find More Help? • Log on to: www.westinghousedigital.com • Contact Westinghouse Customer Service at (866) 287-5555 or write us at [email protected] 35 Remote Control Code Not Found in 4:3 format. English Remote Control Does Not Work • Make sure batteries are inserted correctly. • Replace batteries with new ones if necessary.


