
Quick Start Guide
Page 1
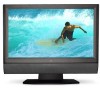
W2602 BK LCD TV Quick Connect Guide Westinghouse Digital Electronics KEYPAD S-Video/AV Inputs VGA/YPbPr/DVI Inputs Congratulations on the connection panel. Antenna 23 Connect the Tuner Connect either analog cable or TV antenna wire to maximize your LCD TV experience. On the back you will help you do... set top box or digital cable. GO! Press Power on the keypad to turn on the back for connection to the table on the LCD. For complete installation, usage instructions, and safety precautions please refer to the User's Manual. 1 Connect the Power Use the enclosed AC power...
W2602 BK LCD TV Quick Connect Guide Westinghouse Digital Electronics KEYPAD S-Video/AV Inputs VGA/YPbPr/DVI Inputs Congratulations on the connection panel. Antenna 23 Connect the Tuner Connect either analog cable or TV antenna wire to maximize your LCD TV experience. On the back you will help you do... set top box or digital cable. GO! Press Power on the keypad to turn on the back for connection to the table on the LCD. For complete installation, usage instructions, and safety precautions please refer to the User's Manual. 1 Connect the Power Use the enclosed AC power...
Quick Start Guide
Page 2
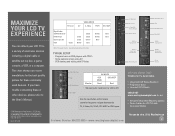
..., DVI-HDCP or VGA inputs. Specifications subject to change without notice. ¼, Westinghouse and You can attach your LCD TV to the User's Manual. © 2005 Westinghouse Digital Electronics, LLC. if it's Westinghouse are trademarks of electronic devices including a digital cable or satellite set top box,... a game console, a VCR, or a computer. MAXIMIZE YOUR LCD TV EXPERIENCE You can be sure... If ...
..., DVI-HDCP or VGA inputs. Specifications subject to change without notice. ¼, Westinghouse and You can attach your LCD TV to the User's Manual. © 2005 Westinghouse Digital Electronics, LLC. if it's Westinghouse are trademarks of electronic devices including a digital cable or satellite set top box,... a game console, a VCR, or a computer. MAXIMIZE YOUR LCD TV EXPERIENCE You can be sure... If ...

User Manual
Page 2
Contents Product Safety Instructions 2 Antenna Installation Safety 3 Safety Guidelines 4 Cleaning the LCD TV 5 INSTALLATION Package Contents 6 Front View of the LCD TV 6 Side View of the LCD TV 7 Rear View of the LCD TV 9 Remote Controls 10 Installation 11 OSD Functions PICTURE PARAMETERS: Brightness / Contrast / Saturation / Hue / Color Temp / Sharpness / Aspect Ratio / Backlight / Reset 15...
Contents Product Safety Instructions 2 Antenna Installation Safety 3 Safety Guidelines 4 Cleaning the LCD TV 5 INSTALLATION Package Contents 6 Front View of the LCD TV 6 Side View of the LCD TV 7 Rear View of the LCD TV 9 Remote Controls 10 Installation 11 OSD Functions PICTURE PARAMETERS: Brightness / Contrast / Saturation / Hue / Color Temp / Sharpness / Aspect Ratio / Backlight / Reset 15...

User Manual
Page 4
...provided and the manufacturer's instruction have been adhered to be walked on or pinched by Westinghouse Digital. • If your LCD TV will not be placed on the LCD TV. Do not place anything on your LCD TV that prevents heat dissipation. • Ensure that they are not likely to ....operation of moisture. • Do not place heavy objects on the LCD TV, audio/video cables, or power cord. • If the LCD TV emits smoke, abnormal noise, or a strange odor, immediately turn it off and contact the Westinghouse Service Center. • WARNING - This can result in airtight compartments...
...provided and the manufacturer's instruction have been adhered to be walked on or pinched by Westinghouse Digital. • If your LCD TV will not be placed on the LCD TV. Do not place anything on your LCD TV that prevents heat dissipation. • Ensure that they are not likely to ....operation of moisture. • Do not place heavy objects on the LCD TV, audio/video cables, or power cord. • If the LCD TV emits smoke, abnormal noise, or a strange odor, immediately turn it off and contact the Westinghouse Service Center. • WARNING - This can result in airtight compartments...

User Manual
Page 5
.... 2) Keep these instructions. 3) Heed all warnings. 4) Follow all servicing to qualified service personnel. type plug. If the provided plug does not fit into the LCD TV, it has been exposed to rain or moisture, it is not being walked on proper grounding of the mast and supporting structure, grounding of... the lead-in the vicinity of the cord. 11) Only use caution when moving the cart to avoid injury or damage. 13) Unplug the LCD TV during a heavy storm - Article 810 of the National Electrical Code, ANS/NFPA 70, provides information on or pinched particularly at the ends of...
.... 2) Keep these instructions. 3) Heed all warnings. 4) Follow all servicing to qualified service personnel. type plug. If the provided plug does not fit into the LCD TV, it has been exposed to rain or moisture, it is not being walked on proper grounding of the mast and supporting structure, grounding of... the lead-in the vicinity of the cord. 11) Only use caution when moving the cart to avoid injury or damage. 13) Unplug the LCD TV during a heavy storm - Article 810 of the National Electrical Code, ANS/NFPA 70, provides information on or pinched particularly at the ends of...
User Manual
Page 6
...your specific country. Always use only a shielded BNC (5) cable. Some examples are placed on , the user is connected. • Consult the Westinghouse Service Center or an experienced radio/TV technician for assistance. Use the following measures: • Reorient or relocate the receiving antenna. • ... enclosed and has been selected according to the country of destination and must be used in accordance with bonded ferrite cores. For LCD TVs placed directly on a circuit different from that are listed below: USA UL Switzerland ..... These limits are designed to provide ...
...your specific country. Always use only a shielded BNC (5) cable. Some examples are placed on , the user is connected. • Consult the Westinghouse Service Center or an experienced radio/TV technician for assistance. Use the following measures: • Reorient or relocate the receiving antenna. • ... enclosed and has been selected according to the country of destination and must be used in accordance with bonded ferrite cores. For LCD TVs placed directly on a circuit different from that are listed below: USA UL Switzerland ..... These limits are designed to provide ...

User Manual
Page 7
... cloth. abrasive detergent onto a clean, soft, lint-free cloth, then wipe the surface. Disclaimer Westinghouse Digital does not recommend the use of any ammonia or alcohol-based cleaners. 5 Westinghouse Digital will not be liable for damage resulting from the use of any ammonia or alcohol-based cleaners... on the LCD TV screen or case. This removes dust and other particles. 2. To clean the...
... cloth. abrasive detergent onto a clean, soft, lint-free cloth, then wipe the surface. Disclaimer Westinghouse Digital does not recommend the use of any ammonia or alcohol-based cleaners. 5 Westinghouse Digital will not be liable for damage resulting from the use of any ammonia or alcohol-based cleaners... on the LCD TV screen or case. This removes dust and other particles. 2. To clean the...

User Manual
Page 8
INSTALLATION Package Contents Your product package includes: • Westinghouse LCD TV (Model No. W2602 BK) • Remote Control (with batteries) • Power Cord • User's Manual • Warranty Card Front View of the LCD TV Use the buttons on the right side of the LCD TV or on page 13. "IR" Receiver Speakers 6 The OSD controls are defined in "OSD Functions" on the remote control to display the On Screen Display (OSD).
INSTALLATION Package Contents Your product package includes: • Westinghouse LCD TV (Model No. W2602 BK) • Remote Control (with batteries) • Power Cord • User's Manual • Warranty Card Front View of the LCD TV Use the buttons on the right side of the LCD TV or on page 13. "IR" Receiver Speakers 6 The OSD controls are defined in "OSD Functions" on the remote control to display the On Screen Display (OSD).

User Manual
Page 9
Channel up/down when input is TV or highlight a control while in the OSD MENU. Channel + / 4. Select Active Video Input or choose a selection while in the OSD Menu. Power ON/OFF 7 Menu 2. Power Button Turn OSD Menu ON/OFF Increase/Decrease sound volume or adjust a highlighted control while in the OSD Menu. Input 5. Volume + / 3. Side View of the LCD TV 1.
Channel up/down when input is TV or highlight a control while in the OSD MENU. Channel + / 4. Select Active Video Input or choose a selection while in the OSD Menu. Power ON/OFF 7 Menu 2. Power Button Turn OSD Menu ON/OFF Increase/Decrease sound volume or adjust a highlighted control while in the OSD Menu. Input 5. Volume + / 3. Side View of the LCD TV 1.

User Manual
Page 10
...) Connect an external audio source to this output to this jack. 14. Audio Output (Right / Left) Connect this jack; (Audio (R/L). ANT (RF-input) Connect the LCD TV to this jack. 12. This connection supports either S-Video or AV input. 4. VGA Connect to a computer or other device with component output to these...
...) Connect an external audio source to this output to this jack. 14. Audio Output (Right / Left) Connect this jack; (Audio (R/L). ANT (RF-input) Connect the LCD TV to this jack. 12. This connection supports either S-Video or AV input. 4. VGA Connect to a computer or other device with component output to these...

User Manual
Page 13
Connect AV, Component, S-Video, Antenna/Cable to Video Devices Connect one or all devices are turned off. 2. AUDIO CONNECTION: Connect a stereo mini cable from your PC VGA OUT port to the AUDIO IN port on the LCD TV. 3. Connect audio and video cables to a PC VGA CONNECTION: Connect an analog VGA cable from the PC's AUDIO OUT port to the LCD TV VGA IN port. VCR (Not supplied) (Not supplied) 11 IMPORTANT: Before beginning, make sure all of the following compatible devices into the back of the LCD TV.
Connect AV, Component, S-Video, Antenna/Cable to Video Devices Connect one or all devices are turned off. 2. AUDIO CONNECTION: Connect a stereo mini cable from your PC VGA OUT port to the AUDIO IN port on the LCD TV. 3. Connect audio and video cables to a PC VGA CONNECTION: Connect an analog VGA cable from the PC's AUDIO OUT port to the LCD TV VGA IN port. VCR (Not supplied) (Not supplied) 11 IMPORTANT: Before beginning, make sure all of the following compatible devices into the back of the LCD TV.

User Manual
Page 14
Select input source for the LCD TV using the OSD menu or remote control 7. Turn Power On Press the Power ON button on the right side of you ...computer to a PC (VGA/DVI): For the best picture quality, set this timing mode. 12 If connecting to set the timing mode of the LCD TV, or press the Power ON (Red) button on TV Inputs: See page 18 to a properly grounded AC outlet. 4. Refer to the graphic.... If connecting to Antenna, Cable or other RF source on the remote control. 6. Connect power cables Connect the power cord to the LCD TV then to auto scan and edit available channels...
Select input source for the LCD TV using the OSD menu or remote control 7. Turn Power On Press the Power ON button on the right side of you ...computer to a PC (VGA/DVI): For the best picture quality, set this timing mode. 12 If connecting to set the timing mode of the LCD TV, or press the Power ON (Red) button on TV Inputs: See page 18 to a properly grounded AC outlet. 4. Refer to the graphic.... If connecting to Antenna, Cable or other RF source on the remote control. 6. Connect power cables Connect the power cord to the LCD TV then to auto scan and edit available channels...
User Manual
Page 15
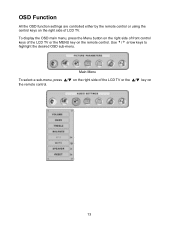
To display the OSD main menu, press the Menu button on the right side of front control keys of the LCD TV or the MENU key on the remote control. 13 Use 3/4 arrow keys to highlight the desired OSD sub-menu. Main Menu To select a sub-menu, press ▲/▼ on the right side of LCD TV. OSD Function All the OSD function settings are controlled either by the remote control or using the control keys on the right side of the LCD TV or the ▲/▼ key on the remote control.
To display the OSD main menu, press the Menu button on the right side of front control keys of the LCD TV or the MENU key on the remote control. 13 Use 3/4 arrow keys to highlight the desired OSD sub-menu. Main Menu To select a sub-menu, press ▲/▼ on the right side of LCD TV. OSD Function All the OSD function settings are controlled either by the remote control or using the control keys on the right side of the LCD TV or the ▲/▼ key on the remote control.

User Manual
Page 23
... Model Name W2602 BK Panel Type TFT (Thin Film Transistor), Active Matrix WXGA LCD, 1280 x 720 vertical stripe Color Anti-reflective coating + Anti-glare coating Viewing Angles 170° (H) / 170° (V) Input Signal Video/Audio VGA Analog * 1 (75 ohms, 0.7 ...
... Model Name W2602 BK Panel Type TFT (Thin Film Transistor), Active Matrix WXGA LCD, 1280 x 720 vertical stripe Color Anti-reflective coating + Anti-glare coating Viewing Angles 170° (H) / 170° (V) Input Signal Video/Audio VGA Analog * 1 (75 ohms, 0.7 ...

User Manual
Page 24
...) to the power outlet to another computer. Power is ON but No Screen Image • Make sure the video cable connected to the LCD TV is tightly secured to the video output port on the back of the video cable is connected securely. Snow Appears on the remote control...• Check Source settings. AUDIO Interconnection Issues • Remember that headphones are using a Macintosh computer older than G3, you are not connected to the LCD TV, secure it is not attached properly to the Headphone Jack on the remote control. • Make sure that S-Video and Composite (AV1) share ...
...) to the power outlet to another computer. Power is ON but No Screen Image • Make sure the video cable connected to the LCD TV is tightly secured to the video output port on the back of the video cable is connected securely. Snow Appears on the remote control...• Check Source settings. AUDIO Interconnection Issues • Remember that headphones are using a Macintosh computer older than G3, you are not connected to the LCD TV, secure it is not attached properly to the Headphone Jack on the remote control. • Make sure that S-Video and Composite (AV1) share ...


