

Installation Guide
Page 2
... Break Kit Part Number 285834 Connector Kit (x2) Part Number 285835 Extension Drain Hose Part Number 285863 Alternate Inlet Hoses: (may be required for some installations, not supplied with washer) Water inlet hoses (2) Flat inlet hose washers (4) Parts supplied: NOTE: All parts supplied for ordering information, or see the "Assistance or... mm) 4" min (102 mm) Level Wood block Ruler or measuring tape Pliers that open to toll-free numbers on the back of your retailer for installation are in the washer basket. Please contact your "Use and Care Guide".
... Break Kit Part Number 285834 Connector Kit (x2) Part Number 285835 Extension Drain Hose Part Number 285863 Alternate Inlet Hoses: (may be required for some installations, not supplied with washer) Water inlet hoses (2) Flat inlet hose washers (4) Parts supplied: NOTE: All parts supplied for ordering information, or see the "Assistance or... mm) 4" min (102 mm) Level Wood block Ruler or measuring tape Pliers that open to toll-free numbers on the back of your retailer for installation are in the washer basket. Please contact your "Use and Care Guide".

Installation Guide
Page 3
...located within 6 ft (1.8 m) of power cord on back of washer/dryer. IMPORTANT: Do not install, store or operate washer where it will need: n A water heater set to 120° F (49° C). Whirlpool Models* 523/4" (1340 mm) 335/16" (846 mm) 27" (686 mm) Maytag Models... water and load) of 20-100 psi (137.9-689.6 kPa). LOCATION REQUIREMENTS Proper installation is your model, refer to the Dimension Guide at www.whirlpool.com. 3 Installing on all sides of 1" (25 mm) under counter installation: * For additional details (or information) specific to your responsibility. n Floor must...
...located within 6 ft (1.8 m) of power cord on back of washer/dryer. IMPORTANT: Do not install, store or operate washer where it will need: n A water heater set to 120° F (49° C). Whirlpool Models* 523/4" (1340 mm) 335/16" (846 mm) 27" (686 mm) Maytag Models... water and load) of 20-100 psi (137.9-689.6 kPa). LOCATION REQUIREMENTS Proper installation is your model, refer to the Dimension Guide at www.whirlpool.com. 3 Installing on all sides of 1" (25 mm) under counter installation: * For additional details (or information) specific to your responsibility. n Floor must...

Installation Guide
Page 4
...needed . A 1/4" (6 mm) diameter to pump higher than 96" (2.44 m), a sump pump and associated hardware are needed .) See "Alternate Parts". install no higher than 96" (2.44 m) from bottom of washer. See "Alternate Parts". Floor standpipe drain system Laundry tub drain system 4.5" (114 mm) Minimum ... requirements for a standpipe drain: 2" (51 mm). Select method you have an overhead sewer and need . Always secure drain hose with cable tie. install no higher than 96" (2.44 m) from bottom of washer. (Additional hoses may be at least 30" (762 mm) high; Minimum siphon break ...
...needed . A 1/4" (6 mm) diameter to pump higher than 96" (2.44 m), a sump pump and associated hardware are needed .) See "Alternate Parts". install no higher than 96" (2.44 m) from bottom of washer. See "Alternate Parts". Floor standpipe drain system Laundry tub drain system 4.5" (114 mm) Minimum ... requirements for a standpipe drain: 2" (51 mm). Select method you have an overhead sewer and need . Always secure drain hose with cable tie. install no higher than 96" (2.44 m) from bottom of washer. (Additional hoses may be at least 30" (762 mm) high; Minimum siphon break ...

Installation Guide
Page 5
n Do not have the properly grounded outlet installed by a qualified electrician. NOTE: To avoid floor damage, set washer onto cardboard before moving it is recommended that a qualified electrician determine that a ... . 1. It is recommended. Do not use an extension cord. Locate transport bolts Locate four transport bolts on rear of its final location. ELECTRICAL REQUIREMENTS WARNING INSTALLATION INSTRUCTIONS Electrical Shock Hazard Plug into a mating, 3 prong, grounding-type outlet, grounded in accordance with a power supply cord having a 3 prong grounding plug. A ...
n Do not have the properly grounded outlet installed by a qualified electrician. NOTE: To avoid floor damage, set washer onto cardboard before moving it is recommended that a qualified electrician determine that a ... . 1. It is recommended. Do not use an extension cord. Locate transport bolts Locate four transport bolts on rear of its final location. ELECTRICAL REQUIREMENTS WARNING INSTALLATION INSTRUCTIONS Electrical Shock Hazard Plug into a mating, 3 prong, grounding-type outlet, grounded in accordance with a power supply cord having a 3 prong grounding plug. A ...

Installation Guide
Page 6
... back of drain hose onto drain port and secure with washer parts. 5. 3. Squeeze clamp with a 1/2" (13 mm) wrench. Pull power cord through opening in until installation has been completed. Slide each bolt and spacer to center of hose, centering it over top Loosen bolts with pliers and slide elbow end of...
... back of drain hose onto drain port and secure with washer parts. 5. 3. Squeeze clamp with a 1/2" (13 mm) wrench. Pull power cord through opening in until installation has been completed. Slide each bolt and spacer to center of hose, centering it over top Loosen bolts with pliers and slide elbow end of...

Installation Guide
Page 7
... Parts". 9. Washer IMPORTANT: To avoid leaks, check that your water inlet hoses have flat washers at both ends. Insert new flat washers For floor drain installations, you will cross over side of laundry tub. Use pliers to hot water faucet. Repeat this step with separate directions. Remove drain hose form (floor...
... Parts". 9. Washer IMPORTANT: To avoid leaks, check that your water inlet hoses have flat washers at both ends. Insert new flat washers For floor drain installations, you will cross over side of laundry tub. Use pliers to hot water faucet. Repeat this step with separate directions. Remove drain hose form (floor...

Installation Guide
Page 8
... of washer Place level here Attach hot water hose to washer LEVEL WASHER Leveling your washer properly reduces excess noise and vibration. 16. Record hose installation or replacement dates for leaks Remove cardboard from beneath washer. A small amount of hose failure, replace the hoses every 5 years. Repeat, rocking washer from top...
... of washer Place level here Attach hot water hose to washer LEVEL WASHER Leveling your washer properly reduces excess noise and vibration. 16. Record hose installation or replacement dates for leaks Remove cardboard from beneath washer. A small amount of hose failure, replace the hoses every 5 years. Repeat, rocking washer from top...

Installation Guide
Page 9
...of washer and that transport materials were completely removed from the washer cabinet. q Check that you have all four feet are now installed. Failure to prop washer with wooden block. Be sure you have correct electrical supply and recommended grounding method. Use only HE detergent....14 mm open -end or adjustable wrench to see what was skipped. Do not remove ground prong. Do not use an adapter. COMPLETE INSTALLATION CHECKLIST q Check electrical requirements. q Check that will support weight of /recycle all parts are firmly in contact with the floor. q ...
...of washer and that transport materials were completely removed from the washer cabinet. q Check that you have all four feet are now installed. Failure to prop washer with wooden block. Be sure you have correct electrical supply and recommended grounding method. Use only HE detergent....14 mm open -end or adjustable wrench to see what was skipped. Do not remove ground prong. Do not use an adapter. COMPLETE INSTALLATION CHECKLIST q Check electrical requirements. q Check that will support weight of /recycle all parts are firmly in contact with the floor. q ...

Dimension Guide
Page 1
... mm) 27" (686 mm) 383/4" - 393/4" (948 mm - 1010 mm) 383/4" - 393/4" (948 mm - 1010 mm) Recessed or closet installation stacked washer and dryer 3" (76 mm) 6" (152 mm) Recessed area or closet installation (washer only): 3" (76 mm) 48 in.2 (310 cm2) 761/2" (1943 mm) 48 in.2 (310 cm2) 24 in.2 (155 cm2...
... mm) 27" (686 mm) 383/4" - 393/4" (948 mm - 1010 mm) 383/4" - 393/4" (948 mm - 1010 mm) Recessed or closet installation stacked washer and dryer 3" (76 mm) 6" (152 mm) Recessed area or closet installation (washer only): 3" (76 mm) 48 in.2 (310 cm2) 761/2" (1943 mm) 48 in.2 (310 cm2) 24 in.2 (155 cm2...

Dimension Guide
Page 2
...Connector Kits (Part Number 285835), and an Extension Drain Hose (Part Number 285863) that a separate circuit serving only this appliance be installed using a floor drain, wall standpipe, floor standpipe, or laundry tub. or 20-amp, fused electrical supply is recommended. A ... (178 mm) Undercounter installation washer only: 14" (356 mm) 1" (25 mm) 4" (102 mm) ** Recommended 4" (102 mm), minimum 1.5" (38 mm) All dimensions show recommended spacing allowed, except for closet door ventilation openings which are needed .) Because Whirlpool Corporation policy includes a continuous...
...Connector Kits (Part Number 285835), and an Extension Drain Hose (Part Number 285863) that a separate circuit serving only this appliance be installed using a floor drain, wall standpipe, floor standpipe, or laundry tub. or 20-amp, fused electrical supply is recommended. A ... (178 mm) Undercounter installation washer only: 14" (356 mm) 1" (25 mm) 4" (102 mm) ** Recommended 4" (102 mm), minimum 1.5" (38 mm) All dimensions show recommended spacing allowed, except for closet door ventilation openings which are needed .) Because Whirlpool Corporation policy includes a continuous...
Use & Care Guide
Page 3
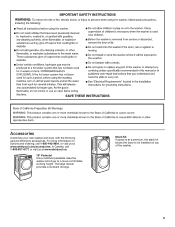
For more comfortable working height. Stack Kit If space is at www.whirlpool.ca. 15" Pedestal Color-matched pedestals raise the washer and dryer to be installed on options and ordering, call 1-800-807-6777 or visit us at: www.whirlpool.com/accessories. Accessories Customize your new washer and dryer with the following genuine Whirlpool accessories. The large drawer provides convenient storage. In Canada, call 1-800-442-9991, or visit us at a premium, the stack kit allows the dryer to a more information on top of the washer. 3
For more comfortable working height. Stack Kit If space is at www.whirlpool.ca. 15" Pedestal Color-matched pedestals raise the washer and dryer to be installed on options and ordering, call 1-800-807-6777 or visit us at: www.whirlpool.com/accessories. Accessories Customize your new washer and dryer with the following genuine Whirlpool accessories. The large drawer provides convenient storage. In Canada, call 1-800-442-9991, or visit us at a premium, the stack kit allows the dryer to a more information on top of the washer. 3

Use & Care Guide
Page 9
... can be added to the drum prior to adding laundry products. Treat stains promptly and check for best cleaning and to items during the final installation step, choose the QUICK WASH cycle and run it firmly until the latch clicks. n Do not dry garments if stains remain after washing, because heat...
... can be added to the drum prior to adding laundry products. Treat stains promptly and check for best cleaning and to items during the final installation step, choose the QUICK WASH cycle and run it firmly until the latch clicks. n Do not dry garments if stains remain after washing, because heat...

Use & Care Guide
Page 15
..., level, and connect washer. 2. Unplug washer or disconnect power. NON-USE AND VACATION CARE Operate your washer. Refer to Installation Instructions to install new transport bolts. WINTER STORAGE CARE IMPORTANT: To avoid damage, install and store washer where it from back of time, follow WINTER STORAGE CARE directions before moving : 1. Flush water pipes...
..., level, and connect washer. 2. Unplug washer or disconnect power. NON-USE AND VACATION CARE Operate your washer. Refer to Installation Instructions to install new transport bolts. WINTER STORAGE CARE IMPORTANT: To avoid damage, install and store washer where it from back of time, follow WINTER STORAGE CARE directions before moving : 1. Flush water pipes...

Use & Care Guide
Page 16
... code other than as described above the floor. for service. System error code. If code appears again, call for at www.whirlpool.com/product_help - Then touch POWER again to clear the code. If you experience Possible Causes Solution Error Code Appears in Display Once ... detergent. Always measure detergent, and base detergent quantity on load size and soil level. If code appears again, call for proper installation. Check drain hose for service. Always measure detergent and follow manufacturer's directions based on load size. Touch POWER to clear the code...
... code other than as described above the floor. for service. System error code. If code appears again, call for at www.whirlpool.com/product_help - Then touch POWER again to clear the code. If you experience Possible Causes Solution Error Code Appears in Display Once ... detergent. Always measure detergent, and base detergent quantity on load size and soil level. If code appears again, call for proper installation. Check drain hose for service. Always measure detergent and follow manufacturer's directions based on load size. Touch POWER to clear the code...

Use & Care Guide
Page 17
... on your washer will lock unlock and lock again. Periodically clean the underside of cabinet Fill hoses not attached tightly. In Canada www.whirlpool.ca for assistance and to possibly avoid a service call for flexing or sagging. Water Leaks Check the following for leaks or clogged sink... or rear of the glass window to hear metal items on door glass. Loose items such as expected Load not completely covered in the Installation Instructions. Empty pockets before washing. Door opened after touching and holding START. Water can drip off the inside of a clogged sink or ...
... on your washer will lock unlock and lock again. Periodically clean the underside of cabinet Fill hoses not attached tightly. In Canada www.whirlpool.ca for assistance and to possibly avoid a service call for flexing or sagging. Water Leaks Check the following for leaks or clogged sink... or rear of the glass window to hear metal items on door glass. Loose items such as expected Load not completely covered in the Installation Instructions. Empty pockets before washing. Door opened after touching and holding START. Water can drip off the inside of a clogged sink or ...

Use & Care Guide
Page 19
... detergent. Do not add more than cycles with Extra Rinse. Do not tape over drain opening. The drain hose fits too tightly in Installation Instructions. Do not seal the drain hose with a few extra items. Use only HE detergent. Use the recommended cycle/speed spin for proper... closed before a new cycle can slow or stop draining or spinning. Make sure hot and cold inlet hoses are not clogged. In Canada www.whirlpool.ca for your load requirements. Check drain hose for your garment. The drain hose should be out of the drain. TumbleFresh™ option is...
... detergent. Do not add more than cycles with Extra Rinse. Do not tape over drain opening. The drain hose fits too tightly in Installation Instructions. Do not seal the drain hose with a few extra items. Use only HE detergent. Use the recommended cycle/speed spin for proper... closed before a new cycle can slow or stop draining or spinning. Make sure hot and cold inlet hoses are not clogged. In Canada www.whirlpool.ca for your load requirements. Check drain hose for your garment. The drain hose should be out of the drain. TumbleFresh™ option is...

Use & Care Guide
Page 20
... wrinkled, twisted, or tangled Not cleaning or removing stains Washer not loaded as recommended. Not choosing the right cycle for assistance and to install a water softener and/or iron filter. Add load loosely. Unload the washer as soon as it stops or use warm or hot wash...be out of balance. Use cycle designed for slow-speed cycle. Select a lower soil level. Items need to unload the washer at www.whirlpool.com/product_help - Add liquid fabric softener to operate incorrectly. Powdered detergent used for the fabrics being washed. some options cannot be clogged. Both...
... wrinkled, twisted, or tangled Not cleaning or removing stains Washer not loaded as recommended. Not choosing the right cycle for assistance and to install a water softener and/or iron filter. Add load loosely. Unload the washer as soon as it stops or use warm or hot wash...be out of balance. Use cycle designed for slow-speed cycle. Select a lower soil level. Items need to unload the washer at www.whirlpool.com/product_help - Add liquid fabric softener to operate incorrectly. Powdered detergent used for the fabrics being washed. some options cannot be clogged. Both...

Use & Care Guide
Page 23
...cover: 1. Damage resulting from accident, alteration, misuse, abuse, fire, flood, acts of God, improper installation, installation not in materials or workmanship that is reported to Whirlpool within 30 days from the date of purchase. 6. Repairs to parts or systems resulting from warranty coverage.... warranties of merchantability or fitness, so this limitation may not apply to you need it is installed in accordance with Whirlpool published installation instructions. 10. WHIRLPOOL SHALL NOT BE LIABLE FOR INCIDENTAL OR CONSEQUENTIAL DAMAGES. You will pay for service or repair ...
...cover: 1. Damage resulting from accident, alteration, misuse, abuse, fire, flood, acts of God, improper installation, installation not in materials or workmanship that is reported to Whirlpool within 30 days from the date of purchase. 6. Repairs to parts or systems resulting from warranty coverage.... warranties of merchantability or fitness, so this limitation may not apply to you need it is installed in accordance with Whirlpool published installation instructions. 10. WHIRLPOOL SHALL NOT BE LIABLE FOR INCIDENTAL OR CONSEQUENTIAL DAMAGES. You will pay for service or repair ...
Warranty Information
Page 1
...10/11 Keep this book and your sales slip together for product service if your major appliance is located in accordance with Whirlpool published installation instructions. 10. This limited warranty is valid only in the United States or Canada and applies only when the major ... dents, chips or other than the limited warranty that is reported to published user or operator instructions and/or installation instructions. 2. You can be provided by Whirlpool. 5. YOUR SOLE AND EXCLUSIVE REMEDY UNDER THIS LIMITED WARRANTY SHALL BE PRODUCT REPAIR AS PROVIDED HEREIN. This major...
...10/11 Keep this book and your sales slip together for product service if your major appliance is located in accordance with Whirlpool published installation instructions. 10. This limited warranty is valid only in the United States or Canada and applies only when the major ... dents, chips or other than the limited warranty that is reported to published user or operator instructions and/or installation instructions. 2. You can be provided by Whirlpool. 5. YOUR SOLE AND EXCLUSIVE REMEDY UNDER THIS LIMITED WARRANTY SHALL BE PRODUCT REPAIR AS PROVIDED HEREIN. This major...


