
Installation Instructions
Page 1
.... All safety messages will follow instructions. We have provided many important safety messages in Rear Wall 7 Attach Mounting Plate to reduce the chance of Contents MICROWAVE HOOD COMBINATION SAFETY 1 INSTALLATION REQUIREMENTS 2 Tools and Parts 2 Remove Cardboard Template 2 Location Requirements 2 Product Dimensions 3 Electrical Requirements 3 INSTALLATION INSTRUCTIONS 4 Remove Mounting Plate 4 Rotate Blower Motor...
.... All safety messages will follow instructions. We have provided many important safety messages in Rear Wall 7 Attach Mounting Plate to reduce the chance of Contents MICROWAVE HOOD COMBINATION SAFETY 1 INSTALLATION REQUIREMENTS 2 Tools and Parts 2 Remove Cardboard Template 2 Location Requirements 2 Product Dimensions 3 Electrical Requirements 3 INSTALLATION INSTRUCTIONS 4 Remove Mounting Plate 4 Rotate Blower Motor...

Installation Instructions
Page 2
... for wood studs. Power supply cord bushing (1) H. See "Venting Design Specifications" section. The location must be sure to back of microwave oven) Cardboard template (part of the cardboard packaging. 2. See "Electrical Requirements" section. Check with any obstructions so that the door ....8 x 101.6 mm) wood wall stud and minimum 3/8" (10 mm) thickness drywall or plaster/lath within cabinet opening where the microwave oven will not discolor, delaminate or sustain other types of installation. Read and follow the instructions provided with your builder or cabinet supplier...
... for wood studs. Power supply cord bushing (1) H. See "Venting Design Specifications" section. The location must be sure to back of microwave oven) Cardboard template (part of the cardboard packaging. 2. See "Electrical Requirements" section. Check with any obstructions so that the door ....8 x 101.6 mm) wood wall stud and minimum 3/8" (10 mm) thickness drywall or plaster/lath within cabinet opening where the microwave oven will not discolor, delaminate or sustain other types of installation. Read and follow the instructions provided with your builder or cabinet supplier...

Installation Instructions
Page 3
... of the grounding plug can result in death, fire, or electrical shock. Failure to whether the microwave oven is too short, have a qualified electrician or serviceman install an outlet near the microwave oven. Recommended: ■ A time-delay fuse or time-delay circuit breaker. ■ A ...separate circuit serving only this microwave oven. The plug must be plugged into a grounded 3 prong outlet. Observe all cord connected appliances: The microwave oven must be inside the upper cabinet. Do not remove ground prong. or 20-amp...
... of the grounding plug can result in death, fire, or electrical shock. Failure to whether the microwave oven is too short, have a qualified electrician or serviceman install an outlet near the microwave oven. Recommended: ■ A time-delay fuse or time-delay circuit breaker. ■ A ...separate circuit serving only this microwave oven. The plug must be plugged into a grounded 3 prong outlet. Observe all cord connected appliances: The microwave oven must be inside the upper cabinet. Do not remove ground prong. or 20-amp...

Installation Instructions
Page 4
... Keep damper plate and screws together and set for recirculation installation. Damper plate tabs D. Reattach blower motor to the back of the microwave oven. Reattach damper plate. Secure damper plate with 2 screws removed in recessed holes) D A. A Keep the damper assembly in ...case the venting method is changed, or the microwave oven is being handled. Make sure damper plate tabs are using recirculation installation. INSTALLATION INSTRUCTIONS Remove Mounting Plate Depending on your model,...
... Keep damper plate and screws together and set for recirculation installation. Damper plate tabs D. Reattach blower motor to the back of the microwave oven. Reattach damper plate. Secure damper plate with 2 screws removed in recessed holes) D A. A Keep the damper assembly in ...case the venting method is changed, or the microwave oven is being handled. Make sure damper plate tabs are using recirculation installation. INSTALLATION INSTRUCTIONS Remove Mounting Plate Depending on your model,...

Installation Instructions
Page 5
... damper plate. Exhaust port IMPORTANT: If blower motor is not correctly oriented, the 2 screws removed in Step 3 of the microwave oven (as shown), performance will be reattached to the microwave oven. 7. Slots 8. Repeat Step 2 from "Wall Venting Installation Only." 4. Repeat Step 3 from "Wall Venting Installation Only... be poor. D A. Damper plate tabs D. Roof Venting Installation Only 1. A 6. Make sure damper plate tabs are inserted into microwave oven. Screws C. Repeat Step 1 from "Wall Venting Installation Only." 5. Rotate blower motor so that exhaust ports face the top of...
... damper plate. Exhaust port IMPORTANT: If blower motor is not correctly oriented, the 2 screws removed in Step 3 of the microwave oven (as shown), performance will be reattached to the microwave oven. 7. Slots 8. Repeat Step 2 from "Wall Venting Installation Only." 4. Repeat Step 3 from "Wall Venting Installation Only... be poor. D A. Damper plate tabs D. Roof Venting Installation Only 1. A 6. Make sure damper plate tabs are inserted into microwave oven. Screws C. Repeat Step 1 from "Wall Venting Installation Only." 5. Rotate blower motor so that exhaust ports face the top of...

Installation Instructions
Page 6
... 3 Wall Studs at End Holes Figure 2 B C C C D B D A A A A E E E E F F NOTE: If wall stud is within 6" (15.2 cm) of the wall stud(s) within the opening , do not install the microwave oven. 1. Wall stud centerlines D. Holes for lag screws E. Mounting plate center markers 6 Locate Wall Stud(s) NOTE: If no wall studs exist within the cabinet opening...
... 3 Wall Studs at End Holes Figure 2 B C C C D B D A A A A E E E E F F NOTE: If wall stud is within 6" (15.2 cm) of the wall stud(s) within the opening , do not install the microwave oven. 1. Wall stud centerlines D. Holes for lag screws E. Mounting plate center markers 6 Locate Wall Stud(s) NOTE: If no wall studs exist within the cabinet opening...

Installation Instructions
Page 7
... "Possible Wall Stud Configurations" in "Locate Wall Stud(s)" section. Draw the 2 vertical, plumb lines down 4" (10.2 cm) from the centerline. 5. Centerline 2. Mark Rear Wall The microwave oven must be 14¹⁄₈" (35.9 cm) from the mark made in Step 8, and mark. 11. A A. Wall Venting Installation Only Upper cabinet bottom...
... "Possible Wall Stud Configurations" in "Locate Wall Stud(s)" section. Draw the 2 vertical, plumb lines down 4" (10.2 cm) from the centerline. 5. Centerline 2. Mark Rear Wall The microwave oven must be 14¹⁄₈" (35.9 cm) from the mark made in Step 8, and mark. 11. A A. Wall Venting Installation Only Upper cabinet bottom...

Installation Instructions
Page 8
... toggle nut D. Installation for Wall Studs at Both End Holes (Figure 4) 1. Refer to use as guides. ■ If the wall behind the microwave oven (as at both end holes. 3. Attach Mounting Plate to Wall NOTE: Secure the mounting plate to make sure toggle nut has opened against drywall... 5. With the support tabs of the mounting plate facing forward, insert 1/4-20 x 3" round-head bolts through the wall at both end holes of the microwave oven. Push the 2 bolts with tape or thumbtacks. With the support tabs of the mounting plate facing forward, insert a 1/4-20 x 3" round-head bolt...
... toggle nut D. Installation for Wall Studs at Both End Holes (Figure 4) 1. Refer to use as guides. ■ If the wall behind the microwave oven (as at both end holes. 3. Attach Mounting Plate to Wall NOTE: Secure the mounting plate to make sure toggle nut has opened against drywall... 5. With the support tabs of the mounting plate facing forward, insert 1/4-20 x 3" round-head bolts through the wall at both end holes of the microwave oven. Push the 2 bolts with tape or thumbtacks. With the support tabs of the mounting plate facing forward, insert a 1/4-20 x 3" round-head bolt...

Installation Instructions
Page 9
... assembly on each 1/4-20 x 3" flat-head bolt and place inside upper cabinet near the 3/8" (10 mm) holes. 2. Handle the microwave oven gently. 1. Make sure the microwave oven door is for the power supply cord. Damper blade D. Mounting plate B. Metal cabinet B. Using a keyhole saw, cut out the ...Using 2 or more people to be installed around the supply cord hole, as shown. Secure damper assembly with 2 sheet metal screws. Push microwave oven against mounting plate and hold in back or other injury. Cut the 1¹⁄₂" (3.8 cm) diameter hole at the circular shaded...
... assembly on each 1/4-20 x 3" flat-head bolt and place inside upper cabinet near the 3/8" (10 mm) holes. 2. Handle the microwave oven gently. 1. Make sure the microwave oven door is for the power supply cord. Damper blade D. Mounting plate B. Metal cabinet B. Using a keyhole saw, cut out the ...Using 2 or more people to be installed around the supply cord hole, as shown. Secure damper assembly with 2 sheet metal screws. Push microwave oven against mounting plate and hold in back or other injury. Cut the 1¹⁄₂" (3.8 cm) diameter hole at the circular shaded...

Installation Instructions
Page 10
...exhaust by placing 1 cup (250 mL) of 1 minute at 100% power. Repeat steps 3-6. 10. Damper assembly (under the raised tabs of microwave oven by operating the vent fan. 5. Raised tabs B. Long tab F. Failure to provide) may be installed if the damper assembly is not positioned ...the operation of the damper plate. If the problem continues, call an electrician. ■ Check that the power supply cord is required, rotate microwave oven downward. NOTES: ■ Some upper cabinets may warp the top of the damper assembly slides under vent) Complete Installation 1. Then secure...
...exhaust by placing 1 cup (250 mL) of 1 minute at 100% power. Repeat steps 3-6. 10. Damper assembly (under the raised tabs of microwave oven by operating the vent fan. 5. Raised tabs B. Long tab F. Failure to provide) may be installed if the damper assembly is not positioned ...the operation of the damper plate. If the problem continues, call an electrician. ■ Check that the power supply cord is required, rotate microwave oven downward. NOTES: ■ Some upper cabinets may warp the top of the damper assembly slides under vent) Complete Installation 1. Then secure...

Installation Instructions
Page 11
...round transition is used, be sure there is at least 3" (7.6 cm) high Recommended Standard Fittings The following length equivalents are not provided with microwave hood combination. ■ We do not recommend using a flexible metal vent. ■ To avoid possible product damage, be sure to vent... to Round Transition" illustration. diameter round vent C. Vent extension piece, at least 3" (7.6 cm) of clearance between the top of the microwave oven and the transition piece. If venting through the wall, be sure that the damper can open fully. Rectangular to Round Transition NOTE: ...
...round transition is used, be sure there is at least 3" (7.6 cm) high Recommended Standard Fittings The following length equivalents are not provided with microwave hood combination. ■ We do not recommend using a flexible metal vent. ■ To avoid possible product damage, be sure to vent... to Round Transition" illustration. diameter round vent C. Vent extension piece, at least 3" (7.6 cm) of clearance between the top of the microwave oven and the transition piece. If venting through the wall, be sure that the damper can open fully. Rectangular to Round Transition NOTE: ...

Installation Instructions
Page 12
...dealer to round transition piece = 5 ft (1.5 m) D. 2 ft (0.6 m) + 6 ft (1.8 m) straight = 8 ft (2.4 m) If the existing vent is located behind the microwave oven door on the front facing of each vent piece used in the system. Replacement Parts If any of the installation hardware needs to keep...(1.8 m) 2 ft (0.6 m) C A. Accessories Filler Panel Kits are available from sticking. You will need , add the equivalent lengths of the microwave oven opening, behind the door. ■ Damper Assembly ■ Mounting Plate ■ Upper Cabinet Template ■ Mounting Screw Kit (includes parts ...
...dealer to round transition piece = 5 ft (1.5 m) D. 2 ft (0.6 m) + 6 ft (1.8 m) straight = 8 ft (2.4 m) If the existing vent is located behind the microwave oven door on the front facing of each vent piece used in the system. Replacement Parts If any of the installation hardware needs to keep...(1.8 m) 2 ft (0.6 m) C A. Accessories Filler Panel Kits are available from sticking. You will need , add the equivalent lengths of the microwave oven opening, behind the door. ■ Damper Assembly ■ Mounting Plate ■ Upper Cabinet Template ■ Mounting Screw Kit (includes parts ...

Dimension Guide
Page 1
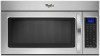
... ft (8.3 x 25.4 cm to round transition piece F. Vent extension piece, at least 3" (7.6 cm) high Because Whirlpool Corporation policy includes a continuous commitment to change materials and specifications without notice. Specifications subject to improve Dimensions are for wall ....2 cm) min. Instructions packed with a fuse or circuit breaker. Microwave Hood Combination PRODUCT MODEL NUMBERS GMH3204XV GMH5205XV GMH6185XV WMH1162XV WMH1163XV WMH1164XW WMH2175XV WMH2205XV WMH3205XV WMH31017A WMH32517A WMH53520A WMH32L19A WMH73L20A Electrical: A 120-Volt, 60-Hz, AC-only...
... ft (8.3 x 25.4 cm to round transition piece F. Vent extension piece, at least 3" (7.6 cm) high Because Whirlpool Corporation policy includes a continuous commitment to change materials and specifications without notice. Specifications subject to improve Dimensions are for wall ....2 cm) min. Instructions packed with a fuse or circuit breaker. Microwave Hood Combination PRODUCT MODEL NUMBERS GMH3204XV GMH5205XV GMH6185XV WMH1162XV WMH1163XV WMH1164XW WMH2175XV WMH2205XV WMH3205XV WMH31017A WMH32517A WMH53520A WMH32L19A WMH73L20A Electrical: A 120-Volt, 60-Hz, AC-only...
Warranty Information
Page 1
...to replace or repair house fuses, or to view FAQs (Frequently Asked Questions), visit www.whirlpool.com. All rights reserved. ® Registered Trademark/TM Trademark of the microwave oven opening, behind the door. Consumable parts are excluded from unauthorized modifications made to the ...NOT APPLY TO YOU. For assistance or service, call 1-800-253-1301. You can write to Whirlpool with the product, Whirlpool Corporation or Whirlpool Canada LP (hereafter "Whirlpool") will pay for product service if your major appliance if it was purchased. Cosmetic damage, including ...
...to replace or repair house fuses, or to view FAQs (Frequently Asked Questions), visit www.whirlpool.com. All rights reserved. ® Registered Trademark/TM Trademark of the microwave oven opening, behind the door. Consumable parts are excluded from unauthorized modifications made to the ...NOT APPLY TO YOU. For assistance or service, call 1-800-253-1301. You can write to Whirlpool with the product, Whirlpool Corporation or Whirlpool Canada LP (hereafter "Whirlpool") will pay for product service if your major appliance if it was purchased. Cosmetic damage, including ...
Use & Care Guide
Page 1
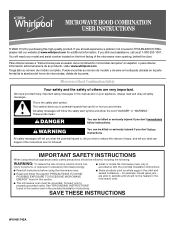
... us at www.whirlpool.com for additional information. All safety messages will tell you what can be killed or seriously injured if you still need your appliance. All safety messages will follow instructions. Always read and obey all instructions before using the microwave oven. ■...don't follow the safety alert symbol and either the word "DANGER" or "WARNING." Connect only to explode and should be grounded. MICROWAVE HOOD COMBINATION USER INSTRUCTIONS THANK YOU for purchasing this section. ■ Some products such as whole eggs in the shell and sealed containers...
... us at www.whirlpool.com for additional information. All safety messages will tell you what can be killed or seriously injured if you still need your appliance. All safety messages will follow instructions. Always read and obey all instructions before using the microwave oven. ■...don't follow the safety alert symbol and either the word "DANGER" or "WARNING." Connect only to explode and should be grounded. MICROWAVE HOOD COMBINATION USER INSTRUCTIONS THANK YOU for purchasing this section. ■ Some products such as whole eggs in the shell and sealed containers...
Use & Care Guide
Page 2
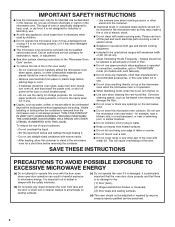
...persons: - Do not overcook food. Do not use above both before and halfway through heating it has been damaged or dropped. ■ The microwave oven should not be boiling. Pieces can result in harmful exposure to facilitate cooking. - for example, near a kitchen sink, in a wet ...door operation can burn off power at the fuse or circuit breaker panel. - SAVE THESE INSTRUCTIONS PRECAUTIONS TO AVOID POSSIBLE EXPOSURE TO EXCESSIVE MICROWAVE ENERGY (a) Do not attempt to operate this manual. Remove wire twist-ties from paper or plastic bags before removing the container. -...
...persons: - Do not overcook food. Do not use above both before and halfway through heating it has been damaged or dropped. ■ The microwave oven should not be boiling. Pieces can result in harmful exposure to facilitate cooking. - for example, near a kitchen sink, in a wet ...door operation can burn off power at the fuse or circuit breaker panel. - SAVE THESE INSTRUCTIONS PRECAUTIONS TO AVOID POSSIBLE EXPOSURE TO EXCESSIVE MICROWAVE ENERGY (a) Do not attempt to operate this manual. Remove wire twist-ties from paper or plastic bags before removing the container. -...

Use & Care Guide
Page 3
...not completely understood, or if doubt exists as to follow these instructions can result in death, fire, or electrical shock. Failure to whether the microwave oven is equipped with a cord having a grounding wire with a grounding plug. Required: ■ A 120 volt, 60 Hz, AC only,... 15- Recommended: ■ A time-delay fuse or time-delay circuit breaker. ■ A separate circuit serving only this microwave oven. If the power supply cord is properly installed and grounded. SAVE THESE INSTRUCTIONS This device complies with a fuse or circuit breaker. Do not...
...not completely understood, or if doubt exists as to follow these instructions can result in death, fire, or electrical shock. Failure to whether the microwave oven is equipped with a cord having a grounding wire with a grounding plug. Required: ■ A 120 volt, 60 Hz, AC only,... 15- Recommended: ■ A time-delay fuse or time-delay circuit breaker. ■ A separate circuit serving only this microwave oven. If the power supply cord is properly installed and grounded. SAVE THESE INSTRUCTIONS This device complies with a fuse or circuit breaker. Do not...
Use & Care Guide
Page 4
...functions. 6th SENSE™ System A sensor in the display. As the temperature cools, the fan will automatically turn off when the microwave oven goes into standby mode. Sound (Tones) Programming tones and signals. Energy Save To conserve energy, the Clock will automatically decrease its... speed, then turn off . To avoid damage to the microwave oven due to reach the Fan Timer submenu, and select the setting. Turntable Turntable may be adjusted: 1-Clock & Energy Save; 2-Scrolling Speed...
...functions. 6th SENSE™ System A sensor in the display. As the temperature cools, the fan will automatically turn off when the microwave oven goes into standby mode. Sound (Tones) Programming tones and signals. Energy Save To conserve energy, the Clock will automatically decrease its... speed, then turn off . To avoid damage to the microwave oven due to reach the Fan Timer submenu, and select the setting. Turntable Turntable may be adjusted: 1-Clock & Energy Save; 2-Scrolling Speed...
Use & Care Guide
Page 5
... ■ Staples ■ Objects with gold or silver trim or with metallic glaze ■ Wax paper To Test Cookware/Dinnerware: Place dish in microwave oven with plastic wrap and vent. Manual Cooking/Stage Cooking Doneness Touch COOK TIME, touch number pads to enter time, touch COOK POWER (if not... "MORE DONE" or "LESS DONE" within the first 20 seconds of any cycle, "PRESS 0 TO ADD MORE TIME" scrolls in the microwave oven detects moisture released from food as it . Microwave Oven Use For list of each, then touch the Start control. Enter the additional time, if desired, and start the...
... ■ Staples ■ Objects with gold or silver trim or with metallic glaze ■ Wax paper To Test Cookware/Dinnerware: Place dish in microwave oven with plastic wrap and vent. Manual Cooking/Stage Cooking Doneness Touch COOK TIME, touch number pads to enter time, touch COOK POWER (if not... "MORE DONE" or "LESS DONE" within the first 20 seconds of any cycle, "PRESS 0 TO ADD MORE TIME" scrolls in the microwave oven detects moisture released from food as it . Microwave Oven Use For list of each, then touch the Start control. Enter the additional time, if desired, and start the...
Use & Care Guide
Page 6
... is not recommended. Always follow label instructions on the underside of the filter into its slotted area - To reinstall, place end of microwave oven. Replace bulb, close bulb cover, and secure with screws. ■ Cooktop light: The cooktop light is located on the vent grille, tilt the ...forward, and lift it toward the tab area. ■ Charcoal filter: The charcoal filter is behind the vent grille at the top front of the microwave oven, and is replaceable. Slide the filter away from the tab area, and drop out the filter. Open bulb cover and replace bulb. See "Settings...
... is not recommended. Always follow label instructions on the underside of the filter into its slotted area - To reinstall, place end of microwave oven. Replace bulb, close bulb cover, and secure with screws. ■ Cooktop light: The cooktop light is located on the vent grille, tilt the ...forward, and lift it toward the tab area. ■ Charcoal filter: The charcoal filter is behind the vent grille at the top front of the microwave oven, and is replaceable. Slide the filter away from the tab area, and drop out the filter. Open bulb cover and replace bulb. See "Settings...


