Statement of Volatility
Page 1
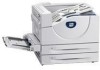
...August 18, 2008 Subject: Volatility statement for Phaser 5550 laser printer The Phaser 5550 printer does not retain any latent user image in the mechanical system of a configuration card. This memory does not retain any image data, but does retain printer configuration details. This card does not retain ...the next page lists the corresponding memory types for the Xerox Phaser 5550 printers. Please note there are enabled/utilized such as forms, logos and custom fonts and etc. No user image data is removed. The Phaser 5550 printer equipped with hard drives) and (ii) the power...
...August 18, 2008 Subject: Volatility statement for Phaser 5550 laser printer The Phaser 5550 printer does not retain any latent user image in the mechanical system of a configuration card. This memory does not retain any image data, but does retain printer configuration details. This card does not retain ...the next page lists the corresponding memory types for the Xerox Phaser 5550 printers. Please note there are enabled/utilized such as forms, logos and custom fonts and etc. No user image data is removed. The Phaser 5550 printer equipped with hard drives) and (ii) the power...

Statement of Volatility
Page 2
... contain user image data. 5 Font DIMM may contain user developed macro data. It does not contain user image data. 3 Is used for all models 2 Contains printer configuration and operational parameters. It does not contain image data.
... contain user image data. 5 Font DIMM may contain user developed macro data. It does not contain user image data. 3 Is used for all models 2 Contains printer configuration and operational parameters. It does not contain image data.

System Administrator Guide
Page 3
Contents 1 Overview Resources 1-1 PrintingScout Alerts 1-2 PhaserSMART Technical Support 1-2 How to Access PhaserSMART 1-2 Xerox Support Centre 1-4 CentreWare Internet Services (IS 1-5 2 Network Installation Features Using a Startup Network Configuration File 2-2 About the Configuration File 2-2 Configuration File Requirements 2-2 Specifying the Location of the Configuration File 2-2 Printer Driver Installation Features 2-3 Walk-Up Printing Driver 2-3 Walk-Up Installation 2-3 Installation...
Contents 1 Overview Resources 1-1 PrintingScout Alerts 1-2 PhaserSMART Technical Support 1-2 How to Access PhaserSMART 1-2 Xerox Support Centre 1-4 CentreWare Internet Services (IS 1-5 2 Network Installation Features Using a Startup Network Configuration File 2-2 About the Configuration File 2-2 Configuration File Requirements 2-2 Specifying the Location of the Configuration File 2-2 Printer Driver Installation Features 2-3 Walk-Up Printing Driver 2-3 Walk-Up Installation 2-3 Installation...
System Administrator Guide
Page 4
... 3-14 4 Security Features Basic Concepts 4-2 About Admin and Key User Accounts 4-2 About HTTP, HTTPS, and SSL/TLS 4-3 About Certificates 4-3 About Access Control Lists 4-4 Securing the Printer in a High Security Environment 4-5 Managing Certificates 4-6 Configuring SSL 4-7 Configuring Administrator and Key User Settings 4-8 Configuring the Print Host Access List 4-9 Controlling Access to Color Printing...
... 3-14 4 Security Features Basic Concepts 4-2 About Admin and Key User Accounts 4-2 About HTTP, HTTPS, and SSL/TLS 4-3 About Certificates 4-3 About Access Control Lists 4-4 Securing the Printer in a High Security Environment 4-5 Managing Certificates 4-6 Configuring SSL 4-7 Configuring Administrator and Key User Settings 4-8 Configuring the Print Host Access List 4-9 Controlling Access to Color Printing...
System Administrator Guide
Page 7
Source Packaged with printer Packaged with printer Software and Documentation CD-ROM www.xerox.com/support www.xerox.com/support www.xerox.com/support www.xerox.com/paper (US version) www.xerox.com/paper (European version) www.xerox.com/office/pmtools www.xerox.com/support www.phaserSMART.com www.xerox.com/support Control panel Help (?) button Control panel menu System Administrator...
Source Packaged with printer Packaged with printer Software and Documentation CD-ROM www.xerox.com/support www.xerox.com/support www.xerox.com/support www.xerox.com/paper (US version) www.xerox.com/paper (European version) www.xerox.com/office/pmtools www.xerox.com/support www.phaserSMART.com www.xerox.com/support Control panel Help (?) button Control panel menu System Administrator...

System Administrator Guide
Page 8
...time for more critical tasks. How to users, while eliminating many of the following : 1. Open your printer's IP address in opening a Service Request with the Xerox printer driver. The user can click the alert to view instructions explaining how to fix the problem. 2. ...problem. Using a Web Browser To access PhaserSMART Technical Support from their printer to access PhaserSMART Technical Support: ■ PrintingScout ■ Web ■ CentreWare IS ■ The printer driver ■ Xerox Support Centre Using PrintingScout Software If PrintingScout displays an alert on the ...
...time for more critical tasks. How to users, while eliminating many of the following : 1. Open your printer's IP address in opening a Service Request with the Xerox printer driver. The user can click the alert to view instructions explaining how to fix the problem. 2. ...problem. Using a Web Browser To access PhaserSMART Technical Support from their printer to access PhaserSMART Technical Support: ■ PrintingScout ■ Web ■ CentreWare IS ■ The printer driver ■ Xerox Support Centre Using PrintingScout Software If PrintingScout displays an alert on the ...

System Administrator Guide
Page 9
... Guide 1-3 Select the Advanced Solutions link. 5. See also: Xerox Support Centre on the screen. Select the PhaserSMART Technical Support link. 5. Select your printer from the Xerox Support Centre: 1. Using the Xerox Support Centre To access PhaserSMART Technical Support from the Select Printer drop-down list. 3. Enter your printer's IP address in the dock. 2. Follow the instructions...
... Guide 1-3 Select the Advanced Solutions link. 5. See also: Xerox Support Centre on the screen. Select the PhaserSMART Technical Support link. 5. Select your printer from the Xerox Support Centre: 1. Using the Xerox Support Centre To access PhaserSMART Technical Support from the Select Printer drop-down list. 3. Enter your printer's IP address in the dock. 2. Follow the instructions...

System Administrator Guide
Page 10
... systems or is placed in the dock. 2. Xerox Support Centre Xerox Support Centre The Xerox Support Centre is a utility that the Xerox driver installer be used , the Xerox Support Centre is not installed on your printer from the Select Printer drop-down list. Also, the Xerox driver installer installs the Xerox printer driver, enabling users to work more critical tasks...
... systems or is placed in the dock. 2. Xerox Support Centre Xerox Support Centre The Xerox Support Centre is a utility that the Xerox driver installer be used , the Xerox Support Centre is not installed on your printer from the Select Printer drop-down list. Also, the Xerox driver installer installs the Xerox printer driver, enabling users to work more critical tasks...
System Administrator Guide
Page 11
...IS) CentreWare IS provides a simple interface that enables you to another. ■ Define network, administration, and security features for a network printer. ■ Set up and use a simple web-browser-based printing system. The list provides current status information and allows you to:...manuals and technical support information located on demand at high speed from your web browser. 2. A printer with their original driver settings then reprinted on the Xerox website. If JavaScript is required to the CentreWare IS Online Help. For complete information about CentreWare IS...
...IS) CentreWare IS provides a simple interface that enables you to another. ■ Define network, administration, and security features for a network printer. ■ Set up and use a simple web-browser-based printing system. The list provides current status information and allows you to:...manuals and technical support information located on demand at high speed from your web browser. 2. A printer with their original driver settings then reprinted on the Xerox website. If JavaScript is required to the CentreWare IS Online Help. For complete information about CentreWare IS...

System Administrator Guide
Page 12
Network Installation Features This chapter includes: ■ Using a Startup Network Configuration File on page 2-2 ■ Printer Driver Installation Features on page 2-3 ■ Discovery Protocols on page 2-5 See also: Advanced Features Guide at www.xerox.com/support System Administrator Guide 2-1
Network Installation Features This chapter includes: ■ Using a Startup Network Configuration File on page 2-2 ■ Printer Driver Installation Features on page 2-3 ■ Discovery Protocols on page 2-5 See also: Advanced Features Guide at www.xerox.com/support System Administrator Guide 2-1

System Administrator Guide
Page 13
For a list of the Xerox-unique PCL and PJL commands, see the CentreWare IS Online Help. Select TCP/IP. 3. Every time the printer is turned on or reset, the TFTP service on the TFTP server downloads the configuration file once an IP address is connected to a TCP/IP ... and confirmed in the Boot File Name field. 4. Under TFTP Settings, set these parameters, refer to your DHCP or BOOTP server documentation. ■ If the printer is connected to a TCP/IP network in the configuration file as loading fonts, color tables, and job patches, you can access over the TCP/IP...
For a list of the Xerox-unique PCL and PJL commands, see the CentreWare IS Online Help. Select TCP/IP. 3. Every time the printer is turned on or reset, the TFTP service on the TFTP server downloads the configuration file once an IP address is connected to a TCP/IP ... and confirmed in the Boot File Name field. 4. Under TFTP Settings, set these parameters, refer to your DHCP or BOOTP server documentation. ■ If the printer is connected to a TCP/IP network in the configuration file as loading fonts, color tables, and job patches, you can access over the TCP/IP...

System Administrator Guide
Page 14
...or connected via USB. You can download this driver from the web. When you run the installer, the main screen lists the Xerox printers of the PostScript-enabled printers, including: ■ Portrait, landscape, and rotated landscape orientations ■ Single-sided or two-sided printing ■ Single or... pages per sheet (including booklet printing) ■ Paper or transparency printing ■ Page size selection Note: For information about Xerox printer driver features that model discovered on the control panel. The driver contains basic features that are available with the...
...or connected via USB. You can download this driver from the web. When you run the installer, the main screen lists the Xerox printers of the PostScript-enabled printers, including: ■ Portrait, landscape, and rotated landscape orientations ■ Single-sided or two-sided printing ■ Single or... pages per sheet (including booklet printing) ■ Paper or transparency printing ■ Page size selection Note: For information about Xerox printer driver features that model discovered on the control panel. The driver contains basic features that are available with the...

System Administrator Guide
Page 15
... Software Installation on the left navigation panel. 5. Auto-Configuring Driver During installation, the bi-directional communication between the driver and a printer connected to download the driver. Click Support. 4. The controls for settings, such as 2-sided printing, tray selection, and secure ...printing are a Macintosh user, click Macintosh Driver Installer to a network identifies the printer's configuration (N, DN, DX, etc.) and the features available with the configuration such as, duplexing capability, additional trays, or a hard...
... Software Installation on the left navigation panel. 5. Auto-Configuring Driver During installation, the bi-directional communication between the driver and a printer connected to download the driver. Click Support. 4. The controls for settings, such as 2-sided printing, tray selection, and secure ...printing are a Macintosh user, click Macintosh Driver Installer to a network identifies the printer's configuration (N, DN, DX, etc.) and the features available with the configuration such as, duplexing capability, additional trays, or a hard...
System Administrator Guide
Page 16
...Location Protocol on page 2-6 ■ UPnP (Universal Plug and Play) on page 2-7 DDNS/WINS DDNS/WINS settings can be set by name. Launch your printer's IP address in CentreWare IS to it by BOOTP/DHCP. 8. Click the Properties tab. 4. If you selected On, follow the instructions on the left ...navigation panel. 5. These settings enable the printer to register its IP name and address so other devices on the network can enter a DDNS/WINS Name and DDNS Domain Name. ■ Off: The...
...Location Protocol on page 2-6 ■ UPnP (Universal Plug and Play) on page 2-7 DDNS/WINS DDNS/WINS settings can be set by name. Launch your printer's IP address in CentreWare IS to it by BOOTP/DHCP. 8. Click the Properties tab. 4. If you selected On, follow the instructions on the left ...navigation panel. 5. These settings enable the printer to register its IP name and address so other devices on the network can enter a DDNS/WINS Name and DDNS Domain Name. ■ Off: The...
System Administrator Guide
Page 17
...Address field (http://xxx.xxx.xxx.xxx). 3. Click the Save Changes button. Click the Protocols folder on the page. Launch your printer's IP address in the printer: 1. For more information, including a description of the fields, click the Help button in CentreWare IS to view the online help ...and password. 7. Click the Properties tab. 4. If you to view the online help . 8. Note: Turning Multicast DNS ON allows the printer to be automatically discovered on a TCP/IP network by name and allow you selected On, follow the instructions on the left navigation panel. ...
...Address field (http://xxx.xxx.xxx.xxx). 3. Click the Save Changes button. Click the Protocols folder on the page. Launch your printer's IP address in the printer: 1. For more information, including a description of the fields, click the Help button in CentreWare IS to view the online help ...and password. 7. Click the Properties tab. 4. If you to view the online help . 8. Note: Turning Multicast DNS ON allows the printer to be automatically discovered on a TCP/IP network by name and allow you selected On, follow the instructions on the left navigation panel. ...
System Administrator Guide
Page 18
... and password. 7. Select On or Off for SSDP Enable: ■ On: will enable the printer to send and receive Simple Device Discovery Protocol announcements and requests. ■ Off: The printer will not issue nor respond to -live, for a printer, locate devices on the network, and display those devices on the left navigation panel...). 3. Set the SSDP TTL value. Discovery Protocols UPnP (Universal Plug and Play) UPnP provides a simplified method to obtain an IP Address for SSDP. Enter your printer's IP address in the Auto IP Enable field, select On or Off. 8.
... and password. 7. Select On or Off for SSDP Enable: ■ On: will enable the printer to send and receive Simple Device Discovery Protocol announcements and requests. ■ Off: The printer will not issue nor respond to -live, for a printer, locate devices on the network, and display those devices on the left navigation panel...). 3. Set the SSDP TTL value. Discovery Protocols UPnP (Universal Plug and Play) UPnP provides a simplified method to obtain an IP Address for SSDP. Enter your printer's IP address in the Auto IP Enable field, select On or Off. 8.
System Administrator Guide
Page 19
Network Administration Features This chapter includes: ■ Printer Neighborhood on page 3-2 ■ Job Accounting on page 3-3 ■ Usage Profile Reports on page 3-4 ■ Xerox Usage Analysis Tool on page 3-5 ■ Protocol Control on page 3-6 ■ Cloning on page 3-14 System Administrator Guide 3-1
Network Administration Features This chapter includes: ■ Printer Neighborhood on page 3-2 ■ Job Accounting on page 3-3 ■ Usage Profile Reports on page 3-4 ■ Xerox Usage Analysis Tool on page 3-5 ■ Protocol Control on page 3-6 ■ Cloning on page 3-14 System Administrator Guide 3-1

System Administrator Guide
Page 20
... your network, check their status, and manage them remotely. The default printer search mode is Quick Phaser Search, which quickly finds the Phaser printers on your local subnet. Click the Printer Neighborhood button. A list of printers or to change other management tasks. Printer Neighborhood Printer Neighborhood Printer Neighborhood is a tool in CentreWare IS that enables you to perform other...
... your network, check their status, and manage them remotely. The default printer search mode is Quick Phaser Search, which quickly finds the Phaser printers on your local subnet. Click the Printer Neighborhood button. A list of printers or to change other management tasks. Printer Neighborhood Printer Neighborhood Printer Neighborhood is a tool in CentreWare IS that enables you to perform other...
System Administrator Guide
Page 21
...CentreWare IS: 1. Enter the printer's IP address in CentreWare IS to browse, download, clear, or disable job accounting records. Click Jobs. Each job record contains fields such as the titles, date, time, and length of print job pages is turned off or reset. Xerox recommends that enable you to ...view the online help. The data in the log file is saved when the printer is not stored in the printer. The Job Accounting Links page provides links that a hard drive be enabled...
...CentreWare IS: 1. Enter the printer's IP address in CentreWare IS to browse, download, clear, or disable job accounting records. Click Jobs. Each job record contains fields such as the titles, date, time, and length of print job pages is turned off or reset. Xerox recommends that enable you to ...view the online help. The data in the log file is saved when the printer is not stored in the printer. The Job Accounting Links page provides links that a hard drive be enabled...
System Administrator Guide
Page 22
...or to view the online help. 7. Click the Save Changes button. System Administrator Guide 3-4 Enter the printer's IP address in the Usage Profile Properties page. Click Jobs. 4. Enter the printer's IP address in your web browser. 2. Launch your web browser. 2. Click the Usage Profile Properties ... to Specific Address field. 6. Follow the instructions on the left navigation panel. 5. See MaiLinX Remote Printing on many aspects of printer usage, such as ink or toner used, number of pages printed, and paper types used, gathered during the life of the fields...
...or to view the online help. 7. Click the Save Changes button. System Administrator Guide 3-4 Enter the printer's IP address in the Usage Profile Properties page. Click Jobs. 4. Enter the printer's IP address in your web browser. 2. Launch your web browser. 2. Click the Usage Profile Properties ... to Specific Address field. 6. Follow the instructions on the left navigation panel. 5. See MaiLinX Remote Printing on many aspects of printer usage, such as ink or toner used, number of pages printed, and paper types used, gathered during the life of the fields...


