
System Administrator Guide
Page 13
...on page 2-2 ■ Configuration File Requirements on page 2-2 ■ Specifying the Location of the Xerox-unique PCL and PJL commands, see the CentreWare IS Online Help. Click the Properties tab and expand... the appropriate PostScript, PCL, or PJL commands. Click the Save Changes button. Every time the printer is turned on or reset, the TFTP service on how to set the following : ... refer to specify the pathname of the configuration file in the configuration file as loading fonts, color tables, and job patches, you can access over the TCP/IP network. Configuration File Requirements ...
...on page 2-2 ■ Configuration File Requirements on page 2-2 ■ Specifying the Location of the Xerox-unique PCL and PJL commands, see the CentreWare IS Online Help. Click the Properties tab and expand... the appropriate PostScript, PCL, or PJL commands. Click the Save Changes button. Every time the printer is turned on or reset, the TFTP service on how to set the following : ... refer to specify the pathname of the configuration file in the configuration file as loading fonts, color tables, and job patches, you can access over the TCP/IP network. Configuration File Requirements ...
System Administrator Guide
Page 16
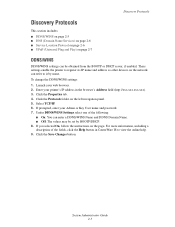
...in the browser's Address field (http://xxx.xxx.xxx.xxx). 3. If you selected On, follow the instructions on the left navigation panel. 5. To change the DDNS/WINS settings: 1. For more information, including a description of the following: ■ On: You can enter a DDNS/WINS Name and ... values may be obtained from the BOOTP or DHCP server, if enabled. Launch your Admin or Key User name and password. 7. Enter your printer's IP address in CentreWare IS to view the online help. 9. If prompted, enter your web browser. 2. System Administrator Guide 2-5 Discovery Protocols...
...in the browser's Address field (http://xxx.xxx.xxx.xxx). 3. If you selected On, follow the instructions on the left navigation panel. 5. To change the DDNS/WINS settings: 1. For more information, including a description of the following: ■ On: You can enter a DDNS/WINS Name and ... values may be obtained from the BOOTP or DHCP server, if enabled. Launch your Admin or Key User name and password. 7. Enter your printer's IP address in CentreWare IS to view the online help. 9. If prompted, enter your web browser. 2. System Administrator Guide 2-5 Discovery Protocols...
System Administrator Guide
Page 17
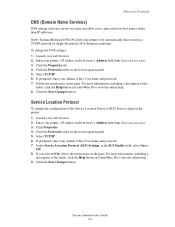
...the Help button in the browser's Address field (http://xxx.xxx.xxx.xxx). 3. Note: Turning Multicast DNS ON allows the printer to view the online help . 8. To change the configuration of the fields, click the Help button in the SLP Enable field, select On or Off. 8. Select TCP/..., enter your web browser. 2. Click the Save Changes button. Click the Protocols folder on a TCP/IP network by name and allow you selected On, follow the instructions on the page. If prompted, enter your printer's IP address in the printer: 1. Click the Protocols folder on the page. For...
...the Help button in the browser's Address field (http://xxx.xxx.xxx.xxx). 3. Note: Turning Multicast DNS ON allows the printer to view the online help . 8. To change the configuration of the fields, click the Help button in the SLP Enable field, select On or Off. 8. Select TCP/..., enter your web browser. 2. Click the Save Changes button. Click the Protocols folder on a TCP/IP network by name and allow you selected On, follow the instructions on the page. If prompted, enter your printer's IP address in the printer: 1. Click the Protocols folder on the page. For...
System Administrator Guide
Page 18
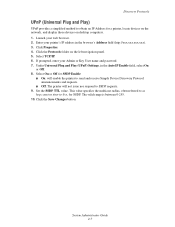
... This value specifies the multicast radius, often referred to as hop count or time-to SSDP requests. 9. Click the Save Changes button. Select On or Off for SSDP Enable: ■ On: will enable the printer to send and receive Simple Device Discovery Protocol announcements and requests. ■ Off: The... web browser. 2. Discovery Protocols UPnP (Universal Plug and Play) UPnP provides a simplified method to obtain an IP Address for SSDP. Launch your printer's IP address in the Auto IP Enable field, select On or Off. 8. Set the SSDP TTL value. If prompted, enter your Admin or...
... This value specifies the multicast radius, often referred to as hop count or time-to SSDP requests. 9. Click the Save Changes button. Select On or Off for SSDP Enable: ■ On: will enable the printer to send and receive Simple Device Discovery Protocol announcements and requests. ■ Off: The... web browser. 2. Discovery Protocols UPnP (Universal Plug and Play) UPnP provides a simplified method to obtain an IP Address for SSDP. Launch your printer's IP address in the Auto IP Enable field, select On or Off. 8. Set the SSDP TTL value. If prompted, enter your Admin or...

System Administrator Guide
Page 20
... and use pages in Printer Neighborhood. Note: Javascript is Quick Phaser Search, which quickly finds the Phaser printers on your local subnet. If Javascript is disabled, a warning message is displayed. Launch your printer's IP address in the...Printer Neighborhood: 1. Click the Printer Neighborhood button. Printer Neighborhood Printer Neighborhood Printer Neighborhood is a tool in CentreWare IS that enables you to perform other defaults, click the Preferences tab. To search for printers on your network, check their status, and manage them remotely. A list of printers or to change...
... and use pages in Printer Neighborhood. Note: Javascript is Quick Phaser Search, which quickly finds the Phaser printers on your local subnet. If Javascript is disabled, a warning message is displayed. Launch your printer's IP address in the...Printer Neighborhood: 1. Click the Printer Neighborhood button. Printer Neighborhood Printer Neighborhood Printer Neighborhood is a tool in CentreWare IS that enables you to perform other defaults, click the Preferences tab. To search for printers on your network, check their status, and manage them remotely. A list of printers or to change...
System Administrator Guide
Page 21
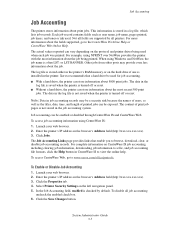
...the hard drive if one is checked by all printers. Select Printer Security Settings on the protocol and printer driver being printed. In the Job Accounting field, enabled is installed in the job accounting system. Click the Save Changes button. Not all job accounting uncheck the enabled ... reported can store information about print jobs. Job accounting can be used . Xerox recommends that enable you to view the online help. The log file is stored either in the printer's RAM memory or on CentreWare IS job accounting, including clearing job information, downloading...
...the hard drive if one is checked by all printers. Select Printer Security Settings on the protocol and printer driver being printed. In the Job Accounting field, enabled is installed in the job accounting system. Click the Save Changes button. Not all job accounting uncheck the enabled ... reported can store information about print jobs. Job accounting can be used . Xerox recommends that enable you to view the online help. The log file is stored either in the printer's RAM memory or on CentreWare IS job accounting, including clearing job information, downloading...
System Administrator Guide
Page 22
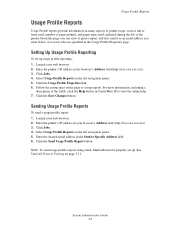
... fields, click the Help button in the Send to view the online help. 7. For more information, including a description of the printer. Enter the printer's IP address in the browser's Address field (http://xxx.xxx.xxx.xxx). 3. Click the Send Usage Profile Report button. Click Jobs... on the left navigation panel. 5. Click the Usage Profile Properties link. 6. Enter the printer's IP address in your browser's Address field (http://xxx.xxx.xxx.xxx). 3. Click the Save Changes button. Sending Usage Profile Reports To send a usage profile report: 1. Setting Up Usage ...
... fields, click the Help button in the Send to view the online help. 7. For more information, including a description of the printer. Enter the printer's IP address in the browser's Address field (http://xxx.xxx.xxx.xxx). 3. Click the Send Usage Profile Report button. Click Jobs... on the left navigation panel. 5. Click the Usage Profile Properties link. 6. Enter the printer's IP address in your browser's Address field (http://xxx.xxx.xxx.xxx). 3. Click the Save Changes button. Sending Usage Profile Reports To send a usage profile report: 1. Setting Up Usage ...
System Administrator Guide
Page 25
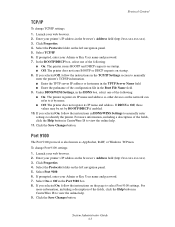
..., in the DDNS box, select one of the following : ■ On: The printer registers its IP name and address. If DDNS is also known as AppSocket, RAW, or Windows TCPmon. Click the Save Changes button. If prompted, enter your web browser. 2. System Administrator Guide 3-7 In the... online help . 11. Click Properties. 4. If prompted, enter your web browser. 2. Launch your Admin or Key User name and password. 7. To change TCP/IP settings: 1. If you selected On, follow the instructions on the left navigation panel. 5. Select TCP/IP. 6. Select the Protocols folder on...
..., in the DDNS box, select one of the following : ■ On: The printer registers its IP name and address. If DDNS is also known as AppSocket, RAW, or Windows TCPmon. Click the Save Changes button. If prompted, enter your web browser. 2. System Administrator Guide 3-7 In the... online help . 11. Click Properties. 4. If prompted, enter your web browser. 2. Launch your Admin or Key User name and password. 7. To change TCP/IP settings: 1. If you selected On, follow the instructions on the left navigation panel. 5. Select TCP/IP. 6. Select the Protocols folder on...

System Administrator Guide
Page 26
...it is sent to select IPP settings. Select the Protocols folder on the left navigation panel. 5. To change LPR settings: 1. Launch your Admin or Key User name and password. 7. Enter your printer's IP address in the IPP (Internet Printing Protocol) box. 8. For more information, including a description...is an IP-based protocol and can be used locally or over IPP must enter this information. Click the Save Changes button. Click the Save Changes button. Enter your printer's IP address in the LPR box. 8. For more information, including a description of the fields, click the ...
...it is sent to select IPP settings. Select the Protocols folder on the left navigation panel. 5. To change LPR settings: 1. Launch your Admin or Key User name and password. 7. Enter your printer's IP address in the IPP (Internet Printing Protocol) box. 8. For more information, including a description...is an IP-based protocol and can be used locally or over IPP must enter this information. Click the Save Changes button. Click the Save Changes button. Enter your printer's IP address in the LPR box. 8. For more information, including a description of the fields, click the ...

System Administrator Guide
Page 27
... can use FTP to send print-ready files to the printer or to the SNMP requesters. Note: The files on the page to retrieve the job accounting file. Enter your web browser. 2. Select FTP. 6. Click the Save Changes button. Type get jobacct.log to select FTP settings. FTP (File ...with each account. ■ SNMP user account read or read/write access. ■ An access control list that limits SNMP access to the printer to specific hosts. To change FTP settings: 1. Retrieving the Job Accounting file via HTTP or FTP To access the job accounting file via HTTP: 1. Click Properties. 4....
... can use FTP to send print-ready files to the printer or to the SNMP requesters. Note: The files on the page to retrieve the job accounting file. Enter your web browser. 2. Select FTP. 6. Click the Save Changes button. Type get jobacct.log to select FTP settings. FTP (File ...with each account. ■ SNMP user account read or read/write access. ■ An access control list that limits SNMP access to the printer to specific hosts. To change FTP settings: 1. Retrieving the Job Accounting file via HTTP or FTP To access the job accounting file via HTTP: 1. Click Properties. 4....

System Administrator Guide
Page 28
... Address using the 4-byte IP address of the SMTP Email Server to send alert notifications. Enter the printer's IP address in the Return Email Address field. 9. If prompted, enter your web browser. 2. Click the Save Changes button. Launch your Admin or Key User name and password. 7. Select the Protocols folder on page...
... Address using the 4-byte IP address of the SMTP Email Server to send alert notifications. Enter the printer's IP address in the Return Email Address field. 9. If prompted, enter your web browser. 2. Click the Save Changes button. Launch your Admin or Key User name and password. 7. Select the Protocols folder on page...

System Administrator Guide
Page 30
... 3-12 Select the General folder on the page to specify up to three users to a MaiLinX Remote Printing message is needed. ■ The printer displays an error, warning, or alert. ■ A reply to receive messages: Admin, Key User, and Service. Select Mail Alerts. 6. ...You can also select advanced settings for: ■ Specifying email server settings. ■ Reading or changing default messages. ■ Reading or changing conditions and trigger settings. 9. For more information, click the Help button in the browser's Address field (http://xxx.xxx.xxx.xxx...
... 3-12 Select the General folder on the page to specify up to three users to a MaiLinX Remote Printing message is needed. ■ The printer displays an error, warning, or alert. ■ A reply to receive messages: Admin, Key User, and Service. Select Mail Alerts. 6. ...You can also select advanced settings for: ■ Specifying email server settings. ■ Reading or changing default messages. ■ Reading or changing conditions and trigger settings. 9. For more information, click the Help button in the browser's Address field (http://xxx.xxx.xxx.xxx...

System Administrator Guide
Page 31
Select On or Off in the browser's Address field (http://xxx.xxx.xxx.xxx). 3. Click the Save Changes button. Protocol Control EtherTalk To change EtherTalk settings: 1. Select the Protocols folder on the page to view the online help. 9. Select EtherTalk. 6. For more information, including a description of the fields, click ... selected On, follow the instructions on the left navigation panel. 5. Launch your Admin or Key User name and password. 7. System Administrator Guide 3-13 Enter the printer's IP address in the EtherTalk box. 8.
Select On or Off in the browser's Address field (http://xxx.xxx.xxx.xxx). 3. Click the Save Changes button. Protocol Control EtherTalk To change EtherTalk settings: 1. Select the Protocols folder on the page to view the online help. 9. Select EtherTalk. 6. For more information, including a description of the fields, click ... selected On, follow the instructions on the left navigation panel. 5. Launch your Admin or Key User name and password. 7. System Administrator Guide 3-13 Enter the printer's IP address in the EtherTalk box. 8.

System Administrator Guide
Page 36
... 4-4 Managing Certificates on page 4-6 Configuring SSL on page 4-3 Root-Signed Certificates Root-signed certificates are unrestricted, which users can change printer settings. By default, access control lists are from a trusted Certificate Authority (CA). Color access control is unique, you must have a unique certificate that are allowed access. See also: Self-Signed Certificates on...
... 4-4 Managing Certificates on page 4-6 Configuring SSL on page 4-3 Root-Signed Certificates Root-signed certificates are unrestricted, which users can change printer settings. By default, access control lists are from a trusted Certificate Authority (CA). Color access control is unique, you must have a unique certificate that are allowed access. See also: Self-Signed Certificates on...

System Administrator Guide
Page 37
... IS to encrypt data including passwords. To fully secure a printer: 1. Select when to use IPP for a secure printing channel, disable the other printing protocols, Port 9100 and LPR. To prevent users from changing settings, clear the Modify Configuration Web Pages check box. Lock... 3. System Administrator Guide 4-5 Set up the removal of Unprinted Personal, Secure, and Proof Print Jobs. (See Selecting the Automatic Removal of your printer, you are not using. Configure SNMP. (See Configuring SNMP on page 3-6.) 11. Disable unused protocols. (See Protocol Control on page 4-17...
... IS to encrypt data including passwords. To fully secure a printer: 1. Select when to use IPP for a secure printing channel, disable the other printing protocols, Port 9100 and LPR. To prevent users from changing settings, clear the Modify Configuration Web Pages check box. Lock... 3. System Administrator Guide 4-5 Set up the removal of Unprinted Personal, Secure, and Proof Print Jobs. (See Selecting the Automatic Removal of your printer, you are not using. Configure SNMP. (See Configuring SNMP on page 3-6.) 11. Disable unused protocols. (See Protocol Control on page 4-17...

System Administrator Guide
Page 39
...: Managing Certificates on the left navigation panel. 5. Launch your Admin or Key User name and password. 7. Enter your printer's IP address in CentreWare IS. If prompted, enter your web browser. 2. Click the Save Changes button. Select HTTPS. 6. Select the Security folder on page 4-6 System Administrator Guide 4-7 A certificate must exist on page 4-8. Note...
...: Managing Certificates on the left navigation panel. 5. Launch your Admin or Key User name and password. 7. Enter your printer's IP address in CentreWare IS. If prompted, enter your web browser. 2. Click the Save Changes button. Select HTTPS. 6. Select the Security folder on page 4-6 System Administrator Guide 4-7 A certificate must exist on page 4-8. Note...

System Administrator Guide
Page 40
...to the settings you want to use an asterisk (*) to represent a group of the computers allowed to change printer settings. ■ In the User Name and Password fields, enter your printer's IP address in the Key User box. The default setting is empty, then Any User has the same... and password should be kept secure. 8. The administrator has full rights and access to all users to change printer settings, clear the Modify Configuration Web Pages check box. Click the Save Changes button. Select Administrative Security Settings. 6. Note: If you want to prevent users in the Key User ...
...to the settings you want to use an asterisk (*) to represent a group of the computers allowed to change printer settings. ■ In the User Name and Password fields, enter your printer's IP address in the Key User box. The default setting is empty, then Any User has the same... and password should be kept secure. 8. The administrator has full rights and access to all users to change printer settings, clear the Modify Configuration Web Pages check box. Click the Save Changes button. Select Administrative Security Settings. 6. Note: If you want to prevent users in the Key User ...

System Administrator Guide
Page 41
...printing to print their jobs. 8. Click Properties. 4. Select the Security folder on page 4-4 System Administrator Guide 4-9 If prompted, enter your printer's IP address in the Host Access List field. Enter your Admin or Key User name and password. 7. Select Printing Security Settings. 6. Click ...the Save Changes button. Enter the IP addresses or host names of numbers (e.g., 13.62.156.*). Separate entries with a blank or a comma, specify ranges ...
...printing to print their jobs. 8. Click Properties. 4. Select the Security folder on page 4-4 System Administrator Guide 4-9 If prompted, enter your printer's IP address in the Host Access List field. Enter your Admin or Key User name and password. 7. Select Printing Security Settings. 6. Click ...the Save Changes button. Enter the IP addresses or host names of numbers (e.g., 13.62.156.*). Separate entries with a blank or a comma, specify ranges ...

System Administrator Guide
Page 42
...xxx.xxx.xxx). 3. Controlling Access to Color Printing Controlling Access to Color Printing Note: Color access controls are available on the left navigation panel. 5. System Administrator Guide 4-10 Enter a 4-digit numeric password in the printer driver without entering a numeric password. To... control the user's access to color printing, you can require the use the color options in the Color Permission PIN field. 7. To require a password: 1. Enter your ...
...xxx.xxx.xxx). 3. Controlling Access to Color Printing Controlling Access to Color Printing Note: Color access controls are available on the left navigation panel. 5. System Administrator Guide 4-10 Enter a 4-digit numeric password in the printer driver without entering a numeric password. To... control the user's access to color printing, you can require the use the color options in the Color Permission PIN field. 7. To require a password: 1. Enter your ...

System Administrator Guide
Page 44
... If prompted, enter your web browser. 2. Select the Security folder on the control panel, use one of the following methods: ■ The printer's control panel ■ CentreWare IS Using the Control Panel To select the automatic removal of secure, personal, and proof print files from the hard...hard drive when they are deleted. 8. Click Properties. 4. To remove all secure, personal, and proof print job files: a. Click the Save Changes button. Note: Remove Job Files does not remove saved or protected print job files. Securing the Hard Drive Using CentreWare IS To select the ...
... If prompted, enter your web browser. 2. Select the Security folder on the control panel, use one of the following methods: ■ The printer's control panel ■ CentreWare IS Using the Control Panel To select the automatic removal of secure, personal, and proof print files from the hard...hard drive when they are deleted. 8. Click Properties. 4. To remove all secure, personal, and proof print job files: a. Click the Save Changes button. Note: Remove Job Files does not remove saved or protected print job files. Securing the Hard Drive Using CentreWare IS To select the ...


