
Owner's Manual
Page 54
... Library Operation 74 Using Libraries 75 Remote Control 83 About Remote Function 83 Pro Tools Remote Layer 83 Nuendo/Cubase Remote Layer 93 Other DAW Remote Layer 94 MIDI Remote Layer 94 Machine Control Function 98 MIDI 100 MIDI & the 01V96i 100 MIDI Port Setup 101 Assigning Scenes to Program Changes for Remote... 156 Scene Memory to Program Change Table 156 Initial Parameter to Control Change Table 157 MIDI Data Format 173 MIDI Implementation Chart End of Manual 01V96i-Owner's Manual
... Library Operation 74 Using Libraries 75 Remote Control 83 About Remote Function 83 Pro Tools Remote Layer 83 Nuendo/Cubase Remote Layer 93 Other DAW Remote Layer 94 MIDI Remote Layer 94 Machine Control Function 98 MIDI 100 MIDI & the 01V96i 100 MIDI Port Setup 101 Assigning Scenes to Program Changes for Remote... 156 Scene Memory to Program Change Table 156 Initial Parameter to Control Change Table 157 MIDI Data Format 173 MIDI Implementation Chart End of Manual 01V96i-Owner's Manual
Reference Manual
Page 2
... Library Operation 74 Using Libraries 75 Remote Control 83 About Remote Function 83 Pro Tools Remote Layer 83 Nuendo/Cubase Remote Layer 93 Other DAW Remote Layer 94 MIDI Remote Layer 94 Machine Control Function 98 MIDI 100 MIDI & the 01V96i 100 MIDI Port Setup 101 Assigning Scenes to Program Changes for Remote... 156 Scene Memory to Program Change Table 156 Initial Parameter to Control Change Table 157 MIDI Data Format 173 MIDI Implementation Chart End of Manual 01V96i-Reference Manual
... Library Operation 74 Using Libraries 75 Remote Control 83 About Remote Function 83 Pro Tools Remote Layer 83 Nuendo/Cubase Remote Layer 93 Other DAW Remote Layer 94 MIDI Remote Layer 94 Machine Control Function 98 MIDI 100 MIDI & the 01V96i 100 MIDI Port Setup 101 Assigning Scenes to Program Changes for Remote... 156 Scene Memory to Program Change Table 156 Initial Parameter to Control Change Table 157 MIDI Data Format 173 MIDI Implementation Chart End of Manual 01V96i-Reference Manual

Reference Manual
Page 83
...Layer) To use the User Defined buttons. Download the Yamaha Steinberg USB Driver from the 01V96i top panel. Install the driver in your computer via the USB or an optional MY16-mLAN card installed in Pro Tools. This layer is connected to a target device via MIDI...an external recording machine that supports the protocol used by using Remote layer. Pro Tools Remote Layer The 01V96i features Remote Layer target especially designed for more information about Pro Tools settings. 01V96i-Reference Manual Remote Control Remote Control 83 Remote Control This chapter describes the...
...Layer) To use the User Defined buttons. Download the Yamaha Steinberg USB Driver from the 01V96i top panel. Install the driver in your computer via the USB or an optional MY16-mLAN card installed in Pro Tools. This layer is connected to a target device via MIDI...an external recording machine that supports the protocol used by using Remote layer. Pro Tools Remote Layer The 01V96i features Remote Layer target especially designed for more information about Pro Tools settings. 01V96i-Reference Manual Remote Control Remote Control 83 Remote Control This chapter describes the...

Reference Manual
Page 84
...with that you will be unable to select USB as described in the installation guide included in Pro Tools. 01V96i-Reference Manual Launch Pro Tools. 6. Move the cursor to the first DAW parameter box in your Mac using a USB ...Pro Tools remotely, you finish setting the parameters, close the window. ton repeatedly until the DIO/Setup | MIDI/Host page appears. 2. Install the driver in the SPECIAL FUNCTIONS section, then rotate the Parameter wheel to use the Remote function. Configuring the 01V96i Follow the steps below to open the Peripherals window. 7. Download the Yamaha...
...with that you will be unable to select USB as described in the installation guide included in Pro Tools. 01V96i-Reference Manual Launch Pro Tools. 6. Move the cursor to the first DAW parameter box in your Mac using a USB ...Pro Tools remotely, you finish setting the parameters, close the window. ton repeatedly until the DIO/Setup | MIDI/Host page appears. 2. Install the driver in the SPECIAL FUNCTIONS section, then rotate the Parameter wheel to use the Remote function. Configuring the 01V96i Follow the steps below to open the Peripherals window. 7. Download the Yamaha...

Reference Manual
Page 85
... position. By default, the Remote layer target is selected, the 01V96i's top panel faders and other channel buttons are selected Pro Tools timecode format is now available for remote control. Note: When the Pro Tools Remote layer is set to remotely control Pro Tools. Remote Control Pro Tools Remote Layer 85 5. The following display modes using these buttons: ■...
... position. By default, the Remote layer target is selected, the 01V96i's top panel faders and other channel buttons are selected Pro Tools timecode format is now available for remote control. Note: When the Pro Tools Remote layer is set to remotely control Pro Tools. Remote Control Pro Tools Remote Layer 85 5. The following display modes using these buttons: ■...

Reference Manual
Page 86
... also assign outboard effects processors.) • COMPARE You can compare your edits with the Compare button in the Pro Tools Inserts and Sends windows. • BYPASS Turning on this button bypasses the plug-ins (see page 91). ...• Information box This box displays plug-in parameter names, values, alarm messages from Pro Tools, etc. • Rotary controls 1-4 These controls enable you to select plug-ins or adjust the selected plug-...ASSIGN/EDIT section This section enables you to insert plug-ins into Pro Tools channels. (If you are displayed. 01V96i-Reference Manual
... also assign outboard effects processors.) • COMPARE You can compare your edits with the Compare button in the Pro Tools Inserts and Sends windows. • BYPASS Turning on this button bypasses the plug-ins (see page 91). ...• Information box This box displays plug-in parameter names, values, alarm messages from Pro Tools, etc. • Rotary controls 1-4 These controls enable you to select plug-ins or adjust the selected plug-...ASSIGN/EDIT section This section enables you to insert plug-ins into Pro Tools channels. (If you are displayed. 01V96i-Reference Manual

Reference Manual
Page 87
...Channel Strip section • [SEL] buttons These buttons select Pro Tools channels, inserts, and Automation mode. • [SOLO] buttons These buttons solo Pro Tools channels. The button indicator flashes while the transport section is selected, the 01V96i controls on /off . Move the cursor to the parameter ... computer keyboard. • Parameter wheel The Parameter wheel enables you can operate the transport section and select various Pro Tools modes from the 01V96i top panel. While you assign any of 194 parameters to reset the corresponding channel fader level. In particular, ...
...Channel Strip section • [SEL] buttons These buttons select Pro Tools channels, inserts, and Automation mode. • [SOLO] buttons These buttons solo Pro Tools channels. The button indicator flashes while the transport section is selected, the 01V96i controls on /off . Move the cursor to the parameter ... computer keyboard. • Parameter wheel The Parameter wheel enables you can operate the transport section and select various Pro Tools modes from the 01V96i top panel. While you assign any of 194 parameters to reset the corresponding channel fader level. In particular, ...

Reference Manual
Page 88
... the Edit menu's Undo/Redo command. Executes the Channel Scroll operation. DAW RTZ Moves the playback cursor to the end of the Pro Tools Group list. DAW AUTO WRITE DAW AUTO TRIM DAW AUTO OFF DAW AUTO SUSPEND Cancels Automation recording and playback for a duration specified ...Correspond to which these functions CTRL/CLUCH are assigned) along with another DAW ALT/FINE button enables you to scroll channels horizontally. 01V96i-Reference Manual When Automation is assigned) enables you press and hold the button to which this function is assigned and pressing a button...
... the Edit menu's Undo/Redo command. Executes the Channel Scroll operation. DAW RTZ Moves the playback cursor to the end of the Pro Tools Group list. DAW AUTO WRITE DAW AUTO TRIM DAW AUTO OFF DAW AUTO SUSPEND Cancels Automation recording and playback for a duration specified ...Correspond to which these functions CTRL/CLUCH are assigned) along with another DAW ALT/FINE button enables you to scroll channels horizontally. 01V96i-Reference Manual When Automation is assigned) enables you press and hold the button to which this function is assigned and pressing a button...

Reference Manual
Page 89
... Channel Levels 1. Press and hold down the [AUX 6] button and press the desired [SEL] button to add. Muting Channels To mute Pro Tools channels, press the [ON] buttons. The button indicator lights up when recording starts. play mode. Pressing the [AUX 7] button repeatedly toggles... adjust monaural channel panpots, first be ineffective. 4. Pressing the button while the button indicator is in Pro Tools: Implicit mute and Explicit mute. If the indicator is lit steadily. 01V96i-Reference Manual Operate the faders to select Channel Dis- There are turned off . In this mode,...
... Channel Levels 1. Press and hold down the [AUX 6] button and press the desired [SEL] button to add. Muting Channels To mute Pro Tools channels, press the [ON] buttons. The button indicator lights up when recording starts. play mode. Pressing the [AUX 7] button repeatedly toggles... adjust monaural channel panpots, first be ineffective. 4. Pressing the button while the button indicator is in Pro Tools: Implicit mute and Explicit mute. If the indicator is lit steadily. 01V96i-Reference Manual Operate the faders to select Channel Dis- There are turned off . In this mode,...

Reference Manual
Page 90
... by operating the faders if faders, [ON] buttons, and the [PAN] control are in the INSERT ASSIGN/EDIT section. 01V96i-Reference Manual Muting Sends A-E You can adjust Pro Tools Send (A-E) send levels as follows. 1. Press the [F2] button to select Channel Dis- The [AUX 8] button indicator ...the [PAN] control to select the desired Sends (A-E). 3. You can now select a channel to which you can pan channel signals sent to Pro Tools Channels You can set the right panpot. tons to control the currently-selected Aux send. Refer to pre or post. 1. Grouped channels are ...
... by operating the faders if faders, [ON] buttons, and the [PAN] control are in the INSERT ASSIGN/EDIT section. 01V96i-Reference Manual Muting Sends A-E You can adjust Pro Tools Send (A-E) send levels as follows. 1. Press the [F2] button to select Channel Dis- The [AUX 8] button indicator ...the [PAN] control to select the desired Sends (A-E). 3. You can now select a channel to which you can pan channel signals sent to Pro Tools Channels You can set the right panpot. tons to control the currently-selected Aux send. Refer to pre or post. 1. Grouped channels are ...

Reference Manual
Page 91
...The current page number and the plug-in name appear for a moment immediately after you can now select plug-ins. Remote Control Pro Tools Remote Layer 91 If the PARAM button is automatically selected and the Information box indicates the selected plug-in parameters. If you press ...to select INSERT. 2 1 5. In the same way, assign plug-ins to change the parameter indication in you press the Tab Scroll buttons. 01V96i-Reference Manual Use the Tab Scroll buttons to display the parameter value you want to adjust the parameters. 7. Press the corresponding [SEL] button ...
...The current page number and the plug-in name appear for a moment immediately after you can now select plug-ins. Remote Control Pro Tools Remote Layer 91 If the PARAM button is automatically selected and the Information box indicates the selected plug-in parameters. If you press ...to select INSERT. 2 1 5. In the same way, assign plug-ins to change the parameter indication in you press the Tab Scroll buttons. 01V96i-Reference Manual Use the Tab Scroll buttons to display the parameter value you want to adjust the parameters. 7. Press the corresponding [SEL] button ...

Reference Manual
Page 92
... you assigned the DAW SCRUB parameter in Step 1. Press the User Defined button to one of Pro Tools. 3. Note: The Scrub/Shuttle operation might be stopped unexpectedly by viewing the corresponding User Defined button indicator. 01V96i-Reference Manual When you must switch layers to scrub or shuttle backwards. Before bypassing plug-ins, you...
... you assigned the DAW SCRUB parameter in Step 1. Press the User Defined button to one of Pro Tools. 3. Note: The Scrub/Shuttle operation might be stopped unexpectedly by viewing the corresponding User Defined button indicator. 01V96i-Reference Manual When you must switch layers to scrub or shuttle backwards. Before bypassing plug-ins, you...
Reference Manual
Page 93
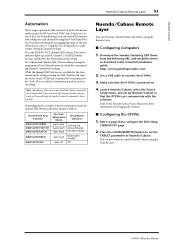
... to be transmitted to Pro Tools. Press the LAYER [REMOTE] button to set up Nuendo/Cubase so that the 01V96i can now remotely control Nuendo/Cubase using the Remote Layer. 01V96i-Reference Manual Press the STEREO OUT channel [SEL] button. Download the Yamaha Steinberg USB Driver from the...button indicator lights up the software. ■ Configuring the 01V96i 1. Refer to page 84 to configure the DIO/Setup | MIDI/HOST page. 2. Remote Control Nuendo/Cubase Remote Layer 93 Automation If you assign a parameter that controls Pro Tools Automation mode (such as DAW Auto Read, DAW Auto ...
... to be transmitted to Pro Tools. Press the LAYER [REMOTE] button to set up Nuendo/Cubase so that the 01V96i can now remotely control Nuendo/Cubase using the Remote Layer. 01V96i-Reference Manual Press the STEREO OUT channel [SEL] button. Download the Yamaha Steinberg USB Driver from the...button indicator lights up the software. ■ Configuring the 01V96i 1. Refer to page 84 to configure the DIO/Setup | MIDI/HOST page. 2. Remote Control Nuendo/Cubase Remote Layer 93 Automation If you assign a parameter that controls Pro Tools Automation mode (such as DAW Auto Read, DAW Auto ...
Reference Manual
Page 94
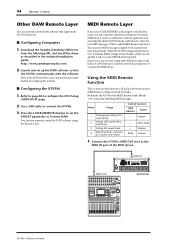
... 01V96i's MIDI OUT port to configure the DIO/Setup | MIDI/HOST page. 2. http://www.yamahaproaudio.com/ 2. Refer to the DAW software's user's manual for the Remote Layer, you select USER DEFINED as the target for more information on setting up the DAW software so that supports the Pro Tools...the parameters of external MIDI devices (such as described in four banks. When the 01V96i is called MIDI Remote function.) You can remotely control the parameters of a connected MIDI device. Download the Yamaha Steinberg USB Driver from the factory, it includes MIDI settings in these banks, ...
... 01V96i's MIDI OUT port to configure the DIO/Setup | MIDI/HOST page. 2. http://www.yamahaproaudio.com/ 2. Refer to the DAW software's user's manual for the Remote Layer, you select USER DEFINED as the target for more information on setting up the DAW software so that supports the Pro Tools...the parameters of external MIDI devices (such as described in four banks. When the 01V96i is called MIDI Remote function.) You can remotely control the parameters of a connected MIDI device. Download the Yamaha Steinberg USB Driver from the factory, it includes MIDI settings in these banks, ...

Reference Manual
Page 115
... section 8 STEREO section 8 USER DEFINED KEYS section ..... 9 Control Surface & Rear Panel 6 COPY 15 Cursor buttons 9 D Data entry section 9 DAW 93 Nuendo/Cubase 93 Other 94 Pro tools 83 Remote 83 DEC & INC buttons 9 Delay 18, 30, 37 DELAY SCALE 18 FB.GAIN 19 DELAY LCR 133 DELAY SCALE 18 DELAY+ER 139... preference ..........110 Display section 9 DIST->DELAY 140 DISTORTION 136 Dithering 15 DIV 56 DOUBLE CHANNEL 16 DOUBLE SPEED 16 Dual Phaser 145 DUAL PITCH 135 01V96i-Reference Manual
... section 8 STEREO section 8 USER DEFINED KEYS section ..... 9 Control Surface & Rear Panel 6 COPY 15 Cursor buttons 9 D Data entry section 9 DAW 93 Nuendo/Cubase 93 Other 94 Pro tools 83 Remote 83 DEC & INC buttons 9 Delay 18, 30, 37 DELAY SCALE 18 FB.GAIN 19 DELAY LCR 133 DELAY SCALE 18 DELAY+ER 139... preference ..........110 Display section 9 DIST->DELAY 140 DISTORTION 136 Dithering 15 DIV 56 DOUBLE CHANNEL 16 DOUBLE SPEED 16 Dual Phaser 145 DUAL PITCH 135 01V96i-Reference Manual

Reference Manual
Page 117
... PHONES LEVEL control 7 PLUG-IN 107 Plug-ins 90 POWER ON/OFF switch 11 Power section 11 Prefer1 page 109 Prefer2 page 110 Preferences 109 Pro tools 83, 89 Automation 93 Channel display mode 86 Channel levels 89 Control surface operation 87 Explicit mute 89 Flip mode 90 Implicit mute 89 Insert... CONTROL section 98 MIDI messages 96 MIDI remote 94 Nuendo 83 ProTools 83 REMOTE 83 Target parameter 85 TRACK ARMING section 98 TRANSPORT section 99 01V96i-Reference Manual
... PHONES LEVEL control 7 PLUG-IN 107 Plug-ins 90 POWER ON/OFF switch 11 Power section 11 Prefer1 page 109 Prefer2 page 110 Preferences 109 Pro tools 83, 89 Automation 93 Channel display mode 86 Channel levels 89 Control surface operation 87 Explicit mute 89 Flip mode 90 Implicit mute 89 Insert... CONTROL section 98 MIDI messages 96 MIDI remote 94 Nuendo 83 ProTools 83 REMOTE 83 Target parameter 85 TRACK ARMING section 98 TRANSPORT section 99 01V96i-Reference Manual

Reference Manual
Page 118
118 Index REMOTE button 8, 83 Remote Layer Nuendo/Cubase 93 Pro tools 83 RESET BOTH 27 REV+CHORUS 137 REV+FLANGE 137 REV+SYMPHO 138 REV->CHORUS 137 REV->FLANGE 138 REV->PAN 138 REV->SYMPHO 138 ... 8 Vintage Phaser 144 W Window Changing the surround mode ......53 Channel Pairing 27 Copy operation 42 WORD CLOCK IN connector 10 WORD CLOCK OUT connector .......10 01V96i-Reference Manual
118 Index REMOTE button 8, 83 Remote Layer Nuendo/Cubase 93 Pro tools 83 RESET BOTH 27 REV+CHORUS 137 REV+FLANGE 137 REV+SYMPHO 138 REV->CHORUS 137 REV->FLANGE 138 REV->PAN 138 REV->SYMPHO 138 ... 8 Vintage Phaser 144 W Window Changing the surround mode ......53 Channel Pairing 27 Copy operation 42 WORD CLOCK IN connector 10 WORD CLOCK OUT connector .......10 01V96i-Reference Manual