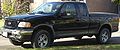
2000 Ford F150 Support Question
2000 Ford F150 Support Question
Find answers below for this question about 2000 Ford F150.Need a 2000 Ford F150 manual? We have 7 online manuals for this item!
Question posted by back2backnd2009arch on August 16th, 2014
Can The Center Piece Of The Rear Sliding Glass Be Reinstalled?
i broke the center piece of my rear window. i purchased just the middle glass and cleaned and removed sliding glass groove inserts yet i can't get the window back in
Current Answers
Related Manual Pages
Owner's Manual - Page 6
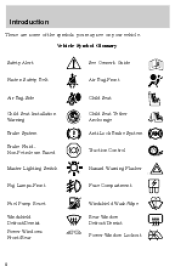
... Child Seat Tether Anchorage Anti-Lock Brake System Traction Control
Hazard Warning Flasher
Fog Lamps-Front
Fuse Compartment
Fuel Pump Reset Windshield Defrost/Demist Power Windows Front/Rear
Windshield Wash/Wipe Rear Window Defrost/Demist Power Window Lockout
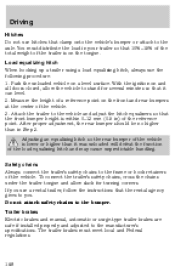
6 Introduction
These are some of the symbols you may see on your vehicle.
Owner's Manual - Page 54
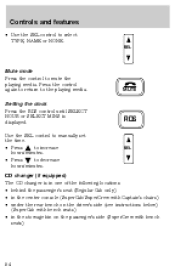
... SELECT MINS is in one of the following locations: • behind the passenger's seat (Regular Cab only) • in the center console (SuperCab/SuperCrew with Captain's chairs) • under the rear bench on the driver's side (see instructions below) (SuperCab with bench seats) • in the stowage bin on the passenger's side...
Owner's Manual - Page 57
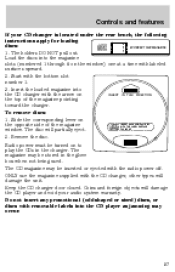
... upward. 2. Remove the disc. Insert the loaded magazine into the CD player as jamming may be stored in the changer. Slide the corresponding lever on INSERT IN THIS DIRECTION the top of the magazine window. Coins and foreign objects will damage the CD player and void your CD changer is located under the rear bench, the...
Owner's Manual - Page 58
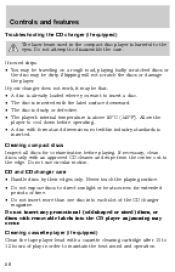
...; The disc is inserted with removable labels into each slot of the CD changer magazine. Never touch the playing surface. • Do not expose discs to maintain the best sound and operation.
58 Cleaning cassette player (if equipped) Clean the tape player head with format and dimensions not within industry standards is inserted. Skipping will...
Owner's Manual - Page 85
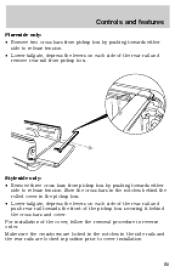
... tension. • Lower tailgate, depress the levers on each side of the rear rail and remove rear rail from pickup box by pushing towards either side to release tension. Stow the... order. Controls and features
Flareside only: • Remove two cross bars from pickup box by pushing towards the front of the rear rail and push rear rail towards either side to cover installation.
85 For...
Owner's Manual - Page 127
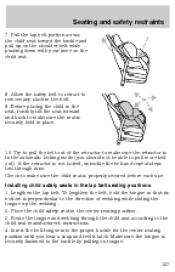
...and feel it latch. Insert the belt tongue into the proper buckle for the center seating position until you should not be able to pull the belt out of webbing while sliding the tongue up on the... shoulder belt while pushing down with your knee on tongue.
127 Allow the safety belt to retract to make sure the seat is securely held in the belt. 9. Check to remove...
Owner's Manual - Page 143
...vehicle. These special design features, such as passenger cars any wheel(s) • high crown in center of road • high crosswinds • wheels out of alignment • loose or worn components ... at speeds as high as larger tires and increased ground clearance, give the vehicle a higher center of gravity than a person wearing a seat belt. Your vehicle has special design and equipment ...
Owner's Manual - Page 161

... damage to haul more cargo and people than the originals because they may raise the center of gravity of the vehicle. 161 Under no circumstance should these limitations. If you...vehicle weight and Front and rear gross axle weight rating limits. The Safety Certification Label, found on the certification label. Do not use replacement tires with a higher center of cargo carried). Always...
Owner's Manual - Page 168
Park the unloaded vehicle on the front and rear bumpers at the center of the trailer is on the tongue. Safety chains Always connect the trailer... vehicle. Do not attach safety chains to the frame or hook retainers of the reference point. After proper adjustment, the rear bumper should be no higher than it can level. 2. Load equalizing hitch When hooking up a trailer using a load ...
Owner's Manual - Page 186

Insert the jack handle into the rear bumper opening. Roadside emergencies
Location of the engine compartment
Jack handle
Removing the spare tire 1. If equipped with a two piece lug wrench, assemble the lug wrench as shown in the following locations:
Tool Spare tire Jack, lug nut wrench Location Under the vehicle, just forward of the rear bumper Regular...
Owner's Manual - Page 187
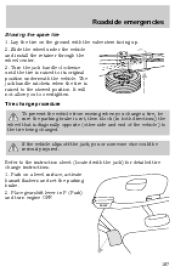
... tire is diagonally opposite (other side and end of the vehicle) to the tire being changed. Refer to overtighten. Slide the wheel under the vehicle and install the retainer through the wheel center. 3. If the vehicle slips off the jack, you to the instruction sheet (located with the valve stem facing up...
Owner's Manual - Page 190

...fully tighten the lug nuts until the wheel is facing outward. Remove the jack and fully tighten 1 the lug nuts in injury ... battery can burn skin, eyes, and clothing, if contacted.
190 Reinstall the lug nuts until the wheel has been lowered. 10. The jack...for changing the tire. • Never use the front or rear differential as a jacking point. 8. Roadside emergencies
To lessen the ...
Owner's Manual - Page 237

... the bulb by turning it counterclockwise, then slide the ring off of guide ribs to break...removed for an extended period of time, contaminants may enter the lamp housings and affect lamp performance. If equipped, remove...release the headlamp assembly. 5. Open the hood. 3. Remove bulb retainer ring by pulling rearward. 7. Disconnect the electrical...lamps Do not remove lamp bulbs unless they can be...
Owner's Manual - Page 238

...Insert the glass end of the lamp assembly. 10. Maintenance and care
9. Install bulb retaining ring over the plastic base and lock the ring into the plastic base until the plastic base contacts the rear... into the guide ribs. 14.
When the grooves in the plastic base are inserted into the proper holes and into place. Remove screw from the lamp assembly. 2. Straighten alignment...
Owner's Manual - Page 244

... it is running engine may cause internal damage. Do not clean plastic parts with a tar remover if necessary. Cleaning the wiper blades, windshield and rear window If the wiper blades do not use fuel, kerosene, paint thinner or other solvents.
244 water in the running ; Cleaning the exterior lamps Wash with undiluted windshield washer solution or...
Owner's Manual - Page 245
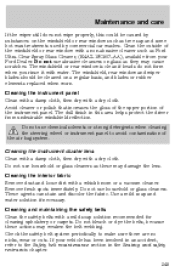
... a dry cloth. Do not use household or glass cleaners as these actions may cause scratches. Cleaning the instrument cluster lens Clean with a damp cloth, then dry with a dry cloth. Cleaning the interior fabric Remove dust and loose dirt with water. Do not use household or glass cleaners. The windshield, rear window and wiper blades should be caused by...
Owner's Manual - Page 268

... nets Cargo organizers (interior) Cargo storage bin (regular cab) Cargo trays (interior) Celluar phone holder Dash trim (wood grain) Engine block heaters Manual sliding rear window Moon roof deflector Power sliding rear window Rapid heat system Tire step Travel equipment Bed mount bike carrier Bumper mount bike carrier Daytime running lights (DRL) Fog lights Heavy-duty...
Four Wheeling Supplement 1st Printing - Page 12

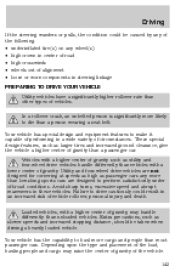
...to avoid splashing, if the ignition system gets wet, the vehicle may make it necessary to slide and swing around during braking.
This will also help prevent spinning the wheels while maintaining sufficient ...to a low gear and maintain steady pressure on the brake pedal. This could cause the rear to travel 12 Avoid water higher than the bottom of 4WD or AWD vehicles without also ...
SVT Supplement 2nd Printing - Page 5
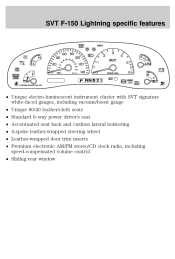
... • Standard 6-way power driver's seat • Accentuated seat back and cushion lateral bolstering • 4-spoke leather-wrapped steering wheel • Leather-wrapped door trim inserts • Premium electronic AM/FM stereo/CD clock radio, including speed-compensated volume control • Sliding rear window
SVT Supplement 2nd Printing - Page 10
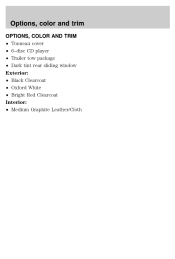
Options, color and trim
OPTIONS, COLOR AND TRIM • Tonneau cover • 6-disc CD player • Trailer tow package • Dark tint rear sliding window Exterior: • Black Clearcoat • Oxford White • Bright Red Clearcoat Interior: • Medium Graphite Leather/Cloth
Similar Questions

What Fuse Or Relay Controls The Rear Power Sliding Window On A 98 F 150
(Posted by DonJjonegr 9 years ago)

On A 2004 F150 What Number Fuse Is The Back Sliding Glass
(Posted by Krlubdub 9 years ago)

Center Console On Ford F150 Pick Is Stuck. How Do I Release It
(Posted by ilclarkd 10 years ago)


Location Of The Oil Pump On An 2000 F150 Ford V6 (4.26l) Engine.
(Posted by fhernandez2 11 years ago)