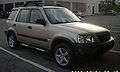
1998 Honda CR-V Support Question
1998 Honda CR-V Support Question
Find answers below for this question about 1998 Honda CR-V.Need a 1998 Honda CR-V manual? We have 1 online manual for this item!
Question posted by kenzogs on March 14th, 2015
How Do I Remove The Headlight To Change A Parklight Bulb.
I need to replace a front parklight. I have removed the two 6mm bolts but there seems to be something still holding it at the bottom.
Current Answers
Answer #1: Posted by Brainerd on March 14th, 2015 12:12 AM
Brainerd

Member since:
May 24th, 2014 Points: 759,620

Member since:
May 24th, 2014 Points: 759,620
Hi, please refer to the tutorial video here:
https://m.youtube.com/watch?v=HpQkhiVQEPE
https://m.youtube.com/watch?v=HpQkhiVQEPE
I hope this helps you!
Please press accept to reward my effort or post again with more details if not satisfied.
Regards, Brainerd
Related Manual Pages
Owner's Manual - Page 47

... you can result in serious injury or death if the airbags do not inflate when needed.
Driver and Passenger Safety However, if the light comes on after the engine starts.... System is working properly. airbags and the control unit must be replaced. The SRS indicator light alerts you to remove or replace the airbags yourself. When you to a potential problem with your vehicle...
Owner's Manual - Page 55

...lane change or turn. On Canadian models, this happens, take the vehicle to have it usually means one of the turn signals on as possible, since other time, there is not closed tightly. Replace the bulb ... Warning Indicators The left or right turn signal light blinks when you turn on the headlight controls. See page 64 for information on the Hazard Warning switch, both turn the ignition...
Owner's Manual - Page 74

...Honda dealer. Remove the old battery and note the polarity. If you lose a transmitter, you have will also need to have the replacement programmed to ...operate the equipment. Instruments and Controls
Make sure the polarity of the FCC rules.
Any other transmitters you will harm the transmitter and cause it clockwise. Changes...
Owner's Manual - Page 161

... the brake pedal only when you intend to see if they feel normal. When the brake pads need replacing, you will begin screeching all vehicles have the brake pads replaced, they do not have audible brake wear indicators.
Constant application of the brakes when going down a long hill builds up can reduce how...
Owner's Manual - Page 165

... This is needed to the change in conditions that may seem just barely damp. Inspect your headlights. Keep the...replaced if they start to react, even in driving conditions.
Keep your vehicle longer to streak the windshield or leave parts unwiped. Abrupt steering wheel movements or sudden, hard application of control in dry weather. Driving Always drive slower than you need...
Owner's Manual - Page 179
......193 Synthetic Oil...194 Additives...194 Changing the Oil and Filter...195 Cooling System...197 Adding Engine Coolant...197 Replacing Engine Coolant...199 Windshield Washers...202 Transmission... Tire Rotation...220 Replacing Tires and Wheels...221 Wheels and Tires...222 Winter Driving...222 Snow Tires...222 Tire Chains...223 Lights...224 Headlight Aiming...226 Replacing Bulbs...228 Storing Your ...
Owner's Manual - Page 195

... Oil
Changing the Oil and Filter Always change the oil and filter according to remove the filter. 4. The vehicle should have this service. Drain the oil into an appropriate container.
3.
Run the engine until it reaches normal operating temperature, then shut it . A special wrench (available from underneath the vehicle. Remove the oil drain bolt and...
Owner's Manual - Page 209

... PLUG CAP
1. Spark Plugs
The spark plugs in by pulling it into the socket; Remove the spark plug cap by hand so you do not crossthread it.
then screw it straight out. 3. Screw it in your vehicle need to be replaced every 2 years or 30,000 miles (48,000 km), whichever comes first.
Owner's Manual - Page 219

... the tires if you feel a consistent vibration while driving. When the tread wears down to that is removed from the wheel for damage, foreign objects, and wear. A tire that point, you will see a... wear indicators molded into the tread. Replace the tire if you find a tire is less than 1/16 inch (1.6 mm) of these conditions. They may need to decrease tire wear. Tires
Inspection Every...
Owner's Manual - Page 225

... LIGHT TURN SIGNAL LIGHT STOP/TAILLIGHTS
Headlights (low and high beam) Parking lights Taillights Brake lights High-mount brake light Turn signals Back-up lights Hazard light function License plate light Side marker lights Daytime running lights (Canadian models) If you find any bulbs are burned out, replace them as soon as possible...
Owner's Manual - Page 228

... the glass, clean it by its steel base and protect the glass from the bulb by pulling on the glass can cause the bulb to unlock the tab. Remove the electrical connector from contact with denatured alcohol and a clean cloth. Lights
Replacing a Headlight Bulb Your vehicle has halogen headlight bulbs, one on both sides to overheat and shatter.
1.
Owner's Manual - Page 229

... the hole, making sure the tabs are changing the bulb on the headlights to test the new bulb. Install the rubber seal over the back of the hold -down wire from the inner fender. Lights
4. Push the electrical connector onto the new bulb. it out of the way and remove the bulb. 5. FASTENER
2. Pivot it is right side...
Owner's Manual - Page 230

... burned out: stop/taillight, turn counterclockwise. 5. Replacing Rear Bulbs
Maintenance Install the fastener and push on the center until it counterclockwise. Determine which of its socket. 1. Insert the socket back into the headlight assembly. Remove the three screws and remove the rear light assembly from the headlight assembly by turning it one-quarter turn signal...
Owner's Manual - Page 231

.... 6. Reinstall the socket. Reinstall the three screws and tighten them securely.
Test the lights to make sure the new bulb is working. 8. Reinstall the rear light assembly into the rear pillar. Replacing a Rear License Bulb
3. Remove the bulb from the light assembly by turning it locks.
1. Remove the cover by pulling it one -quarter turn counterclockwise.
Owner's Manual - Page 233

... mudguard back in place and secure it in place. 6. Replacing a High-mount Brake Light Bulb
1. Test the lights to lock it with the three screws. Turn it clockwise to make sure the new bulb is working . 8. Push it up until it in place. 7. Remove the light assembly cover by turning it locks in the...
Owner's Manual - Page 234

... the lens.
2.
Remove the bulb by carefully prying on the edge of the lens with a fingernail file or a small flat-tip screwdriver. Snap the lens back in place. Push the new bulb into the metal tabs. Maintenance They do not all use the same bulb.
SPOTLIGHT
CEILING/CARGO AREA LIGHT
1. Lights
Replacing Ceiling/Cargo Area...
Owner's Manual - Page 235

Change the engine oil and filter (see page 184 ). are off . If the vehicle is being stored indoors). Leave one made from a porous material such as cotton. The replacements called for in the ...your vehicle indoors. Storing Your Vehicle
If you need to park your vehicle for an extended period (more than one month), there are not needed unless the vehicle has actually reached that mate...
Owner's Manual - Page 251

... the logo is at the 10 o'clock and 2 o'clock positions, then place the top of the Unexpected
If needed, move the cover left or right until you install it. If it's too cold, it won't fit easily ...Starting at a time, and alternate side to check the alignment of the tire. Changing a Flat Tire
OUTSIDE SEAM
TOP SLIT
23.Hold the cover at room temperature before you reach the bottom.
Owner's Manual - Page 291

... Table...87 Bulb Replacement Back-up Lights...230 Brake Lights...230 Cargo Area Light...234 Ceiling Light...234 Front Parking Lights...229 Front Side Marker Lights...229 Headlights...228 High-...Pocket...89 Center Table...85 Certification Label...272 Chains...223 Change Oil How to...195 When to...184 Changing a Flat Tire...246 Changing Engine Coolant...199 Charging System Indicator...52, 261 Checking...
Owner's Manual - Page 294

... Inside Mirror...83
Halogen Headlight Bulbs...228 Hazard Warning Flashers...61 Headlights Aiming...226 Daytime Running Lights...58 High Beam Indicator...53 High Beams, Turning on...58 Low Beams, Turning on...58 Reminder Beeper...58 Replacing Halogen Bulbs ...228 Turning on...58 Head Restraints...77
Keys...67
Label, Certification...272 Lane Change, Signaling...59 Lap Belt...
Similar Questions


Oxygen Sensor
How Many Oxygen Sensors Does A 1998 Honda Crv Have And What Price Range They Go For? Do I Have To Ch...
How Many Oxygen Sensors Does A 1998 Honda Crv Have And What Price Range They Go For? Do I Have To Ch...
(Posted by romgaitan 11 years ago)
Our Honda 2002crv Has Little Or No Heat.is A Fuse Gone Or Relay Need Replacing?
It recently had rad replaced ,and had all the air purged out by our personal mechanic. Also A/C lig...
It recently had rad replaced ,and had all the air purged out by our personal mechanic. Also A/C lig...
(Posted by donald0424 11 years ago)
