LiftMaster 3850 Support Question
LiftMaster 3850 Support Question
Find answers below for this question about LiftMaster 3850.Need a LiftMaster 3850 manual? We have 1 online manual for this item!
Question posted by soosjs on January 20th, 2014
Chamberlain 3850 Repairs
Door goes up 6inches and stops? Other door works fine???
Current Answers
Related LiftMaster 3850 Manual Pages
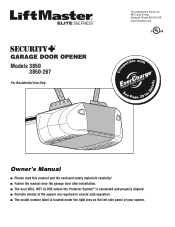
3850 Elite Series Manual - Page 1
...;
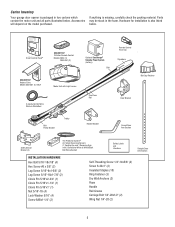
GARAGE DOOR OPENER Models 3850
3850-267
For Residential Use Only
Com Details
The Chamberlain Group, Inc. 845 Larch Avenue Elmhurst, Illinois 60126-1196 www.liftmaster.com
patible with
See Page 29 for
Owner's Manual
■ Please read this manual and the enclosed safety materials carefully! ■ Fasten the manual near the garage door after installation. ■ The door...
3850 Elite Series Manual - Page 2
...
36-37
Rail assembly parts 36
Installation parts 36
Motor unit assembly parts 37
Accessories
38
Notes
39
Repair Parts and Service
40
Warranty
40
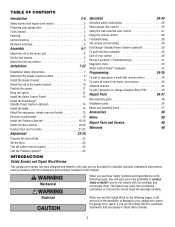
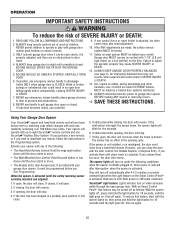
INTRODUCTION Safety Symbol and Signal Word Review
This garage door opener has been designed and tested to the possibility of serious injury or death if you do not comply...
3850 Elite Series Manual - Page 3
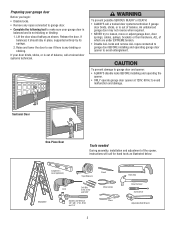
... EXTREME tension.
• Disable ALL locks and remove ALL ropes connected to garage door BEFORE installing and operating garage door opener to make sure your garage door is balanced and is any ropes connected to garage door.
• Complete the following test to avoid entanglement. An unbalanced garage door may not reverse when required.
• NEVER try to loosen, move or...
3850 Elite Series Manual - Page 4

...& fastening hardware is required.
Torsion Spring
Extension
Spring OR
Motor Unit
--- --- -- Survey your garage area to your opener.
SECTIONAL DOOR INSTALLATION
Horizontal and vertical reinforcement is needed for details. See page 12. Vertical Centerline of Door
Access Door
Wallmounted Door Control
Safety
Gap between floor and bottom of the conditions below apply to see...
3850 Elite Series Manual - Page 5
...all parts illustrated below . LOCK
LIGHT
SLmCaDrtMCootniotrnolDPeatencetli®ng Door Control Console
SECURITY✚® 3-Button Remote Control
Models 3850 (1) 3850-267 (2)
SECURITY✚® Keyless Entry Model 3850-267 (1) ONLY
Motor Unit with Light Lenses
2-Conductor Bell... for installation is also listed below . Carton Inventory
Your garage door opener is packaged in the foam.
3850 Elite Series Manual - Page 6
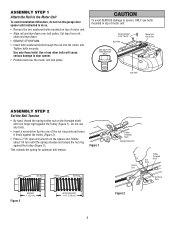
... 3). This extends the spring for optimum belt tension.
ASSEMBLY STEP 1 Attach the Rail to the Motor Unit
To avoid installation difficulties, do not run the garage door opener until instructed to do so. • Remove the two washered bolts mounted on top of motor unit. • Align rail and styrofoam over the motor...
3850 Elite Series Manual - Page 7
... avoid SERIOUS PERSONAL INJURY or DEATH from electrocution, disconnect ALL electric and battery power BEFORE performing ANY service or maintenance.
7 Door MUST reverse on contact with #8x3/8" hex screws provided.
Install garage door opener 7 feet (2.1 m) or more above floor.
7. ALL repairs to do so.
8. NEVER wear watches, rings or loose clothing while installing or servicing...
3850 Elite Series Manual - Page 8
..., sticks, or is minimal. (It may be RIGIDLY fastened to structural support on header wall or ceiling, otherwise garage door might not reverse when required. Open your door.
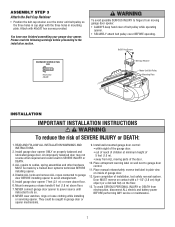
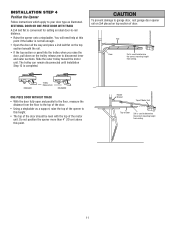
1. INSTALLATION STEP 1 Determine the Header Bracket Location
To prevent possible SERIOUS INJURY or DEATH:
• Header bracket MUST be mounted on the wall upside down ...
3850 Elite Series Manual - Page 10

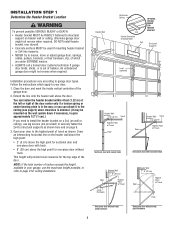
... join with a clevis pin as a protective base. Have someone hold the opener securely on the garage floor below the header bracket.
NOTE: If the door spring is in the way you'll need help. Header Wall Header Bracket Belt Pulley Bracket
Garage Door
INSTALLATION STEP 3 Attach the Rail to the Header Bracket
• Position the...
3850 Elite Series Manual - Page 11
... until Installation Step 12 is convenient for setting an ideal door-to-rail distance.
• Raise the opener onto a stepladder. INSTALLATION STEP 4
Position the Opener
Follow instructions which apply to the top of the door.
• Using a stepladder as illustrated.
To prevent damage to garage door, rest garage door opener rail on 2x4 placed on the trolley release arm...
3850 Elite Series Manual - Page 12
... 5/16" Nut 5/16"-18
12 Yours may be used if installing ANY brackets into masonry. Measure the distance from a falling garage door opener, fasten it SECURELY to structural supports of the hanging bracket to opener at this time. Drill 3/16" pilot holes in line
with 5/16"-18x7/8"
hex bolts, lock washers and nuts. 6. Operate...
3850 Elite Series Manual - Page 13
... position until completely closed. DO NOT overtighten.
• Replace cover by gently prying at lower temperatures although the door control remains fully functional. The trolley will not return to operate the same garage door opener, it may damage the LCD screen.
To prevent possible SERIOUS INJURY or DEATH from ALL moving parts of the...
3850 Elite Series Manual - Page 14
...; Reverse the procedure to close the lens.
• Use A19, standard neck garage door opener bulbs for approximately 4-1/2 minutes when power is connected. NOTE: Use only standard light bulbs.
ALWAYS wear protective gloves and eye protection when changing the battery or working around the battery compartment. Channel
Battery
Battery Cover
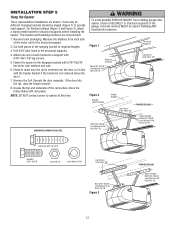
INSTALLATION STEP 8
Install the...
3850 Elite Series Manual - Page 15

... prevent unraveling.
To make it is necessary to cut the rope, heat seal the cut end with an overhand knot. Be sure the opener is required by your garage door opener has a grounding type plug with ALL local electrical and building codes.
• NEVER use an extension cord, 2-wire adapter, or change plug in...
3850 Elite Series Manual - Page 16
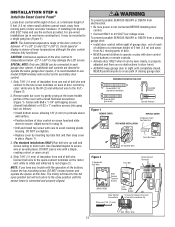
... stop and reverse to full open position, and the opener lights will detect an obstacle in masonry if repositioning is necessary. above the floor. To prevent SERIOUS INJURY or DEATH from inside the garage so that the sending and receiving eyes face each location to avoid drilling extra holes in the path of the garage door...
3850 Elite Series Manual - Page 17

... place right and left assemblies to the floor with curved arms facing the door. Garage door track installation (preferred):
• Slip the curved arms over the rounded edge...door, no higher than 6" (15 cm) above the floor. Make sure all door hardware obstructions are cleared.
Floor installation (Figure 4):
• Use wood blocks or extension brackets (see Accessories) to the opener...
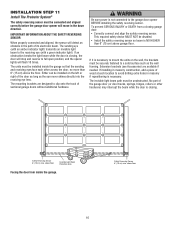
3850 Elite Series Manual - Page 25
... SAFETY CHECK:
Test the Safety Reverse System after:
• Each adjustment of door arm length, limits, or force controls.
• Any repair to or adjustment of the garage door (including springs and hardware).
• Any repair to or buckling of the opener. The garage door opener will flash. Complete Adjustment Steps 1 and 2 Program the Travel Limits and Set the...
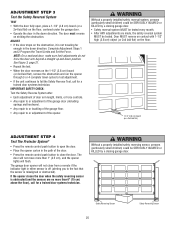
3850 Elite Series Manual - Page 26
ALWAYS keep garage door in sight until the light goes on when someone walks through the open garage door. NO ONE SHOULD CROSS THE PATH OF THE MOVING DOOR.
5. If one Security✚® Keyless Entry System. Failure to adjust the operator properly may also need adjustment.
10. Activate your garage door opener, it will stop .
4. If closed, it must be programmed...
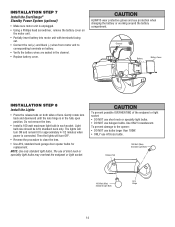
3850 Elite Series Manual - Page 38
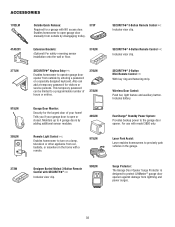
... to the garage door opener. SECURITY✚® 3-Button Mini Remote Control : With key ring and fastening strip. Includes battery.
Wireless Door Control: Push bar, light feature and auxiliary button. ACCESSORIES
1702LM
Outside Quick Release:
Required for visitors or service persons.
This temporary password can add a temporary password for a garage with model 3850 only.
3850 Elite Series Manual - Page 40
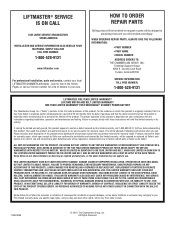
... TELEPHONE. WHEN ORDERING REPAIR PARTS, ALWAYS GIVE THE FOLLOWING INFORMATION:
• PART NUMBER • PART NAME • MODEL NUMBER ADDRESS ORDERS TO: THE CHAMBERLAIN GROUP, INC.
ALL...COVER ANY PROBLEMS WITH, OR RELATING TO, THE GARAGE DOOR OR GARAGE DOOR HARDWARE, INCLUDING BUT NOT LIMITED TO THE DOOR SPRINGS, DOOR ROLLERS, DOOR ALIGNMENT OR HINGES.
ANY SERVICE CALL THAT DETERMINES...
Similar Questions

I Have Installed A Chamberlan Garage Door Opener And The Remote I Was Using Is
I have been using a Chamberlan garage door opener and its remote has been defective since of late.Pl...
I have been using a Chamberlan garage door opener and its remote has been defective since of late.Pl...
(Posted by donweera42 8 months ago)

Remote Control For Liftmaster /chamberlain 3850 Garage Door Opener
what is the correct remote control for the chamberlain/liftmaster 3850 garage door opener
what is the correct remote control for the chamberlain/liftmaster 3850 garage door opener
(Posted by sendtoalice 9 years ago)


Garage Door Lights
Both side lights on opener unit stopped working at same time. Replaced bulbs but lights do not come ...
Both side lights on opener unit stopped working at same time. Replaced bulbs but lights do not come ...
(Posted by bja3758 9 years ago)
Replacing Backup Battery In Garage Door Opener.
How do I replace the backup battery in the LiftMaster 3850 garage door opener? Are there instruction...
How do I replace the backup battery in the LiftMaster 3850 garage door opener? Are there instruction...
(Posted by melindanannin 12 years ago)