Get support for Singer Signature

Singer Signature Support Question

Singer Signature Support Question

Find answers below for this question about Singer Signature.
Need a Singer Signature manual? We have 2 online manuals for this item!
Question posted by Vphillips103 on October 12th, 2015

E7 Error

what does E7 mean on a sew mate

Current Answers

Answer #1: Posted by TechSupport101 on October 12th, 2015 8:15 PM
TechSupport101

Member since:
May 24th, 2013

Points: 12,171,275
100
points
This is usually due to the foot pedal not being plugged all the way into the machine or a threading error. If you've ensured it's neither of these issues or would like one on one assistance, please call us at 1-800-4SINGER or email [email protected]

Related Singer Signature Manual Pages

Instruction Manual - Page 3

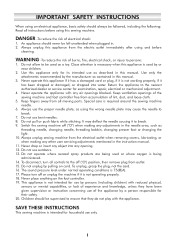
... if it has a damaged cord or plug, if it to be used by the manufacturer as described in this manual. 3. Keep ventilation openings of the sewing machine and foot controller free from all instructions before cleaning. Please turn all controls to the nearest authorized dealer or service center for household use the...
Instruction Manual - Page 4

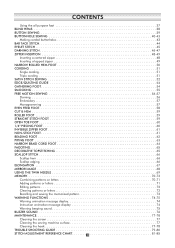
...6-7 ACCESSORIES 8 CONNECTING THE MACHINE TO THE POWER SOURCE 9 Connecting the machine 9 WINDING THE BOBBIN 10...-11 Bobbin winding 10-11 INSERTING THE BOBBIN 12 THREADING THE UPPER THREAD 13-14 USING THE NEEDLE THREADER 15 DRAWING UP THE LOWER THREAD 16 CUTTING THE THREAD 16 TWO-STEP PRESSER FOOT LIFTER 17 ADJUSTING PRESSER FOOT PRESSURE 17 STARTING SEWING...
Instruction Manual - Page 5

...FOOT 50 CORDING 51 Single cording 51 Triple cording 51 SATIN STITCH SEWING 52 EDGE/QUILTING GUIDE 53 GATHERING FOOT 54 SMOCKING 55 FREE MOTION SEWING 56-57 Darning 56 Embroidery 57 Monogramming 57 EVEN FEED FOOT ...76 MAINTENANCE 77-78 Cleaning the screen 77 Cleaning the sewing machine surface 77 Cleaning the hook 77-78 TROUBLE SHOOTING GUIDE 79-80 STITCH ADJUSTMENT REFERENCE CHART ...
Instruction Manual - Page 6

PRINCIPAL PARTS OF THE MACHINE Stitch pattern plate Tension dial Presser foot pressure Face plate Operation buttons A Thread cutter Buttonhole lever Auto needle threader Needle plate cover Sewing table and accessory box Hole for Auxiliary spool pin Handwheel Main power switch Power cord socket Foot controller connector Bobbin winder spindle Bobbin winder stopper...
Instruction Manual - Page 7

... cutter button Press this button to move the needle to stop . 5. Needle up/down position button Press this button after finishing sewing and the machine will be programmed to either up or down this button to sew stitches in selected position until button is pressed again. Operation buttons (see page 28/29/30) 6.
Instruction Manual - Page 8

.... Speed limiting adjustment lever Slide this button. Mirror button Press this button will clear it. 15. MACHINE CONTROL BUTTONS 8. Clear button If an incorrect pattern is selected or memorized, pressing this button to change the sewing speed. 3 Memory button Press this button to adjust the length of the pattern number to enter...
Instruction Manual - Page 13

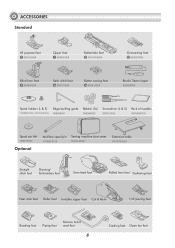
... Edge/quilting guide Bobbin (3x) Screwdriver (L & S) Pack of needles H1D0083210(L) TA10943210(S) 006008001 006084009 006012008 006V880010 Spool pin felt 006015009 Optional Auxiliary spool pin Sewing machine dust cover H1D0073210 020H7A0001 Extension table H7A0754210 Straight stitch foot Darning/ Embroidery foot Even feed foot Rolled hem foot Gathering foot Non-stick foot Roller ...
Instruction Manual - Page 14

... switch. 4. Connect the power line plug to the machine by inserting the 2-hole plug into the power cord socket. 2. this plug will light up when the switch is conforming with your electrical power. If it still does not fit, contact a qualified electrician. The sewing lamp will fit in a polarized outlet only one...
Instruction Manual - Page 16

... winding position", the symbol " " appears on the right, "bobbin winding position", the machine will not sew and the handwheel will disappear from the LCD screen when the bobbin winder spindle is pushed to the left "sewing position". 11 To start sewing, push the bobbin winder switch to the left , which is full. WINDING THE...
Instruction Manual - Page 22

... heavy fabric, loosen the pressure by turning it clockwise. 17 When sewing several layers or thick fabrics, the presser foot can be raised a second stage for ...presser foot pressure of fabric (light-or-heavy weight). However, if you need to the type of the machine has been pre-set and requires no particular readjustment according to adjust the presser foot pressure, turn the presser adjusting screw...
Instruction Manual - Page 23

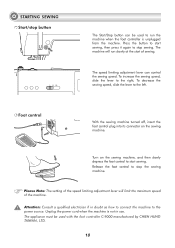
... speed limiting adjustment lever can be used to stop the sewing machine. Release the foot control to the left. The machine will limit the maximum speed of sewing. Foot control With the sewing machine turned off, insert the foot control plug into its connector on the sewing machine, and then slowly depress the foot control to the power...
Instruction Manual - Page 30

... the threads. 25 The foot control must be disconnected to complete this button after finishing sewing and the machine will increase slowly until reaching the speed setting selected with the speed limiting adjustment lever. Press this operation. The machine will stop when pressed the second time. OPERATION BUTTONS Needle up/down position button...
Instruction Manual - Page 31

.... Select Direct patterns 6-7, B Group Patterns 07-16, 33-50, and C Group Patterns 01-66 a reinforcement stitch sews at the end of the current pattern and automatically stop . Press the button again to sew, the machine will permanently sew in reverse. The LCD screen will be cancelled if you press the reverse button before starting...
Instruction Manual - Page 32

... the highest position. When the arrow points upward, the needle will raise or lower the needle. OPERATION BUTTONS Needle up/down position button The machine automatically stops sewing with the needle in the lowest position. 27 The Needle up/down position button offers the option of stopping with the needle in the...
Instruction Manual - Page 35

Press the " " button, the machine automatically reduces the maximum width for mirror imaging the pattern appears on the LCD screen. The mirror function also will continue to sew the reflected pattern until the mirror button is pressed again. The function for twin needle sewing. Press the button again for single needle sewing. 30 Twin needle...
Instruction Manual - Page 37

... " " button again to leave the editing mode and return to remove an added pattern when sewing combinations of characters or decorative stitches. 32 Press this button in the memory mode. Pressing the ...button to memory mode. (See pages 66-69 for more information on programming the machine Memory). SELECTION BUTTONS Edit button Memory button Clear button The " " button is selected.
Instruction Manual - Page 38

... released. Raise the presser foot. 4. Press the reverse button and sew 4-5 stitches. Stop the sewing machine when you reach a corner. 2. The machine will sew forward when the button is convenient for sewing tubular areas such as a pivot and turn the fabric. 5. Use the needle as pant hems and cuffs. 33 Lower the presser foot and resume...
Instruction Manual - Page 39

... the toe of the foot and push in before lowering the presser foot. The black button releases automatically after sewing few stitches. Snap (A) of the extension table into (B) of the machine. 3 Sewing on heavy fabrics The black button on the right side of the all purpose presser foot will lock the presser foot...
Instruction Manual - Page 50

... needle into the fabric at the center using an eyelet punch. * Eyelet punch is completed, the machine automatically sews reinforcement stitches, then stops. 3 44 Make a hole at the beginning of eyelet. Once sewing is not included with the machine. 4 45 Attach presser the foot "A". 1 22 Press the " – " or " + " stitch width A B C adjustment to get...
Instruction Manual - Page 53

...the seam line. Attach the right side of the presser foot pin to the holder when sewing the left side of the zipper. 3 4 44 Attach the left side of the presser foot pin ... 6 48 ZIPPER INSERTION 1 I 3.5 1.5~3.0 Inserting a centered zipper 2 inch Attention: Zipper foot should be used with machine set for straight stitch only. Baste the zipper tape in place. 33 Attach the zipper foot.

Similar Questions

C2 Error Message On Sew Mate 5400
c2 message on singer sew mate 540
(Posted by dlmcdonald 3 years ago)
Manuel For Singer Sew Mate 4500
(Posted by Vphillips103 8 years ago)
Singer Sew Mate 5400
My sew mate has stopped stictching and shows c2 on the display screen
(Posted by julzzs 10 years ago)
Machine Shakes
I have a Singer Signature Computerized sewing machine. When I put it on anything faster than the slo...
(Posted by donabakker 11 years ago)
I Would Like To Know The Exact Size Needles To Use For My Signature ?
I am a bit confused as to what size needles to use for my Singer Signature machine as my other Singe...
(Posted by Countrychick18 11 years ago)
Ask a New Question
Use the box below to post a new question about this Singer product .
Points & Prizes
  • You can earn points for nearly everything you do on HelpOwl.com
  • You can trade in those points for gift cards at leading retailers such as Amazon.com and Walmart
  • It's that simple!
See How it Works
Create a Free Account

Singer Manuals

Find free Singer Signature manuals and user guides available at ManualOwl.com. Try out our unique manual viewer allowing you to interact with manuals from directly within your browser!

Singer Reviews

View thousands of Singer user reviews and customer ratings available at ReviewOwl.com.

Contact Information

Complete Singer customer service contact information including steps to reach representatives, hours of operation, customer support links and more from ContactHelp.com.

Scoreboard Ratings

See detailed Singer customer service rankings, employee comments and much more from our sister site.