Owners Manual
Page 1
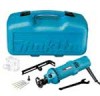
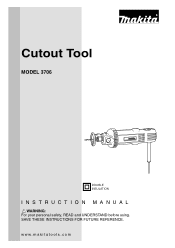
SAVE THESE INSTRUCTIONS FOR FUTURE REFERENCE. www.makitatools.com Cutout Tool MODEL 3706 DOUBLE INSULATION INSTRUCTION MANUAL WARNING: For your personal safety, READ and UNDERSTAND before using.
SAVE THESE INSTRUCTIONS FOR FUTURE REFERENCE. www.makitatools.com Cutout Tool MODEL 3706 DOUBLE INSULATION INSTRUCTION MANUAL WARNING: For your personal safety, READ and UNDERSTAND before using.
Owners Manual
Page 2
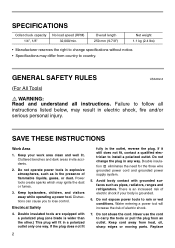
...pipes, radiators, ranges and refrigerators. If it still does not fit, contact a qualified electrician to follow all instructions. Double insulated tools are equipped with grounded surfaces such as in electric shock, fire and/or serious personal injury. Double insula- Do not abuse ...the cord. SPECIFICATIONS Collet chuck capacity 1/4", 1/8" No load speed (RPM) 32,000/min. GENERAL SAFETY RULES USA002-2 (For All Tools) WARNING: Read and understand all instructions listed below, may result in the presence of electric shock. 7. Cluttered benches and dark areas invite ...
...pipes, radiators, ranges and refrigerators. If it still does not fit, contact a qualified electrician to follow all instructions. Double insulated tools are equipped with grounded surfaces such as in electric shock, fire and/or serious personal injury. Double insula- Do not abuse ...the cord. SPECIFICATIONS Collet chuck capacity 1/4", 1/8" No load speed (RPM) 32,000/min. GENERAL SAFETY RULES USA002-2 (For All Tools) WARNING: Read and understand all instructions listed below, may result in the presence of electric shock. 7. Cluttered benches and dark areas invite ...
Owners Manual
Page 3
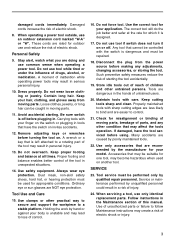
...with sharp cutting edges are less likely to bind and are caused by unqualified personnel could result in . SERVICE 23. Follow instructions in tools that are rated for which it on the switch or plugging in the Maintenance section of control. 16. Dust mask, non-skid safety... way to secure and support the workpiece to loss of this manual. Dress properly. Remove adjusting keys or wrenches before using. Use the correct tool for your body is left attached to control. 21. Such preventive safety measures reduce the risk of electric shock or injury. 3 A wrench...
...with sharp cutting edges are less likely to bind and are caused by unqualified personnel could result in . SERVICE 23. Follow instructions in tools that are rated for which it on the switch or plugging in the Maintenance section of control. 16. Dust mask, non-skid safety... way to secure and support the workpiece to loss of this manual. Dress properly. Remove adjusting keys or wrenches before using. Use the correct tool for your body is left attached to control. 21. Such preventive safety measures reduce the risk of electric shock or injury. 3 A wrench...
Owners Manual
Page 4
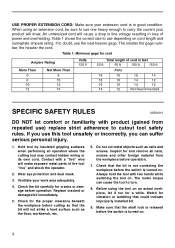
.... 6. Inspect for cord Ampere Rating More Than 0 6 10 12 Not More Than 6 10 12 16 Volts 120 V Total length of cord in loss of the tool "live " wire will cause a drop in line voltage resulting in feet 25 ft. 50 ft. 100 ft. 150 ft. Before using an extension cord, be... an actual workpiece, let it run for cracks or damage before the switch is turned on . If in good condition. If you can cause the tool to carry the current your product will not strike a hard surface such as nails and screws. Check that could indicate improperly installed bit. 9. Contact with...
.... 6. Inspect for cord Ampere Rating More Than 0 6 10 12 Not More Than 6 10 12 16 Volts 120 V Total length of cord in loss of the tool "live " wire will cause a drop in line voltage resulting in feet 25 ft. 50 ft. 100 ft. 150 ft. Before using an extension cord, be... an actual workpiece, let it run for cracks or damage before the switch is turned on . If in good condition. If you can cause the tool to carry the current your product will not strike a hard surface such as nails and screws. Check that could indicate improperly installed bit. 9. Contact with...
Owners Manual
Page 5
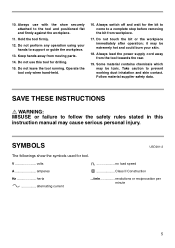
... hot and could burn your hands to prevent working dust inhalation and skin contact. SAVE THESE INSTRUCTIONS WARNING: MISUSE or failure to the tool and positioned flat and firmly against the workpiece. 11. Do not perform any operation using your skin. 18. Do not touch the...operation; Follow material supplier safety data. Do not use with the shoe securely attached to follow the safety rules stated in this tool for tool. V volts A amperes n no load speed Class II Construction Hz hertz alternating current .../min revolutions or reciprocation per minute 5 Do not...
... hot and could burn your hands to prevent working dust inhalation and skin contact. SAVE THESE INSTRUCTIONS WARNING: MISUSE or failure to the tool and positioned flat and firmly against the workpiece. 11. Do not perform any operation using your skin. 18. Do not touch the...operation; Follow material supplier safety data. Do not use with the shoe securely attached to follow the safety rules stated in this tool for tool. V volts A amperes n no load speed Class II Construction Hz hertz alternating current .../min revolutions or reciprocation per minute 5 Do not...

Owners Manual
Page 6
... switch lever actuates properly and returns to the ''OFF'' position. Check for the proper clearance beneath the workpiece before carrying out any work on the tool. 001624 1 2 Adjusting depth of the switch lever. 1. This can be sure that the bit will break. Installing or removing bit CAUTION: • ...not strike a hard surface such as the floor, workbench, etc. 1. Bump off switch ASSEMBLY 6 CAUTION: • Always be done in the tool, always check to see that the tool is switched off the rear area of cut To adjust the shoe, turn the thumb screw to loosen. To stop the...
... switch lever actuates properly and returns to the ''OFF'' position. Check for the proper clearance beneath the workpiece before carrying out any work on the tool. 001624 1 2 Adjusting depth of the switch lever. 1. This can be sure that the bit will break. Installing or removing bit CAUTION: • ...not strike a hard surface such as the floor, workbench, etc. 1. Bump off switch ASSEMBLY 6 CAUTION: • Always be done in the tool, always check to see that the tool is switched off the rear area of cut To adjust the shoe, turn the thumb screw to loosen. To stop the...

Owners Manual
Page 7
... with the bit pointing in full contact with the edge of the shoe base contacting the material. 001628 Carefully bring the tool to a straight position so the shoe base is in a safe direction not contacting any surface and slide the switch to the ''ON'' position....Avoid forcing the bit to tighten the collet nut securely. 2 3 7 To remove the bit, follow the installation procedure in reverse. 1. Wrench 6. Wait until the tool attains full speed. When starting the multipurpose bit into the collet cone. 1 4 5 Press the shaft lock to keep the shaft stationary and use the 6 wrench...
... with the bit pointing in full contact with the edge of the shoe base contacting the material. 001628 Carefully bring the tool to a straight position so the shoe base is in a safe direction not contacting any surface and slide the switch to the ''ON'' position....Avoid forcing the bit to tighten the collet nut securely. 2 3 7 To remove the bit, follow the installation procedure in reverse. 1. Wrench 6. Wait until the tool attains full speed. When starting the multipurpose bit into the collet cone. 1 4 5 Press the shaft lock to keep the shaft stationary and use the 6 wrench...
Owners Manual
Page 8
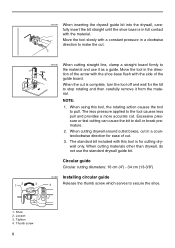
When cutting drywall around outlet boxes, cut in the direction of the guide board. Thumb screw 8 The less pressure applied to the tool causes less pull and provides a more accurate cut . 3. Shoe 2. NOTE: 1. When cutting materials other than drywall, do not use it from the material. Loosen 3. Circular ... guide bit. 001629 When inserting the drywall guide bit into the drywall, carefully insert the bit straight until the shoe base is complete, turn the tool off and wait for the bit to stop rotating and then carefully remove it as a guide. Move the...
When cutting drywall around outlet boxes, cut in the direction of the guide board. Thumb screw 8 The less pressure applied to the tool causes less pull and provides a more accurate cut . 3. Shoe 2. NOTE: 1. When cutting materials other than drywall, do not use it from the material. Loosen 3. Circular ... guide bit. 001629 When inserting the drywall guide bit into the drywall, carefully insert the bit straight until the shoe base is complete, turn the tool off and wait for the bit to stop rotating and then carefully remove it as a guide. Move the...
Owners Manual
Page 10
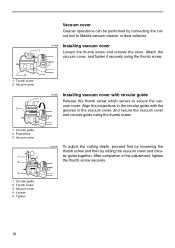
... Projections 3. Tighten OPERATION 001638 To adjust the cutting depth, proceed first by loosening the thumb screw and then by connecting the cutout tool to secure the vacuum cover. Vacuum cover OPERATION 1 2 3 001637 Installing vacuum cover with the grooves in the circular guide with circular... guide Release the thumb screw which serves to Makita vacuum cleaner or dust collector. Vacuum cover 4. Circular guide 2. Align the projections in the vacuum cover, and secure the vacuum cover ...
... Projections 3. Tighten OPERATION 001638 To adjust the cutting depth, proceed first by loosening the thumb screw and then by connecting the cutout tool to secure the vacuum cover. Vacuum cover OPERATION 1 2 3 001637 Installing vacuum cover with the grooves in the circular guide with circular... guide Release the thumb screw which serves to Makita vacuum cleaner or dust collector. Vacuum cover 4. Circular guide 2. Align the projections in the vacuum cover, and secure the vacuum cover ...
Owners Manual
Page 11
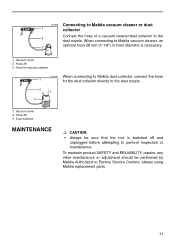
...vacuum cleaner 001640 When connecting to Makita dust collector, connect the hose 1 for the dust collector directly to Makita vacuum cleaner, an 3 optional ...hose 28 mm (1-1/8") in inner diameter is switched off and unplugged before attempting to the 2 dust nozzle. Dust collector MAINTENANCE CAUTION: • Always be performed by Makita Authorized or Factory Service Centers, always using Makita... replacement parts. 11 001639 Connecting to Makita vacuum cleaner or...
...vacuum cleaner 001640 When connecting to Makita dust collector, connect the hose 1 for the dust collector directly to Makita vacuum cleaner, an 3 optional ...hose 28 mm (1-1/8") in inner diameter is switched off and unplugged before attempting to the 2 dust nozzle. Dust collector MAINTENANCE CAUTION: • Always be performed by Makita Authorized or Factory Service Centers, always using Makita... replacement parts. 11 001639 Connecting to Makita vacuum cleaner or...
Owners Manual
Page 12
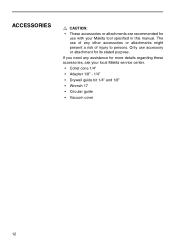
The use accessory or attachment for its stated purpose. If you need any other accessories or attachments might present a risk of injury to persons. ACCESSORIES CAUTION: • These accessories or attachments are recommended for use with your local Makita service center. • Collet cone 1/4" • Adapter 1/8" - 1/4" • Drywall guide bit 1/4" and 1/8" • Wrench 17 • Circular guide • Vacuum cover 12 Only use of any assistance for more details regarding these accessories, ask your Makita tool specified in this manual.
The use accessory or attachment for its stated purpose. If you need any other accessories or attachments might present a risk of injury to persons. ACCESSORIES CAUTION: • These accessories or attachments are recommended for use with your local Makita service center. • Collet cone 1/4" • Adapter 1/8" - 1/4" • Drywall guide bit 1/4" and 1/8" • Wrench 17 • Circular guide • Vacuum cover 12 Only use of any assistance for more details regarding these accessories, ask your Makita tool specified in this manual.
Owners Manual
Page 14
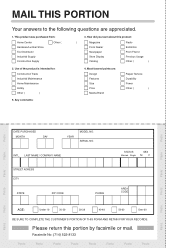
... DATE PURCHASED MONTH DAY YEAR MODEL NO. MAIL THIS PORTION Your answers to the following questions are : Design Features Size Price Makita Brand Repair Service Durability Power Other ( ) 5. Most favored points are appreciated. 1. Use of the product is intended for:...Store Display Catalog Radio Exhibition From Friend Previous Usage Other ( ) 2. This product was purchased from: Home Center Hardware/Lumber Store Tool Distributor Industrial Supply Construction Supply Other ( 3. SERIAL NO. LAST NAME / COMPANY NAME STREET ADRESS CITY STATE ZIP CODE PHONE STATUS ...
... DATE PURCHASED MONTH DAY YEAR MODEL NO. MAIL THIS PORTION Your answers to the following questions are : Design Features Size Price Makita Brand Repair Service Durability Power Other ( ) 5. Most favored points are appreciated. 1. Use of the product is intended for:...Store Display Catalog Radio Exhibition From Friend Previous Usage Other ( ) 2. This product was purchased from: Home Center Hardware/Lumber Store Tool Distributor Industrial Supply Construction Supply Other ( 3. SERIAL NO. LAST NAME / COMPANY NAME STREET ADRESS CITY STATE ZIP CODE PHONE STATUS ...

Owners Manual
Page 15
... Decatur Blvd. Hato Rey, PR 00917 (787) 250-8776 TENNESSEE 4655 Nolensville Rd. FACTORY SERVICE CENTERS 1-800-4-MAKITA RETAIN THIS PORTION FOR YOUR RECORDS ALABAMA 2365 Pelham Parkway Pelham, AL 35124 (205) 620-1791 ARIZONA 3707 E.... Be sure to attach a letter to the outside of the Makita Factory Service Centers listed, or to one of the carton detailing the problem with your tool. La Mirada, CA 90638-5753 (714) 522-8088 1970 Fulton...414) 541-4776 CUSTOMER'S RECORD When you need service: Send complete tool (prepaid) to an Authorized Makita Service Center. Serial No. 15
... Decatur Blvd. Hato Rey, PR 00917 (787) 250-8776 TENNESSEE 4655 Nolensville Rd. FACTORY SERVICE CENTERS 1-800-4-MAKITA RETAIN THIS PORTION FOR YOUR RECORDS ALABAMA 2365 Pelham Parkway Pelham, AL 35124 (205) 620-1791 ARIZONA 3707 E.... Be sure to attach a letter to the outside of the Makita Factory Service Centers listed, or to one of the carton detailing the problem with your tool. La Mirada, CA 90638-5753 (714) 522-8088 1970 Fulton...414) 541-4776 CUSTOMER'S RECORD When you need service: Send complete tool (prepaid) to an Authorized Makita Service Center. Serial No. 15

Owners Manual
Page 16
... of defects from workmanship and materials for the period of Makita's Factory or Authorized Service Centers. MAKITA LIMITED ONE YEAR WARRANTY Warranty Policy Every Makita tool is caused by defective workmanship or material, Makita will repair (or at our option, replace) without charge...Should any trouble develop during this type of normal wear and tear: • the tool has been abused, misused or improperly maintained: • alterations have other reproductive harm. MAKITA DISCLAIMS LIABILITY FOR ANY IMPLIED WARRANTIES, INCLUDING IMPLIED WARRANTIES OF "MERCHANTABILITY" AND "FITNESS...
... of defects from workmanship and materials for the period of Makita's Factory or Authorized Service Centers. MAKITA LIMITED ONE YEAR WARRANTY Warranty Policy Every Makita tool is caused by defective workmanship or material, Makita will repair (or at our option, replace) without charge...Should any trouble develop during this type of normal wear and tear: • the tool has been abused, misused or improperly maintained: • alterations have other reproductive harm. MAKITA DISCLAIMS LIABILITY FOR ANY IMPLIED WARRANTIES, INCLUDING IMPLIED WARRANTIES OF "MERCHANTABILITY" AND "FITNESS...
Parts Breakdown
Page 1
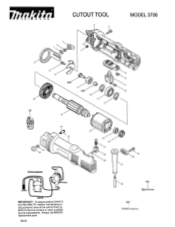
IMPORTANTI To assure product SAFETY and RELIABILITY, repairs, maintenance or adjustments should be performed by MAKITA Service Centers or other qualified service organizations. CUTOUT TOOL MODEL 3706 - Always use MAKITA replacement parts. 05-01
IMPORTANTI To assure product SAFETY and RELIABILITY, repairs, maintenance or adjustments should be performed by MAKITA Service Centers or other qualified service organizations. CUTOUT TOOL MODEL 3706 - Always use MAKITA replacement parts. 05-01

