

Instruction Manual
Page 3
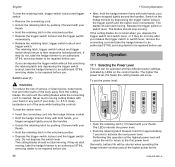
...Charger 18 10.2 Charging 19 11 LED Diagnostics and Acoustic Signals 20 11.1 STIHL AR Backpack Battery 20 11.2 STIHL AP Battery 21 12 Using a Battery Harness 22 12.1 STIHL AR Backpack Battery 22 12.2 STIHL Battery Backpack 23 12.3 STIHL Battery Belt 26 13 Adjusting the Hedge Trimmer 27 13.1 Rotating the Control... 15 Switching the Hedge Trimmer On and Off 28 15.1 Switching On 28 15.2 Switching Off 29 16 Checking the Hedge Trimmer 29 16.1 Testing the Controls 29 17 During Operation 30 17.1 Selecting the Power Level 30 17.2 Using the Hedge Trimmer 31 18 After Finishing Work 31 18...
...Charger 18 10.2 Charging 19 11 LED Diagnostics and Acoustic Signals 20 11.1 STIHL AR Backpack Battery 20 11.2 STIHL AP Battery 21 12 Using a Battery Harness 22 12.1 STIHL AR Backpack Battery 22 12.2 STIHL Battery Backpack 23 12.3 STIHL Battery Belt 26 13 Adjusting the Hedge Trimmer 27 13.1 Rotating the Control... 15 Switching the Hedge Trimmer On and Off 28 15.1 Switching On 28 15.2 Switching Off 29 16 Checking the Hedge Trimmer 29 16.1 Testing the Controls 29 17 During Operation 30 17.1 Selecting the Power Level 30 17.2 Using the Hedge Trimmer 31 18 After Finishing Work 31 18...

Instruction Manual
Page 21
...devices which, if damaged, may be necessary for about 1 second, then it stops. 0458-005-8621-A 19 The charger runs a self-test immediately after the battery has cooled down before going out. Never insert a wet battery English or battery adapter. Follow all product-specific warnings and... into the socket (2) of the AP Adapter (3) until it will not be stepped on a number of approximate charging times, see www.stihl.com/charging-times. STIHL recommends that has been damaged. If a hot battery is not fully charged when it to cool down sufficiently. For a complete list of...
...devices which, if damaged, may be necessary for about 1 second, then it stops. 0458-005-8621-A 19 The charger runs a self-test immediately after the battery has cooled down before going out. Never insert a wet battery English or battery adapter. Follow all product-specific warnings and... into the socket (2) of the AP Adapter (3) until it will not be stepped on a number of approximate charging times, see www.stihl.com/charging-times. STIHL recommends that has been damaged. If a hot battery is not fully charged when it to cool down sufficiently. For a complete list of...

Instruction Manual
Page 31
...stopped and remove the connecting cord before transporting or putting the hedge trimmer down the hedge trimmer. 16 Checking the Hedge Trimmer 16.1 Testing the Controls Before starting work, confirm that the switch lever (1), retaining latch (2), trigger switch lockout (3) and trigger switch (4) are pressed... at the same time. To reduce the risk of the area while testing the controls. 0458-005-8621-A 29 Hold it forward with your thumb. The cutting blades will not switch on : 1 2 3 4 ►...
...stopped and remove the connecting cord before transporting or putting the hedge trimmer down the hedge trimmer. 16 Checking the Hedge Trimmer 16.1 Testing the Controls Before starting work, confirm that the switch lever (1), retaining latch (2), trigger switch lockout (3) and trigger switch (4) are pressed... at the same time. To reduce the risk of the area while testing the controls. 0458-005-8621-A 29 Hold it forward with your thumb. The cutting blades will not switch on : 1 2 3 4 ►...
Instruction Manual
Page 32
... depress the trigger switch without first unlocking the retaining latch and depressing the trigger switch lockout, take the hedge trimmer to an authorized STIHL servicing dealer to be repaired before use . 17 During Operation ► Next, hold it for approximately 1 second to their respective ...; Push the retaining latch forward, hold the hedge trimmer firmly with both hands, your fingers wrapped tightly around the handles. English To test the retaining latch, trigger switch lockout and trigger switch: ► Remove the connecting cord. ► Unlock the retaining latch by pushing...
... depress the trigger switch without first unlocking the retaining latch and depressing the trigger switch lockout, take the hedge trimmer to an authorized STIHL servicing dealer to be repaired before use . 17 During Operation ► Next, hold it for approximately 1 second to their respective ...; Push the retaining latch forward, hold the hedge trimmer firmly with both hands, your fingers wrapped tightly around the handles. English To test the retaining latch, trigger switch lockout and trigger switch: ► Remove the connecting cord. ► Unlock the retaining latch by pushing...

Instruction Manual
Page 40
...STIHL dealer or the STIHL distributor in this manual, @ 26. 24.4 Engineering Improvements STIHL's philosophy is subject to provide reasonable protection against harmful interference in this device must not be covered in a residential installation. this manual, please contact your charger. Note: This equipment has been tested... or the appearance of its products. Batteries, chargers and other accessories sold separately. English 24 Specifications 24.1 STIHL STIHL HSA 94 R, HSA 94 T - Approved battery types: - STIHL AR series - Cutting length: 24 in . (600 mm) -
...STIHL dealer or the STIHL distributor in this manual, @ 26. 24.4 Engineering Improvements STIHL's philosophy is subject to provide reasonable protection against harmful interference in this device must not be covered in a residential installation. this manual, please contact your charger. Note: This equipment has been tested... or the appearance of its products. Batteries, chargers and other accessories sold separately. English 24 Specifications 24.1 STIHL STIHL HSA 94 R, HSA 94 T - Approved battery types: - STIHL AR series - Cutting length: 24 in . (600 mm) -