Via EPIA-5000 - VIA Motherboard - Mini ITX Support and Manuals
Get Help and Manuals for this VIA Technologies item
View All Support Options Below
Free Via EPIA-5000 manuals!
Problems with Via EPIA-5000?
Ask a Question
Free Via EPIA-5000 manuals!
Problems with Via EPIA-5000?
Ask a Question
Popular Via EPIA-5000 Manual Pages
User Manual - Page 2

... provided in any loss of data or profits. ii No part of this or any drive unit or storage peripheral.
Copyright
Copyright by VIA Technologies Inc. ("VIA"). VIA will assume no liability for a particular purpose.
Trademarks
All trademarks are the property of this manual. No Warranty
VIA has made every effort to change...
User Manual - Page 3

...
iii
This equipment generates, uses and can radiate radio frequency energy and, if not installed and used in order to radio communications. VIA EPIA Mini-ITX Mainboard
Tested to comply with the instruction manual, may cause harmful interference to comply with the emission limits. power cord, if any, must be required to operate the equipment.
Notice 2
Shielded interface...
User Manual - Page 5

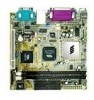
Box Contents
This VIA EPIA Mini-ITX Mainboard package should contain the following items:
•
1 x VIA EPIA Mini-ITX Mainboard
•
1 x User's manual
•
1 x ATA-33/66/100 Hard drive ribbon cables
•
1 x Driver Utilities CD
•
1 x I/O Bracket
v
User Manual - Page 18

Chapter 2
Power Supply
The VIA EPIA Mini-ITX Mainboard requires an ATX power supply to ensure that all components are correctly aligned. Before inserting the power supply connector, always make sure the plugs of the power supply are inserted in the proper orientation and the pins are installed correctly to be caused. Then, push down the power supply plug firmly into the connector.
2-6...
User Manual - Page 19

... provides a standard RJ-45 port for connecting printers supports Enhanced Parallel Port (EPP) and Extended Capabilities Parallel Port (ECP) modes.
PS/2 Keyboard
The mainboard provides a standard PS/2 keyboard connector for connecting a PS/2 keyboard.
Hardware Setup
Back Panel
The back panel of the VIA EPIA Mini-ITX Mainboard contains the following connectors:
PS/2 Mouse
LPT Connector...
User Manual - Page 21

...documentation supplied by setting its jumper on Module can connect a master and a slave drive, allowing a maximum of the IDE connectors. These connectors utilize the provided IDE cable. Both IDE 1 and IDE2 can be connected.
Hardware Setup
Connectors
The VIA EPIA Mini-ITX Mainboard provides the following connectors: IDE Connectors The two PCI IDE connectors (IDE 1 & IDE 2) support Ultra...
User Manual - Page 68

... Chipset Drivers option to install the VIA Service Pack 4.
4-2 System Requirements
Monitor
VGA Support, minimum 640 x 480 reso-
The CD should run the "setup.exe" within the CD manually. 3. Featuring the Apollo PLE133 graphics controller with highly integrated display control device that includes a video accelerator with advanced DVD video and TV output capability. Insert the supplied CD...
User Manual - Page 69

... Normally Install to manually install every driver, else select Quickly Install to continue.
4-3 The screen shows two drivers: VIA PCI IDE Bus Driver VIA INF Driver
Please select the driver and click Next to install the drivers automatically. When the installation starts, click Next to step 9.
7. Click Next to continue, for Quickly Install users please go to view the VIA Service Pack...
User Manual - Page 71

... continue.
4-5 Please select all three drivers and click Next to view the VIA Service Pack README. 5. Insert the supplied CD into the CD-ROM drive. 2. The screen now should run the "setup.exe" within the CD manually. 3. Click Yes to install the VIA Service Pack 4. 4. On the setup screen click on the Install VIA Chipset Drivers option to proceed. 6. The...
User Manual - Page 73

..." within the CD manually. 3. If not, please run automatically and the setup screen will appear. On the setup screen click on the Install VIA Chipset Drivers option to proceed.
4-7 When the installation starts, click Next to view the VIA Service Pack README. 5. Insert the supplied CD into the CD-ROM drive. 2. Software Setup
4in1 chipset driver installation for Windows 98/98SE...
User Manual - Page 76

... drivers and click Next to install the VIA Service Pack 4. 4. On the setup screen click on the Install VIA Chipset Drivers option to continue.
8. The screen now will appear. The screen now should run the "setup.exe" within the CD manually. 3. If not, please run automatically and the setup screen will show three drivers:
VIA ATAPI Vendor Support Driver. When the installation...
User Manual - Page 78

... run automatically and the setup screen will appear. On the setup screen click on the Install Integrated VGA Driver option. .
4. The CD should run the "setup.exe" within the CD manually. 3. Chapter 4
VIA PLE133 Integrated VGA Driver
VGA driver installation for Windows 98/98SE/ME/2000/XP 1. Install VIA Tech KLE/PLE Display Driver.
4-12 Insert the supplied CD into the CD...
User Manual - Page 80

...". If not, please run automatically and the setup screen will appear. Click Next to continue.
5. On the setup screen click the Install VIA Audio Driver.
4. The CD should run the "setup.exe" within the CD manually. 3. Chapter 4
VIA Audio Driver
Audio driver installation for Windows 98/98SE/ME/2000/XP 1. Insert the supplied CD disc into the CD-ROM drive...
User Manual - Page 95

Then click "Next" to continue.
7. Then click "Finish" of the "Update Device Driver Wizard" dialog. 8. Then click "Next" to continue.
6. Software Setup 5. Select "The updated driver [Recommended] VIA PCI 10/100Mb Fast Ethernet Adapter" to specify a location: E:\DRIVERS\LAN". Select "Search for a better driver than the one your device is using now. [Recommended]" and use "Browse" ...
User Manual - Page 97

In the "VIA Fast InfraRed Controller Properties" window, select "Update Driver" button.
4-31 The "Device Manager" window is popped. Then, select the "VIA Fast InfraRed Controller" and click right button to select the "Properties".
4. Software Setup 3.
Via EPIA-5000 Reviews
We have not received any reviews for Via yet.