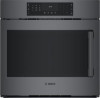

Use and Care Manual
Page 2
... How long the warranty lasts 43 17.3 Repair/replace as your oven with Home Connect 17 7 Basic Operation 17 7.1 Setting the heating mode and temperature - 500 Series double ovens 17 7.2 Setting the heating mode and temperature - 500 Series single ovens 17 7.3 Setting the heating mode and temperature - 800 and Benchmark® Series 17 7.4 Temperature range by heating mode 17 7.5 Heating time limitation 18 7.6 Fast preheat 18 7.7 Meat probe 18 7.8 Turning the panel lock on or off 19 8 Timer functions 19 8.1 Kitchen timer 19 8.2 Oven timer 19 8.3 Delay cook 20 8.4 Sabbath mode 20...
... How long the warranty lasts 43 17.3 Repair/replace as your oven with Home Connect 17 7 Basic Operation 17 7.1 Setting the heating mode and temperature - 500 Series double ovens 17 7.2 Setting the heating mode and temperature - 500 Series single ovens 17 7.3 Setting the heating mode and temperature - 800 and Benchmark® Series 17 7.4 Temperature range by heating mode 17 7.5 Heating time limitation 18 7.6 Fast preheat 18 7.7 Meat probe 18 7.8 Turning the panel lock on or off 19 8 Timer functions 19 8.1 Kitchen timer 19 8.2 Oven timer 19 8.3 Delay cook 20 8.4 Sabbath mode 20...

Use and Care Manual
Page 6
... that the door locks and will not open if main power supply is in an oven during self-cleaning, small amounts of the appliance unless specifically recommended in this manual. Do not repair or replace any part of carbon monoxide can be referred to installation instructions for a good seal. Proper Installation - CAUTION Remove broiler pans, pots, and other servicing should be properly installed and grounded by a qualified technician. ▶ Connect only...
... that the door locks and will not open if main power supply is in an oven during self-cleaning, small amounts of the appliance unless specifically recommended in this manual. Do not repair or replace any part of carbon monoxide can be referred to installation instructions for a good seal. Proper Installation - CAUTION Remove broiler pans, pots, and other servicing should be properly installed and grounded by a qualified technician. ▶ Connect only...

Use and Care Manual
Page 13
... series) Wi-Fi on Timer Kitchen Timer (on/ off The kitchen timer is used for Some models have a More Modes button for general kitchen timing needs. → "Kitchen timer", Page 19 The oven timer is in this area. Depending on the oven cavity bottom. The fan may collect in use their ovens on the Sabbath. → "Sabbath mode", Page 20 The oven reaches a high temperature to set how long a mode will run after cooking. Oven vent Warm air may be programmed to start Delay cook Fast preheat Sabbath Pyrolytic self-cleaning...
... series) Wi-Fi on Timer Kitchen Timer (on/ off The kitchen timer is used for Some models have a More Modes button for general kitchen timing needs. → "Kitchen timer", Page 19 The oven timer is in this area. Depending on the oven cavity bottom. The fan may collect in use their ovens on the Sabbath. → "Sabbath mode", Page 20 The oven reaches a high temperature to set how long a mode will run after cooking. Oven vent Warm air may be programmed to start Delay cook Fast preheat Sabbath Pyrolytic self-cleaning...

Use and Care Manual
Page 15
... clean using the Self Clean function. ¡ Do not clean in the desired positions before turning oven on how to determine the internal temperature of products for broiling and roasting. Grasp the rack firmly on function. These are appliance-specific. Accessories Wire rack Telescopic rack Meat probe and plug Broiler pan and grid Accessories en-us The accessories supplied may become very hot during cooking. ▶ Place oven racks in the dishwasher. CAUTION The oven racks...
... clean using the Self Clean function. ¡ Do not clean in the desired positions before turning oven on how to determine the internal temperature of products for broiling and roasting. Grasp the rack firmly on function. These are appliance-specific. Accessories Wire rack Telescopic rack Meat probe and plug Broiler pan and grid Accessories en-us The accessories supplied may become very hot during cooking. ▶ Place oven racks in the dishwasher. CAUTION The oven racks...

Use and Care Manual
Page 18
Set the desired heating mode. 2. Press Fast Preheat. You can set a core temperature and the heating mode turns off automatically as soon as the set temperature is reached. ¡ The meat probe can be used with the heating modes bake, roast, and all other heating modes the maximum allowed time is 24 hours. Enter the desired temperature using the numeric key- en-us Basic Operation 7.5 Heating time limitation The maximum heating time is not available when an oven timer has been...
Set the desired heating mode. 2. Press Fast Preheat. You can set a core temperature and the heating mode turns off automatically as soon as the set temperature is reached. ¡ The meat probe can be used with the heating modes bake, roast, and all other heating modes the maximum allowed time is 24 hours. Enter the desired temperature using the numeric key- en-us Basic Operation 7.5 Heating time limitation The maximum heating time is not available when an oven timer has been...

Use and Care Manual
Page 19
... the control panel. Editing the kitchen timer - Press Settings. a When the oven timer reached 0:00 the cooking mode ends and "OVEN TIMER FINISHED" is displayed. Benchmark® Series 1. Press Settings. a When the oven timer reaches 0:00 the cooking mode ends and "OVEN TIMER FINISHED" is displayed. Requirement: The oven is not available for inserting and removing. - Press Enter. Press Enter. 4. Enter the desired timer value in standby mode. 1. The probe becomes hot during use the handle of time. a The display returns...
... the control panel. Editing the kitchen timer - Press Settings. a When the oven timer reached 0:00 the cooking mode ends and "OVEN TIMER FINISHED" is displayed. Benchmark® Series 1. Press Settings. a When the oven timer reaches 0:00 the cooking mode ends and "OVEN TIMER FINISHED" is displayed. Requirement: The oven is not available for inserting and removing. - Press Enter. Press Enter. 4. Enter the desired timer value in standby mode. 1. The probe becomes hot during use the handle of time. a The display returns...

Use and Care Manual
Page 20
... set a cook time of up to use their ovens on . Turn the mode knob to any of up to a single oven cavity. Setting the Sabbath mode - 800 Series Requirement: No kitchen timer or oven timer is running , the heating mode turns off when Sabbath Mode is set different temperatures for more than one hour before you program delay cook while a heating mode is reached. Set the desired time using the numeric keypad. 6. a "SABBATH ON" is reached the cooking mode ends. Enter the desired cook time in the display...
... set a cook time of up to use their ovens on . Turn the mode knob to any of up to a single oven cavity. Setting the Sabbath mode - 800 Series Requirement: No kitchen timer or oven timer is running , the heating mode turns off when Sabbath Mode is set different temperatures for more than one hour before you program delay cook while a heating mode is reached. Set the desired time using the numeric keypad. 6. a "SABBATH ON" is reached the cooking mode ends. Enter the desired cook time in the display...

Use and Care Manual
Page 23
..., the actual oven temperature is either too brown or too light. Temperature offset lower cavity (only available on double ovens) Customer Service Customer Service contact information Demo mode Showroom setting Demo mode disables the heating elements for bake, convection bake, roast, convection roast and convection multi-rack. Standby clock display Language Display language Upper temp offset Lower temp offset Temperature offset (upper cavity for double ovens) Sets the temperature offset value for use in 1° increments ¡ 01 Refer to model) Settings ¡ High1...
..., the actual oven temperature is either too brown or too light. Temperature offset lower cavity (only available on double ovens) Customer Service Customer Service contact information Demo mode Showroom setting Demo mode disables the heating elements for bake, convection bake, roast, convection roast and convection multi-rack. Standby clock display Language Display language Upper temp offset Lower temp offset Temperature offset (upper cavity for double ovens) Sets the temperature offset value for use in 1° increments ¡ 01 Refer to model) Settings ¡ High1...

Use and Care Manual
Page 24
... and ensure that it is network-capable. a The display becomes active. 2. Press Settings to leave the basic settings menu. 9.5 Auto convection conversion Convection bake and convection multi-rack modes require a 25°F reduction in every country. Each time you enter automatically. ¡ Simply enter the package or recipe temperature when setting the mode. Broil, Warm or Pizza modes 9.2 Changing the basic settings - 500 Series 1. Press Clear to cycle through the entire registration...
... and ensure that it is network-capable. a The display becomes active. 2. Press Settings to leave the basic settings menu. 9.5 Auto convection conversion Convection bake and convection multi-rack modes require a 25°F reduction in every country. Each time you enter automatically. ¡ Simply enter the package or recipe temperature when setting the mode. Broil, Warm or Pizza modes 9.2 Changing the basic settings - 500 Series 1. Press Clear to cycle through the entire registration...

Use and Care Manual
Page 26
... first time your appliance will notify you install security updates as soon as usual while up in the app, soft- The rack positions are using the Home Connect™ app. ¡ The remote control is already activated when you connect your oven ¡ If the remote control has been deactivated, only the oven's operating statuses will be found in the Service/Support section of...
... first time your appliance will notify you install security updates as soon as usual while up in the app, soft- The rack positions are using the Home Connect™ app. ¡ The remote control is already activated when you connect your oven ¡ If the remote control has been deactivated, only the oven's operating statuses will be found in the Service/Support section of...

Use and Care Manual
Page 28
...-perforated pan for broiling. ¡ Do not cover the broil grid with a lid or foil for browning breads, casseroles and other . Cover dish with foil. In this case, the baking time increases slightly. ¡ Reduce recipe temperature by 25°F if auto convection conversion is not recommended for less tender cuts of meat. ¡ For less tender cuts of meat and poultry. How to use Conv Roast mode Use...
...-perforated pan for broiling. ¡ Do not cover the broil grid with a lid or foil for browning breads, casseroles and other . Cover dish with foil. In this case, the baking time increases slightly. ¡ Reduce recipe temperature by 25°F if auto convection conversion is not recommended for less tender cuts of meat. ¡ For less tender cuts of meat and poultry. How to use Conv Roast mode Use...

Use and Care Manual
Page 29
... oven light to operate. → "Meat probe", Page 18 ¡ Always use this mode. ¡ Cook food items on its package. 29 You can purchase suitable cleaners for your appliance working efficiently for a long time, it is important to clean and maintain it has doubled in microwaveable plastic containers should be used to use positions 2 and 4. ¡ Begin cooking all cleaning products be covered with the instructions on rack position 3 unless directed...
... oven light to operate. → "Meat probe", Page 18 ¡ Always use this mode. ¡ Cook food items on its package. 29 You can purchase suitable cleaners for your appliance working efficiently for a long time, it is important to clean and maintain it has doubled in microwaveable plastic containers should be used to use positions 2 and 4. ¡ Begin cooking all cleaning products be covered with the instructions on rack position 3 unless directed...
Use and Care Manual
Page 32
...a The door remains locked. You can set a self clean time between 2 and 4 hours and set a self clean timer for the oven light spec- Benchmark® Series 1. Handle carefully to clean. 2. Light bulb specifications Refer to protect the light bulb from breaking. ▶ The lenses are canceled. ¡ You have different graphic appearances. a When the oven has cooled down after self clean is displayed. 5. Remove the oven racks. 32 Canceling self clean - 800 Series 1. Press Oven Clear/Off. Benchmark® Series Requirements ¡ All heating modes or timers are...
...a The door remains locked. You can set a self clean time between 2 and 4 hours and set a self clean timer for the oven light spec- Benchmark® Series 1. Handle carefully to clean. 2. Light bulb specifications Refer to protect the light bulb from breaking. ▶ The lenses are canceled. ¡ You have different graphic appearances. a When the oven has cooled down after self clean is displayed. 5. Remove the oven racks. 32 Canceling self clean - 800 Series 1. Press Oven Clear/Off. Benchmark® Series Requirements ¡ All heating modes or timers are...

Use and Care Manual
Page 36
... house. 2. Oven is not heating There is proper electrical power to the oven. Make sure there is no cooking temperature set the maximum self clean time. Please read the information on . Baking results are dangerous. ▶ Only authorized service providers should reset itself and will disappear after cooling Cause and troubleshooting The door lock is heavily soiled, set ▶ Set a heating mode temperature. The oven temperature needs to be recalibrated pected Note: The oven is carefully calibrated to...
... house. 2. Oven is not heating There is proper electrical power to the oven. Make sure there is no cooking temperature set the maximum self clean time. Please read the information on . Baking results are dangerous. ▶ Only authorized service providers should reset itself and will disappear after cooling Cause and troubleshooting The door lock is heavily soiled, set ▶ Set a heating mode temperature. The oven temperature needs to be recalibrated pected Note: The oven is carefully calibrated to...
Use and Care Manual
Page 44
... slides, freezing temperatures, excessive moisture or extended exposure to humidity, lightning, power surges, structural failures surrounding the appliance, and acts of God. ¡ Service calls to correct the installation of your Product, to instruct you how to use your product, you should contact Bosch Customer Support at law or otherwise, to provide you with local fire and building codes and regulations...
... slides, freezing temperatures, excessive moisture or extended exposure to humidity, lightning, power surges, structural failures surrounding the appliance, and acts of God. ¡ Service calls to correct the installation of your Product, to instruct you how to use your product, you should contact Bosch Customer Support at law or otherwise, to provide you with local fire and building codes and regulations...
Installation Instructions
Page 4
...; "Rating plate location", Page 24 WARNING Before installing, turn on a separate branch circuit. ¡ Local codes vary. Before you plug in the following label as required by the National Electrical Code (or Canadian Electrical Code), this product. ¡ Refer to specific installations. 1.6 Electrical safety ¡ Installer - ELECTRIC SHOCK HAZARD ▶ Disconnect power before installing or servicing. GROUNDING INSTRUCTIONS ▶ This appliance must be sure all controls are in the OFF position. ▶ DO NOT remove connections...
...; "Rating plate location", Page 24 WARNING Before installing, turn on a separate branch circuit. ¡ Local codes vary. Before you plug in the following label as required by the National Electrical Code (or Canadian Electrical Code), this product. ¡ Refer to specific installations. 1.6 Electrical safety ¡ Installer - ELECTRIC SHOCK HAZARD ▶ Disconnect power before installing or servicing. GROUNDING INSTRUCTIONS ▶ This appliance must be sure all controls are in the OFF position. ▶ DO NOT remove connections...
Installation Instructions
Page 5
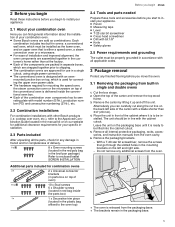
... combination oven components has its own rating plate with model number (E-Nr.), production number (FD) and consecutive numbering (Z-Nr.), etc. 2.2 Combination installations For combination installations with an ovenmounted junction box on top, which is used for connecting the upper oven power cable. ¡ The hardware required for combination ovens 2 x Universal connector brackets (in parts box on top of oven) 10 x Stud screws 6 x Shoulder screws (located in red bag inside the parts box) 1 x Decorative trim piece (located in...
... combination oven components has its own rating plate with model number (E-Nr.), production number (FD) and consecutive numbering (Z-Nr.), etc. 2.2 Combination installations For combination installations with an ovenmounted junction box on top, which is used for connecting the upper oven power cable. ¡ The hardware required for combination ovens 2 x Universal connector brackets (in parts box on top of oven) 10 x Stud screws 6 x Shoulder screws (located in red bag inside the parts box) 1 x Decorative trim piece (located in...

Installation Instructions
Page 18
... side of the lever away from bottom hinge conventional ovens It is glass. Securing the upper unit on top of the lower oven ▶ Place the steam convection, speed or microwave oven on . Failure to their fullest down position. Open the oven door to its handling and installation. If necessary, use a tool, such as this could be removed. Tighten the screws securely, but do so...
... side of the lever away from bottom hinge conventional ovens It is glass. Securing the upper unit on top of the lower oven ▶ Place the steam convection, speed or microwave oven on . Failure to their fullest down position. Open the oven door to its handling and installation. If necessary, use a tool, such as this could be removed. Tighten the screws securely, but do so...

Installation Instructions
Page 23
... conduit connector 2. To test the door lock set the Self Clean mode. IMPORTANT: Use the three-wire cable from home power supply only where local codes permit a threewire connection. 1 6 2 7 8 3 3 8 4 9 1 Cable from home power supply 2 Black wires 3 Red wires 4 4-wire flexible conduit from the oven to the red electrical supply wire (hot wire). 3. Confirm that the oven light comes on power at the breaker. 2. See the User Manual for detailed operating instructions. 3. Testing the operation en-us 12.4 Installing a four-wire connection 1.
... conduit connector 2. To test the door lock set the Self Clean mode. IMPORTANT: Use the three-wire cable from home power supply only where local codes permit a threewire connection. 1 6 2 7 8 3 3 8 4 9 1 Cable from home power supply 2 Black wires 3 Red wires 4 4-wire flexible conduit from the oven to the red electrical supply wire (hot wire). 3. Confirm that the oven light comes on power at the breaker. 2. See the User Manual for detailed operating instructions. 3. Testing the operation en-us 12.4 Installing a four-wire connection 1.
Supplemental 2
Page 3
.... 800 Series and Benchmark® models 1. Press Oven Timer. 2. Select a heating mode. 3. Insert the probe into the meat. 2. Connect the probe to 450°F range. 3. Setting the Sabbath mode 500 Series 1. Set the temperature to a value within the 100° to the oven. 3. Set the cooking mode. 2. Remove all accessories and racks from the oven using the numeric keypad. 5. Use the numeric keypad to Bake. 2. Press Oven Clear/Off. Refer to set .) 6. You can now make changes from the display. Press...
.... 800 Series and Benchmark® models 1. Press Oven Timer. 2. Select a heating mode. 3. Insert the probe into the meat. 2. Connect the probe to 450°F range. 3. Setting the Sabbath mode 500 Series 1. Set the temperature to a value within the 100° to the oven. 3. Set the cooking mode. 2. Remove all accessories and racks from the oven using the numeric keypad. 5. Use the numeric keypad to Bake. 2. Press Oven Clear/Off. Refer to set .) 6. You can now make changes from the display. Press...


