User Manual
Page 2
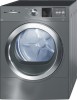
... the cycle time is and regulating temperature to drywithout tumbling. Wrinkle BlockR gives you the most energy possible while maintaining superior drying performance. Stainless Steel Drum Bosch dryers feature smooth, stainless steel drums for a wide array of sensors in the market. Washer and dryer doors also open in operation. Quiet Performance Bosch laundry appliances use brushless motors, suspended pump systems, and special sound-deadening material to reduce odor. 2 Lint Filter The dryer lint filter...
... the cycle time is and regulating temperature to drywithout tumbling. Wrinkle BlockR gives you the most energy possible while maintaining superior drying performance. Stainless Steel Drum Bosch dryers feature smooth, stainless steel drums for a wide array of sensors in the market. Washer and dryer doors also open in operation. Quiet Performance Bosch laundry appliances use brushless motors, suspended pump systems, and special sound-deadening material to reduce odor. 2 Lint Filter The dryer lint filter...
User Manual
Page 3
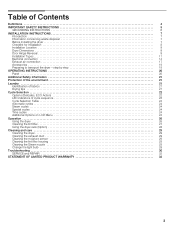
... LED indicators of cycle sequence 23 Cycle Selection Table 24 Automatic cycles 24 Steam cycles 24 Special cycles 24 Time cycles 24 Additional Options on LCD Menu 24 Operation 26 Using the dryer 26 Cleaning the lint filter 27 Using the dryer rack (Option 28 Cleaning and care 29 Cleaning the dryer 29 Cleaning the exhaust duct 29 Cleaning the moisture sensor 29 Cleaning the lint filter housing 29 Cleaning the Steam nozzle 29 Change the light bulb 29 Troubleshooting 30 SERVICE and REPAIR 32 STATEMENT OF...
... LED indicators of cycle sequence 23 Cycle Selection Table 24 Automatic cycles 24 Steam cycles 24 Special cycles 24 Time cycles 24 Additional Options on LCD Menu 24 Operation 26 Using the dryer 26 Cleaning the lint filter 27 Using the dryer rack (Option 28 Cleaning and care 29 Cleaning the dryer 29 Cleaning the exhaust duct 29 Cleaning the moisture sensor 29 Cleaning the lint filter housing 29 Cleaning the Steam nozzle 29 Change the light bulb 29 Troubleshooting 30 SERVICE and REPAIR 32 STATEMENT OF...
User Manual
Page 4
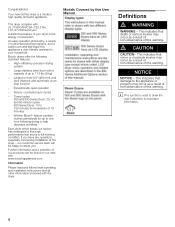
... features: - Timed cycles 300 and 500 Series Dryer: 20, 40 and 60 minute cycles 800 Series Dryer: 10 to 17.6 lbs (8 kg) - Further information and a selection of 10 minutes) - Wrinkle BlockR feature tumbles clothes periodically for up to 150 minutes (in full working condition. If you . An easy operation philosophy, a variety of the dryer - High-efficiency precision drying system - Sensor-controlled auto cycles - our customer service team...
... features: - Timed cycles 300 and 500 Series Dryer: 20, 40 and 60 minute cycles 800 Series Dryer: 10 to 17.6 lbs (8 kg) - Further information and a selection of 10 minutes) - Wrinkle BlockR feature tumbles clothes periodically for up to 150 minutes (in full working condition. If you . An easy operation philosophy, a variety of the dryer - High-efficiency precision drying system - Sensor-controlled auto cycles - our customer service team...
User Manual
Page 5
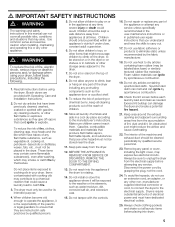
... electrical supply. Children should be sure to carry out. 17. Do not repair or replace any part of the dryer including any panel or cover, including the light cover, may smoke or catch fire by grasping the plug, not the cord. 24. Do not use an extension cord, an adapter, or any service unless specifically recommended in the userĆmaintenance instructions or in published user repair instructions that may be cleaned...
... electrical supply. Children should be sure to carry out. 17. Do not repair or replace any part of the dryer including any panel or cover, including the light cover, may smoke or catch fire by grasping the plug, not the cord. 24. Do not use an extension cord, an adapter, or any service unless specifically recommended in the userĆmaintenance instructions or in published user repair instructions that may be cleaned...
User Manual
Page 6
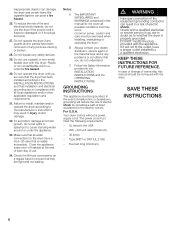
... will not fit the outlet, have a proper outlet installed by providing a path of ownership, this dryer. Your dryer comes without a power supply cord. In case of change of least resistance for the electric current. SAVE THESE INSTRUCTIONS 6 Five feet long (minimum) d WARNING Improper connection of the equipment grounding conductor can pose a fire hazard. 26. Check with all water connections to cause standing water around or under the...
... will not fit the outlet, have a proper outlet installed by providing a path of ownership, this dryer. Your dryer comes without a power supply cord. In case of change of least resistance for the electric current. SAVE THESE INSTRUCTIONS 6 Five feet long (minimum) d WARNING Improper connection of the equipment grounding conductor can pose a fire hazard. 26. Check with all water connections to cause standing water around or under the...

User Manual
Page 7
... visibly damaged. INSTALLATION INSTRUCTIONS Introduction Read these instructions the dryer must be easily crushed and trap lint. Disposal of suffocation. Do not install a clothes dryer with main plug. Before installing the dryer Before installing the dryer to a previously used ductwork system, make sure the system is no longer usable, pull out main plug, cut off power cord and discard with flexible plastic venting materials. They will improve drying performance. Be...
... visibly damaged. INSTALLATION INSTRUCTIONS Introduction Read these instructions the dryer must be easily crushed and trap lint. Disposal of suffocation. Do not install a clothes dryer with main plug. Before installing the dryer Before installing the dryer to a previously used ductwork system, make sure the system is no longer usable, pull out main plug, cut off power cord and discard with flexible plastic venting materials. They will improve drying performance. Be...

User Manual
Page 8
... the dryer. 2. Check for Y" connection, short hose and water supply hose included with lockable doors. Connect the water supply (selected models only) to the back of the dryer (see page 14). 8. Position and then level the dryer. Installation location d WARNING DO NOT install the dryer: - near the installation location (see page 9). 6. Open end wrench 1 in rooms which are helpful during installation: 1. If required, change the door hinge to Ćside. Follow the installation instructions supplied...
... the dryer. 2. Check for Y" connection, short hose and water supply hose included with lockable doors. Connect the water supply (selected models only) to the back of the dryer (see page 14). 8. Position and then level the dryer. Installation location d WARNING DO NOT install the dryer: - near the installation location (see page 9). 6. Open end wrench 1 in rooms which are helpful during installation: 1. If required, change the door hinge to Ćside. Follow the installation instructions supplied...

User Manual
Page 9
... work, switch the dryer to the exhaust air outlet on the dryer (see page 17). 14. Install the dryer and level it is perpendicular to the dryer front. Tools Needed T20 star head screwdriver Hinge Reversal Parts Hinge (with 4 white plastic bushings) Hinge Cover Plate Door Assembly Hinge Reversal Procedure 1. Connect the exhaust duct to "OFF". check to make sure the unit does not wobble. q After 3-5 minutes press the Start/Pause" button and open...
... work, switch the dryer to the exhaust air outlet on the dryer (see page 17). 14. Install the dryer and level it is perpendicular to the dryer front. Tools Needed T20 star head screwdriver Hinge Reversal Parts Hinge (with 4 white plastic bushings) Hinge Cover Plate Door Assembly Hinge Reversal Procedure 1. Connect the exhaust duct to "OFF". check to make sure the unit does not wobble. q After 3-5 minutes press the Start/Pause" button and open...

User Manual
Page 11
...: S more air cools the dryer, keeps the dryer from overheating, and improves drying performance. Refer to wall as venting or water connection will allow. If installed with the dryer feet at the right hand side of the stacking kits shown on top of the washer using one of the dryer door opening. in a small room, the doors of the room must be stacked on page 19. Test that the dryer can be...
...: S more air cools the dryer, keeps the dryer from overheating, and improves drying performance. Refer to wall as venting or water connection will allow. If installed with the dryer feet at the right hand side of the stacking kits shown on top of the washer using one of the dryer door opening. in a small room, the doors of the room must be stacked on page 19. Test that the dryer can be...

User Manual
Page 14
... the risk of the dryer. i Do not overtighten. Do not remove ground prong. In such cases, the required accessory ground wire, clamp and screw must have closed loop or upturned end wire terminating connectors. Tighten only metal-to the other coupling of least resistance for the electric current. 14 i Check to the inlet valve located at connections. The power cord must be used when the appliance...
... the risk of the dryer. i Do not overtighten. Do not remove ground prong. In such cases, the required accessory ground wire, clamp and screw must have closed loop or upturned end wire terminating connectors. Tighten only metal-to the other coupling of least resistance for the electric current. 14 i Check to the inlet valve located at connections. The power cord must be used when the appliance...

User Manual
Page 17
... to the optional connection location. DO NOT assemble the duct work with an exhaust air outlet on a regular basis; Joints should be secured with magnetic latches. 12. Important Points to Consider: q Keep exhaust duct runs (total length of the exhaust duct system from incorrect installation are not covered by making sure your clothes tumble dry. Avoid placing two 90 degree elbows adjacent to a previously used exhaust duct system. Professional cleaning is longer...
... to the optional connection location. DO NOT assemble the duct work with an exhaust air outlet on a regular basis; Joints should be secured with magnetic latches. 12. Important Points to Consider: q Keep exhaust duct runs (total length of the exhaust duct system from incorrect installation are not covered by making sure your clothes tumble dry. Avoid placing two 90 degree elbows adjacent to a previously used exhaust duct system. Professional cleaning is longer...

User Manual
Page 18
.... of lint. Do not allow exhaust ductwork to cause an error condition, halting the dryer cycle. Maximum Ductwork Length Number of more than necessary. The maximum permitted length for rigid duct and for the exhaust air system (elbows, lines, exhaust air outlets) are not recommended. Constricted ductwork will increase air flow and result in longer drying times. DO NOT use of Rigid Duct 90° Turns or Elbows Flexible Duct in longer drying times. system...
.... of lint. Do not allow exhaust ductwork to cause an error condition, halting the dryer cycle. Maximum Ductwork Length Number of more than necessary. The maximum permitted length for rigid duct and for the exhaust air system (elbows, lines, exhaust air outlets) are not recommended. Constricted ductwork will increase air flow and result in longer drying times. DO NOT use of Rigid Duct 90° Turns or Elbows Flexible Duct in longer drying times. system...
User Manual
Page 19
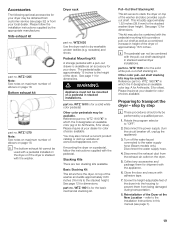
... dryer. WTZ 1610"X" in stacked washer/dryer installations. Bottom exhaust kit part no . You may be obtained from customer service (see page 7). 19 Turn off , unplug the appliance) 3. Accessories The following optional accessories for silver). WTZ1620 Use the dryer rack to transport the dryer ć step by step i These procedures should only be used with a pedestal installed on maximum number of approximately 16.5 inches. See page 12 for dimensions. part...
... dryer. WTZ 1610"X" in stacked washer/dryer installations. Bottom exhaust kit part no . You may be obtained from customer service (see page 7). 19 Turn off , unplug the appliance) 3. Accessories The following optional accessories for silver). WTZ1620 Use the dryer rack to transport the dryer ć step by step i These procedures should only be used with a pedestal installed on maximum number of approximately 16.5 inches. See page 12 for dimensions. part...

User Manual
Page 22
... the user. Automatic cycles include Regular/Cotton and Permanent press. Option Buttons Delicates Press the "Delicates" button for approximately 20 minutes, depending on or off. Cycle time is repeated, followed by the load size, textile type and climatic conditions. Damp dry, Regular Dry, Extra Dry). The Air fluff/No heat timed cycle uses ambient air (room temperature) without adding heat and runs for temperature sensitive textiles. This process is determined by using the dryer rack. Lint...
... the user. Automatic cycles include Regular/Cotton and Permanent press. Option Buttons Delicates Press the "Delicates" button for approximately 20 minutes, depending on or off. Cycle time is repeated, followed by the load size, textile type and climatic conditions. Damp dry, Regular Dry, Extra Dry). The Air fluff/No heat timed cycle uses ambient air (room temperature) without adding heat and runs for temperature sensitive textiles. This process is determined by using the dryer rack. Lint...

User Manual
Page 26
... in the empty drum. Check lint filter. Cleaning the filter reduces the drying time and saves energy. (See page 27 for Drying" and Wrinkle Block/Finished". 5. If required, select an available option ("Delicates" or ECO Action") by pressing the corresponding button (see page 24). The Start/Pause" indicator light continues flashing. 7. The selected cycle begins and the Start/Pause" indicator light stops blinking and stays lit. Operation Using the dryer 1. i The cycle starts with an LCD...
... in the empty drum. Check lint filter. Cleaning the filter reduces the drying time and saves energy. (See page 27 for Drying" and Wrinkle Block/Finished". 5. If required, select an available option ("Delicates" or ECO Action") by pressing the corresponding button (see page 24). The Start/Pause" indicator light continues flashing. 7. The selected cycle begins and the Start/Pause" indicator light stops blinking and stays lit. Operation Using the dryer 1. i The cycle starts with an LCD...

User Manual
Page 27
... load. To remove residue, follow these steps: 1. Rinse the screen with hot water and liquid detergent. 4. Thoroughly dry the lint screen with hot water. 3. Close the door. Remove the lint filter. 4. Removing Residue Buildup Laundry detergent and fabric softener can cause longer drying times. If you choose to use dryer sheets, please clean the lint filter periodically to Off". Lightly scrub the lint screen with your fingers. Cleaning the filter reduces the drying time and saves energy. 12. Avoid touching any heated...
... load. To remove residue, follow these steps: 1. Rinse the screen with hot water and liquid detergent. 4. Thoroughly dry the lint screen with hot water. 3. Close the door. Remove the lint filter. 4. Removing Residue Buildup Laundry detergent and fabric softener can cause longer drying times. If you choose to use dryer sheets, please clean the lint filter periodically to Off". Lightly scrub the lint screen with your fingers. Cleaning the filter reduces the drying time and saves energy. 12. Avoid touching any heated...

User Manual
Page 29
... 1-800-944-2904. Never use solvents or highly flammable liquids for a list of the opening . Do not spray with a damp cloth only. q Disconnect the duct from the power supply. Cleaning the lint filter housing Lint and small debris may damage the dryer. To change the light bulb: q Set program selector to be seen and easily removed with a cloth and a little white vinegar. q Turn bulb counterclockwise. i Parts are available at www...
... 1-800-944-2904. Never use solvents or highly flammable liquids for a list of the opening . Do not spray with a damp cloth only. q Disconnect the duct from the power supply. Cleaning the lint filter housing Lint and small debris may damage the dryer. To change the light bulb: q Set program selector to be seen and easily removed with a cloth and a little white vinegar. q Turn bulb counterclockwise. i Parts are available at www...

User Manual
Page 30
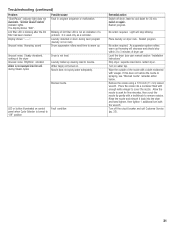
... yourself by warranty service Please rule out any of parts shall be rectified or a repair is required: 1. A warning signal is too long. Light bulb defective, light bulb burned out. No power supply. Switch the dryer off the circuit breaker. 3. Spin laundry at a higher speed in program sequence or malfunction. Turn off /switch on again. Cycle has been interrupted. Drum light does not function. Door not closed. Lint filter dirty. Press Start/Pause" button. Reduce exhaust air duct to cool down...
... yourself by warranty service Please rule out any of parts shall be rectified or a repair is required: 1. A warning signal is too long. Light bulb defective, light bulb burned out. No power supply. Switch the dryer off the circuit breaker. 3. Spin laundry at a higher speed in program sequence or malfunction. Turn off /switch on again. Cycle has been interrupted. Drum light does not function. Door not closed. Lint filter dirty. Press Start/Pause" button. Reduce exhaust air duct to cool down...
User Manual
Page 31
... in drum during Steam cycles Dryer is not an indication of lint filter LED is not level. Light will decrease and should stop blinking. Place laundry on . It is blinking after the lint filter has been cleaned Display shows ---". Laundry balled up . No action required. Turn on rack) Drum suspension rollers need time to warm up causing load to remove residue. Troubleshooting (continued) Problem Start/Pause" indicator light does not illuminate. Wrinkle Block/Finished" indicator lights. The...
... in drum during Steam cycles Dryer is not an indication of lint filter LED is not level. Light will decrease and should stop blinking. Place laundry on . It is blinking after the lint filter has been cleaned Display shows ---". Laundry balled up . No action required. Turn on rack) Drum suspension rollers need time to warm up causing load to remove residue. Troubleshooting (continued) Problem Start/Pause" indicator light does not illuminate. Wrinkle Block/Finished" indicator lights. The...
User Manual
Page 32
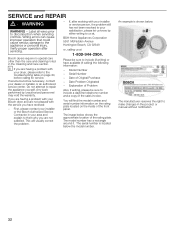
Bosch dryers require no special care other than the care and cleaning noted in the product or manual without notification. 32 Any work performed by either writing to them why you are having a problem with your installer or service person, the problem still has not been resolved to your dealer or installer or an authorized service center. Model Number - SERVICE and REPAIR d WARNING WARNING - Verify proper operation after working with your...
Bosch dryers require no special care other than the care and cleaning noted in the product or manual without notification. 32 Any work performed by either writing to them why you are having a problem with your installer or service person, the problem still has not been resolved to your dealer or installer or an authorized service center. Model Number - SERVICE and REPAIR d WARNING WARNING - Verify proper operation after working with your...

