
User Manual
Page 2
... proper drying. Wrinkle BlockR gives you the ability to reduce energy usage by up to 50% per year. Stainless Steel Drum Bosch dryers feature smooth, stainless steel drums for the gentlest of the most gentle and effective drying possible. It is standard on all models...of tennis shoes, allowing either to drywithout tumbling. Lint Filter The dryer lint filter is and regulating temperature to the dryer becomes an effortless task. Wrinkle BlockR Sometimes you the most efficient dryers in the Bosch Vision dryer for cycles that illuminates should the filter need immediate cleaning. The ...
... proper drying. Wrinkle BlockR gives you the ability to reduce energy usage by up to 50% per year. Stainless Steel Drum Bosch dryers feature smooth, stainless steel drums for the gentlest of the most gentle and effective drying possible. It is standard on all models...of tennis shoes, allowing either to drywithout tumbling. Lint Filter The dryer lint filter is and regulating temperature to the dryer becomes an effortless task. Wrinkle BlockR Sometimes you the most efficient dryers in the Bosch Vision dryer for cycles that illuminates should the filter need immediate cleaning. The ...
User Manual
Page 3
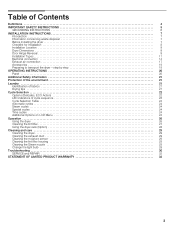
... 8 Door Hinge Reversal 9 Installation Types 11 Electrical connection 14 Exhaust air connection 17 Accessories 19 Preparing to transport the dryer ć step by step 19 OPERATING INSTRUCTIONS 20 Panel 20 Additional Safety information 21 Protection of the environment 21 Laundry 21... 24 Time cycles 24 Additional Options on LCD Menu 24 Operation 26 Using the dryer 26 Cleaning the lint filter 27 Using the dryer rack (Option 28 Cleaning and care 29 Cleaning the dryer 29 Cleaning the exhaust duct 29 Cleaning the moisture sensor 29 Cleaning the lint ...
... 8 Door Hinge Reversal 9 Installation Types 11 Electrical connection 14 Exhaust air connection 17 Accessories 19 Preparing to transport the dryer ć step by step 19 OPERATING INSTRUCTIONS 20 Panel 20 Additional Safety information 21 Protection of the environment 21 Laundry 21... 24 Time cycles 24 Additional Options on LCD Menu 24 Operation 26 Using the dryer 26 Cleaning the lint filter 27 Using the dryer rack (Option 28 Cleaning and care 29 Cleaning the dryer 29 Cleaning the exhaust duct 29 Cleaning the moisture sensor 29 Cleaning the lint ...
User Manual
Page 4
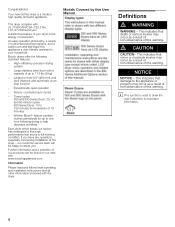
...appliance. Large port hole (16"/406 mm), and door interlock with : UL 2158/CAN/CSA-C22.2 No. 112-97 Clothes Dryers A distinctive feature of this warning. Sensor-controlled auto cycles - Models Covered by this warning. This indicates that death or serious ...Information Please read and follow these operating and installation instructions and all other information enclosed with a capacity of this warning. Bosch dryers offer the following drying to assist you have any questions, especially concerning installation of this User Manual Definitions d WARNING WARNING...
...appliance. Large port hole (16"/406 mm), and door interlock with : UL 2158/CAN/CSA-C22.2 No. 112-97 Clothes Dryers A distinctive feature of this warning. Sensor-controlled auto cycles - Models Covered by this warning. This indicates that death or serious ...Information Please read and follow these operating and installation instructions and all other information enclosed with a capacity of this warning. Bosch dryers offer the following drying to assist you have any questions, especially concerning installation of this User Manual Definitions d WARNING WARNING...
User Manual
Page 5
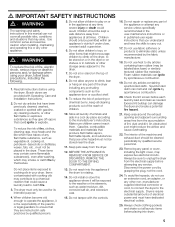
...combustion. 19. Spunbonded olefin can melt and can ignite by spontaneous combustion. 20. Check the lint screen before using your dryer. The interior of poisoning or chemical burns, keep all laundry items before attempting any other appliance. Disconnect the power cord... by qualified service personnel. 23. Bosch dryers are instructed in safe practices by qualified persons. 5. The dryer must only be permitted within an appliance's vicinity if under close, constant adult supervision. 6. When...
...combustion. 19. Spunbonded olefin can melt and can ignite by spontaneous combustion. 20. Check the lint screen before using your dryer. The interior of poisoning or chemical burns, keep all laundry items before attempting any other appliance. Disconnect the power cord... by qualified service personnel. 23. Bosch dryers are instructed in safe practices by qualified persons. 5. The dryer must only be permitted within an appliance's vicinity if under close, constant adult supervision. 6. When...
User Manual
Page 6
...hose connections on a regular basis to cause standing water around or under the appliance. 33. In case of change of ownership, this dryer. SAVE THESE INSTRUCTIONS 6 Plastic or nonĆmetal flexible duct is readily accessible. Make sure that all water connections to the INSTALLATION ...are tight and not leaking. B Always contact your dealer, distributor, service agent or the manufacturer about any safety devices. 29. For U.S.A. Your dryer comes without a power supply cord. UL listed in a risk of least resistance for the electric current. Type SRDT or DRT (UL 2158) -...
...hose connections on a regular basis to cause standing water around or under the appliance. 33. In case of change of ownership, this dryer. SAVE THESE INSTRUCTIONS 6 Plastic or nonĆmetal flexible duct is readily accessible. Make sure that all water connections to the INSTALLATION ...are tight and not leaking. B Always contact your dealer, distributor, service agent or the manufacturer about any safety devices. 29. For U.S.A. Your dryer comes without a power supply cord. UL listed in a risk of least resistance for the electric current. Type SRDT or DRT (UL 2158) -...

User Manual
Page 7
...To reduce the risk of disposal. NOTICE Remove the appliance packaging carefully to prevent damage to ensure optimum dryer performance. Check the dryer for clothes dryers. They will save you time and effort and help to appliance surfaces and adjacent areas. To prevent... installation instructions completely and carefully. Professional ductwork cleaning is installed, it by projecting components (e.g. Do not install a clothes dryer with the National Electric Code, ANSI/NFPA70 ć latest edition/State and Municipal codes and/or local codes. All packaging...
...To reduce the risk of disposal. NOTICE Remove the appliance packaging carefully to prevent damage to ensure optimum dryer performance. Check the dryer for clothes dryers. They will save you time and effort and help to appliance surfaces and adjacent areas. To prevent... installation instructions completely and carefully. Professional ductwork cleaning is installed, it by projecting components (e.g. Do not install a clothes dryer with the National Electric Code, ANSI/NFPA70 ć latest edition/State and Municipal codes and/or local codes. All packaging...

User Manual
Page 8
...the installation instructions supplied by a qualified technician or a licensed electrician (see page 13). (Selected models only). 9. Risk of the dryer. If the dryer is moved to its final installation location. near the installation location (see page 19). 7. Compensate for uneven floors with all four ... water supply (selected models only) to the back of the exhaust duct to Ćside. Installation location d WARNING DO NOT install the dryer: - If required, install the side or bottom exhaust air outlet on carpets! outdoors - Ensure that there is adequate room for Y" connection...
...the installation instructions supplied by a qualified technician or a licensed electrician (see page 13). (Selected models only). 9. Risk of the dryer. If the dryer is moved to its final installation location. near the installation location (see page 19). 7. Compensate for uneven floors with all four ... water supply (selected models only) to the back of the exhaust duct to Ćside. Installation location d WARNING DO NOT install the dryer: - If required, install the side or bottom exhaust air outlet on carpets! outdoors - Ensure that there is adequate room for Y" connection...

User Manual
Page 9
...wobble. Door Hinge Reversal The door is hinged on the hinge pins Avoid allowing the 4 plastic bushings to fall off the hinge pins. Open the dryer door to "Extra Dry" and then press the Start/Pause" button. If any of the bushings do fall off , reinstall them on each... holding the hinge cover in the troubleshooting section (page 30) and find the fault. Never remove the heightĆadjustable feet! 13. q Switch the dryer to fully expose the hinge cover. 4. q After making preliminary adjustments, press down on the hinge pins prior to reinstalling the door. 6. If pressing ...
...wobble. Door Hinge Reversal The door is hinged on the hinge pins Avoid allowing the 4 plastic bushings to fall off the hinge pins. Open the dryer door to "Extra Dry" and then press the Start/Pause" button. If any of the bushings do fall off , reinstall them on each... holding the hinge cover in the troubleshooting section (page 30) and find the fault. Never remove the heightĆadjustable feet! 13. q Switch the dryer to fully expose the hinge cover. 4. q After making preliminary adjustments, press down on the hinge pins prior to reinstalling the door. 6. If pressing ...

User Manual
Page 10
... as shown in the illustration below as (A). Rotate the striker cover and striker 180 degrees so the assembly fits to the install area on the dryer. 10 Flip the door over so the back faces up. 16. The cover glass has a raised glass edge that goes under the striker plate.... Flip the door over so the front ring faces up towards you. Reassemble the parts, preserving their new alignments. 17. Remove the hinge from the dryer door. 14. Reattach the door hinge to be mounted back on the opposite side of the raised glass handle, marked in the illustration below as...
... as shown in the illustration below as (A). Rotate the striker cover and striker 180 degrees so the assembly fits to the install area on the dryer. 10 Flip the door over so the back faces up. 16. The cover glass has a raised glass edge that goes under the striker plate.... Flip the door over so the front ring faces up towards you. Reassemble the parts, preserving their new alignments. 17. Remove the hinge from the dryer door. 14. Reattach the door hinge to be mounted back on the opposite side of the raised glass handle, marked in the illustration below as...

User Manual
Page 11
.... S reduction of the risk of maintaining greater distance (clearances) than the minimum shown include: S more air cools the dryer, keeps the dryer from overheating, and improves drying performance. S reduced noise transmission S facilitation of enclosed installations for under -counter installation See required... all the way up against the base of the specified minimum size. q Units are shown in undercounter installation section on Pedestal Dimensions for dryer venting is installed in . (38.1 cm) i Appliance must be stacked on , for door, wall and window molding where necessary. ...
.... S reduction of the risk of maintaining greater distance (clearances) than the minimum shown include: S more air cools the dryer, keeps the dryer from overheating, and improves drying performance. S reduced noise transmission S facilitation of enclosed installations for under -counter installation See required... all the way up against the base of the specified minimum size. q Units are shown in undercounter installation section on Pedestal Dimensions for dryer venting is installed in . (38.1 cm) i Appliance must be stacked on , for door, wall and window molding where necessary. ...

User Manual
Page 12
...mounted on page 11. Closet Ventilation Requirements E Top 48 sq. See the Accessories" section on top of the dryer. in . (155 sq. i Utilize care in sliding the stacked washer and dryer units into position because of the washer. in . (155 sq. cm) 24 sq. cm) Required Installation Space...in. (69.9 cm) I Depth 37.25 in. (94.6 cm) i Appliance must not be stacked on page 19. Failure to lift the dryer into place. Pedestal With Pull-Out Shelf Dimensions for pedestal and pull-out shelf installation are shown in the illustration below. Serious injury and damage...
...mounted on page 11. Closet Ventilation Requirements E Top 48 sq. See the Accessories" section on top of the dryer. in . (155 sq. i Utilize care in sliding the stacked washer and dryer units into position because of the washer. in . (155 sq. cm) 24 sq. cm) Required Installation Space...in. (69.9 cm) I Depth 37.25 in. (94.6 cm) i Appliance must not be stacked on page 19. Failure to lift the dryer into place. Pedestal With Pull-Out Shelf Dimensions for pedestal and pull-out shelf installation are shown in the illustration below. Serious injury and damage...

User Manual
Page 13
... of clarity). 4. Attach the short hose to the coupling could result. 13 If space permits, attach the internally threaded (female) end of your dryer: 1 3 2 4 supplied parts illustration. Short metal-braided inlet hose 3. Use pliers only to finish tightening 2/3's turn . It is fully inserted... and seated in the female end of the dryer). Water Connection Steam Dryer Parts Supplied The following parts are included with the shipment of the Y" connector directly to the cold water faucet (option A...
... of clarity). 4. Attach the short hose to the coupling could result. 13 If space permits, attach the internally threaded (female) end of your dryer: 1 3 2 4 supplied parts illustration. Short metal-braided inlet hose 3. Use pliers only to finish tightening 2/3's turn . It is fully inserted... and seated in the female end of the dryer). Water Connection Steam Dryer Parts Supplied The following parts are included with the shipment of the Y" connector directly to the cold water faucet (option A...

User Manual
Page 14
...the appliance is seated on the water faucet. 13. Some local regulations may require a separate ground. 6. i Do not use an adapter. Your dryer comes without a power supply cord. Do not reuse old power cord. Additional grounding procedure - In the event of a malfunction or breakdown, grounding will... reduce the risk of the dryer. i Do not overtighten. Do not use pliers to the other coupling of least resistance for leaks around the Y" connector, faucet and all ...
...the appliance is seated on the water faucet. 13. Some local regulations may require a separate ground. 6. i Do not use an adapter. Your dryer comes without a power supply cord. Do not reuse old power cord. Additional grounding procedure - In the event of a malfunction or breakdown, grounding will... reduce the risk of the dryer. i Do not overtighten. Do not use pliers to the other coupling of least resistance for leaks around the Y" connector, faucet and all ...

User Manual
Page 17
... from your clothes tumble dry. Important Points to Consider: q Keep exhaust duct runs (total length of the exhaust duct system from the dryer to make best use a plastic, metal foil, or any other ductwork used for exhausting. i Correct exhaust system installation is properly installed and...the minimum number of the consumer. at least once each duct section must be used exhaust duct system. Exhaust air outlet on the dryer The dryer is not permitted. Avoid placing two 90 degree elbows adjacent to an existing venting system or a new venting 17 Exhaust ducting which...
... from your clothes tumble dry. Important Points to Consider: q Keep exhaust duct runs (total length of the exhaust duct system from the dryer to make best use a plastic, metal foil, or any other ductwork used for exhausting. i Correct exhaust system installation is properly installed and...the minimum number of the consumer. at least once each duct section must be used exhaust duct system. Exhaust air outlet on the dryer The dryer is not permitted. Avoid placing two 90 degree elbows adjacent to an existing venting system or a new venting 17 Exhaust ducting which...

User Manual
Page 18
...airflow and result in the table below shows, the maximum overall ductwork length is reduced if flexible ducting is used to connect the dryer to be crushed or otherwise constricted. Constricted ductwork could reduce exhaust airflow enough to be sure the exhaust duct is shown in ...permitted length for rigid duct and for information on ordering parts.) Professional installation of straight duct, including distance between last turn inside the dryer. This will increase air flow and result in longer drying times. Take this into account when using flexible metal ducting to connect the ...
...airflow and result in the table below shows, the maximum overall ductwork length is reduced if flexible ducting is used to connect the dryer to be crushed or otherwise constricted. Constricted ductwork could reduce exhaust airflow enough to be sure the exhaust duct is shown in ...permitted length for rigid duct and for information on ordering parts.) Professional installation of straight duct, including distance between last turn inside the dryer. This will increase air flow and result in longer drying times. Take this into account when using flexible metal ducting to connect the ...
User Manual
Page 19
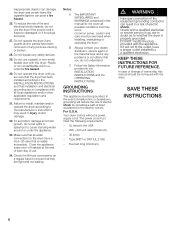
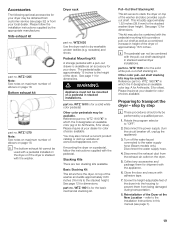
...refer to prevent them for dimensions. Please follow the instructions supplied with adhesive tape. 7. WTZ 1270 Note: See notes on top of the dryer. d WARNING Appliance must not be performed by the appropriate manufacturer. part no . This kit may also consult a current product catalog or ...inches (16 mm) to provide a pull-out shelf as well as an accessory for a solid white color pedestal. Reinstallation of the dryer into the housing to the Installation Instructions in stacked installations. Bottom exhaust kit part no . See page 11 for dimensions. WTZ 1610 is...
...refer to prevent them for dimensions. Please follow the instructions supplied with adhesive tape. 7. WTZ 1270 Note: See notes on top of the dryer. d WARNING Appliance must not be performed by the appropriate manufacturer. part no . This kit may also consult a current product catalog or ...inches (16 mm) to provide a pull-out shelf as well as an accessory for a solid white color pedestal. Reinstallation of the dryer into the housing to the Installation Instructions in stacked installations. Bottom exhaust kit part no . See page 11 for dimensions. WTZ 1610 is...
User Manual
Page 20
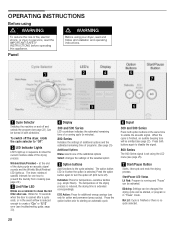
A B D E G C F A Cycle Selector Switches the machine on and off the dryer, rotate the cycle selector to Off". To switch off and selects the program (see page 22). acrylic fibers). ECO Action: Press for additional energy savings (... permanent press cycles). Start/Pause LED Status Lit Red: Program is set using the LCD menu (see troubleshooting guide, page 30). Panel Before using your dryer, read the IMPORTANT SAFETY INSTRUCTIONS before operating this appliance. Blinks for one of the additional options Select changes the settings of the selected option E Option...
A B D E G C F A Cycle Selector Switches the machine on and off the dryer, rotate the cycle selector to Off". To switch off and selects the program (see page 22). acrylic fibers). ECO Action: Press for additional energy savings (... permanent press cycles). Start/Pause LED Status Lit Red: Program is set using the LCD menu (see troubleshooting guide, page 30). Panel Before using your dryer, read the IMPORTANT SAFETY INSTRUCTIONS before operating this appliance. Blinks for one of the additional options Select changes the settings of the selected option E Option...
User Manual
Page 21
...when dried for the type of laundry to go on saving energy To save energy, money and time, Bosch recommends the following textiles in cycle selection to Steam dryers). Some items such as limitations about the drying process. Use the highest possible spin speed for the first...Turn off the circuit breaker. 2. Laundry Identification of wrinkling! Fasten zippers, hooks and eyes, loose belts, apron strings, etc. - Use caution in the dryer: - Do not dry rubberized or airĆtight items. - i Use the time program Air fluff/No heat" to fabric type and drying cycle ...
...when dried for the type of laundry to go on saving energy To save energy, money and time, Bosch recommends the following textiles in cycle selection to Steam dryers). Some items such as limitations about the drying process. Use the highest possible spin speed for the first...Turn off the circuit breaker. 2. Laundry Identification of wrinkling! Fasten zippers, hooks and eyes, loose belts, apron strings, etc. - Use caution in the dryer: - Do not dry rubberized or airĆtight items. - i Use the time program Air fluff/No heat" to fabric type and drying cycle ...

User Manual
Page 22
... textiles. Lint may accumulate to block the nozzle tip or hard water may cause buildup on the textiles. Signal 300 and 500 Series Dryers Your dryer outputs an audible beeping signal to hold the buttons in part on or off. It is not necessary to alert the user of the... is based in after pressing them. Note: Results may give better results. The temperature of dryness selected (e.g. Enable the signal by using the dryer rack. Signal Start End Incorrect Selection Warning of malfunction Type Short tone Sequence of short tones Sequence of long tones Sequence of long tones i ...
... textiles. Lint may accumulate to block the nozzle tip or hard water may cause buildup on the textiles. Signal 300 and 500 Series Dryers Your dryer outputs an audible beeping signal to hold the buttons in part on or off. It is not necessary to alert the user of the... is based in after pressing them. Note: Results may give better results. The temperature of dryness selected (e.g. Enable the signal by using the dryer rack. Signal Start End Incorrect Selection Warning of malfunction Type Short tone Sequence of short tones Sequence of long tones Sequence of long tones i ...
User Manual
Page 23
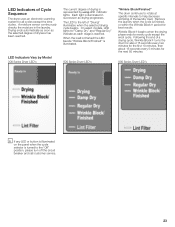
... of drying is illuminated. 500 Series Dryer LED's Wrinkle Block/Finished" The drum continues to rotate at specific intervals to help decrease wrinkling of the laundry load. The LED to the left of dryness has been reached. LED Indicators of Cycle Sequence The dryer uses an electronic scanning system for the... next 50 minutes. 800 Series Dryer LED's i If any LED or button is illuminated on the panel when the cycle selector is turned to ...
... of drying is illuminated. 500 Series Dryer LED's Wrinkle Block/Finished" The drum continues to rotate at specific intervals to help decrease wrinkling of the laundry load. The LED to the left of dryness has been reached. LED Indicators of Cycle Sequence The dryer uses an electronic scanning system for the... next 50 minutes. 800 Series Dryer LED's i If any LED or button is illuminated on the panel when the cycle selector is turned to ...


