

Series Basic Operation Guide
Page 5
... 1-2 External View (Back 1-4 Operation Panel 1-5 Main Operation Panel 1-5 Send Operation Panel (imageRUNNER 1025iF only 1-8 Display Parts and Functions 1-9 Copy Mode 1-9 Send Mode (imageRUNNER 1025iF only 1-9 Scan Mode 1-9 Log In Mode 1-9 Toner Cartridge 1-10 Maintaining the Toner Cartridge 1-11 Entering Characters 1-12 Telephone Line Setting (imageRUNNER 1025iF Only 1-13 Timer Settings 1-14 Setting the Sleep Mode 1-14 Setting...
... 1-2 External View (Back 1-4 Operation Panel 1-5 Main Operation Panel 1-5 Send Operation Panel (imageRUNNER 1025iF only 1-8 Display Parts and Functions 1-9 Copy Mode 1-9 Send Mode (imageRUNNER 1025iF only 1-9 Scan Mode 1-9 Log In Mode 1-9 Toner Cartridge 1-10 Maintaining the Toner Cartridge 1-11 Entering Characters 1-12 Telephone Line Setting (imageRUNNER 1025iF Only 1-13 Timer Settings 1-14 Setting the Sleep Mode 1-14 Setting...

Series Basic Operation Guide
Page 9
... Toner Cartridge with a New One 12-10 Replacing the Drum Unit 12-13 Transporting the Machine 12-15 13 Troubleshooting 13-1 Clearing Jams 13-2 Original Jams 13-2 Stack Bypass 13-4 Inside the Machine and Paper Drawers 13-5 Error Messages 13-7 Error Codes (imageRUNNER ... Contacting Your Local Authorized Canon Dealer 13-17 REPORT SETTINGS 14-22 SYSTEM SETTINGS 14-24 15 Appendix 15-1 Specifications 15-2 General 15-2 Copier 15-3 Printer 15-3 Scanner 15-3 Facsimile (imageRUNNER 1025iF Only 15-4 Telephone (imageRUNNER 1025iF Only 15-4 Send (imageRUNNER 1025iF Only) ..........15...
... Toner Cartridge with a New One 12-10 Replacing the Drum Unit 12-13 Transporting the Machine 12-15 13 Troubleshooting 13-1 Clearing Jams 13-2 Original Jams 13-2 Stack Bypass 13-4 Inside the Machine and Paper Drawers 13-5 Error Messages 13-7 Error Codes (imageRUNNER ... Contacting Your Local Authorized Canon Dealer 13-17 REPORT SETTINGS 14-22 SYSTEM SETTINGS 14-24 15 Appendix 15-1 Specifications 15-2 General 15-2 Copier 15-3 Printer 15-3 Scanner 15-3 Facsimile (imageRUNNER 1025iF Only 15-4 Telephone (imageRUNNER 1025iF Only 15-4 Send (imageRUNNER 1025iF Only) ..........15...
Series Basic Operation Guide
Page 13
...on the machine since they may require extensive work by any of its interior covers will be sure to remove the toner cartridge from operating properly. - Place the toner cartridge in its original protective bag or wrap it . - To avoid spillage in this guide. Dust accumulation can prevent...the machine, do not attempt to service the machine yourself. Unplug the machine from the wall outlet and contact your local authorized Canon dealer. Adjust only those controls that are covered by applicable laws) after production of other risks. xii Safety Precautions Safety Precautions ...
...on the machine since they may require extensive work by any of its interior covers will be sure to remove the toner cartridge from operating properly. - Place the toner cartridge in its original protective bag or wrap it . - To avoid spillage in this guide. Dust accumulation can prevent...the machine, do not attempt to service the machine yourself. Unplug the machine from the wall outlet and contact your local authorized Canon dealer. Adjust only those controls that are covered by applicable laws) after production of other risks. xii Safety Precautions Safety Precautions ...

Series Basic Operation Guide
Page 30
... 1-2 External View (Back 1-4 Operation Panel 1-5 Main Operation Panel 1-5 Send Operation Panel (imageRUNNER 1025iF only 1-8 Display Parts and Functions 1-9 Copy Mode 1-9 Send Mode (imageRUNNER 1025iF only 1-9 Scan Mode 1-9 Log In Mode 1-9 Toner Cartridge 1-10 Maintaining the Toner Cartridge 1-11 Entering Characters 1-12 Telephone Line Setting (imageRUNNER 1025iF Only 1-13 Timer Settings 1-14 Setting the Sleep Mode 1-14 Setting...
... 1-2 External View (Back 1-4 Operation Panel 1-5 Main Operation Panel 1-5 Send Operation Panel (imageRUNNER 1025iF only 1-8 Display Parts and Functions 1-9 Copy Mode 1-9 Send Mode (imageRUNNER 1025iF only 1-9 Scan Mode 1-9 Log In Mode 1-9 Toner Cartridge 1-10 Maintaining the Toner Cartridge 1-11 Entering Characters 1-12 Telephone Line Setting (imageRUNNER 1025iF Only 1-13 Timer Settings 1-14 Setting the Sleep Mode 1-14 Setting...

Series Basic Operation Guide
Page 39
... a fire. - When removing a used toner cartridges, put the cartridges into a case to replace the toner cartridge appears on the display, replace the toner cartridge with a new one. Never dispose toner cartridges in a fire or incinerator, as this machine. - If the toner gets into your eyes or mouth. When discarding used toner cartridge, remove the toner cartridge carefully to prevent the toner from open flames, as...
... a fire. - When removing a used toner cartridges, put the cartridges into a case to replace the toner cartridge appears on the display, replace the toner cartridge with a new one. Never dispose toner cartridges in a fire or incinerator, as this machine. - If the toner gets into your eyes or mouth. When discarding used toner cartridge, remove the toner cartridge carefully to prevent the toner from open flames, as...

Series Basic Operation Guide
Page 40
...80%. ˔ Never store the cartridge in a vertical position. ˔ Genuine Supplies Canon has developed and manufactured Toner, Parts, and Supplies specifically for...Canon is not responsible for use of counterfeit toner may result in the marketplace. Use of non-genuine Canon toner or counterfeit toner. The recommended storage conditions are counterfeit Canon toners in poor print quality or machine performance. For more information, see http://www.canon.com/counterfeit. 1-11 Before Using the Machine Toner Cartridge Maintaining the Toner Cartridge ˔ Store toner cartridges...
...80%. ˔ Never store the cartridge in a vertical position. ˔ Genuine Supplies Canon has developed and manufactured Toner, Parts, and Supplies specifically for...Canon is not responsible for use of counterfeit toner may result in the marketplace. Use of non-genuine Canon toner or counterfeit toner. The recommended storage conditions are counterfeit Canon toners in poor print quality or machine performance. For more information, see http://www.canon.com/counterfeit. 1-11 Before Using the Machine Toner Cartridge Maintaining the Toner Cartridge ˔ Store toner cartridges...

Series Basic Operation Guide
Page 177
...storing documents in memory. The printed documents may be reset. 1 Press [Additional Functions]. 2 Press [ ] or [ ] to select or , then press [OK]. After the toner cartridge is replaced, the documents can be printed and the setting can be light or blurred because of lack of...RX SETTINGS 3 Press [ ] or [ ] to select , then press [OK]. RX SETTINGS 3.CONT. Fax (imageRUNNER 1025iF Only) Specifying Printing When Toner Runs Out You can set if the machine stores all documents in memory, when the toner runs out. The default setting is erased when the documents are printed out, so you...
...storing documents in memory. The printed documents may be reset. 1 Press [Additional Functions]. 2 Press [ ] or [ ] to select or , then press [OK]. After the toner cartridge is replaced, the documents can be printed and the setting can be light or blurred because of lack of...RX SETTINGS 3 Press [ ] or [ ] to select , then press [OK]. RX SETTINGS 3.CONT. Fax (imageRUNNER 1025iF Only) Specifying Printing When Toner Runs Out You can set if the machine stores all documents in memory, when the toner runs out. The default setting is erased when the documents are printed out, so you...

Series Basic Operation Guide
Page 250
Cleaning the Machine 12-2 Exterior 12-2 Interior 12-3 Scanning Area 12-5 Replacing the Toner Cartridge 12-9 When a Message Appears 12-9 Replacing the Toner Cartridge with a New One 12-10 Replacing the Drum Unit 12-13 Transporting the Machine 12-15 Maintenance Maintenance 12 This chapter describes how to perform routine cleaning operations, and replace toner cartridge.
Cleaning the Machine 12-2 Exterior 12-2 Interior 12-3 Scanning Area 12-5 Replacing the Toner Cartridge 12-9 When a Message Appears 12-9 Replacing the Toner Cartridge with a New One 12-10 Replacing the Drum Unit 12-13 Transporting the Machine 12-15 Maintenance Maintenance 12 This chapter describes how to perform routine cleaning operations, and replace toner cartridge.

Series Basic Operation Guide
Page 252
..., then open it. - Cleaning the roller takes approximately 100 seconds. 1 Press [Additional Functions]. 2 Press [ ] or [ ] to prevent toner powder and paper dust from accumulating inside. ˔ Cleaning the Fuser Roller If black streaks appear with printing, the fuser roller in the following procedure...to select , then press [OK]. Should this occur, clean the fuser roller in the main unit may be cleaned each time the toner cartridge is replaced. ADJUST./CLEANING 3.FIX.UNIT CLEANING Cleaning starts. Throw away the cleaning paper after use. When finished, the display returns to ...
..., then open it. - Cleaning the roller takes approximately 100 seconds. 1 Press [Additional Functions]. 2 Press [ ] or [ ] to prevent toner powder and paper dust from accumulating inside. ˔ Cleaning the Fuser Roller If black streaks appear with printing, the fuser roller in the following procedure...to select , then press [OK]. Should this occur, clean the fuser roller in the main unit may be cleaned each time the toner cartridge is replaced. ADJUST./CLEANING 3.FIX.UNIT CLEANING Cleaning starts. Throw away the cleaning paper after use. When finished, the display returns to ...

Series Basic Operation Guide
Page 258
... describes how to be performed. Contents and Remedies - Replace the toner cartridge. - If you replace the toner cartridge before printing a large amount of data. Message When it is Displayed When a toner cartridge needs to replace or handle the toner cartridges and precautions on storing them. If the toner is recommended that you continue copying when the message appears, copying...
... describes how to be performed. Contents and Remedies - Replace the toner cartridge. - If you replace the toner cartridge before printing a large amount of data. Message When it is Displayed When a toner cartridge needs to replace or handle the toner cartridges and precautions on storing them. If the toner is recommended that you continue copying when the message appears, copying...

Series Basic Operation Guide
Page 259
Do not pull the toner cartridge out until the message appears on the display. Doing so may cause the toner to spill. Put the toner cartridge in a vertical position. Maintenance 12-10 Do not shake the used toner cartridge or hold it will go clockwise. 2 Pull the toner cartridge lever (A) towards you. 4 Pull the cartridge out of the machine. Replacing the Toner Cartridge Replacing the Toner Cartridge with a New One 1 Open the front cover. 3 Turn the lever as far as it in the original plastic case for disposal.
Do not pull the toner cartridge out until the message appears on the display. Doing so may cause the toner to spill. Put the toner cartridge in a vertical position. Maintenance 12-10 Do not shake the used toner cartridge or hold it will go clockwise. 2 Pull the toner cartridge lever (A) towards you. 4 Pull the cartridge out of the machine. Replacing the Toner Cartridge Replacing the Toner Cartridge with a New One 1 Open the front cover. 3 Turn the lever as far as it in the original plastic case for disposal.

Series Basic Operation Guide
Page 260
... Keep the box and case for future use. 8 Holding the cartridge steady with one hand, pull out the seal completely with the arrow (B) pointing towards the machine. 6 Open the case and remove the toner cartridge. 5 Remove the plastic case from the box. Maintenance 12-11... Do not touch the portions (A), and (B). - Replacing the Toner Cartridge 7 Pull the toner cartridge lever (A) towards you and insert the cartridge into the machine as the toner may spill out. Do not ...
... Keep the box and case for future use. 8 Holding the cartridge steady with one hand, pull out the seal completely with the arrow (B) pointing towards the machine. 6 Open the case and remove the toner cartridge. 5 Remove the plastic case from the box. Maintenance 12-11... Do not touch the portions (A), and (B). - Replacing the Toner Cartridge 7 Pull the toner cartridge lever (A) towards you and insert the cartridge into the machine as the toner may spill out. Do not ...

Series Basic Operation Guide
Page 261
Maintenance 12-12 - Be careful not to close the front cover, do not force it will go counterclockwise. 10 Push down the lever. 11 Close the front cover. Open the front cover and pull out the toner cartridge, then reinsert the cartridge into the machine. Replacing the Toner Cartridge 9 Turn the toner cartridge lever as far as it to get your fingers caught. - If you cannot close .
Maintenance 12-12 - Be careful not to close the front cover, do not force it will go counterclockwise. 10 Push down the lever. 11 Close the front cover. Open the front cover and pull out the toner cartridge, then reinsert the cartridge into the machine. Replacing the Toner Cartridge 9 Turn the toner cartridge lever as far as it to get your fingers caught. - If you cannot close .

Series Basic Operation Guide
Page 274
... transmission, the machine may be opened and closed to send a document identified from memory is filled with waste toner. Install the toner cartridge correctly. - Remove the printouts from the power supply and contact your local authorized Canon dealer. Clean the ADF scanning area, then press [OK]. Check the line condition, then try again. Load...
... transmission, the machine may be opened and closed to send a document identified from memory is filled with waste toner. Install the toner cartridge correctly. - Remove the printouts from the power supply and contact your local authorized Canon dealer. Clean the ADF scanning area, then press [OK]. Check the line condition, then try again. Load...

Series Basic Operation Guide
Page 293
... User Telephone Number and Unit Name" Selects the telephone line type. - Settings Menu Setting Item 2. e-Manual "Fax", "I -Fax", "EMail", "Scanning Documents to after replacing the toner cartridge. p. 5-45 Sets whether the ECM (Error Correction Mode) transmission is turned on. REDUCE DIRECTION OFF 3. AUTO - The machine does not store documents in memory if...
... User Telephone Number and Unit Name" Selects the telephone line type. - Settings Menu Setting Item 2. e-Manual "Fax", "I -Fax", "EMail", "Scanning Documents to after replacing the toner cartridge. p. 5-45 Sets whether the ECM (Error Correction Mode) transmission is turned on. REDUCE DIRECTION OFF 3. AUTO - The machine does not store documents in memory if...
Series Basic Operation Guide
Page 317
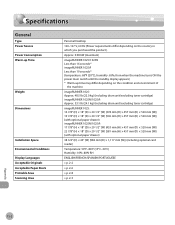
...-127 V, 60 Hz (Power requirements differ depending on the condition and environment of the machine. imageRUNNER 1025: Approx. 48.5 lb (22.0 kg) (including drum unit/excluding toner cartridge) imageRUNNER 1025N/1025iF: Approx. 53.1 lb (24.1 kg) (including drum unit/excluding toner cartridge) imageRUNNER 1025: 14 7/8" (H) × 18" (D) × 20 1/2" (W) (378 mm (H) × 457 mm (D) × 520 mm (W)) 19...
...-127 V, 60 Hz (Power requirements differ depending on the condition and environment of the machine. imageRUNNER 1025: Approx. 48.5 lb (22.0 kg) (including drum unit/excluding toner cartridge) imageRUNNER 1025N/1025iF: Approx. 53.1 lb (24.1 kg) (including drum unit/excluding toner cartridge) imageRUNNER 1025: 14 7/8" (H) × 18" (D) × 20 1/2" (W) (378 mm (H) × 457 mm (D) × 520 mm (W)) 19...

Series Basic Operation Guide
Page 318
of Copies Printer Printing Method Paper Handling Paper Delivery Print Speed Printing Resolution Number of Tones Toner Cartridge Scanner Type Max Scanning Size Scanning Resolution Scanning Speed Host Interface System Requirements Device Driver Specifications 600 dpi × 600 dpi 1200 dpi enhanced × ...
of Copies Printer Printing Method Paper Handling Paper Delivery Print Speed Printing Resolution Number of Tones Toner Cartridge Scanner Type Max Scanning Size Scanning Resolution Scanning Speed Host Interface System Requirements Device Driver Specifications 600 dpi × 600 dpi 1200 dpi enhanced × ...

Series Basic Operation Guide
Page 324
... Log In/Out key 1-6 Index M Machine component External View (Back) 1-4 External View (Front) 1-2 Main Operation Panel 1-5 Main Power indicator 1-6 Main power switch 1-4 Maintenance Replacing the Toner Cartridge 12-9 When a Message Appears 12-9 Manuals for the Machine i Multiple Originals onto One Sheet (2 on 1) 4-25 N Numeric keys 1-6 O OK key 1-6 One-touch keys Editing 3-10...
... Log In/Out key 1-6 Index M Machine component External View (Back) 1-4 External View (Front) 1-2 Main Operation Panel 1-5 Main Power indicator 1-6 Main power switch 1-4 Maintenance Replacing the Toner Cartridge 12-9 When a Message Appears 12-9 Manuals for the Machine i Multiple Originals onto One Sheet (2 on 1) 4-25 N Numeric keys 1-6 O OK key 1-6 One-touch keys Editing 3-10...
Series Basic Operation Guide
Page 326
... Registering E-Mail addresses 3-5 Registering Fax numbers 3-3 Registering File server addresses 3-7 Registering group addresses 3-9 Registering I-Fax addresses 3-6 Symbols Used in This Manual x System Manager Settings 11-4 Toner Cartridge 1-10 Maintaining 1-11 Replacing 12-9 Transporting the Machine 12-15 TX REPORT 5-66 U UFRII LT 7-4 USB Cable 8-5 USB port 1-4 User ID Management 11-16 T Telephone...
... Registering E-Mail addresses 3-5 Registering Fax numbers 3-3 Registering File server addresses 3-7 Registering group addresses 3-9 Registering I-Fax addresses 3-6 Symbols Used in This Manual x System Manager Settings 11-4 Toner Cartridge 1-10 Maintaining 1-11 Replacing 12-9 Transporting the Machine 12-15 TX REPORT 5-66 U UFRII LT 7-4 USB Cable 8-5 USB port 1-4 User ID Management 11-16 T Telephone...

Series Quick Start Guide
Page 2
... Included with the Machine...4 Optional Items...4 Manuals for the Machine...5 Install Toner Cartridge...6 Install Drum Unit...8 Set Up Paper Drawer and Load Paper...9 Connect the Power Cord and Turn ON the Machine...11 Set Date and Time...12 3 Make Fax Settings (imageRUNNER 1025iF Only 14 Connect Telephone Cables...14 Register User Telephone Number...
... Included with the Machine...4 Optional Items...4 Manuals for the Machine...5 Install Toner Cartridge...6 Install Drum Unit...8 Set Up Paper Drawer and Load Paper...9 Connect the Power Cord and Turn ON the Machine...11 Set Date and Time...12 3 Make Fax Settings (imageRUNNER 1025iF Only 14 Connect Telephone Cables...14 Register User Telephone Number...

