
Owners Manual
Page 5
... parameters 15 Total distance covered indicator: "Odometer" 18 Vehicle speed indication 19 Oil temperature indicator 20 "TRIP" meter 21 Distance travelled on fuel reserve: "TRIP FUEL" 22 Clock display indicator 23 Service indicator 24 Position of motorcycle controls 44 Key-operated ignition switch and steering lock 45 Lh switch 46 Clutch lever 47 RH switch 48 Throttle twistgrip 48 Front brake lever 49 Rear brake pedal 50 Gear change pedal 50 Controls 44 4
... parameters 15 Total distance covered indicator: "Odometer" 18 Vehicle speed indication 19 Oil temperature indicator 20 "TRIP" meter 21 Distance travelled on fuel reserve: "TRIP FUEL" 22 Clock display indicator 23 Service indicator 24 Position of motorcycle controls 44 Key-operated ignition switch and steering lock 45 Lh switch 46 Clutch lever 47 RH switch 48 Throttle twistgrip 48 Front brake lever 49 Rear brake pedal 50 Gear change pedal 50 Controls 44 4
Owners Manual
Page 6
... 69 Tool kit and accessories 70 Checking brake pads for wear 75 Lubricating cables and linkages 76 Throttle cable adjustment 77 Charging the battery 78 Checking drive chain tension 79 Lubricating the drive chain 80 Replacing the headlight bulbs 81 Changing the rear turn indicator bulbs 83 Replacing the number plate light bulbs 84 Beam setting 85 Beam adjustment 86 Tubeless tyres 87 Checking engine oil level 89 Cleaning and replacing the spark plugs 90...
... 69 Tool kit and accessories 70 Checking brake pads for wear 75 Lubricating cables and linkages 76 Throttle cable adjustment 77 Charging the battery 78 Checking drive chain tension 79 Lubricating the drive chain 80 Replacing the headlight bulbs 81 Changing the rear turn indicator bulbs 83 Replacing the number plate light bulbs 84 Beam setting 85 Beam adjustment 86 Tubeless tyres 87 Checking engine oil level 89 Cleaning and replacing the spark plugs 90...
Owners Manual
Page 9
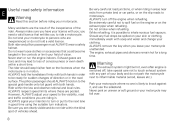
.... Warning 8 E Useful road safety information Warning Read this section before riding your intention to turn or pull to the next lane in good time using the suitable turn off ; you need a valid licence that could become tangled in the controls or limit your body and do not ride within the blind spot of vision. Never start or run the engine indoors. Exhaust gases...
.... Warning 8 E Useful road safety information Warning Read this section before riding your intention to turn or pull to the next lane in good time using the suitable turn off ; you need a valid licence that could become tangled in the controls or limit your body and do not ride within the blind spot of vision. Never start or run the engine indoors. Exhaust gases...

Owners Manual
Page 28
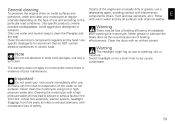
...Page 2 - Page 3 - If battery power is suddenly cut off (Batt-OFF), when battery power is restored and upon next Key-On, the backlighting setting is at maximum power; press "▲" press RESET for 3 seconds in one after the other: Page 1 - "LIGHT MID" set up : With this ...the instrument panel goes back to page 2. press "▲" press RESET for 3 sec. From this option, backlighting is about 30% less than maximum power; Backlighting setting (LIGHT SET) This function allows dashboard backlighting setting. press switch (1, fig. 10) "▲" to go to the initial "LIGHT ...
...Page 2 - Page 3 - If battery power is suddenly cut off (Batt-OFF), when battery power is restored and upon next Key-On, the backlighting setting is at maximum power; press "▲" press RESET for 3 seconds in one after the other: Page 1 - "LIGHT MID" set up : With this ...the instrument panel goes back to page 2. press "▲" press RESET for 3 sec. From this option, backlighting is about 30% less than maximum power; Backlighting setting (LIGHT SET) This function allows dashboard backlighting setting. press switch (1, fig. 10) "▲" to go to the initial "LIGHT ...

Owners Manual
Page 38
... used to: - open the fuel tank filler plug. - The immobilizer system For additional anti-theft protection, the motorcycle is equipped with an IMMOBILIZER, an electronic system that locks the engine automatically whenever the ignition switch is changed at each ignition key contains an electronic device that modulates the output signal from a special antenna in order to carry out certain servicing operations. The grip of the...
... used to: - open the fuel tank filler plug. - The immobilizer system For additional anti-theft protection, the motorcycle is equipped with an IMMOBILIZER, an electronic system that locks the engine automatically whenever the ignition switch is changed at each ignition key contains an electronic device that modulates the output signal from a special antenna in order to carry out certain servicing operations. The grip of the...

Owners Manual
Page 42
... your CODE CARD. If the engine still does not start the engine; 2) if the "Vehicle/Engine Diagnosis - If the engine still does not start the engine: 1) if the code is recognised, the protection system releases the engine lock. The Ducati Service Centre will program all keys and the CODE CARD to make those keys unserviceable in use the same key throughout the procedure. Always use . Warning 41 Note Sharp knocks can...
... your CODE CARD. If the engine still does not start the engine; 2) if the "Vehicle/Engine Diagnosis - If the engine still does not start the engine: 1) if the code is recognised, the protection system releases the engine lock. The Ducati Service Centre will program all keys and the CODE CARD to make those keys unserviceable in use the same key throughout the procedure. Always use . Warning 41 Note Sharp knocks can...

Owners Manual
Page 58
...To move the side stand to its rear wheel facing downhill. Note E It is fully extended. Warning 1 2 fig. 49 57 Note Do not sit on the sidestand. or the motorcycle may fall over. one spring is supported on the motorcycle when it...fuse placed at the same time, lift the thrust arm (1) with your foot. Lean the motorcycle to the left until stand is possible to start the engine with a gear engaged, pull the clutch lever (in neutral. Side stand (fig. 49) Before lowering the side stand, make sure that signals stand position to the Engine Control Unit. Do not park on soft ground...
...To move the side stand to its rear wheel facing downhill. Note E It is fully extended. Warning 1 2 fig. 49 57 Note Do not sit on the sidestand. or the motorcycle may fall over. one spring is supported on the motorcycle when it...fuse placed at the same time, lift the thrust arm (1) with your foot. Lean the motorcycle to the left until stand is possible to start the engine with a gear engaged, pull the clutch lever (in neutral. Side stand (fig. 49) Before lowering the side stand, make sure that signals stand position to the Engine Control Unit. Do not park on soft ground...

Owners Manual
Page 69
... turn the ignition key to inflammable material (wood, leaves etc.). Do not leave the key turned to engage first gear and then neutral. The exhaust system might be hot, even after engine is not near a source of rider and passenger. Apply the brakes and bring the motorcycle to OFF (page 45). You may impair motorcycle operation and the safety of heat. Warning 68 Important Parking...
... turn the ignition key to inflammable material (wood, leaves etc.). Do not leave the key turned to engage first gear and then neutral. The exhaust system might be hot, even after engine is not near a source of rider and passenger. Apply the brakes and bring the motorcycle to OFF (page 45). You may impair motorcycle operation and the safety of heat. Warning 68 Important Parking...
Owners Manual
Page 92
... leather. The warranty does not apply to seizure or serious faults in the front fork, wheel hub assembly, electric system, headlight (fogging), front fork seals, air inlets or exhaust silencers, with consequent loss of safety. Use specific products, where possible biodegradable. Cleaning the motorcycle with transmission components (chain, front and rear sprockets, etc.). E There may lead to motorcycles where there is evidence of poor maintenance...
... leather. The warranty does not apply to seizure or serious faults in the front fork, wheel hub assembly, electric system, headlight (fogging), front fork seals, air inlets or exhaust silencers, with consequent loss of safety. Use specific products, where possible biodegradable. Cleaning the motorcycle with transmission components (chain, front and rear sprockets, etc.). E There may lead to motorcycles where there is evidence of poor maintenance...

Owners Manual
Page 95
... time interval *] Change the air filter Check throttle body synchronisation and idling (1) Check the brake and clutch fluid levels Change the clutch and brake fluid Check and adjust the brake and clutch control cables Check/lubricate throttle / cold start controls Check tyre pressure and wear Check the brake pads. Check the steering head bearings Check the drive chain tension, alignment and lubrication Check the clutch disc pack. x1000 List of operations and type of the rear wheel axle nut Check the external fuel hoses...
... time interval *] Change the air filter Check throttle body synchronisation and idling (1) Check the brake and clutch fluid levels Change the clutch and brake fluid Check and adjust the brake and clutch control cables Check/lubricate throttle / cold start controls Check tyre pressure and wear Check the brake pads. Check the steering head bearings Check the drive chain tension, alignment and lubrication Check the clutch disc pack. x1000 List of operations and type of the rear wheel axle nut Check the external fuel hoses...

Owners Manual
Page 97
x1000 List of operations and type of intervention [set interval, whichever comes first (mileage or months) 1 mi. If necessary, contact your dealer to be carried out by the customer Km. E Programmed maintenance plan: operations to replace pads * Service on the set mileage (km/mi) or time interval *] Checking the engine oil level Check the brake and clutch fluid levels Check tyre pressure and wear Check the drive chain tension and lubrication Check the brake pads. x1000 0.6 Months 6 96
x1000 List of operations and type of intervention [set interval, whichever comes first (mileage or months) 1 mi. If necessary, contact your dealer to be carried out by the customer Km. E Programmed maintenance plan: operations to replace pads * Service on the set mileage (km/mi) or time interval *] Checking the engine oil level Check the brake and clutch fluid levels Check tyre pressure and wear Check the drive chain tension and lubrication Check the brake pads. x1000 0.6 Months 6 96

Owners Manual
Page 105
... frame and upper pivot point of the electric system are: HEADLIGHT: One-bulb H4 (12V - 55W / 60W). Parking lights W3W (12V - 3W). REAR TURN INDICATORS, 12V - 3W bulbs. Red frame and black rims. 104 HORN. At the bottom pivot point it is adjustable for rebound and spring preload. Tail light, led. ELECTRICAL CONTROLS on handlebars. BATTERY dry, 12V - 10 Ah. E Suspension Front Hydraulic upside-down fork. Generator...
... frame and upper pivot point of the electric system are: HEADLIGHT: One-bulb H4 (12V - 55W / 60W). Parking lights W3W (12V - 3W). REAR TURN INDICATORS, 12V - 3W bulbs. Red frame and black rims. 104 HORN. At the bottom pivot point it is adjustable for rebound and spring preload. Tail light, led. ELECTRICAL CONTROLS on handlebars. BATTERY dry, 12V - 10 Ah. E Suspension Front Hydraulic upside-down fork. Generator...

Owners Manual
Page 107
Failure to avoid possible short circuits. A blown fuse is identified by the interrupted centre link (12, fig. 88). 12 12 Switch the ignition key to OFF before replacing the fuse to observe this rule may damage the electric system or even cause fire. IN GOOD CONDITION BLOWN fig. 88 106 E Besides the fuse box, a master fuse (11, fig. 87) positioned on the solenoid starter under the seat in front of battery. Remove caps to expose fuses (11, fig. 87). Important Warning Never use a fuse with a rating other than that specified.
Failure to avoid possible short circuits. A blown fuse is identified by the interrupted centre link (12, fig. 88). 12 12 Switch the ignition key to OFF before replacing the fuse to observe this rule may damage the electric system or even cause fire. IN GOOD CONDITION BLOWN fig. 88 106 E Besides the fuse box, a master fuse (11, fig. 87) positioned on the solenoid starter under the seat in front of battery. Remove caps to expose fuses (11, fig. 87). Important Warning Never use a fuse with a rating other than that specified.

Owners Manual
Page 108
... antenna Ignition switch Fuse box Data acquisition / diagnosis Starter motor Solenoid starter with MASTER fuse Battery Engine ground / System ground Regulator Generator Tail light RH rear turn indicator Number plate light LH rear turn indicator Fuel tank Injection relay Speed sensor Side stand switch Air temperature sensor MAP pressure sensor Vertical lambda sensor Horizontal lambda sensor Horizontal cylinder coil Horizontal cylinder spark plug, RH side Vertical cylinder coil Vertical cylinder spark plug, RH side Horizontal cylinder injector Vertical cylinder injector Throttle position sensor...
... antenna Ignition switch Fuse box Data acquisition / diagnosis Starter motor Solenoid starter with MASTER fuse Battery Engine ground / System ground Regulator Generator Tail light RH rear turn indicator Number plate light LH rear turn indicator Fuel tank Injection relay Speed sensor Side stand switch Air temperature sensor MAP pressure sensor Vertical lambda sensor Horizontal lambda sensor Horizontal cylinder coil Horizontal cylinder spark plug, RH side Vertical cylinder coil Vertical cylinder spark plug, RH side Horizontal cylinder injector Vertical cylinder injector Throttle position sensor...

Owners Manual
Page 112
... be checked for repair or replacement if the motorcycle noise has increased significantly through the air cleaner and the throttle body. Crankcase Emission Control System The engine is in the same way, but is separate from the throttle body and fuel tank. Evaporative Emission Control System California motorcycles are aware of any new vehicle for the purpose of noise control prior to its sale or delivery to...
... be checked for repair or replacement if the motorcycle noise has increased significantly through the air cleaner and the throttle body. Crankcase Emission Control System The engine is in the same way, but is separate from the throttle body and fuel tank. Evaporative Emission Control System California motorcycles are aware of any new vehicle for the purpose of noise control prior to its sale or delivery to...

Owners Manual
Page 113
... or sparks when refuelling or servicing the fuel system. Do not rely solely on the front and rear brakes. Applying only one brake for sudden braking may not see Running in passing, shift to a lower gear to control vehicle speed and less on the rear view mirror; Riding at all conditions. The throttle should be reduced. to avoid damage to the safety of both the front and rear brakes. High speed increases...
... or sparks when refuelling or servicing the fuel system. Do not rely solely on the front and rear brakes. Applying only one brake for sudden braking may not see Running in passing, shift to a lower gear to control vehicle speed and less on the rear view mirror; Riding at all conditions. The throttle should be reduced. to avoid damage to the safety of both the front and rear brakes. High speed increases...
Owners Manual
Page 117
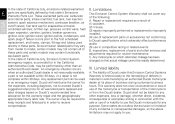
... a problem exists. Where a warrantable condition exists, Ducati North America, Inc. Manufacturer's warranty coverage - 5 years or 30,000 kilometers (18641 miles), whichever first occurs. cannot deny warranty solely for the lack of time, not to a Ducati dealer as soon as fuelinjection system, the ignition system, catalytic converter, and engine computer. may deny you retain all scheduled maintenance. - at 001.408.253.0499 or the California Air...
... a problem exists. Where a warrantable condition exists, Ducati North America, Inc. Manufacturer's warranty coverage - 5 years or 30,000 kilometers (18641 miles), whichever first occurs. cannot deny warranty solely for the lack of time, not to a Ducati dealer as soon as fuelinjection system, the ignition system, catalytic converter, and engine computer. may deny you retain all scheduled maintenance. - at 001.408.253.0499 or the California Air...

Owners Manual
Page 118
Fuel tank. Intake manifolds; Ducati limited warranty on emission control system In the event of Ducati. 4 5 2 1 fig. and B) is designed, built and equipped so as to conform with the Clean Air Act and applicable regulations of (fig. Any part or parts replaced under this warranty shall become the property of fuel system malfunction, contact Ducati's authorized Service Centres. Canister; Breather pipe; C 117 E USA I. C): 1) 2) 3) 4) 5) 6) Warn air inlet; Coverage 6 3 Warranty defects...
Fuel tank. Intake manifolds; Ducati limited warranty on emission control system In the event of Ducati. 4 5 2 1 fig. and B) is designed, built and equipped so as to conform with the Clean Air Act and applicable regulations of (fig. Any part or parts replaced under this warranty shall become the property of fuel system malfunction, contact Ducati's authorized Service Centres. Canister; Breather pipe; C 117 E USA I. C): 1) 2) 3) 4) 5) 6) Warn air inlet; Coverage 6 3 Warranty defects...
Owners Manual
Page 119
spark advance mechanism; air cutoff valves; fuel tank cap for routine maintenance. Repair or replacement required as provided for any purpose. C. Limited liability A. intake manifold; oil filler cap; igniters; ignition points, condensers, and spark plugs if failure occors prior to Ducati specifications which odometer mileage has been changed so that state's Emissions Warranty Parts List. Any replacement part can be required to keep receipts and failed parts in order to exceed Ducati's suggested retail price for...
spark advance mechanism; air cutoff valves; fuel tank cap for routine maintenance. Repair or replacement required as provided for any purpose. C. Limited liability A. intake manifold; oil filler cap; igniters; ignition points, condensers, and spark plugs if failure occors prior to Ducati specifications which odometer mileage has been changed so that state's Emissions Warranty Parts List. Any replacement part can be required to keep receipts and failed parts in order to exceed Ducati's suggested retail price for...

Owners Manual
Page 122
... G/Y Bk/V Bn/W P/Y W A B C 1 2 3 2 1 A B C f f f f f f Bk/G Br/G O HYPERMOTARD 1100 evo 33 32 31 30 f f 40 M Left Handle Swicth 39 38 37 36 35 34 A B C D f 2 2 1 1 V O f f 27 V 1 2 25 29 28.../V Bk/Y f W/Bk HALL 1 2 3 4 1 2 3 4 21 O 1 2 20 19 18 O V 24 23 22 SCHERM. 5 1 Right Handle Swicth STARTER BW Bk FREE PUSH OFF RUN ENGINE STOP RW RBk 2 3 Lb WR R GBk GR Y LOCK PARK OFF ON 4 6 1 R/Bk O R/B Bn R/Y R/Y 1 2 3 4 7 30A Bk Bk 8 10 11 M R/W R/G R 1 2 B/Bk ...R SET UP N L Bk Gr RB Br TURN PUSH OFF RB BW HORN PUSH OFF B RB HI BEAM PUSH OFF ...
... G/Y Bk/V Bn/W P/Y W A B C 1 2 3 2 1 A B C f f f f f f Bk/G Br/G O HYPERMOTARD 1100 evo 33 32 31 30 f f 40 M Left Handle Swicth 39 38 37 36 35 34 A B C D f 2 2 1 1 V O f f 27 V 1 2 25 29 28.../V Bk/Y f W/Bk HALL 1 2 3 4 1 2 3 4 21 O 1 2 20 19 18 O V 24 23 22 SCHERM. 5 1 Right Handle Swicth STARTER BW Bk FREE PUSH OFF RUN ENGINE STOP RW RBk 2 3 Lb WR R GBk GR Y LOCK PARK OFF ON 4 6 1 R/Bk O R/B Bn R/Y R/Y 1 2 3 4 7 30A Bk Bk 8 10 11 M R/W R/G R 1 2 B/Bk ...R SET UP N L Bk Gr RB Br TURN PUSH OFF RB BW HORN PUSH OFF B RB HI BEAM PUSH OFF ...