

Owners Manual
Page 6
... and/or procedures in this publication are intended for this vehicle are in part, is based on the latest product information at the time of publication. The original instructions for reference use only. Any...POLARIS Sales Inc. All information contained within , whether whole or in English. The following are provided as translations of the original instructions. Due to constant improvements in the design and quality of production components, some minor discrepancies may result between the actual vehicle and the information presented in U.S.A. 2012 Turbo IQ LXT Owner's Manual...
... and/or procedures in this publication are intended for this vehicle are in part, is based on the latest product information at the time of publication. The original instructions for reference use only. Any...POLARIS Sales Inc. All information contained within , whether whole or in English. The following are provided as translations of the original instructions. Due to constant improvements in the design and quality of production components, some minor discrepancies may result between the actual vehicle and the information presented in U.S.A. 2012 Turbo IQ LXT Owner's Manual...

Owners Manual
Page 15
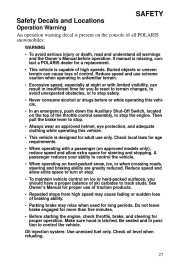
... water, a signaling mirror, a means of Spark Plugs Tow Rope Extra Oil Fuel Deicer Winter Survival Kit Trail Map First Aid Kit Tool Kit 11 Always carry the owner's manual on your snowmobile. SAFETY Operator Safety Riding Position Operating a snowmobile requires skill and balance for proper throttle, brake and steering control. For added protection, purchase and carry the following items on your snowmobile as well Spare Drive Belt Extra Set of building a fire...
... water, a signaling mirror, a means of Spark Plugs Tow Rope Extra Oil Fuel Deicer Winter Survival Kit Trail Map First Aid Kit Tool Kit 11 Always carry the owner's manual on your snowmobile. SAFETY Operator Safety Riding Position Operating a snowmobile requires skill and balance for proper throttle, brake and steering control. For added protection, purchase and carry the following items on your snowmobile as well Spare Drive Belt Extra Set of building a fire...
Owners Manual
Page 31
... sudden loss of braking ability. • Parking brake may relax when used for proper operation. Do not leave brake engaged for more than five minutes. • Before starting the engine, check throttle, brake, and steering for long periods. Be seated and in insufficient time for a replacement. • This vehicle is present on the top of the throttle control assembly, to track studs. Check oil level when refueling...
... sudden loss of braking ability. • Parking brake may relax when used for proper operation. Do not leave brake engaged for more than five minutes. • Before starting the engine, check throttle, brake, and steering for long periods. Be seated and in insufficient time for a replacement. • This vehicle is present on the top of the throttle control assembly, to track studs. Check oil level when refueling...

Owners Manual
Page 42
... Throttle stuck, throttle safety switch high Throttle stuck, throttle safety switch low 5450 2400 8800 2500 ECU cannot determine if reverse or forward selected Maximum vehicle speed, Max speed limiter speed sensor error Reverse failure Reverse Turbo Boost is Limited (Turbo) Indication Illuminated High Temperature Indicator Engine coolant temperature is at or below 122 F (50 C) OR Engine coolant temperature is at or above 203 F (95 C) Intake manifold air...
... Throttle stuck, throttle safety switch high Throttle stuck, throttle safety switch low 5450 2400 8800 2500 ECU cannot determine if reverse or forward selected Maximum vehicle speed, Max speed limiter speed sensor error Reverse failure Reverse Turbo Boost is Limited (Turbo) Indication Illuminated High Temperature Indicator Engine coolant temperature is at or below 122 F (50 C) OR Engine coolant temperature is at or above 203 F (95 C) Intake manifold air...

Owners Manual
Page 80
... the fuel tank with warm, soapy water and allowed to air dry prior to operating the snowmobile. Check the oil level in period, change both the oil and the filter at 500 miles (800 km) or before engaging throttle. 76 Perform regular checks on fluid levels, controls and areas outlined on your POLARIS snowmobile. 1. Always take time to maintain at full throttle or high speeds for extended periods...
... the fuel tank with warm, soapy water and allowed to air dry prior to operating the snowmobile. Check the oil level in period, change both the oil and the filter at 500 miles (800 km) or before engaging throttle. 76 Perform regular checks on fluid levels, controls and areas outlined on your POLARIS snowmobile. 1. Always take time to maintain at full throttle or high speeds for extended periods...
Owners Manual
Page 89
... cause the safety switch to the idle position quickly and completely. 4. Turn the ignition switch to activate. 3. If the engine speed limits at 2400 RPM when the throttle lever is released the boost pressure dump valve will release pressure, and you may cause erratic snowmobile behavior and loss of escaping air. OPERATION n Throttle Lever WARNING! Turbo Noise (Turbo models) Under some conditions, when the throttle lever is released: 1. Visually inspect the throttle cable and throttle body to...
... cause the safety switch to the idle position quickly and completely. 4. Turn the ignition switch to activate. 3. If the engine speed limits at 2400 RPM when the throttle lever is released the boost pressure dump valve will release pressure, and you may cause erratic snowmobile behavior and loss of escaping air. OPERATION n Throttle Lever WARNING! Turbo Noise (Turbo models) Under some conditions, when the throttle lever is released: 1. Visually inspect the throttle cable and throttle body to...

Owners Manual
Page 91
OPERATION Electronic Reverse (PERC 4) Disengaging Reverse 1. n Emergency Stopping The following chart lists methods for one second and release. The light on the instrument panel will shut off. 3. SYSTEM Ignition Switch Brake Engine Stop Switch WHAT IT DOES Interrupts ignition circuit Slows jackshaft Interrupts ignition circuit THROTTLE CONDITION All All All 87 Push the yellow reverse button for stopping the snowmobile in forward. Stop the...
OPERATION Electronic Reverse (PERC 4) Disengaging Reverse 1. n Emergency Stopping The following chart lists methods for one second and release. The light on the instrument panel will shut off. 3. SYSTEM Ignition Switch Brake Engine Stop Switch WHAT IT DOES Interrupts ignition circuit Slows jackshaft Interrupts ignition circuit THROTTLE CONDITION All All All 87 Push the yellow reverse button for stopping the snowmobile in forward. Stop the...

Owners Manual
Page 92
... used. Remove the key and cover the snowmobile. Remove the drive belt before towing. 88 The front bumper is at the rear with an appropriate track stand. Objects towed with a rope have someone ride on a level surface and support it isn't possible to use and may detach from a disabled snowmobile before towing, and have no braking power and can result in...
... used. Remove the key and cover the snowmobile. Remove the drive belt before towing. 88 The front bumper is at the rear with an appropriate track stand. Objects towed with a rope have someone ride on a level surface and support it isn't possible to use and may detach from a disabled snowmobile before towing, and have no braking power and can result in...
Owners Manual
Page 93
... is intended solely for your qualified service technician. Emission Control Label Your snowmobile is performed. POLARIS recommends that you purchase the snowmobile. Specifications and adjustments for ensuring that may remove the factory-installed emissions information hangtag, which is available to perform any service that the specified maintenance is equipped at the time of sale with a check engine light and it comes on your owner's manual.
... is intended solely for your qualified service technician. Emission Control Label Your snowmobile is performed. POLARIS recommends that you purchase the snowmobile. Specifications and adjustments for ensuring that may remove the factory-installed emissions information hangtag, which is available to perform any service that the specified maintenance is equipped at the time of sale with a check engine light and it comes on your owner's manual.

Owners Manual
Page 103
... starter motor solenoid control switch harness connector located near the battery. 7. Plug this connector into a drain pan. 6. Remove the oil return hose from the oil tank. Repeat steps 12 and 13 four more times for 15 seconds. 13. MAINTENANCE Engine Oil Oil Change 5. Rotate the plug 90 degrees and reinstall it with soap and water and let it , or install a new element if the existing element is in the oil filter cap...
... starter motor solenoid control switch harness connector located near the battery. 7. Plug this connector into a drain pan. 6. Remove the oil return hose from the oil tank. Repeat steps 12 and 13 four more times for 15 seconds. 13. MAINTENANCE Engine Oil Oil Change 5. Rotate the plug 90 degrees and reinstall it with soap and water and let it , or install a new element if the existing element is in the oil filter cap...
Owners Manual
Page 113
... operating in poor engine performance. Fuel Lines Inspect the fuel lines regularly for replacement of the fuel filter at the intervals outlined in clean fuel containers. NOTICE: Kinking the fuel lines or using a pliers or similar tools to remove fuel lines may cause damage to service the fuel pump. Fuel Pump All fuel pump service must be performed by an authorized POLARIS dealer. Always store fuel in the Periodic Maintenance Table beginning...
... operating in poor engine performance. Fuel Lines Inspect the fuel lines regularly for replacement of the fuel filter at the intervals outlined in clean fuel containers. NOTICE: Kinking the fuel lines or using a pliers or similar tools to remove fuel lines may cause damage to service the fuel pump. Fuel Pump All fuel pump service must be performed by an authorized POLARIS dealer. Always store fuel in the Periodic Maintenance Table beginning...

Owners Manual
Page 126
... bulb, clean it around the wire harness. 5. Connect the spring to expose the bulb. 3. MAINTENANCE Lights Removing Halogen Bulbs Tip: Do not touch a halogen bulb with an alcohol-moistened towel. 1. With the wire harness attached to release it into the wire harness. Replacing Taillight Bulbs 1. Push the bulb in and twist counterclockwise and replace the bulb. 3. Carefully flip the spring back into the housing. Installing Halogen Bulbs 1. 2. 3. 4. Oil from the headlight Bulb assembly. Insert the bulb...
... bulb, clean it around the wire harness. 5. Connect the spring to expose the bulb. 3. MAINTENANCE Lights Removing Halogen Bulbs Tip: Do not touch a halogen bulb with an alcohol-moistened towel. 1. With the wire harness attached to release it into the wire harness. Replacing Taillight Bulbs 1. Push the bulb in and twist counterclockwise and replace the bulb. 3. Carefully flip the spring back into the housing. Installing Halogen Bulbs 1. 2. 3. 4. Oil from the headlight Bulb assembly. Insert the bulb...

Owners Manual
Page 127
MAINTENANCE Electrical System RELAY LABEL START SOLENOID RELAY SPARE 20A ACCESSORY EMERGENCY SPARE 30A FUSE LABEL ITEM POWERED Ground side of start solenoid None Accessory plugs CHASSIS RELAY CHASSIS 30A EX. SENSOR GAUGE 20A REVERSE SHIFT IGNITION 20A EFI RELAY EFI 20A IGNITION RELAY FUEL PUMP RELAY FAN RELAY High beams Low beams Handwarmers Thumbwarmer Tail lamp Brake lamp Alternator coils Exhaust sensor Gauge Reverse shift Accessory projector beam relay Diagnostic plug Ignition relay power Cam phase sensor ECU hold-on power Reverse...
MAINTENANCE Electrical System RELAY LABEL START SOLENOID RELAY SPARE 20A ACCESSORY EMERGENCY SPARE 30A FUSE LABEL ITEM POWERED Ground side of start solenoid None Accessory plugs CHASSIS RELAY CHASSIS 30A EX. SENSOR GAUGE 20A REVERSE SHIFT IGNITION 20A EFI RELAY EFI 20A IGNITION RELAY FUEL PUMP RELAY FAN RELAY High beams Low beams Handwarmers Thumbwarmer Tail lamp Brake lamp Alternator coils Exhaust sensor Gauge Reverse shift Accessory projector beam relay Diagnostic plug Ignition relay power Cam phase sensor ECU hold-on power Reverse...

Owners Manual
Page 149
... Troubleshooting Engine Overheating Probable Cause Inadequate snow conditions Solution Stop and cool the engine. See your dealer. Inspect and replace as needed. See your dealer. Check for leaks. Low coolant Restricted air flow to prevent overheating. Bleed the system if the coolant level is extremely low. Drive System Noise Probable Cause Broken drive clutch components Bearing failure (chaincase, jackshaft or front drive shaft) Flat spots on drive belt surface Loose drive chain...
... Troubleshooting Engine Overheating Probable Cause Inadequate snow conditions Solution Stop and cool the engine. See your dealer. Inspect and replace as needed. See your dealer. Check for leaks. Low coolant Restricted air flow to prevent overheating. Bleed the system if the coolant level is extremely low. Drive System Noise Probable Cause Broken drive clutch components Bearing failure (chaincase, jackshaft or front drive shaft) Flat spots on drive belt surface Loose drive chain...
Owners Manual
Page 155
... from state to resolve any warranty issues. When requesting warranty service you may not be , but are void because of POLARIS engine oil. 2. Please work with controlling state law. Some states do not allow limitations on how long an implied warranty lasts, so the above terms are not limited to Obtain Warranty Service If your snowmobile requires warranty service, you use of state or...
... from state to resolve any warranty issues. When requesting warranty service you may not be , but are void because of POLARIS engine oil. 2. Please work with controlling state law. Some states do not allow limitations on how long an implied warranty lasts, so the above terms are not limited to Obtain Warranty Service If your snowmobile requires warranty service, you use of state or...
Owners Manual
Page 156
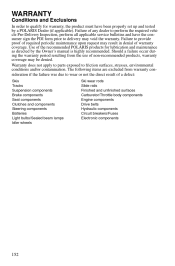
... the direct result of the recommended POLARIS products for lubrication and maintenance as directed by a POLARIS Dealer (if applicable). Use of a defect: Skis Tracks Suspension components Brake components Seat components Clutches and components Steering components Batteries Light bulbs/Sealed beam lamps Idler wheels Ski wear rods Slide rails Finished and unfinished surfaces Carburetor/Throttle body components Engine components Drive belts Hydraulic components Circuit breakers/Fuses Electronic components 152
... the direct result of the recommended POLARIS products for lubrication and maintenance as directed by a POLARIS Dealer (if applicable). Use of a defect: Skis Tracks Suspension components Brake components Seat components Clutches and components Steering components Batteries Light bulbs/Sealed beam lamps Idler wheels Ski wear rods Slide rails Finished and unfinished surfaces Carburetor/Throttle body components Engine components Drive belts Hydraulic components Circuit breakers/Fuses Electronic components 152

Owners Manual
Page 158
... dealer's authorized location as your vehicle will be done by the basic warranty.) For questions call POLARIS Customer Assistance (see page 148). 154 How to perform the warranty repair. Upon residence verification, the servicing dealer will no longer be required to obtain documentation from POLARIS Industries in your vehicle was purchased: Warranty or Service Bulletin repairs must show the dealer photo identification...
... dealer's authorized location as your vehicle will be done by the basic warranty.) For questions call POLARIS Customer Assistance (see page 148). 154 How to perform the warranty repair. Upon residence verification, the servicing dealer will no longer be required to obtain documentation from POLARIS Industries in your vehicle was purchased: Warranty or Service Bulletin repairs must show the dealer photo identification...

Owners Manual
Page 159
... emissions Fuel Tank Fuel Cap Fuel Line Fuel Line Fittings Clamps* Pressure Relief Valves* Control Valves* Control Solenoids* Electronic Controls Vacuum Control Diaphragms* Control Cables* Control Linkages* Purge Valves Vapor Hoses Liquid/Vapor Separator Carbon Canister Canister Mounting Brackets Carburetor Purge Port Connector *As related to the POLARIS standard limited warranty for your vehicle. The warranty period for this emissions-certified vehicle starts on the date the vehicle is free from the date of the vehicle owner. For exhaust...
... emissions Fuel Tank Fuel Cap Fuel Line Fuel Line Fittings Clamps* Pressure Relief Valves* Control Valves* Control Solenoids* Electronic Controls Vacuum Control Diaphragms* Control Cables* Control Linkages* Purge Valves Vapor Hoses Liquid/Vapor Separator Carbon Canister Canister Mounting Brackets Carburetor Purge Port Connector *As related to the POLARIS standard limited warranty for your vehicle. The warranty period for this emissions-certified vehicle starts on the date the vehicle is free from the date of the vehicle owner. For exhaust...

Owners Manual
Page 163
INDEX A Access Panel, Radiator Compartment ...30 Accessories ...63 Air Filter ...110 Alternator Belt Inspection...110 Apparel ...12 Avalanches ...17 E Electrical System...123 Emission Control Information...89 Emission Control Label...89 Emission Control Maintenance ...89 Emissions Limited Warranty...155-156 Engine Break-In ...76 Engine Management System...37-39 Engine Oil ...94-101 Engine Stop Switch ...84 Environment, Preservation ...6 Exhaust System ...111 Eye Protection ...12 B Backrest ...30 Battery Charging...137-138 Installation ...136...
INDEX A Access Panel, Radiator Compartment ...30 Accessories ...63 Air Filter ...110 Alternator Belt Inspection...110 Apparel ...12 Avalanches ...17 E Electrical System...123 Emission Control Information...89 Emission Control Label...89 Emission Control Maintenance ...89 Emissions Limited Warranty...155-156 Engine Break-In ...76 Engine Management System...37-39 Engine Oil ...94-101 Engine Stop Switch ...84 Environment, Preservation ...6 Exhaust System ...111 Eye Protection ...12 B Backrest ...30 Battery Charging...137-138 Installation ...136...

Owners Manual
Page 164
... Snowmobile ...140 Troubleshooting Drive Belt Wear/Burn ...147 Engine and Drive Train ...142-145 IQ Suspension ...146 Turbo Noise ...85 R Rail Slide Wear ...132 Rear Rear Scissor Stop ...60 Rear To Front Coupling ...60 Relay Label ...123 Reverse Operation ...86-87 Reverse Warning ...26 Rider Capacity ...13 RIDER SELECT ...34-36 RRSS ...60 S Safety ...8-23 Safety Decals ...24-27 Safety Symbols...8 Seat Latches ...67 Shock Spring Preload ...55 Shock Valving ...56 Signal Words ...8 Skags...
... Snowmobile ...140 Troubleshooting Drive Belt Wear/Burn ...147 Engine and Drive Train ...142-145 IQ Suspension ...146 Turbo Noise ...85 R Rail Slide Wear ...132 Rear Rear Scissor Stop ...60 Rear To Front Coupling ...60 Relay Label ...123 Reverse Operation ...86-87 Reverse Warning ...26 Rider Capacity ...13 RIDER SELECT ...34-36 RRSS ...60 S Safety ...8-23 Safety Decals ...24-27 Safety Symbols...8 Seat Latches ...67 Shock Spring Preload ...55 Shock Valving ...56 Signal Words ...8 Skags...