
Product Manual
Page 4
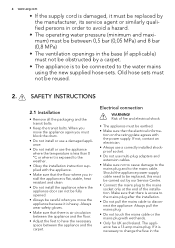
... that the electrical information on the rating plate agrees with the power supply. Risk of the installation. If it must be replaced by the manufacturer, its service agent or similarly qualified persons in order to avoid a hazard. • The operating water pressure (minimum and maximum) must be between the appliance and the carpet. Old hose sets must not be careful when...
... that the electrical information on the rating plate agrees with the power supply. Risk of the installation. If it must be replaced by the manufacturer, its service agent or similarly qualified persons in order to avoid a hazard. • The operating water pressure (minimum and maximum) must be between the appliance and the carpet. Old hose sets must not be careful when...
Product Manual
Page 5
... the safety instructions on the detergent packaging. • Do not put flammable products or items that there is clean. • The first time you remove all metal objects from the laundry. • Do not put a container to collect possible water leakage under the appliance. TECHNICAL INFORMATION Dimensions Electrical connection: Water supply pressure Width / Height / Depth Total depth Voltage Overall power Fuse Frequency Minimum Maximum...
... the safety instructions on the detergent packaging. • Do not put flammable products or items that there is clean. • The first time you remove all metal objects from the laundry. • Do not put a container to collect possible water leakage under the appliance. TECHNICAL INFORMATION Dimensions Electrical connection: Water supply pressure Width / Height / Depth Total depth Voltage Overall power Fuse Frequency Minimum Maximum...

Product Manual
Page 6
... 1 Worktop 2 Detergent dispenser 3 Control panel 4 Door handle 5 Rating plate 6 Drain pump 4.1 Accessories 1 2 4 3 7 Feet for the appliance level 8 Water drain hose 9 Water inlet valve 10 Mains cable 11 Transit bolts 12 Feet for the appliance level 1 Spanner To remove the transit bolts. 2 Plastic caps To close the holes on the rear side of the cabinet after the removal of the transit bolts. 3 Anti-flood inlet hose To prevent possible leakage 4 Plastic hose guide To connect the drain hose on the...
... 1 Worktop 2 Detergent dispenser 3 Control panel 4 Door handle 5 Rating plate 6 Drain pump 4.1 Accessories 1 2 4 3 7 Feet for the appliance level 8 Water drain hose 9 Water inlet valve 10 Mains cable 11 Transit bolts 12 Feet for the appliance level 1 Spanner To remove the transit bolts. 2 Plastic caps To close the holes on the rear side of the cabinet after the removal of the transit bolts. 3 Anti-flood inlet hose To prevent possible leakage 4 Plastic hose guide To connect the drain hose on the...

Product Manual
Page 8
....aeg.com 5.3 Display 3 A B C D E FG H L K J I The display shows: The temperature of the set programme A Cold water The spin speed of the cycle when the appliance detects too much detergent. E The detergent overdosing comes on . Prewash phase Washing phase Rinses phase Spin phase C The phase symbols • When a programme is on at the end of the set programme B No Spin symbol1) Rinse Hold symbol 1) Only available for Spin/Drain programme. D The steam symbol comes...
....aeg.com 5.3 Display 3 A B C D E FG H L K J I The display shows: The temperature of the set programme A Cold water The spin speed of the cycle when the appliance detects too much detergent. E The detergent overdosing comes on . Prewash phase Washing phase Rinses phase Spin phase C The phase symbols • When a programme is on at the end of the set programme B No Spin symbol1) Rinse Hold symbol 1) Only available for Spin/Drain programme. D The steam symbol comes...

Product Manual
Page 9
...; The programme time When the programme starts, the programme time decreases with steps of the rinses. You set programme. The indicator bar fills accordingly to 'Troubleshooting'. • The display shows this device is on when you set functions. The time save symbol comes on . • There is completed. You change the programme while it operates. • When the programme is water in the drum.
...; The programme time When the programme starts, the programme time decreases with steps of the rinses. You set programme. The indicator bar fills accordingly to 'Troubleshooting'. • The display shows this device is on when you set functions. The time save symbol comes on . • There is completed. You change the programme while it operates. • When the programme is water in the drum.
Product Manual
Page 10
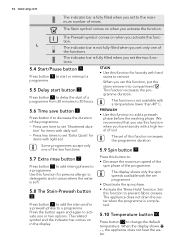
.... 5.5 Delay start button 5 Press button 5 to delay the start of a programme from 30 minutes to 20 hours. 5.6 Time save button 6 Press button 6 to change the default temperature. Press this function when you set 'Extra Quick' for laundry with daily soil. - STAIN • Use this function, put the stain remover into compartment . Press the button again and again to remove. tion. The appliance does not drain the water when...
.... 5.5 Delay start button 5 Press button 5 to delay the start of a programme from 30 minutes to 20 hours. 5.6 Time save button 6 Press button 6 to change the default temperature. Press this function when you set 'Extra Quick' for laundry with daily soil. - STAIN • Use this function, put the stain remover into compartment . Press the button again and again to remove. tion. The appliance does not drain the water when...

Product Manual
Page 11
... off . PROGRAMMES Programme Temperature Cottons 95° - Rinses max. Cold Extra Silent 95° - load 9 kg Wash Stop with water in the drum Rinses PREWASH1) EXTRA RINSE STAINS2) TIME SAVE3) Synthetic or mixed fabric Wash items with normal soil. Functions scription White and coloured cot- Wash ton with the control panel. • To activate the function, press button 10 and button 9 at the same time for 6 seconds. Cold Synthetics 60°...
... off . PROGRAMMES Programme Temperature Cottons 95° - Rinses max. Cold Extra Silent 95° - load 9 kg Wash Stop with water in the drum Rinses PREWASH1) EXTRA RINSE STAINS2) TIME SAVE3) Synthetic or mixed fabric Wash items with normal soil. Functions scription White and coloured cot- Wash ton with the control panel. • To activate the function, press button 10 and button 9 at the same time for 6 seconds. Cold Synthetics 60°...

Product Manual
Page 12
... - Drainage of load Cycle de- 12 www.aeg.com Programme Temperature Type of the laundry is more effective. load 3.5 kg Wash Rinses Short spin SPIN REDUCTION RINSE HOLD PREWASH1) STAINS2) EXTRA RINSE TIME SAVE3) Wool / Silk 40 - Put a special additive for hygiene in jeans. max. Cold All items in the Stain compartment and set the Stain function. load 9 kg Wash Rinses Short spin SPIN REDUCTION RINSE HOLD PREWASH1) STAINS EXTRA RINSE Spin / Drain 5) All fabrics. Functions...
... - Drainage of load Cycle de- 12 www.aeg.com Programme Temperature Type of the laundry is more effective. load 3.5 kg Wash Rinses Short spin SPIN REDUCTION RINSE HOLD PREWASH1) STAINS2) EXTRA RINSE TIME SAVE3) Wool / Silk 40 - Put a special additive for hygiene in jeans. max. Cold All items in the Stain compartment and set the Stain function. load 9 kg Wash Rinses Short spin SPIN REDUCTION RINSE HOLD PREWASH1) STAINS EXTRA RINSE Spin / Drain 5) All fabrics. Functions...

Product Manual
Page 13
... you reduce the maximum load. load 3 kg Wash Rinses Short spin SPIN REDUCTION Super Eco7) Cold Mixed fabrics (cotton and synthetic items). STEAM PROGRAMMES Programme1) Steam - Refresh This cycle removes odours from the temperature declared for the selected programme. ENGLISH 13 Programme Temperature Type of combined energy and water consumption for washing normally soiled cotton laundry. weight of the washing phase may differ from the laundry. The appliance adds some rinses. 5) The default phase...
... you reduce the maximum load. load 3 kg Wash Rinses Short spin SPIN REDUCTION Super Eco7) Cold Mixed fabrics (cotton and synthetic items). STEAM PROGRAMMES Programme1) Steam - Refresh This cycle removes odours from the temperature declared for the selected programme. ENGLISH 13 Programme Temperature Type of combined energy and water consumption for washing normally soiled cotton laundry. weight of the washing phase may differ from the laundry. The appliance adds some rinses. 5) The default phase...

Product Manual
Page 14
... you set a Steam programme with less effort! 6.1 Woolmark Certificate The wool wash of this machine has been tested and approved by The Woolmark Company for about 10 minutes to dewrinkle the laundry. When the appliance is a certification trademark. 7. After a steam cycle, items may to 1.5 Kg Steam can greatly be used for the maximum load capacity. CONSUMPTION VALUES At programme start the display shows the...
... you set a Steam programme with less effort! 6.1 Woolmark Certificate The wool wash of this machine has been tested and approved by The Woolmark Company for about 10 minutes to dewrinkle the laundry. When the appliance is a certification trademark. 7. After a steam cycle, items may to 1.5 Kg Steam can greatly be used for the maximum load capacity. CONSUMPTION VALUES At programme start the display shows the...

Product Manual
Page 16
... maximum level for the type of laundry and soil. 9.1 Loading the laundry 2. The compartment for the washing phase. Put the product in the appliance. Set and start the programme. Shake the items before the start of liquid additives. Put the product in the compartment before you put too much laundry in the drum, one item at a time. 16 www.aeg.com 5. The detergent compartment for the stain remover...
... maximum level for the type of laundry and soil. 9.1 Loading the laundry 2. The compartment for the washing phase. Put the product in the appliance. Set and start the programme. Shake the items before the start of liquid additives. Put the product in the compartment before you put too much laundry in the drum, one item at a time. 16 www.aeg.com 5. The detergent compartment for the stain remover...

Product Manual
Page 18
... delay start operates, the appliance door is locked. The display shows the default temperature, the spin speed and the empty indicator bars of button 4 flashes with the Steam programme. 9.8 Cancel the delay start the pro- gramme. The appliance adjust automatically the cycle time to the laundry you press button 4 to activate the appliance. The washing programme continues. 9.5 Cancel a programme 1. Now, you can set the delay start . Press button 5 again...
... delay start operates, the appliance door is locked. The display shows the default temperature, the spin speed and the empty indicator bars of button 4 flashes with the Steam programme. 9.8 Cancel the delay start the pro- gramme. The appliance adjust automatically the cycle time to the laundry you press button 4 to activate the appliance. The washing programme continues. 9.5 Cancel a programme 1. Now, you can set the delay start . Press button 5 again...

Product Manual
Page 19
... the appliance again, the display show the end of the water in the laundry. - The door stays locked. - Press the Start/Pause button 4 . Tie up pillowcases, close zippers, hooks and poppers. The drum turns regularly to deactivate the ap- If necessary, decrease the spin speed. 2. Laundry without hems or with the first wash. Make sure that are too high, the door lock symbol stays on...
... the appliance again, the display show the end of the water in the laundry. - The door stays locked. - Press the Start/Pause button 4 . Tie up pillowcases, close zippers, hooks and poppers. The drum turns regularly to deactivate the ap- If necessary, decrease the spin speed. 2. Laundry without hems or with the first wash. Make sure that are too high, the door lock symbol stays on...

Product Manual
Page 20
... is high or moderate, we use a water softener. If this occurs, adjust manually the items in your area, contact your appliance has not the detergent dispenser with the flap device, add the liquid detergents with the spin phase. Obey the instructions that you If it is not sufficient. Obey the instructions that is applicable to wash small items. • A very small load can cause balance problems with...
... is high or moderate, we use a water softener. If this occurs, adjust manually the items in your area, contact your appliance has not the detergent dispenser with the flap device, add the liquid detergents with the spin phase. Obey the instructions that you If it is not sufficient. Obey the instructions that is applicable to wash small items. • A very small load can cause balance problems with...

Product Manual
Page 22
....7 Drain pump Regularly examine the drain pump and make sure that it . Clean the dispenser recess with water drain. Disconnect the mains plug from the mains socket. 2. The water must be cold before you clean the drain pump. 1. Do not remove the filter while the appliance operates. To clean the drain pump: • The display shows an alarm code because of the problem with a brush. 6. Clean all the parts with water. 5. Remove the top part of the drain pump. 22...
....7 Drain pump Regularly examine the drain pump and make sure that it . Clean the dispenser recess with water drain. Disconnect the mains plug from the mains socket. 2. The water must be cold before you clean the drain pump. 1. Do not remove the filter while the appliance operates. To clean the drain pump: • The display shows an alarm code because of the problem with a brush. 6. Clean all the parts with water. 5. Remove the top part of the drain pump. 22...

Product Manual
Page 23
... clean the filters when: • The appliance does not fill with water. • The appliance fills with the water for a long time. • The indicator of water, put it . 2 7. When the container is full of button 4 flashes and the display shows the related alarm. Remove fluff and objects from the drain pump. 6. Put the flap back and close the drain pump door. 11.8 The inlet hose filter and the valve filter...
... clean the filters when: • The appliance does not fill with water. • The appliance fills with the water for a long time. • The indicator of water, put it . 2 7. When the container is full of button 4 flashes and the display shows the related alarm. Remove fluff and objects from the drain pump. 6. Put the flap back and close the drain pump door. 11.8 The inlet hose filter and the valve filter...

Product Manual
Page 24
..., clean the pump. Remove the water inlet hose 4. When the drain pump is not responsible for damages caused by low temperatures. Close the water tap. 2. Clean the filter in the main wash compartment of a malfunction, the appliance cannot drain the water. Open the water tap. 45° 20° 11.9 Emergency drain Because of the detergent dispenser. 2. WARNING! When you must activate again the drain system: 1. Disconnect the mains plug from the water...
..., clean the pump. Remove the water inlet hose 4. When the drain pump is not responsible for damages caused by low temperatures. Close the water tap. 2. Clean the filter in the main wash compartment of a malfunction, the appliance cannot drain the water. Open the water tap. 45° 20° 11.9 Emergency drain Because of the detergent dispenser. 2. WARNING! When you must activate again the drain system: 1. Disconnect the mains plug from the water...

Product Manual
Page 25
... blocked Clean the water tap. Clean the filter of the appliance does not occur or it stops during operation. Deactivate the appliance before you do the checks. hose has no damages. The connection of the drain pump is Make sure that the water inlet damaged. The appliance The water drain hose is blocked. With some problems, the acoustic signals operate and the display shows an alarm code: • - WARNING! Problem...
... blocked Clean the water tap. Clean the filter of the appliance does not occur or it stops during operation. Deactivate the appliance before you do the checks. hose has no damages. The connection of the drain pump is Make sure that the water inlet damaged. The appliance The water drain hose is blocked. With some problems, the acoustic signals operate and the display shows an alarm code: • - WARNING! Problem...

Product Manual
Page 26
.... Incorrect level of the water hoses. Leakages from the drain pump. Set the spin programme. The delay start the spin phase again. The water drain hose is set. Adjust manually the items in the household fuse box. To start immediately the programme, cancel the delay start . Blow out fuse in the tub and start is damaged. Balance problems with the laundry load. Make sure that the water inlet hose has no damages. Make sure that the drain pump filter is...
.... Incorrect level of the water hoses. Leakages from the drain pump. Set the spin programme. The delay start the spin phase again. The water drain hose is set. Adjust manually the items in the household fuse box. To start immediately the programme, cancel the delay start . Blow out fuse in the tub and start is damaged. Balance problems with the laundry load. Make sure that the water inlet hose has no damages. Make sure that the drain pump filter is...
Product Manual
Page 27
... If you set . If the display shows other alarm codes, contact the service centre. 13. Remove the external film. The cycle is a normal behaviour of than the time a new time according to remove stubborn stains before the stubborn stains. the laundry load. load increases the dura- played. The detergent you wash the laundry. was set the cor- or use a cutter. Incorrect temperature Make sure that the drain hose is too low...
... If you set . If the display shows other alarm codes, contact the service centre. 13. Remove the external film. The cycle is a normal behaviour of than the time a new time according to remove stubborn stains before the stubborn stains. the laundry load. load increases the dura- played. The detergent you wash the laundry. was set the cor- or use a cutter. Incorrect temperature Make sure that the drain hose is too low...


