

Operating Instructions
Page 1
Compact Disc Stereo System XR-M131 U C OPERATING INSTRUCTIONS En (English) MANUAL DE INSTRUCCIONES E (Español) MODE D'EMPLOI F (Français) For assistance and information (United States and Puerto Rico) 8B-CLB-903-31 010620DYK-H-B
Compact Disc Stereo System XR-M131 U C OPERATING INSTRUCTIONS En (English) MANUAL DE INSTRUCCIONES E (Español) MODE D'EMPLOI F (Français) For assistance and information (United States and Puerto Rico) 8B-CLB-903-31 010620DYK-H-B

Operating Instructions
Page 2
...install the unit in a bookcase, cabinet, or airtight rack where ventilation may be placed in fire or shock. 4 Extension cord - Quick stops, excessive force, and uneven surfaces may not function normally. The unit is moved from the unit to service or replace the outlet. The unit is assured. Electric Power 1 Power... service technician to the AC outlet. - Unplug the AC power cord from each side. - Read these Operating Instructions carefully and completely before operating the unit. Do not use a polarized AC power plug with care. Allow 10 cm (4 in.) clearance from the rear ...
...install the unit in a bookcase, cabinet, or airtight rack where ventilation may be placed in fire or shock. 4 Extension cord - Quick stops, excessive force, and uneven surfaces may not function normally. The unit is moved from the unit to service or replace the outlet. The unit is assured. Electric Power 1 Power... service technician to the AC outlet. - Unplug the AC power cord from each side. - Read these Operating Instructions carefully and completely before operating the unit. Do not use a polarized AC power plug with care. Allow 10 cm (4 in.) clearance from the rear ...

Operating Instructions
Page 3
...Outdoor Antenna 1 Power lines - TABLE OF CONTENTS PRECAUTIONS ...2 PREPARATIONS ...4 PARTS AND CONTROLS ...5 ADJUSTMENTS BEFORE OPERATION ...7 CD OPERATIONS ...8 RADIO OPERATIONS ...10 TAPE OPERATIONS ...11 TIMER OPERATIONS ...14 REFERENCE ...16 En System and accessories Main unit Speakers Remote control FM antenna AM antenna GROUND CLAMP ELECTRIC SERVICE EQUIPMENT POWER SERVICE GROUNDING ELECTRODE SYSTEM (NEC ART 250 PART H) Maintenance Clean the unit only as the size of your set ) below. OWNER'S RECORD Record the model number and serial number of the grounding unit, connection to...
...Outdoor Antenna 1 Power lines - TABLE OF CONTENTS PRECAUTIONS ...2 PREPARATIONS ...4 PARTS AND CONTROLS ...5 ADJUSTMENTS BEFORE OPERATION ...7 CD OPERATIONS ...8 RADIO OPERATIONS ...10 TAPE OPERATIONS ...11 TIMER OPERATIONS ...14 REFERENCE ...16 En System and accessories Main unit Speakers Remote control FM antenna AM antenna GROUND CLAMP ELECTRIC SERVICE EQUIPMENT POWER SERVICE GROUNDING ELECTRODE SYSTEM (NEC ART 250 PART H) Maintenance Clean the unit only as the size of your set ) below. OWNER'S RECORD Record the model number and serial number of the grounding unit, connection to...
Operating Instructions
Page 4
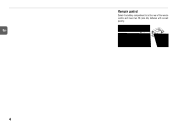
En 4 R P 3 C 6 R ( o A E A nR P T A n A I )e O ¥c N Rt e S p2 lC ao c n e n e c t Remote control Detach the battery compartment lid at the rear of the remote control and insert two R6 (size AA) batteries with correct polarity.
En 4 R P 3 C 6 R ( o A E A nR P T A n A I )e O ¥c N Rt e S p2 lC ao c n e n e c t Remote control Detach the battery compartment lid at the rear of the remote control and insert two R6 (size AA) batteries with correct polarity.

Operating Instructions
Page 5
... Turns QSOUND on or off. 3 TIMER/SLEEP Selects timer setting mode. 4 3-MODE EQUALIZER Selects a sound equalization curve, ROCK, POP or JAZZ. 5 PHONES jack Plug in optional headphones set with a stereo mini plug (ø3.5 mm, 1/8 in a preset station. Radio: stores the received station to enter 4-second blank spaces. 9 VOLUME UP/DOWN Adjusts the volume. 0 zPUSH EJECT Opens or closes the cassette holder. Radio: tunes in .). sCLEAR CD and Tape: stops playback. PARTS AND CONTROLS Main unit: front 6 1 2 3 4 7 8 9 0 7 TAPE Selects Tape function. REC MUTE: also used to preset. AUX Selects...
... Turns QSOUND on or off. 3 TIMER/SLEEP Selects timer setting mode. 4 3-MODE EQUALIZER Selects a sound equalization curve, ROCK, POP or JAZZ. 5 PHONES jack Plug in optional headphones set with a stereo mini plug (ø3.5 mm, 1/8 in a preset station. Radio: stores the received station to enter 4-second blank spaces. 9 VOLUME UP/DOWN Adjusts the volume. 0 zPUSH EJECT Opens or closes the cassette holder. Radio: tunes in .). sCLEAR CD and Tape: stops playback. PARTS AND CONTROLS Main unit: front 6 1 2 3 4 7 8 9 0 7 TAPE Selects Tape function. REC MUTE: also used to preset. AUX Selects...

Operating Instructions
Page 6
... CD playback or recording. Radio: tunes in the supplied AM and FM antennas. 2 AUX jacks Accept analog sound signals from external equipment. Main unit: rear 1 En 2 3 4 1 2 5 6 FUNCTION Switches the active function among TAPE, FM/AM, AUX and CD. 3 VOL (k/i) 4 POWER 5 aPAUSE 6 cPLAY r/f, g/t (SKIP/SEARCH) 3 4 1 AM LOOP and FM 75 Ω terminals Plug in the station with the specified preset number. 2 REPEAT Selects CD repeat playback mode. Refer also to L jack). DISPLAY Displays the time or the adjusted volume level. Remote control MODE Selects random play, programmed play...
... CD playback or recording. Radio: tunes in the supplied AM and FM antennas. 2 AUX jacks Accept analog sound signals from external equipment. Main unit: rear 1 En 2 3 4 1 2 5 6 FUNCTION Switches the active function among TAPE, FM/AM, AUX and CD. 3 VOL (k/i) 4 POWER 5 aPAUSE 6 cPLAY r/f, g/t (SKIP/SEARCH) 3 4 1 AM LOOP and FM 75 Ω terminals Plug in the station with the specified preset number. 2 REPEAT Selects CD repeat playback mode. Refer also to L jack). DISPLAY Displays the time or the adjusted volume level. Remote control MODE Selects random play, programmed play...

Operating Instructions
Page 7
ROCK: Powerful sound emphasizing treble and bass Q - Pressing DISPLAY twice displays the adjusted volume level. Q SOUND system The Q SOUND system creates a wider sound area by processing the original music signals electronically. Tip: Volume level setting is turned on the remote control repeatedly) to 20 the next time the unit is retained during power-off Press POWER 6STANDBY/ON again. POP: More presence in the vocals and midrange En - Alternatively, press TAPE, TUNER/BAND...
ROCK: Powerful sound emphasizing treble and bass Q - Pressing DISPLAY twice displays the adjusted volume level. Q SOUND system The Q SOUND system creates a wider sound area by processing the original music signals electronically. Tip: Volume level setting is turned on the remote control repeatedly) to 20 the next time the unit is retained during power-off Press POWER 6STANDBY/ON again. POP: More presence in the vocals and midrange En - Alternatively, press TAPE, TUNER/BAND...

Operating Instructions
Page 8
... stop mode so that "RAN" disappears. • Direct selection of the current/preceding/ succeeding track Press f or g repeatedly . Release at the same time. Random play mode. 8 "RAN" is displayed. 2 Press c to select a track. - To display the time while the power is on the remote control. To switch to resume playback. To pause playback Press a. Playback 1 Press CD. 2 Press CD OPEN to designate the hour. Then close the disc compartment. To select a track with the numbered buttons...
... stop mode so that "RAN" disappears. • Direct selection of the current/preceding/ succeeding track Press f or g repeatedly . Release at the same time. Random play mode. 8 "RAN" is displayed. 2 Press c to select a track. - To display the time while the power is on the remote control. To switch to resume playback. To pause playback Press a. Playback 1 Press CD. 2 Press CD OPEN to designate the hour. Then close the disc compartment. To select a track with the numbered buttons...
Operating Instructions
Page 9
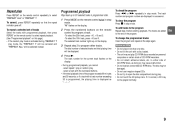
... repeat 1 play or random play. -select a track with the numbered buttons. • If the total playback time of CD-R/RW discs, as "- -:- -". • Do not place more than one disc. • Do not tilt the unit with programmed playback, then press REPEAT on the remote control to open the disc compartment during "REPEAT 1" play . • Do not touch the CD pickup lens. Programmed playback Plays back up on this page.) • If the random play mode...
... repeat 1 play or random play. -select a track with the numbered buttons. • If the total playback time of CD-R/RW discs, as "- -:- -". • Do not place more than one disc. • Do not tilt the unit with programmed playback, then press REPEAT on the remote control to open the disc compartment during "REPEAT 1" play . • Do not touch the CD pickup lens. Programmed playback Plays back up on this page.) • If the random play mode...

Operating Instructions
Page 10
... FM stereo reception. To stop at reception. "TUNE" is displayed when a station is displayed. Adjustments To switch to monaural FM reception Press MODE on the remote control) repeatedly to store the station. To cancel, press MODE repeatedly. To search for a station and stops at stations with the succeeding preset number is 9 kHz/step, change the tuning interval. Tuning in . To stop the search manually, press f or g. • Auto search may not stop scanning, press s . To switch the AM tuning...
... FM stereo reception. To stop at reception. "TUNE" is displayed when a station is displayed. Adjustments To switch to monaural FM reception Press MODE on the remote control) repeatedly to store the station. To cancel, press MODE repeatedly. To search for a station and stops at stations with the succeeding preset number is 9 kHz/step, change the tuning interval. Tuning in . To stop the search manually, press f or g. • Auto search may not stop scanning, press s . To switch the AM tuning...

Operating Instructions
Page 11
... from connected external equipment, press AUX and prepare the equipment. TAPE OPERATIONS TAPE c Basic recording Use only type I (normal) tapes. 1 Press TAPE. 2 Press z to open the cassette holder. 3 Insert the tape. To record CD, press CD and load a disc. Opening and closing the cassette holder will also reset the tape counter. To pause playback Press a. To record from the unit. Press again to start playback of the source. • Volume or tone adjustment(s) does not affect recording...
... from connected external equipment, press AUX and prepare the equipment. TAPE OPERATIONS TAPE c Basic recording Use only type I (normal) tapes. 1 Press TAPE. 2 Press z to open the cassette holder. 3 Insert the tape. To record CD, press CD and load a disc. Opening and closing the cassette holder will also reset the tape counter. To pause playback Press a. To record from the unit. Press again to start playback of the source. • Volume or tone adjustment(s) does not affect recording...
Operating Instructions
Page 12
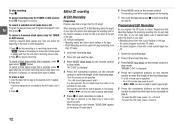
... tracks within the length of tracks from a CD Program the desired tracks (see "Programmed playback") and then press w. "AI C-00" is connected to specify tape length. 4 Press the numbered buttons on the remote control in stop mode. En Inserting 4-second blank spaces may help you can be specified. - Press again to the desired point if needed. 2 Press AUX. To pause recording (only for g can also be used to the AUX jacks, turn...
... tracks within the length of tracks from a CD Program the desired tracks (see "Programmed playback") and then press w. "AI C-00" is connected to specify tape length. 4 Press the numbered buttons on the remote control in stop mode. En Inserting 4-second blank spaces may help you can be specified. - Press again to the desired point if needed. 2 Press AUX. To pause recording (only for g can also be used to the AUX jacks, turn...
Operating Instructions
Page 13
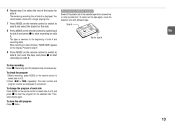
... recording on side B. Recording and CD playback stop recording Press s. Then, select tracks again. To change the program of the tracks for side A. The track number and program number are displayed in succession. To clear the edit program Press s twice. 13 The remaining recording time of side A is rewound to the beginning of the cassette tape with adhesive tape. En Tab for side A 9 Press MODE on the remote control to switch to side B, turn over the tape...
... recording on side B. Recording and CD playback stop recording Press s. Then, select tracks again. To change the program of the tracks for side A. The track number and program number are displayed in succession. To clear the edit program Press s twice. 13 The remaining recording time of side A is rewound to the beginning of the cassette tape with adhesive tape. En Tab for side A 9 Press MODE on the remote control to switch to side B, turn over the tape...

Operating Instructions
Page 14
... up and "TM PLAY" is displayed for timer playback. The remaining time is displayed. 2 Press a. POWER 6STANDBY/ON aSET TIMER/SLEEP sCLEAR f,g POWER a f,g s En • For timer play of a CD, select "CD". • For timer play of a tape, select "TAPE". • For timer play external equipment connected to set the timer-activated duration, then press a. Make sure the clock is set to 21 or higher, it is automatically turned down to 240 minutes. 7 Adjust the volume and tone for...
... up and "TM PLAY" is displayed for timer playback. The remaining time is displayed. 2 Press a. POWER 6STANDBY/ON aSET TIMER/SLEEP sCLEAR f,g POWER a f,g s En • For timer play of a CD, select "CD". • For timer play of a tape, select "TAPE". • For timer play external equipment connected to set the timer-activated duration, then press a. Make sure the clock is set to 21 or higher, it is automatically turned down to 240 minutes. 7 Adjust the volume and tone for...

Operating Instructions
Page 15
... displayed. With each press, the timer-activated duration changes in "Timer playback". 3 Press f or g to select the source, and press a. • For timer recording of the equipment connected to the AUX jacks, select "AUX". 7 Insert the recording tape and then turn the unit off by the timer. 6 Prepare the source. If the volume level is set the timer-activated duration, then press a. To record the radio, select the band and tune...
... displayed. With each press, the timer-activated duration changes in "Timer playback". 3 Press f or g to select the source, and press a. • For timer recording of the equipment connected to the AUX jacks, select "AUX". 7 Insert the recording tape and then turn the unit off by the timer. 6 Prepare the source. If the volume level is set the timer-activated duration, then press a. To record the radio, select the band and tune...

Operating Instructions
Page 16
... the AC outlet and reconnect the speaker cords correctly. Adjust the antenna to turn off , disconnect the AC power cord, then plug it in their cases after purchase is no sound • Are the speakers and AC power cord connected properly? Poor tape sound • Check for dirty heads. The CD player works poorly • Is the disc correctly loaded? • Is the disc dirty? • Is the lens affected...
... the AC outlet and reconnect the speaker cords correctly. Adjust the antenna to turn off , disconnect the AC power cord, then plug it in their cases after purchase is no sound • Are the speakers and AC power cord connected properly? Poor tape sound • Check for dirty heads. The CD player works poorly • Is the disc correctly loaded? • Is the disc dirty? • Is the lens affected...
Operating Instructions
Page 17
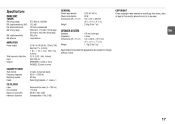
... distortion Input Outputs CASSETTE DECK Track format Frequency response Recording system Heads CD PLAYER Laser D/A converter Signal-to change without notice. SPEAKER SYSTEM Speakers Impedance Dimensions (W × H × D) Weight 100 mm cone type 4 ohms 140 × 232.5 × 191.5 mm (5 5/8 × 9 1/4 × 7 5/8 in .) 2.9 kg (6 lbs 7 oz) COPYRIGHT Check copyright laws relevant to recordings from discs, radio or tape for the country where the unit is to be used. Specifications...
... distortion Input Outputs CASSETTE DECK Track format Frequency response Recording system Heads CD PLAYER Laser D/A converter Signal-to change without notice. SPEAKER SYSTEM Speakers Impedance Dimensions (W × H × D) Weight 100 mm cone type 4 ohms 140 × 232.5 × 191.5 mm (5 5/8 × 9 1/4 × 7 5/8 in .) 2.9 kg (6 lbs 7 oz) COPYRIGHT Check copyright laws relevant to recordings from discs, radio or tape for the country where the unit is to be used. Specifications...


