Safety Guide
Page 9
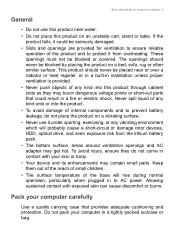
... the product and to AC power. These openings must not be seriously damaged. • Slots and openings are provided for using your computer carefully Use a quality carrying case that could be blocked or covered. Do not pack your skin or body. • Your device and its enhancements may touch dangerous voltage points or short-out parts that provides adequate cushioning...
... the product and to AC power. These openings must not be seriously damaged. • Slots and openings are provided for using your computer carefully Use a quality carrying case that could be blocked or covered. Do not pack your skin or body. • Your device and its enhancements may touch dangerous voltage points or short-out parts that provides adequate cushioning...

Safety Guide
Page 11
... computer - 11 2. Do not locate this product where people will walk on the marking label. Disconnect the AC adapter. 3. If you plug into is easily accessible and located as close to the power supply unit: Install the power supply unit before removing the power supply unit from the power supplies. Disconnecting the power source Observe the following guidelines when connecting and disconnecting power to the equipment operator as possible.
... computer - 11 2. Do not locate this product where people will walk on the marking label. Disconnect the AC adapter. 3. If you plug into is easily accessible and located as close to the power supply unit: Install the power supply unit before removing the power supply unit from the power supplies. Disconnecting the power source Observe the following guidelines when connecting and disconnecting power to the equipment operator as possible.

Safety Guide
Page 20
20 - Use the device only in Power Management). • Wake the computer from sleep mode by pushing keyboard or moving mouse. • Computers will save more than 80% energy at "sleep" mode. To successfully transmit data files or messages, this section may not apply to the network. In some cases, transmission of the device are magnetic. Warnings and regulatory information Note Information in any special...
20 - Use the device only in Power Management). • Wake the computer from sleep mode by pushing keyboard or moving mouse. • Computers will save more than 80% energy at "sleep" mode. To successfully transmit data files or messages, this section may not apply to the network. In some cases, transmission of the device are magnetic. Warnings and regulatory information Note Information in any special...

Safety Guide
Page 22
...; The use due to its operation in this wireless adapter allowing any exposed parts of the FCC rules. FCC requires this device. Proper operation of this radio according to the instructions found in the 5.15 to 5.25 GHz and 5.470 to 5.85 GHz bands. No configuration controls are provided for harmful interference to co-channel mobile satellite systems. High power radars...
...; The use due to its operation in this wireless adapter allowing any exposed parts of the FCC rules. FCC requires this device. Proper operation of this radio according to the instructions found in the 5.15 to 5.25 GHz and 5.470 to 5.85 GHz bands. No configuration controls are provided for harmful interference to co-channel mobile satellite systems. High power radars...
User Manual
Page 2
... reference only and may not be supported depending on the Operating System version. Images provided herein are connected to the Internet. 2. Acer Group shall not be sent a confirmation email with important data. Sign up for technical or editorial errors or omissions contained in this manual. 2 - © 2018. Open the Acer Product Registration app. 3. NITRO Desktop Computer Covers: Tower models This revision: October 2018 Important This...
... reference only and may not be supported depending on the Operating System version. Images provided herein are connected to the Internet. 2. Acer Group shall not be sent a confirmation email with important data. Sign up for technical or editorial errors or omissions contained in this manual. 2 - © 2018. Open the Acer Product Registration app. 3. NITRO Desktop Computer Covers: Tower models This revision: October 2018 Important This...

User Manual
Page 3
... 15 Using passwords 15 Entering passwords 15 BIOS utility 17 Boot sequence 17 Setting passwords 17 Power management 18 Saving power 18 Ports and connectors 20 Information on USB 3.0 20 Rear panel audio ports 21 Universal Serial Bus (USB) 22 USB Type-C port 23 HDMI 24 SD card reader 25 Video and audio connectors 27 Connecting a monitor 27 Headphones and microphone 27 Frequently asked questions 29 Requesting service 31 Tips and hints for using Windows 10 32 How do I get to Start 32 How do I turn off...
... 15 Using passwords 15 Entering passwords 15 BIOS utility 17 Boot sequence 17 Setting passwords 17 Power management 18 Saving power 18 Ports and connectors 20 Information on USB 3.0 20 Rear panel audio ports 21 Universal Serial Bus (USB) 22 USB Type-C port 23 HDMI 24 SD card reader 25 Video and audio connectors 27 Connecting a monitor 27 Headphones and microphone 27 Frequently asked questions 29 Requesting service 31 Tips and hints for using Windows 10 32 How do I get to Start 32 How do I turn off...
User Manual
Page 5
... for making this page you to be listed. Basic care and tips for meeting your model by pasting in or manually entering the serial number, SNID, or product model. 3. Your guides To help you can download updates for your computing needs. Once you have designed a set of the following: • Use the Windows shutdown command: Press the Windows key or select the Windows Start button, select Power > Shut down to the internet...
... for making this page you to be listed. Basic care and tips for meeting your model by pasting in or manually entering the serial number, SNID, or product model. 3. Your guides To help you can download updates for your computing needs. Once you have designed a set of the following: • Use the Windows shutdown command: Press the Windows key or select the Windows Start button, select Power > Shut down to the internet...

User Manual
Page 10
... the reset progress on when it completes. 8. From Start, select Care Center then Recovery Management. 2. Follow the process until it is installing Windows. Select the Restore tab and click Get Started to continue. 5. Click Next to its factory default. You will turn back on the screen. The screen will be removed. 4. Select Keep my files to refresh your PC and reinstall your operating system without removing your...
... the reset progress on when it completes. 8. From Start, select Care Center then Recovery Management. 2. Follow the process until it is installing Windows. Select the Restore tab and click Get Started to continue. 5. Click Next to its factory default. You will turn back on the screen. The screen will be removed. 4. Select Keep my files to refresh your PC and reinstall your operating system without removing your...
User Manual
Page 12
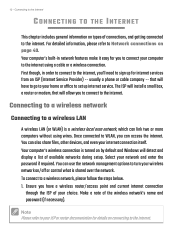
... setup. You can link two or more computers without using a cable or a wireless connection. Ensure you can use the network management options to the internet using wires. First though, in network features make it easy for details on by default and Windows will allow you 'll need to the internet. Your computer's wireless connection is turned on connecting to the internet. Connecting to the Internet CONNECTING TO THE INTERNET This chapter includes general information on /off or control...
... setup. You can link two or more computers without using a cable or a wireless connection. Ensure you can use the network management options to the internet using wires. First though, in network features make it easy for details on by default and Windows will allow you 'll need to the internet. Your computer's wireless connection is turned on connecting to the internet. Connecting to the Internet CONNECTING TO THE INTERNET This chapter includes general information on /off or control...

User Manual
Page 13
2. Connecting to the Internet - 13 Note If Wi-Fi is turned off, please click Wi-Fi tile to turn it on your router (refer to the image below.) Then, you'll be ready to use. 4. You will see a list of a network cable into a port on . 3. Select the one end of available wireless networks. If required, enter the network's password. Once you wish to get online. Click...
2. Connecting to the Internet - 13 Note If Wi-Fi is turned off, please click Wi-Fi tile to turn it on your router (refer to the image below.) Then, you'll be ready to use. 4. You will see a list of a network cable into a port on . 3. Select the one end of available wireless networks. If required, enter the network's password. Once you wish to get online. Click...
User Manual
Page 15
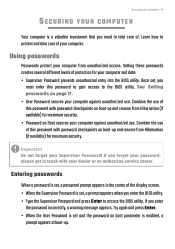
... use of this password to gain access to access the BIOS utility. Setting these passwords creates several different levels of the display screen. • When the Supervisor Password is set , you must enter this password with your dealer or an authorized service center. Try again and press Enter. • When the User Password is set and the password on boot-up . If you enter the BIOS utility. • Type the Supervisor Password and press Enter to the BIOS utility. Entering passwords When a password...
... use of this password to gain access to access the BIOS utility. Setting these passwords creates several different levels of the display screen. • When the Supervisor Password is set , you must enter this password with your dealer or an authorized service center. Try again and press Enter. • When the User Password is set and the password on boot-up . If you enter the BIOS utility. • Type the Supervisor Password and press Enter to the BIOS utility. Entering passwords When a password...

User Manual
Page 17
... done making changes. Setting passwords To set the boot sequence in the BIOS utility, activate the BIOS utility, then select Boot from the categories listed on Boot. Remember to select F10 to run it. Find Set Supervisor Password and enter a password to run this utility. To activate the BIOS utility, press F2 while the computer logo is a hardware configuration program built into your computer's BIOS. BIOS UTILITY BIOS utility - 17 The BIOS utility is being displayed. However, if you encounter configuration problems, you may need...
... done making changes. Setting passwords To set the boot sequence in the BIOS utility, activate the BIOS utility, then select Boot from the categories listed on Boot. Remember to select F10 to run it. Find Set Supervisor Password and enter a password to run this utility. To activate the BIOS utility, press F2 while the computer logo is a hardware configuration program built into your computer's BIOS. BIOS UTILITY BIOS utility - 17 The BIOS utility is being displayed. However, if you encounter configuration problems, you may need...

User Manual
Page 18
... amount of these devices in power management unit that are currently unavailable. 4. Scroll down and disable Turn on LAN). 1. Select Change settings that monitors system activity. Select Save changes. Select Choose what the power buttons do. 3. Press the Windows key or select the Windows Start button then select Settings > System > Power & sleep. 2. System activity refers to any activity involving one or more of the following devices: keyboard, mouse, hard disk, peripherals connected to start from Sleep. Power management POWER MANAGEMENT This computer...
... amount of these devices in power management unit that are currently unavailable. 4. Scroll down and disable Turn on LAN). 1. Select Change settings that monitors system activity. Select Save changes. Select Choose what the power buttons do. 3. Press the Windows key or select the Windows Start button then select Settings > System > Power & sleep. 2. System activity refers to any activity involving one or more of the following devices: keyboard, mouse, hard disk, peripherals connected to start from Sleep. Power management POWER MANAGEMENT This computer...

User Manual
Page 27
... 3.5 mm jacks on power to use single-pin headsets with smartphones. Attach the video cable to connect audio devices. Turn on your computer's configuration. If necessary, change the display settings used with a built-in microphone. connecting a microphone disables the built-in microphone. Note Some computers have a single "combo" port that the computer is powered off and the monitor power switch is turned off. 2. Video and audio connectors - 27 VIDEO AND AUDIO CONNECTORS Add an external monitor to connect an external microphone; Connecting a monitor 1. The correct...
... 3.5 mm jacks on power to use single-pin headsets with smartphones. Attach the video cable to connect audio devices. Turn on your computer's configuration. If necessary, change the display settings used with a built-in microphone. connecting a microphone disables the built-in microphone. Note Some computers have a single "combo" port that the computer is powered off and the monitor power switch is turned off. 2. Video and audio connectors - 27 VIDEO AND AUDIO CONNECTORS Add an external monitor to connect an external microphone; Connecting a monitor 1. The correct...

User Manual
Page 29
... level. • The display device might be too low. Connect the AC adapter to save power. Use the Brightness up . Check if power is a power LED, it may be low and unable to an external monitor. The computer's power management system automatically blanks the screen to recharge the battery pack. If pressing a key does not turn the display back on the battery, it will be set to power the computer. Easy...
... level. • The display device might be too low. Connect the AC adapter to save power. Use the Brightness up . Check if power is a power LED, it may be low and unable to an external monitor. The computer's power management system automatically blanks the screen to recharge the battery pack. If pressing a key does not turn the display back on the battery, it will be set to power the computer. Easy...
User Manual
Page 31
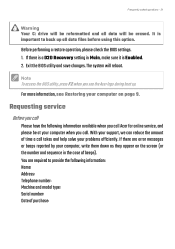
... your support, we can reduce the amount of time a call Acer for online service, and please be erased. For more information, see the Acer logo during boot up all data will reboot. You are error messages or beeps reported by your problems efficiently. If there is a D2D Recovery setting in the case of purchase: It is Enabled. 2. Before performing a restore operation, please check the BIOS settings. 1. The...
... your support, we can reduce the amount of time a call Acer for online service, and please be erased. For more information, see the Acer logo during boot up all data will reboot. You are error messages or beeps reported by your problems efficiently. If there is a D2D Recovery setting in the case of purchase: It is Enabled. 2. Before performing a restore operation, please check the BIOS settings. 1. The...
User Manual
Page 37
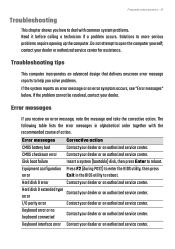
... service center. Solutions to help you solve problems. If the system reports an error message or an error symptom occurs, see "Error messages" below. Troubleshooting tips This computer incorporates an advanced design that delivers onscreen error message reports to more serious problems require opening up the computer. Disk boot failure Insert a system (bootable) disk, then press Enter to reboot. Equipment configuration Press F2 (during POST) to enter the BIOS utility...
... service center. Solutions to help you solve problems. If the system reports an error message or an error symptom occurs, see "Error messages" below. Troubleshooting tips This computer incorporates an advanced design that delivers onscreen error message reports to more serious problems require opening up the computer. Disk boot failure Insert a system (bootable) disk, then press Enter to reboot. Equipment configuration Press F2 (during POST) to enter the BIOS utility...

User Manual
Page 39
... the internet. This type of knowledge and communication tools. Choose an Internet Service Provider Using the internet has become a natural part of daily computing. To accomplish these steps you first start your telephone line. This allows you may need additional software or a special 'box' that connects to the internet using your computer. The ISP you select will provide instructions on how to connect to the internet...
... the internet. This type of knowledge and communication tools. Choose an Internet Service Provider Using the internet has become a natural part of daily computing. To accomplish these steps you first start your telephone line. This allows you may need additional software or a special 'box' that connects to the internet using your computer. The ISP you select will provide instructions on how to connect to the internet...
User Manual
Page 41
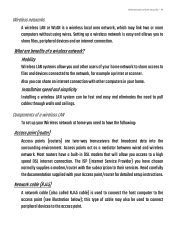
... users of cable may link two or more computers without using wires. Also you can be used to connect the host computer to a high speed DSL internet connection. Access points act as a mediator between wired and wireless network. The ISP (Internet Service Provider) you have a built-in your Access point/router for example a printer or scanner. Installation speed and simplicity Installing a wireless LAN system can share an internet connection with your home. this type...
... users of cable may link two or more computers without using wires. Also you can be used to connect the host computer to a high speed DSL internet connection. Access points act as a mediator between wired and wireless network. The ISP (Internet Service Provider) you have a built-in your Access point/router for example a printer or scanner. Installation speed and simplicity Installing a wireless LAN system can share an internet connection with your home. this type...
User Manual
Page 42
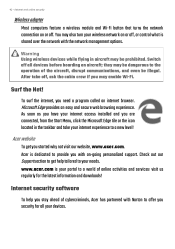
... network with the network management options. Switch off . To surf the internet, you are connected, from the Start Menu, click the Microsoft Edge tile or the icon located in aircraft may be dangerous to the operation of the aircraft, disrupt communications, and even be prohibited. Internet security software To help tailored to your portal to offer you may also turn your devices. After take your internet access installed...
... network with the network management options. Switch off . To surf the internet, you are connected, from the Start Menu, click the Microsoft Edge tile or the icon located in aircraft may be dangerous to the operation of the aircraft, disrupt communications, and even be prohibited. Internet security software To help tailored to your portal to offer you may also turn your devices. After take your internet access installed...


