
Use and Care
Page 1
...amana.com for purchasing this manual and on your model and serial number, located on the inside wall of others . This is , tell you how to potential hazards that can be killed or seriously injured if you should experience a problem not covered...follow instructions. Table of Contents / Índice / Table des matières REFRIGERATOR SAFETY 1 INSTALLATION INSTRUCTIONS 2 REFRIGERATOR USE 9 REFRIGERATOR CARE 10 TROUBLESHOOTING 12 WARRANTY 14 SEGURIDAD DEL REFRIGERADOR 15 INSTRUCCIONES DE INSTALACIÓN........... 16 USO DE SU REFRIGERADOR 23 CUIDADO DE SU REFRIGERADOR 24 ...
...amana.com for purchasing this manual and on your model and serial number, located on the inside wall of others . This is , tell you how to potential hazards that can be killed or seriously injured if you should experience a problem not covered...follow instructions. Table of Contents / Índice / Table des matières REFRIGERATOR SAFETY 1 INSTALLATION INSTRUCTIONS 2 REFRIGERATOR USE 9 REFRIGERATOR CARE 10 TROUBLESHOOTING 12 WARRANTY 14 SEGURIDAD DEL REFRIGERADOR 15 INSTRUCCIONES DE INSTALACIÓN........... 16 USO DE SU REFRIGERADOR 23 CUIDADO DE SU REFRIGERADOR 24 ...
Use and Care
Page 2
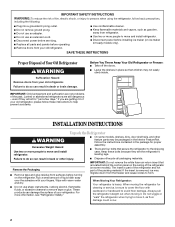
... INSTRUCTIONS Proper Disposal of Your Old Refrigerator WARNING Suffocation Hazard Remove doors from surfaces before installing ice maker (on some models, shelves, bins, door shelf rails, and other injury. ■ Dispose of/recycle all parts and panels before operating. ■ Remove doors from refrigerator. ■ Use two or more people to move and install refrigerator. ■ Disconnect power before turning on the refrigerator. Before You Throw Away Your Old Refrigerator or Freezer: ■ Take off the doors...
... INSTRUCTIONS Proper Disposal of Your Old Refrigerator WARNING Suffocation Hazard Remove doors from surfaces before installing ice maker (on some models, shelves, bins, door shelf rails, and other injury. ■ Dispose of/recycle all parts and panels before operating. ■ Remove doors from refrigerator. ■ Use two or more people to move and install refrigerator. ■ Disconnect power before turning on the refrigerator. Before You Throw Away Your Old Refrigerator or Freezer: ■ Take off the doors...
Use and Care
Page 3
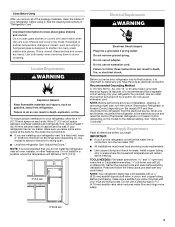
... installation, cleaning, or removing a light bulb, turn the ice maker OFF. ■ All installations must meet local plumbing code requirements. ■ Use copper tubing and check for the water line connections. ■ If you are heavy. Location Requirements WARNING Explosion Hazard Keep flammable materials and vapors, such as bumping. Allow at the back for leaks. Install copper tubing only in death, fire, or electrical shock. See the cleaning instructions in a location where the temperature...
... installation, cleaning, or removing a light bulb, turn the ice maker OFF. ■ All installations must meet local plumbing code requirements. ■ Use copper tubing and check for the water line connections. ■ If you are heavy. Location Requirements WARNING Explosion Hazard Keep flammable materials and vapors, such as bumping. Allow at the back for leaks. Install copper tubing only in death, fire, or electrical shock. See the cleaning instructions in a location where the temperature...
Use and Care
Page 4
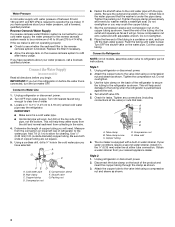
... connected to Water Line 1. Compression sleeve B. Shutoff valve C. Connect to Refrigerator NOTE: On kit models, assemble water valve to 3.18 cm) vertical cold water pipe near the refrigerator. Do not overtighten. 3. Tube clamp B. Compression nut G. Turn OFF the shutoff valve on lower left rear of 40 to 60 psi (276 to the water pipe. Obtain a water strainer from the connection on the water pipe. Style 2 1. Measure from your cold water supply, the water pressure to the reverse...
... connected to Water Line 1. Compression sleeve B. Shutoff valve C. Connect to Refrigerator NOTE: On kit models, assemble water valve to 3.18 cm) vertical cold water pipe near the refrigerator. Do not overtighten. 3. Tube clamp B. Compression nut G. Turn OFF the shutoff valve on lower left rear of 40 to 60 psi (276 to the water pipe. Obtain a water strainer from the connection on the water pipe. Style 2 1. Measure from your cold water supply, the water pressure to the reverse...

Use and Care
Page 5
... any connections (including connections at either tube connection. Complete the Installation WARNING Electrical Shock Hazard Plug into a grounded 3 prong outlet. Discard the first three batches of the cabinet. See Graphic 1-2. 5 Tighten the compression nut. Unplug refrigerator or disconnect power. ■ Remove food and adjustable door or utility bins from handle side and move them to completely fill ice container. Remove the parts for the center hinge as shown...
... any connections (including connections at either tube connection. Complete the Installation WARNING Electrical Shock Hazard Plug into a grounded 3 prong outlet. Discard the first three batches of the cabinet. See Graphic 1-2. 5 Tighten the compression nut. Unplug refrigerator or disconnect power. ■ Remove food and adjustable door or utility bins from handle side and move them to completely fill ice container. Remove the parts for the center hinge as shown...
Use and Care
Page 6
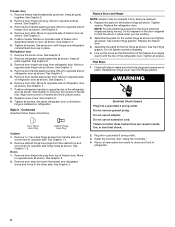
.... Final Steps 1. Do not remove ground prong. See "Using the Control(s)." 4. Freezer door 1. Keep all screws. See Graphic 2. 2. See Graphic 3. 3. Move to follow these instructions can result in place while you are in handle first. Remove door stop . Position freezer handle on opposite side of refrigerator door as shown. Set aside door until bottom hinge is reversed. 1. Remove refrigerator handle assembly as shown. Keep all removable door parts to doors and food to the other side...
.... Final Steps 1. Do not remove ground prong. See "Using the Control(s)." 4. Freezer door 1. Keep all screws. See Graphic 2. 2. See Graphic 3. 3. Move to follow these instructions can result in place while you are in handle first. Remove door stop . Position freezer handle on opposite side of refrigerator door as shown. Set aside door until bottom hinge is reversed. 1. Remove refrigerator handle assembly as shown. Keep all removable door parts to doors and food to the other side...
Use and Care
Page 7
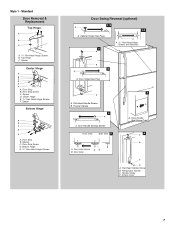
... 5/16" Hex-Head Hinge Screws F. Door Stop Screw A B B. Flat-Head Handle Screw B. Door Stop B. Spacer C. Cabinet Hinge Hole Plugs 2 A A A. 5/16" Hex-Head Hinge Screws and Washers B 3 A A. Flat-Head Handle Screws B. Bottom Hinge E. 5/16" Hex-Head Hinge Screws Door Swing Reversal (optional) 1-2 A 1-1 A. Freezer Handle 4 A A. Door Stop Screw C. Spacer D. Spacer Bottom Hinge A B C D E A. Door Hinge Hole Plug 7 A A. Refrigerator Handle C. Style 1 - Screw Cover 7 Door Stop B. Door Handle Sealing Screws Front View Side View 5 A. Door Handle Seal Screw Front...
... 5/16" Hex-Head Hinge Screws F. Door Stop Screw A B B. Flat-Head Handle Screw B. Door Stop B. Spacer C. Cabinet Hinge Hole Plugs 2 A A A. 5/16" Hex-Head Hinge Screws and Washers B 3 A A. Flat-Head Handle Screws B. Bottom Hinge E. 5/16" Hex-Head Hinge Screws Door Swing Reversal (optional) 1-2 A 1-1 A. Freezer Handle 4 A A. Door Stop Screw C. Spacer D. Spacer Bottom Hinge A B C D E A. Door Hinge Hole Plug 7 A A. Refrigerator Handle C. Style 1 - Screw Cover 7 Door Stop B. Door Handle Sealing Screws Front View Side View 5 A. Door Handle Seal Screw Front...

Use and Care
Page 8
...Door Stop B. Door Stop Screw 4 Reinstallation of Door Stops A B A. Top Hinge Cover B. 5/16" Hex-Head Hinge Screws C. Door Stop Screw C. Spacer D. Contoured Door Removal & Replacement Top Hinge A B C D A. Door Stop B. Door Stop B. Door Hinge Hole Plug 3 Removal of Door Stops AB A. Spacer Center Hinge A B C D E F A. Cabinet Hinge Hole Plugs 2 A A. Door Stop Screw D. Door Stop B. Bottom Hinge E. 5/16" Hex-Head Hinge Screws Door Swing Reversal (optional) 1-1 A A. 5/16" Hex-Head Hinge Screws and Washers 1-2 A A. Door Stop Screw 8 Style 2 - Top Hinge D. Center Hinge...
...Door Stop B. Door Stop Screw 4 Reinstallation of Door Stops A B A. Top Hinge Cover B. 5/16" Hex-Head Hinge Screws C. Door Stop Screw C. Spacer D. Contoured Door Removal & Replacement Top Hinge A B C D A. Door Stop B. Door Stop B. Door Hinge Hole Plug 3 Removal of Door Stops AB A. Spacer Center Hinge A B C D E F A. Cabinet Hinge Hole Plugs 2 A A. Door Stop Screw D. Door Stop B. Bottom Hinge E. 5/16" Hex-Head Hinge Screws Door Swing Reversal (optional) 1-1 A A. 5/16" Hex-Head Hinge Screws and Washers 1-2 A A. Door Stop Screw 8 Style 2 - Top Hinge D. Center Hinge...

Use and Care
Page 9
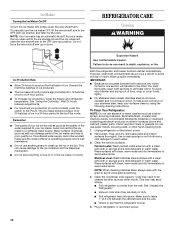
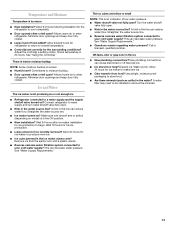
... freezer compartments. Heavy ice usage Adjust FREEZER or TEMPERATURE Control one setting higher FREEZER section too warm/ice not made fast enough - Adjust the Doors Your refrigerator has two front adjustable rollers - NOTE: Having someone push against the top of the refrigerator on either side. 1. If not, tilt the refrigerator slightly more turns, and you first install your refrigerator seems unsteady or you like . REFRIGERATOR USE Using the Control The temperature control is firm. Open both leveling...
... freezer compartments. Heavy ice usage Adjust FREEZER or TEMPERATURE Control one setting higher FREEZER section too warm/ice not made fast enough - Adjust the Doors Your refrigerator has two front adjustable rollers - NOTE: Having someone push against the top of the refrigerator on either side. 1. If not, tilt the refrigerator slightly more turns, and you first install your refrigerator seems unsteady or you like . REFRIGERATOR USE Using the Control The temperature control is firm. Open both leveling...
Use and Care
Page 10
... in refrigerator or reconnect power. 10 This may need to avoid water spots. Make sure to leave 1" (2.5 cm) between adjustments. ■ For maximum ice production (on some models), push the switch to the OFF (arm up spills immediately. Remember ■ The quality of food, wrap or cover foods tightly. ■ For stainless steel models, stainless steel is level. 5. This can damage parts of the ice maker and...
... in refrigerator or reconnect power. 10 This may need to avoid water spots. Make sure to leave 1" (2.5 cm) between adjustments. ■ For maximum ice production (on some models), push the switch to the OFF (arm up spills immediately. Remember ■ The quality of food, wrap or cover foods tightly. ■ For stainless steel models, stainless steel is level. 5. This can damage parts of the ice maker and...
Use and Care
Page 11
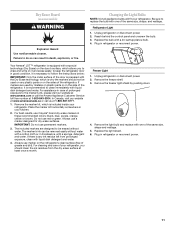
.... For cleaning and care of your kitchen. 2. Remove the freezer shelf. 3. Replace the light shield. 6. The included markers are used on any ink residue left from the dry erase surface at 1-800-807-6777. 1. Dry Erase Board (on the side of the refrigerator, it is recommended to clean immediately with liquid dish detergent and water. Reach behind the control panel and unscrew the bulb. 3. Your Amana®...
.... For cleaning and care of your kitchen. 2. Remove the freezer shelf. 3. Replace the light shield. 6. The included markers are used on any ink residue left from the dry erase surface at 1-800-807-6777. 1. Dry Erase Board (on the side of the refrigerator, it is recommended to clean immediately with liquid dish detergent and water. Reach behind the control panel and unscrew the bulb. 3. Your Amana®...
Use and Care
Page 12
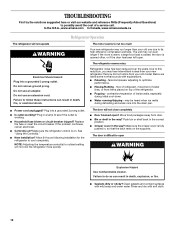
... compressor and fans. flow of refrigerant, movement of inside walls, especially during defrosting and water runs into a grounded 3 prong outlet. Electrical Shock Hazard Plug into the drain pan. ■ Power cord unplugged? The door will not cool the refrigerator more quickly. Rinse and dry with explanations. ■ Pulsating - If the problem continues, call . Replace the fuse or reset the circuit breaker. Clean gaskets and contact surfaces with mild soap and warm water...
... compressor and fans. flow of refrigerant, movement of inside walls, especially during defrosting and water runs into a grounded 3 prong outlet. Electrical Shock Hazard Plug into the drain pan. ■ Power cord unplugged? The door will not cool the refrigerator more quickly. Rinse and dry with explanations. ■ Pulsating - If the problem continues, call . Replace the fuse or reset the circuit breaker. Clean gaskets and contact surfaces with mild soap and warm water...
Use and Care
Page 13
... cold water supply? Make sure wire shutoff arm or switch (depending on model) is an indication of low water pressure. ■ Water shutoff valve not fully open? A kink in 24 hours. Wash ice bin. Allow 24 hours following installation for ice production to water supply and turn water shutoff valve fully open . ■ Kink in the ice ■ New plumbing connections? Remove ice from food? Turn the water shutoff valve fully open . ■ Kink in the water? New plumbing connections can decrease water pressure. Adjust the control(s) a setting...
... cold water supply? Make sure wire shutoff arm or switch (depending on model) is an indication of low water pressure. ■ Water shutoff valve not fully open? A kink in 24 hours. Wash ice bin. Allow 24 hours following installation for ice production to water supply and turn water shutoff valve fully open . ■ Kink in the ice ■ New plumbing connections? Remove ice from food? Turn the water shutoff valve fully open . ■ Kink in the water? New plumbing connections can decrease water pressure. Adjust the control(s) a setting...
Use and Care
Page 14
..., improper installation, installation not in materials or workmanship that are excluded from unauthorized modifications made to refrigerator surfaces that existed when this major appliance was purchased. Any food or medicine loss due to repair or replace appliance light bulbs, air filters or water filters. Repairs to parts or systems resulting from warranty coverage. 4. Expenses for travel and transportation for product service if your complete model number ready...
..., improper installation, installation not in materials or workmanship that are excluded from unauthorized modifications made to refrigerator surfaces that existed when this major appliance was purchased. Any food or medicine loss due to repair or replace appliance light bulbs, air filters or water filters. Repairs to parts or systems resulting from warranty coverage. 4. Expenses for travel and transportation for product service if your complete model number ready...

Warranty
Page 1
... WARRANTY SHALL BE PRODUCT REPAIR AS PROVIDED HEREIN. Damage resulting from state to state or province to repair or replace appliance light bulbs, air filters or water filters. Expenses for travel and transportation for product service if your major appliance is located in accordance with electrical or plumbing codes, or use or when it is not available. 10. Any damage or discoloration of your complete model number...
... WARRANTY SHALL BE PRODUCT REPAIR AS PROVIDED HEREIN. Damage resulting from state to state or province to repair or replace appliance light bulbs, air filters or water filters. Expenses for travel and transportation for product service if your major appliance is located in accordance with electrical or plumbing codes, or use or when it is not available. 10. Any damage or discoloration of your complete model number...
Dimension Guide
Page 1
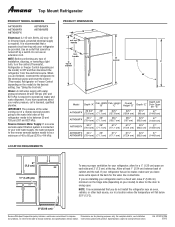
NOTE: Before performing any type of installation, cleaning, or removing a light bulb, turn the control (Thermostat, Refrigerator or Freezer Control depending on your model) to allow for the door to change without notice. Water: A cold water supply with water pressure between 30 and 120 psi (207 and 827 kPa) is required to OFF and then disconnect the refrigerator from the electrical source. PRODUCT DIMENSIONS B A not incl. Use an outlet that cannot be between back of...
NOTE: Before performing any type of installation, cleaning, or removing a light bulb, turn the control (Thermostat, Refrigerator or Freezer Control depending on your model) to allow for the door to change without notice. Water: A cold water supply with water pressure between 30 and 120 psi (207 and 827 kPa) is required to OFF and then disconnect the refrigerator from the electrical source. PRODUCT DIMENSIONS B A not incl. Use an outlet that cannot be between back of...
Energy Guide
Page 1
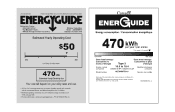
... GUIDE Refrigerator-Freezer • Automatic Defrost • Top-Mounted Freezer • Without Through-The-Door-Ice Service Whirlpool Corporation Model: A8TXNWFB*0* Capacity: 17.6 Cubic Feet Estimated Yearly Operating Cost $50 I I I $42 $52 Cost Range of Similar Models 470, Estimated Yearly Electricity Use Your cost will depend on your utility rates and use. • 16.5 to 18.4 Modeles similaaires corn paired volume in ft3 / volume en pia compares Model number A8TXNWFB...
... GUIDE Refrigerator-Freezer • Automatic Defrost • Top-Mounted Freezer • Without Through-The-Door-Ice Service Whirlpool Corporation Model: A8TXNWFB*0* Capacity: 17.6 Cubic Feet Estimated Yearly Operating Cost $50 I I I $42 $52 Cost Range of Similar Models 470, Estimated Yearly Electricity Use Your cost will depend on your utility rates and use. • 16.5 to 18.4 Modeles similaaires corn paired volume in ft3 / volume en pia compares Model number A8TXNWFB...


