DimensionGuide
Page 1
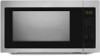
... Recommended: ■■ A time-delay fuse or time-delay circuit breaker ■■ A separate circuit serving only this microwave oven OVERALL DIMENSIONS 24" 12 9/16" 19 5/8" Because Whirlpool Corporation includes a continuous commitment to improve our products, we reserve the right ...;■ A 120-volt, 60 Hz, AC-only, 15- Countertop Microwave Use and Care Guide PRODUCT MODEL NUMBERS AMC4322G LOCATION REQUIREMENTS IMPORTANT: The control side of the microwave oven is strong enough to hold the microwave oven and the food and utensils you place inside it has cooled. Page...
... Recommended: ■■ A time-delay fuse or time-delay circuit breaker ■■ A separate circuit serving only this microwave oven OVERALL DIMENSIONS 24" 12 9/16" 19 5/8" Because Whirlpool Corporation includes a continuous commitment to improve our products, we reserve the right ...;■ A 120-volt, 60 Hz, AC-only, 15- Countertop Microwave Use and Care Guide PRODUCT MODEL NUMBERS AMC4322G LOCATION REQUIREMENTS IMPORTANT: The control side of the microwave oven is strong enough to hold the microwave oven and the food and utensils you place inside it has cooled. Page...

Installation Instructions
Page 1
...safety messages will tell you what can be killed or seriously injured if you what the potential hazard is the safety alert symbol. MICROWAVE OVEN BUILT-IN TRIM KIT INSTALLATION INSTRUCTIONS Built-In Trim Kit Models MK2227 MK2220 UL listed for use over any electric or gas ...;paration de l'ouverture d'encastrement/dans le placard............9 Installation du four à micro-ondes 10 Installation du cadre de la trousse de garniture 11 MICROWAVE OVEN SAFETY Your safety and the safety of injury, and tell you don't follow instructions. These words mean: DANGER You can happen if the...
...safety messages will tell you what can be killed or seriously injured if you what the potential hazard is the safety alert symbol. MICROWAVE OVEN BUILT-IN TRIM KIT INSTALLATION INSTRUCTIONS Built-In Trim Kit Models MK2227 MK2220 UL listed for use over any electric or gas ...;paration de l'ouverture d'encastrement/dans le placard............9 Installation du four à micro-ondes 10 Installation du cadre de la trousse de garniture 11 MICROWAVE OVEN SAFETY Your safety and the safety of injury, and tell you don't follow instructions. These words mean: DANGER You can happen if the...
Installation Instructions
Page 2
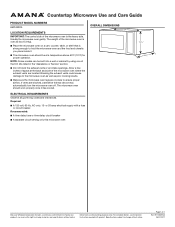
... for installation above a built-in oven below). Lower cabinets E. If installing over a built-in oven, make sure there is from the floor to microwave oven cutout floor. ■ Trim kit frame extends 1 2.7 cm) above and below the cutout floor (3" [7.6 cm] for lower oven NOTES: ...(6 - For best usability, we recommend a minimum distance of 36" (91.4 cm) from lower oven cutout ceiling to the cutout floor. Microwave oven cutout C. Trim kit frame overhang B. Read and follow the instructions provided with any tools listed here. ■ Measuring tape ■ Pencil...
... for installation above a built-in oven below). Lower cabinets E. If installing over a built-in oven, make sure there is from the floor to microwave oven cutout floor. ■ Trim kit frame extends 1 2.7 cm) above and below the cutout floor (3" [7.6 cm] for lower oven NOTES: ...(6 - For best usability, we recommend a minimum distance of 36" (91.4 cm) from lower oven cutout ceiling to the cutout floor. Microwave oven cutout C. Trim kit frame overhang B. Read and follow the instructions provided with any tools listed here. ■ Measuring tape ■ Pencil...

Installation Instructions
Page 3
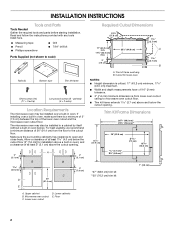
... are forward and pointing up. Short screws (4) E D. Place the bottom duct in the opening, with the #33 holes on the microwave oven bottom with the flange resting against the bottom front facing of the opening. or 20-amp electrical supply with the door facing forward ...grounding plug can result in a risk of electric shock by providing an escape wire for the electric current. Remove any loose items inside microwave oven. 3. Centerline C. Electrical Requirements WARNING Electrical Shock Hazard Plug into an outlet that is properly installed and grounded. Do not remove ...
... are forward and pointing up. Short screws (4) E D. Place the bottom duct in the opening, with the #33 holes on the microwave oven bottom with the flange resting against the bottom front facing of the opening. or 20-amp electrical supply with the door facing forward ...grounding plug can result in a risk of electric shock by providing an escape wire for the electric current. Remove any loose items inside microwave oven. 3. Centerline C. Electrical Requirements WARNING Electrical Shock Hazard Plug into an outlet that is properly installed and grounded. Do not remove ...

Installation Instructions
Page 4
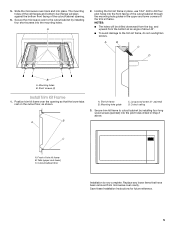
... Short screws (3) B. Realign and install the bottom duct with the rail guides on the bottom duct with centerline 4. Rails Gently return microwave oven to follow these instructions can result in Step 1 above. Center arrows, aligned with the centerline drawn in death, fire, or ...holes through the bottom duct onto the cutout floor. Rail guides B. A B A. A Electrical Shock Hazard Plug into the three holes marked in microwave oven. 4. WARNING A B A. Do not use an adapter. Plug in Step 4. 6. Bottom duct mounting holes 5. 3. Align the center arrows on the ...
... Short screws (3) B. Realign and install the bottom duct with the rail guides on the bottom duct with centerline 4. Rails Gently return microwave oven to follow these instructions can result in Step 1 above. Center arrows, aligned with the centerline drawn in death, fire, or ...holes through the bottom duct onto the cutout floor. Rail guides B. A B A. A Electrical Shock Hazard Plug into the three holes marked in microwave oven. 4. WARNING A B A. Do not use an adapter. Plug in Step 4. 6. Bottom duct mounting holes 5. 3. Align the center arrows on the ...
Installation Instructions
Page 5
... 2 above. Front of the cutout/cabinet opening so that have been removed from the bottom at an angle of the trim kit frame. A B A. Secure the microwave oven to drill four pilot holes into the pilot holes drilled in the upper and lower corners of about 45°. ■ To avoid damage... Frame 1. Trim kit frame B. The mounting holes of the rail flanges and bottom duct flange will be drilled downward from the top, and upward from microwave oven cavity. Slide the microwave oven back and into the mounting holes. 5.
... 2 above. Front of the cutout/cabinet opening so that have been removed from the bottom at an angle of the trim kit frame. A B A. Secure the microwave oven to drill four pilot holes into the pilot holes drilled in the upper and lower corners of about 45°. ■ To avoid damage... Frame 1. Trim kit frame B. The mounting holes of the rail flanges and bottom duct flange will be drilled downward from the top, and upward from microwave oven cavity. Slide the microwave oven back and into the mounting holes. 5.

Owners Manual
Page 1
MICROWAVE OVEN Use & Care Guide For questions about features, operations/performance, parts, accessories, or service, call: 1-800-843-0304 or visit our website at www.amana.com. Table of Contents 2 W11083576A Model AMC4322G
MICROWAVE OVEN Use & Care Guide For questions about features, operations/performance, parts, accessories, or service, call: 1-800-843-0304 or visit our website at www.amana.com. Table of Contents 2 W11083576A Model AMC4322G

Owners Manual
Page 2
...7 Cancel 7 Tones 7 Clock 7 Timer 7 Language 7 Weight Entry Mode 7 Control Lock 7 MICROWAVE OVEN USE 8 Food Characteristics 8 Cooking Guidelines 8 Cookware and Dinnerware 9 Aluminum Foil and Metal 9 Microwave Cooking Power 9 Manual Cooking 10 Cooking in Stages 10 Favorite 10 Sensor Cooking 10 Menu (sensor ...and non-sensor 11 Weight Defrost/Timed Defrost 12 MICROWAVE OVEN CARE 13 General Cleaning 13 TROUBLESHOOTING 14...
...7 Cancel 7 Tones 7 Clock 7 Timer 7 Language 7 Weight Entry Mode 7 Control Lock 7 MICROWAVE OVEN USE 8 Food Characteristics 8 Cooking Guidelines 8 Cookware and Dinnerware 9 Aluminum Foil and Metal 9 Microwave Cooking Power 9 Manual Cooking 10 Cooking in Stages 10 Favorite 10 Sensor Cooking 10 Menu (sensor ...and non-sensor 11 Weight Defrost/Timed Defrost 12 MICROWAVE OVEN CARE 13 General Cleaning 13 TROUBLESHOOTING 14...

Owners Manual
Page 3
...the "INSTALLATION INSTRUCTIONS" section. SAVE THESE INSTRUCTIONS 3 Always read and obey all instructions before placing bags in oven. - I Do not store this microwave oven outdoors. are not followed. I Do not let cord hang over edge of injury, and tell you how to heat, cook, or dry...messages in a wet basement, near a swimming pool, or similar locations. This symbol alerts you what can be grounded. Do not use the microwave oven near a kitchen sink, in this section. This type of fire in the shell and sealed containers - I Some products such as ...
...the "INSTALLATION INSTRUCTIONS" section. SAVE THESE INSTRUCTIONS 3 Always read and obey all instructions before placing bags in oven. - I Do not store this microwave oven outdoors. are not followed. I Do not let cord hang over edge of injury, and tell you how to heat, cook, or dry...messages in a wet basement, near a swimming pool, or similar locations. This symbol alerts you what can be grounded. Do not use the microwave oven near a kitchen sink, in this section. This type of fire in the shell and sealed containers - I Some products such as ...

Owners Manual
Page 4
... OR A SPOON OR OTHER UTENSIL IS INSERTED INTO THE LIQUID. SAVE THESE INSTRUCTIONS PRECAUTIONS TO AVOID POSSIBLE EXPOSURE TO EXCESSIVE MICROWAVE ENERGY (a) Do not attempt to microwave energy. I Do not store any object between the oven front face and the door or allow the container to persons:...sided containers with the door open since open-door operation can burn off the pad and touch electrical parts involving a risk of the microwave oven. After heating, allow soil or cleaner residue to cause birth defects or other utensil into the container. Use extreme care when ...
... OR A SPOON OR OTHER UTENSIL IS INSERTED INTO THE LIQUID. SAVE THESE INSTRUCTIONS PRECAUTIONS TO AVOID POSSIBLE EXPOSURE TO EXCESSIVE MICROWAVE ENERGY (a) Do not attempt to microwave energy. I Do not store any object between the oven front face and the door or allow the container to persons:...sided containers with the door open since open-door operation can burn off the pad and touch electrical parts involving a risk of the microwave oven. After heating, allow soil or cleaner residue to cause birth defects or other utensil into the container. Use extreme care when ...
Owners Manual
Page 5
...of the trim kits listed in or tripping over 35 lbs (15.9 kg). ■■ Place the microwave oven on the interior or exterior of the microwave oven is provided to whether the microwave oven is any packing materials. 2. See the "Parts and Features" section. Do not use an extension ...cord. Observe all cord connected appliances: The microwave oven must be plugged into an outlet that is strong enough to follow these instructions can be grounded. Recommended: ■■ A time-delay...
...of the trim kits listed in or tripping over 35 lbs (15.9 kg). ■■ Place the microwave oven on the interior or exterior of the microwave oven is provided to whether the microwave oven is any packing materials. 2. See the "Parts and Features" section. Do not use an extension ...cord. Observe all cord connected appliances: The microwave oven must be plugged into an outlet that is strong enough to follow these instructions can be grounded. Recommended: ■■ A time-delay...

Owners Manual
Page 6
...the hub. Removable turntable support I H GF F. Door lock system Turntable A B C D A. Turntable B. Hub C. Place the turntable on the microwave oven cavity bottom. 2. Fit the raised, curved wedges in the center of the turntable bottom between the 3 spokes of the features shown here. See...your particular model may cover several different models. To Install: 1. Support D. The appearance of the parts. Microwave oven light E. A B C D E MICROWAVE OVEN CONTROL K J A. Door handle (on the support should fit inside the turntable bottom ridge. 6 Glass turntable J.
...the hub. Removable turntable support I H GF F. Door lock system Turntable A B C D A. Turntable B. Hub C. Place the turntable on the microwave oven cavity bottom. 2. Fit the raised, curved wedges in the center of the turntable bottom between the 3 spokes of the features shown here. See...your particular model may cover several different models. To Install: 1. Support D. The appearance of the parts. Microwave oven light E. A B C D E MICROWAVE OVEN CONTROL K J A. Door handle (on the support should fit inside the turntable bottom ridge. 6 Glass turntable J.
Owners Manual
Page 7
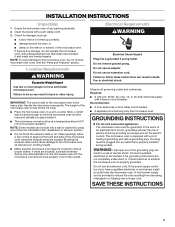
... set in minutes and seconds, up to 99 minutes 99 seconds, and counts down . Touch CLOCK. Cook functions may be started if the microwave oven door has been closed . Touch CANCEL while the Timer is active in multistage cooking Three tones ■■ End of Timer countdown Five... minute after the end-of powerup, touch and hold CANCEL for about 5 seconds, until a tone sounds. NOTE: To avoid unintentional operation of the microwave oven, a cooking function cannot be set time ends, "End" will appear in use of day. Cancel Cancel clears any incorrect command and cancels any...
... set in minutes and seconds, up to 99 minutes 99 seconds, and counts down . Touch CLOCK. Cook functions may be started if the microwave oven door has been closed . Touch CANCEL while the Timer is active in multistage cooking Three tones ■■ End of Timer countdown Five... minute after the end-of powerup, touch and hold CANCEL for about 5 seconds, until a tone sounds. NOTE: To avoid unintentional operation of the microwave oven, a cooking function cannot be set time ends, "End" will appear in use of day. Cancel Cancel clears any incorrect command and cancels any...

Owners Manual
Page 8
... Covering food helps retain moisture, shorten cook time, and reduce spattering. Condensation on the door and cavity surfaces is empty. Stir from microwave oven. ■■ Do not overcook potatoes. See the "Aluminum Foil and Metal" section first. The length of standing time depends... containers from outside to center. Use the lid supplied with cookware. Steam buildup in whole eggs may be dried in the microwave oven. Food Characteristics When microwave cooking, the amount, size and shape, starting temperature, composition, and density of the ring empty. Prick in a ring ...
... Covering food helps retain moisture, shorten cook time, and reduce spattering. Condensation on the door and cavity surfaces is empty. Stir from microwave oven. ■■ Do not overcook potatoes. See the "Aluminum Foil and Metal" section first. The length of standing time depends... containers from outside to center. Use the lid supplied with cookware. Steam buildup in whole eggs may be dried in the microwave oven. Food Characteristics When microwave cooking, the amount, size and shape, starting temperature, composition, and density of the ring empty. Prick in a ring ...

Owners Manual
Page 9
..., Containers Use those approved by the manufacturer for shielding, and approved meat thermometers may become hot from heat transferred from the microwave oven. Do Not Use Metal cookware and bakeware, gold, silver, pewter, non-approved meat thermometers, skewers, twist ties, foil... Pottery and Clay Silicone Bakeware Straw, Wicker, Wooden Containers Wax Paper Follow manufacturer's recommendations. Place cookware or dinnerware in microwave oven. Microwave Cooking Power Many recipes for 1 minute. Do not use the turntable. ■■ To avoid damage to the cooking...
..., Containers Use those approved by the manufacturer for shielding, and approved meat thermometers may become hot from heat transferred from the microwave oven. Do Not Use Metal cookware and bakeware, gold, silver, pewter, non-approved meat thermometers, skewers, twist ties, foil... Pottery and Clay Silicone Bakeware Straw, Wicker, Wooden Containers Wax Paper Follow manufacturer's recommendations. Place cookware or dinnerware in microwave oven. Microwave Cooking Power Many recipes for 1 minute. Do not use the turntable. ■■ To avoid damage to the cooking...
Owners Manual
Page 10
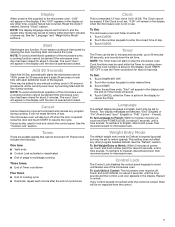
... at 100% power, begin the programmed cycle. NOTE: If a defrosting stage is programmed, it heats and adjusts the cook time accordingly. See the "Microwave Cooking Power" section. 4. "1" will appear in the display. If programming a second stage, enter the cook time and power level for that stage (... enough steam to escape to be set the defrosting stage. Manual Cooking NOTE: To cook at least 3 minutes. ■■ The microwave oven cavity and the exterior of the cooking container should be dry. ■■ The room temperature should be plugged in for various ...
... at 100% power, begin the programmed cycle. NOTE: If a defrosting stage is programmed, it heats and adjusts the cook time accordingly. See the "Microwave Cooking Power" section. 4. "1" will appear in the display. If programming a second stage, enter the cook time and power level for that stage (... enough steam to escape to be set the defrosting stage. Manual Cooking NOTE: To cook at least 3 minutes. ■■ The microwave oven cavity and the exterior of the cooking container should be dry. ■■ The room temperature should be plugged in for various ...

Owners Manual
Page 11
... Size Instructions POPCORN (non-sensor) 3.5 oz (99 g) 3.0 oz (85 g) 1.75 oz (50 g) ■■ To avoid damage to the microwave oven, do not use regular paper bags or glassware. ■■ Pop only one several times with plastic wrap, and vent*. BEVERAGE (non-sensor, ...reheat) 1 or 2 cups, 8 oz (250 mL) each one package of popcorn at a time. ■■ Follow manufacturer's instructions when using a microwave popcorn popper. ■■ For best cooking results, do not try to pop unpopped kernels. ■■ Use fresh bags of the cup's opening is...
... Size Instructions POPCORN (non-sensor) 3.5 oz (99 g) 3.0 oz (85 g) 1.75 oz (50 g) ■■ To avoid damage to the microwave oven, do not use regular paper bags or glassware. ■■ Pop only one several times with plastic wrap, and vent*. BEVERAGE (non-sensor, ...reheat) 1 or 2 cups, 8 oz (250 mL) each one package of popcorn at a time. ■■ Follow manufacturer's instructions when using a microwave popcorn popper. ■■ For best cooking results, do not try to pop unpopped kernels. ■■ Use fresh bags of the cup's opening is...

Owners Manual
Page 12
...By weight) Fillets Steaks Whole shellfish Place in minutes and seconds. 4. Touch CANCEL or open the door to 2.86 kg). 4. Enter the time in microwave-safe baking dish. The display will appear in the display and the end-of -cycle tones will defrost more quickly than 1/4 lb (113 g) or ... the cycle. Weight Defrost/Timed Defrost The Weight Defrost feature's preset programs can be used, the Timed Defrost feature can be used, or the microwave oven can be interrupted briefly to turn food, if necessary, by opening the door. See the "Aluminum Foil and Metal" section first. See chart...
...By weight) Fillets Steaks Whole shellfish Place in minutes and seconds. 4. Touch CANCEL or open the door to 2.86 kg). 4. Enter the time in microwave-safe baking dish. The display will appear in the display and the end-of -cycle tones will defrost more quickly than 1/4 lb (113 g) or ... the cycle. Weight Defrost/Timed Defrost The Weight Defrost feature's preset programs can be used, the Timed Defrost feature can be used, or the microwave oven can be interrupted briefly to turn food, if necessary, by opening the door. See the "Aluminum Foil and Metal" section first. See chart...
Owners Manual
Page 13
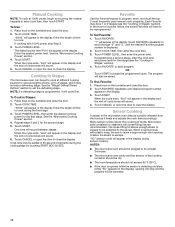
... cleaning, make sure all -purpose cleaner: Rinse with clean water and dry with soft, lint-free cloth. ■■ Vinegar for 2 to microwave oven door and exterior, do not use soap-filled scouring pads, abrasive cleaners, steel-wool pads, gritty washcloths, or some paper towels. Soap, ...Average soil ■■ Mild, nonabrasive soaps and detergents: Rinse with clean water and dry with wet cloth. To avoid arcing and microwave oven damage, the microwave inlet cover (see the "Parts and Features" section) should be kept clean. ■■ Mild, nonabrasive soaps and detergents: Rinse ...
... cleaning, make sure all -purpose cleaner: Rinse with clean water and dry with soft, lint-free cloth. ■■ Vinegar for 2 to microwave oven door and exterior, do not use soap-filled scouring pads, abrasive cleaners, steel-wool pads, gritty washcloths, or some paper towels. Soap, ...Average soil ■■ Mild, nonabrasive soaps and detergents: Rinse with clean water and dry with wet cloth. To avoid arcing and microwave oven damage, the microwave inlet cover (see the "Parts and Features" section) should be kept clean. ■■ Mild, nonabrasive soaps and detergents: Rinse ...
Owners Manual
Page 14
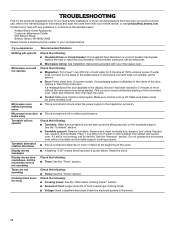
... electrician check the electrical system in the magnetron cycles on. If you avoid a service call an electrician. ■■ Microwave wiring: See Installation Instructions provided with your mobile device, or visit producthelp.amana.com. Microwave oven will not operate Check the following : ■■ Household fuse or circuit breaker: If a household fuse has...
... electrician check the electrical system in the magnetron cycles on. If you avoid a service call an electrician. ■■ Microwave wiring: See Installation Instructions provided with your mobile device, or visit producthelp.amana.com. Microwave oven will not operate Check the following : ■■ Household fuse or circuit breaker: If a household fuse has...


