User Guide
Page 2
... www.apple.com Apple, the Apple logo, Apple Store, FireWire, iPod, Mac, Macintosh, Mac OS, PowerBook, and Power Mac are trademarks of third-party products is accurate. registered trademark. The FireWire logo and iSight are trademarks of Apple Computer, Inc., registered in the U.S. Mention of Apple Computer, Inc. Apple assumes no responsibility with regard to ensure that the information in part, without...
... www.apple.com Apple, the Apple logo, Apple Store, FireWire, iPod, Mac, Macintosh, Mac OS, PowerBook, and Power Mac are trademarks of third-party products is accurate. registered trademark. The FireWire logo and iSight are trademarks of Apple Computer, Inc., registered in the U.S. Mention of Apple Computer, Inc. Apple assumes no responsibility with regard to ensure that the information in part, without...
User Guide
Page 3
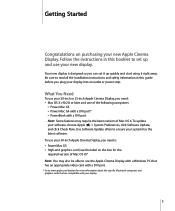
... the installation instructions and safety information in this guide before you need : • Mac OS X v10.2.8 or later and one of Mac OS X. To use your 30-inch Apple Cinema Display, you plug your new Apple Cinema Display. Getting Started 1 Congratulations on the box for the required version of Mac OS X)* Note: You may also be able to use the Apple Cinema Display with a Windows PC that has an appropriate video card with a DVI port. * Go...
... the installation instructions and safety information in this guide before you need : • Mac OS X v10.2.8 or later and one of Mac OS X. To use your 30-inch Apple Cinema Display, you plug your new Apple Cinema Display. Getting Started 1 Congratulations on the box for the required version of Mac OS X)* Note: You may also be able to use the Apple Cinema Display with a Windows PC that has an appropriate video card with a DVI port. * Go...
User Guide
Page 4
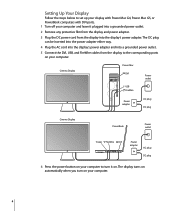
...the power adapter either way. 4 Plug the AC cord into the display's power adapter and into a grounded power outlet. 5 Connect the DVI, USB, and FireWire cables from the display into a grounded power outlet. 2 Remove any protective film from the display and power adapter. 3 Plug the DC power cord from the display to turn on your computer. 4 Cinema Display Power Mac DVI Power outlet USB FireWire Power adapter AC plug DC plug Cinema Display PowerBook Power outlet USB FireWire DVI Power adapter AC plug DC plug 6 Press the power button on your computer to the corresponding ports...
...the power adapter either way. 4 Plug the AC cord into the display's power adapter and into a grounded power outlet. 5 Connect the DVI, USB, and FireWire cables from the display into a grounded power outlet. 2 Remove any protective film from the display and power adapter. 3 Plug the DC power cord from the display to turn on your computer. 4 Cinema Display Power Mac DVI Power outlet USB FireWire Power adapter AC plug DC plug Cinema Display PowerBook Power outlet USB FireWire DVI Power adapter AC plug DC plug 6 Press the power button on your computer to the corresponding ports...

User Guide
Page 5
... can adjust your display's resolution, brightness, and color settings. iSight is disabled. • Disable the brightness buttons on or off and to turn your computer. To preserve your data, keep these and other magnetic media away from the camera into a FireWire port on the back of the display to adjust the brightness up (+) or down Power USB ports LED FireWire Security slot ports Use System Preferences to adjust the resolution, brightness, and color on your display. 1 Choose Apple...
... can adjust your display's resolution, brightness, and color settings. iSight is disabled. • Disable the brightness buttons on or off and to turn your computer. To preserve your data, keep these and other magnetic media away from the camera into a FireWire port on the back of the display to adjust the brightness up (+) or down Power USB ports LED FireWire Security slot ports Use System Preferences to adjust the resolution, brightness, and color on your display. 1 Choose Apple...
User Guide
Page 6
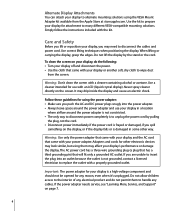
... around the power adapter and use with your display and the AC cord that will fit only a grounded AC outlet. Use correct lifting techniques when positioning the display. To clean the screen on the display, or if the display falls or is a high-voltage component and should not be opened for attachment to many different VESA-compatible mounting solutions. Use the kit to prepare your display off and...
... around the power adapter and use with your display and the AC cord that will fit only a grounded AC outlet. Use correct lifting techniques when positioning the display. To clean the screen on the display, or if the display falls or is a high-voltage component and should not be opened for attachment to many different VESA-compatible mounting solutions. Use the kit to prepare your display off and...

User Guide
Page 7
....apple.com/about displays, go to www.apple.com/displays. • To register your display, go to www.apple.com/register. • For display service and support information, go to obtain warranty service. 7 Onscreen Help To find more information about your display on a footrest Power adapter For more information about using your display, choose Help > Mac Help in onscreen help. Online Resources • For the latest information about /ergonomics. The best...
....apple.com/about displays, go to www.apple.com/displays. • To register your display, go to www.apple.com/register. • For display service and support information, go to obtain warranty service. 7 Onscreen Help To find more information about your display on a footrest Power adapter For more information about using your display, choose Help > Mac Help in onscreen help. Online Resources • For the latest information about /ergonomics. The best...
User Guide
Page 8
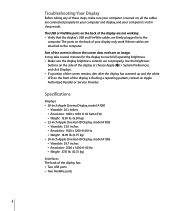
...-inch Apple Cinema HD Display, model A1083 • Viewable: 29.7 inches • Resolution: 2560 x 1600 @ 60 Hz • Weight: 27.15 lb. (12.31 kg) Interfaces The back of the display is not in to the computer. Troubleshooting Your Display Before taking any of these cables are set properly. Part of the screen remains dim after the display has warmed up and the white LED on , all the cables...
...-inch Apple Cinema HD Display, model A1083 • Viewable: 29.7 inches • Resolution: 2560 x 1600 @ 60 Hz • Weight: 27.15 lb. (12.31 kg) Interfaces The back of the display is not in to the computer. Troubleshooting Your Display Before taking any of these cables are set properly. Part of the screen remains dim after the display has warmed up and the white LED on , all the cables...
User Guide
Page 9
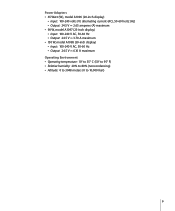
Power Adapters • 65 Watt (W), model A1096 (20-inch display) • Input: 100-240 volts (V) alternating current (AC), 50-60 hertz (Hz) • Output: 24.5 V ¯ 2.65 amperes (A) maximum • 90 W, model A1097 (23-inch display) • Input: 100-240 V AC, 50-60 Hz • Output: 24.5 V ¯ 3.70 A maximum • 150 W, model A1098 (30-inch display) • Input: 100-240 V AC, 50-60 Hz...
Power Adapters • 65 Watt (W), model A1096 (20-inch display) • Input: 100-240 volts (V) alternating current (AC), 50-60 hertz (Hz) • Output: 24.5 V ¯ 2.65 amperes (A) maximum • 90 W, model A1097 (23-inch display) • Input: 100-240 V AC, 50-60 Hz • Output: 24.5 V ¯ 3.70 A maximum • 150 W, model A1098 (30-inch display) • Input: 100-240 V AC, 50-60 Hz...
User Guide
Page 27
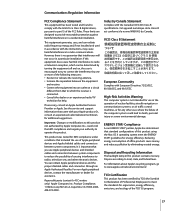
... efficiency. Responsible party (contact for a Class B digital device, pursuant to part 15 of the TCO '03 program. 27 This equipment generates, uses, and can obtain Apple peripheral devices and the proper shielded cables and connectors through an Apple Authorized Reseller. Disposal and Recycling Information The backlight lamp in this product using the Mac OS X operating system meet the standards for...
... efficiency. Responsible party (contact for a Class B digital device, pursuant to part 15 of the TCO '03 program. 27 This equipment generates, uses, and can obtain Apple peripheral devices and the proper shielded cables and connectors through an Apple Authorized Reseller. Disposal and Recycling Information The backlight lamp in this product using the Mac OS X operating system meet the standards for...


