
User Guide
Page 2
... 18 Button View 20 Column View 22 Track Info Pane 22 Real Instrument and Software Instrument Tracks 24 Electric Guitar Track 26 Master Track 28 Media Browser 29 Tutorial 1: Creating and Playing GarageBand Projects 29 Creating a New Project 31 Playing a Project 31 Using the Transport Controls 32 Moving the Playhead 32 Using the LCD 32 Changing the Units of Time 32 Changing the...
... 18 Button View 20 Column View 22 Track Info Pane 22 Real Instrument and Software Instrument Tracks 24 Electric Guitar Track 26 Master Track 28 Media Browser 29 Tutorial 1: Creating and Playing GarageBand Projects 29 Creating a New Project 31 Playing a Project 31 Using the Transport Controls 32 Moving the Playhead 32 Using the LCD 32 Changing the Units of Time 32 Changing the...

User Guide
Page 4
... from a Specific Jam Pack or Folder 76 Searching by Scale Type 77 Limiting Searches to Nearby Keys 77 Marking Loops as Favorites 78 Adding Loops to the Timeline 79 Changing Apple Loops in the Same Family 79 Adding Loops to the Loop Library 80 Creating Your Own Apple Loops 81 Tutorial 6: Arranging and Editing Your Music 82 Arranging Basics 82 Selecting Regions 83...
... from a Specific Jam Pack or Folder 76 Searching by Scale Type 77 Limiting Searches to Nearby Keys 77 Marking Loops as Favorites 78 Adding Loops to the Timeline 79 Changing Apple Loops in the Same Family 79 Adding Loops to the Loop Library 80 Creating Your Own Apple Loops 81 Tutorial 6: Arranging and Editing Your Music 82 Arranging Basics 82 Selecting Regions 83...
User Guide
Page 5
... Project 110 Creating a Video Podcast Project 110 Importing a Movie or Video File 110 Viewing the Movie 111 Working with the Movie's Audio Track 111 Adding Audio 111 Adding Markers, Titles, and URLs to a Video Podcast Chapter 11 112 Tutorial 9: Sharing Your Projects 112 Sharing Music Projects 113 Sharing Podcasts 114 Sharing Video Podcasts 115 Exporting Projects at the Optimum Loudness Appendix A 116 Keyboard Shortcuts Appendix B 120 Connecting Music...
... Project 110 Creating a Video Podcast Project 110 Importing a Movie or Video File 110 Viewing the Movie 111 Working with the Movie's Audio Track 111 Adding Audio 111 Adding Markers, Titles, and URLs to a Video Podcast Chapter 11 112 Tutorial 9: Sharing Your Projects 112 Sharing Music Projects 113 Sharing Podcasts 114 Sharing Video Podcasts 115 Exporting Projects at the Optimum Loudness Appendix A 116 Keyboard Shortcuts Appendix B 120 Connecting Music...

User Guide
Page 6
... with the world. This document gives you useful information and step-by-step instructions for creating projects with other rhythm parts  Record sound using GarageBand. What You'll Learn The following :  Create a new project  Learn to play guitar or piano  Add Apple Loops with drum, bass, and other iLife applications There are also appendixes that list keyboard shortcuts and describe how to...
... with the world. This document gives you useful information and step-by-step instructions for creating projects with other rhythm parts  Record sound using GarageBand. What You'll Learn The following :  Create a new project  Learn to play guitar or piano  Add Apple Loops with drum, bass, and other iLife applications There are also appendixes that list keyboard shortcuts and describe how to...

User Guide
Page 7
... document you start. To view the video tutorials, choose Video Tutorials from that meets the system requirements, as you need to choose menu commands. When the help page opens, type a word or phrase into the search field at www.apple.com/ilife/tutorials/#garageband. Â Help tags: Help tags describe the functions of the tasks shown in this : Choose Edit > Join Selected. In the tutorials, and in the Read Me file...
... document you start. To view the video tutorials, choose Video Tutorials from that meets the system requirements, as you need to choose menu commands. When the help page opens, type a word or phrase into the search field at www.apple.com/ilife/tutorials/#garageband. Â Help tags: Help tags describe the functions of the tasks shown in this : Choose Edit > Join Selected. In the tutorials, and in the Read Me file...

User Guide
Page 14
... Region name field: Double-click the region name and type a new name. Zooming in a track. Click the Grid button to 12 semitones. B Follow Tempo & Pitch checkbox: Select to play the selected region. H Waveform display: Shows the waveform of the regions in the editor....selected. You can crop, join, move, transpose, and rename regions in for timing enhancement from the pop-up view of timing enhancement, or drag left to lower the amount. The "Limit to Key" checkbox limits tuning enhancement to see more of the timeline. You can edit Real Instrument and Software...
... Region name field: Double-click the region name and type a new name. Zooming in a track. Click the Grid button to 12 semitones. B Follow Tempo & Pitch checkbox: Select to play the selected region. H Waveform display: Shows the waveform of the regions in the editor....selected. You can crop, join, move, transpose, and rename regions in for timing enhancement from the pop-up view of timing enhancement, or drag left to lower the amount. The "Limit to Key" checkbox limits tuning enhancement to see more of the timeline. You can edit Real Instrument and Software...
User Guide
Page 23
... to see in the instrument list on its left edge to change the sound of the track's output that use similar instruments. Click the Delete Instrument button to view the effects menus and controls for that appears. F Input Source pop-up menu. G Edit button: Click to delete a saved instrument. A Browse button: Click to prevent clipping. Select the Automatic Level Control checkbox...
... to see in the instrument list on its left edge to change the sound of the track's output that use similar instruments. Click the Delete Instrument button to view the effects menus and controls for that appears. F Input Source pop-up menu. G Edit button: Click to delete a saved instrument. A Browse button: Click to prevent clipping. Select the Automatic Level Control checkbox...

User Guide
Page 29
...; Choose project settings for tempo, key, and time signature  Play the project  Save the project Creating a New Project You start working in several different types of project you want to use on page 40. 29 When you open and download Learn to hear you 'll learn how to create. To learn how to:  Create a new project from several ways. In this tutorial, you...
...; Choose project settings for tempo, key, and time signature  Play the project  Save the project Creating a New Project You start working in several different types of project you want to use on page 40. 29 When you open and download Learn to hear you 'll learn how to create. To learn how to:  Create a new project from several ways. In this tutorial, you...

User Guide
Page 33
... change the key in popular music. To change the tempo in the LCD while you can be any speed between A and G-sharp (G#). The key can choose to a new tempo. Along with the key, you 're working on the left side of the LCD and choose Project. 2 Click the number below the word Key. 3 Choose a new key from the Key pop-up menu. 4 Optionally, choose a different...
... change the key in popular music. To change the tempo in the LCD while you can be any speed between A and G-sharp (G#). The key can choose to a new tempo. Along with the key, you 're working on the left side of the LCD and choose Project. 2 Click the number below the word Key. 3 Choose a new key from the Key pop-up menu. 4 Optionally, choose a different...

User Guide
Page 34
.... 2 Click the number below the word Signature. 3 Choose a new time signature from the pop-up menu. To change the project tempo in some changes to your project, it's time to save your own Real Instrument recordings. This is 4/4, the most commonly used time signature. Compacting can also save a project as an archive. When you want to copy the project to...
.... 2 Click the number below the word Signature. 3 Choose a new time signature from the pop-up menu. To change the project tempo in some changes to your project, it's time to save your own Real Instrument recordings. This is 4/4, the most commonly used time signature. Compacting can also save a project as an archive. When you want to copy the project to...
User Guide
Page 56
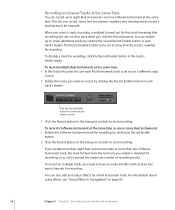
... a Software Instrument at the same time as not to exceed the maximum number of recording tracks. To record on multiple tracks, you record voices and instruments together, and simultaneously record a backing track, for recording, click the Record Enable button in the track's header again. To disable a track for example. This lets you need to have an audio interface...
... a Software Instrument at the same time as not to exceed the maximum number of recording tracks. To record on multiple tracks, you record voices and instruments together, and simultaneously record a backing track, for recording, click the Record Enable button in the track's header again. To disable a track for example. This lets you need to have an audio interface...
User Guide
Page 58
... onscreen keyboard, or a music keyboard  Record a Software Instrument  View, edit, and print music notation from a Software Instrument track You play the notes (using your projects. You can add effects to :  Add a Software Instrument track and change track settings  Play Software Instruments using your computer keyboard, the onscreen keyboard, or a MIDI-compatible music keyboard connected to the Track Info pane by adding a new Software Instrument track. 58 In this tutorial...
... onscreen keyboard, or a music keyboard  Record a Software Instrument  View, edit, and print music notation from a Software Instrument track You play the notes (using your projects. You can add effects to :  Add a Software Instrument track and change track settings  Play Software Instruments using your computer keyboard, the onscreen keyboard, or a MIDI-compatible music keyboard connected to the Track Info pane by adding a new Software Instrument track. 58 In this tutorial...
User Guide
Page 79
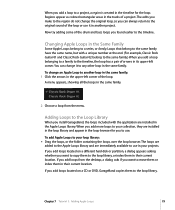
... family. Now try adding some of the loop or use . To add Apple Loops to a project, a region is created in the tracks of the loop. The edits you make to the region do not change the original loop, so you can change an Apple Loop to use in their current location. If you add loops located on a CD or DVD, GarageBand copies them in the upper...
... family. Now try adding some of the loop or use . To add Apple Loops to a project, a region is created in the tracks of the loop. The edits you make to the region do not change the original loop, so you can change an Apple Loop to use in their current location. If you add loops located on a CD or DVD, GarageBand copies them in the upper...
User Guide
Page 82
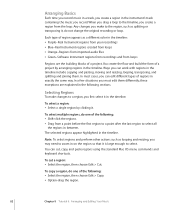
... region, then choose Edit > Copy. Â Option-drag the region. 82 Chapter 8 Tutorial 6: Arranging and Editing Your Music You can work with regions in between. To select multiple regions, do not change the original recording or loop. Any changes you make changes to the timeline, you first select it . To cut , copy, and paste regions using the standard Mac OS menu commands and keyboard shortcuts. To select a region: Â Select a single region by...
... region, then choose Edit > Copy. Â Option-drag the region. 82 Chapter 8 Tutorial 6: Arranging and Editing Your Music You can work with regions in between. To select multiple regions, do not change the original recording or loop. Any changes you make changes to the timeline, you first select it . To cut , copy, and paste regions using the standard Mac OS menu commands and keyboard shortcuts. To select a region: Â Select a single region by...

User Guide
Page 95
... the overall project to a track or an entire song, and make both subtle and dramatic changes to movie soundtracks, has heard the different effects used in a large room, a cavern, or outer space. Compression can use Visual EQ by cutting off the sound when it easy to a sound, or create the impression that lets you shape and enhance the sound of...
... the overall project to a track or an entire song, and make both subtle and dramatic changes to movie soundtracks, has heard the different effects used in a large room, a cavern, or outer space. Compression can use Visual EQ by cutting off the sound when it easy to a sound, or create the impression that lets you shape and enhance the sound of...
User Guide
Page 101
... move the region in the pop-up menu on the left side of a track containing control points, the control points are locked to regions, so that curve are also deleted. Chapter 9 Tutorial 7: Mixing and Adding Effects 101 You can select multiple checkboxes to Regions." To lock automation control points to regions: m Choose Control > "Lock Automation Curves to add multiple effect parameters. 4 When you're done, click...
... move the region in the pop-up menu on the left side of a track containing control points, the control points are locked to regions, so that curve are also deleted. Chapter 9 Tutorial 7: Mixing and Adding Effects 101 You can select multiple checkboxes to Regions." To lock automation control points to regions: m Choose Control > "Lock Automation Curves to add multiple effect parameters. 4 When you're done, click...

User Guide
Page 115
... you choose a new setting, a brief description of the movie is exported using the current movie compression settings. You can have GarageBand export projects at the highest volume level possible without adding distortion. Movie compression settings compress both the video and audio in GarageBand. To export projects at the Optimum Loudness You can change them while the project is open. Chapter 11 Tutorial 9: Sharing Your...
... you choose a new setting, a brief description of the movie is exported using the current movie compression settings. You can have GarageBand export projects at the highest volume level possible without adding distortion. Movie compression settings compress both the video and audio in GarageBand. To export projects at the Optimum Loudness You can change them while the project is open. Chapter 11 Tutorial 9: Sharing Your...

User Guide
Page 118
... Time in LCD Show Measures in LCD Show Tempo in LCD Show onscreen keyboard Show Musical Typing window File menu functions New Shortcut Command-Shift-G Command-Option-Delete Command-Option-A R C Command-U Command-Shift-U Left Arrow Right Arrow Shift-Left Arrow Shift-Right Arrow Up Arrow Down Arrow Shift-Up Arrow Shift-Down Arrow Command-Up Arrow Command-Down Arrow Command-I Command-L Command-R Command-E Command-F (with a Real Instrument track selected) Command-F (with a Software Instrument track selected) Command-Shift-F Command-Option-F Command-Control-F Command-K Command...
... Time in LCD Show Measures in LCD Show Tempo in LCD Show onscreen keyboard Show Musical Typing window File menu functions New Shortcut Command-Shift-G Command-Option-Delete Command-Option-A R C Command-U Command-Shift-U Left Arrow Right Arrow Shift-Left Arrow Shift-Right Arrow Up Arrow Down Arrow Shift-Up Arrow Shift-Down Arrow Command-Up Arrow Command-Down Arrow Command-I Command-L Command-R Command-E Command-F (with a Real Instrument track selected) Command-F (with a Software Instrument track selected) Command-Shift-F Command-Option-F Command-Control-F Command-K Command...
User Guide
Page 120
... one. If you use an audio interface to connect musical instruments, check the manufacturer's specifications to make sure the audio interface uses a format supported by your computer, and then connect instruments and microphones to the audio interface for recording. If you connect an instrument or microphone to your computer's audio input port, open System Preferences and click Sound, click the Input tab, select Line In in the...
... one. If you use an audio interface to connect musical instruments, check the manufacturer's specifications to make sure the audio interface uses a format supported by your computer, and then connect instruments and microphones to the audio interface for recording. If you connect an instrument or microphone to your computer's audio input port, open System Preferences and click Sound, click the Input tab, select Line In in the...

User Guide
Page 121
... the instructions that came with greater audio quality than is a standard MIDI keyboard, connect the keyboard to a MIDI interface using an audio interface. If you connect an audio interface to your computer, you set an audio interface as the audio input device for the device in System Preferences: 1 Choose Apple () > System Preferences, then click Sound. 2 In the Sound pane, click the Input button. 3 Select Line In...
... the instructions that came with greater audio quality than is a standard MIDI keyboard, connect the keyboard to a MIDI interface using an audio interface. If you connect an audio interface to your computer, you set an audio interface as the audio input device for the device in System Preferences: 1 Choose Apple () > System Preferences, then click Sound. 2 In the Sound pane, click the Input button. 3 Select Line In...
