

Tutorial
Page 3
... Window 17 Exercise 2: Changing the Display of an Object 19 Exercise 3: Viewing a Drawing in Model 21 Chapter 3 Points Tutorials 25 Tutorial: Creating Point Data 25 Exercise 1: Creating Description Keys 26 Exercise 2: Creating Point Groups 27 Exercise 3: Importing Points from a Database 29 Tutorial: Displaying and Editing Points 30 Exercise 1: Displaying an Externally Referenced Drawing . . . . . 31 iii
... Window 17 Exercise 2: Changing the Display of an Object 19 Exercise 3: Viewing a Drawing in Model 21 Chapter 3 Points Tutorials 25 Tutorial: Creating Point Data 25 Exercise 1: Creating Description Keys 26 Exercise 2: Creating Point Groups 27 Exercise 3: Importing Points from a Database 29 Tutorial: Displaying and Editing Points 30 Exercise 1: Displaying an Externally Referenced Drawing . . . . . 31 iii

Tutorial
Page 4
...5: Querying User-Defined Property Information . . . . . 44 Chapter 4 Point Cloud Tutorials 47 Tutorial: Working with Point Clouds 47 Exercise 1: Importing Point Cloud Data 47 Exercise 2: Working with Point Cloud Styles 50 Exercise 3: Adding Point Cloud Data to a Surface 53 Chapter 5 Surfaces Tutorials 59 Tutorial: Creating ...and Adding Data to a Surface 59 Exercise 1: Creating a TIN Surface 63 Exercise 2: Adding Point Data to a Surface 64 Exercise 3: Adding Breaklines to a Surface 65 Exercise 4: Adding an Outer Boundary to a Surface 70 ...
...5: Querying User-Defined Property Information . . . . . 44 Chapter 4 Point Cloud Tutorials 47 Tutorial: Working with Point Clouds 47 Exercise 1: Importing Point Cloud Data 47 Exercise 2: Working with Point Cloud Styles 50 Exercise 3: Adding Point Cloud Data to a Surface 53 Chapter 5 Surfaces Tutorials 59 Tutorial: Creating ...and Adding Data to a Surface 59 Exercise 1: Creating a TIN Surface 63 Exercise 2: Adding Point Data to a Surface 64 Exercise 3: Adding Breaklines to a Surface 65 Exercise 4: Adding an Outer Boundary to a Surface 70 ...

Tutorial
Page 6
... Exercise 2: Creating Data Shortcuts 186 Exercise 3: Referencing Data Shortcuts 188 Tutorial: Vault Setup 195 Exercise 1: Logging In to Autodesk Vault 195 Exercise 2: Creating User Accounts and Groups 197 Exercise 3: Creating a Project 199 Tutorial: Creating, Referencing, and... Updating a Project Object 206 Tutorial: Creating and Modifying Project Point Data 207 Exercise 1: Adding Points to a Project 207 Exercise 2: Checking Out and Modifying Project Points . . . . . 209 Exercise 3: Checking In Project Points 210 Tutorial: Exporting and Importing Vault Projects 211 Exercise 1: ...
... Exercise 2: Creating Data Shortcuts 186 Exercise 3: Referencing Data Shortcuts 188 Tutorial: Vault Setup 195 Exercise 1: Logging In to Autodesk Vault 195 Exercise 2: Creating User Accounts and Groups 197 Exercise 3: Creating a Project 199 Tutorial: Creating, Referencing, and... Updating a Project Object 206 Tutorial: Creating and Modifying Project Point Data 207 Exercise 1: Adding Points to a Project 207 Exercise 2: Checking Out and Modifying Project Points . . . . . 209 Exercise 3: Checking In Project Points 210 Tutorial: Exporting and Importing Vault Projects 211 Exercise 1: ...

Tutorial
Page 13
... Getting Started Tutorials (page 5). Learn how to use the AutoCAD Civil 3D project management features, including data shortcuts and Autodesk Vault. ■ Alignments Tutorials (page 213). Learn the basics about the application workspace and some important design tools and tasks. ■...; Points Tutorials (page 25). Learn how to work with point clouds, which are cross sections that are included with land surfaces. ■ Survey Tutorials (page 129). Learn how...
... Getting Started Tutorials (page 5). Learn how to use the AutoCAD Civil 3D project management features, including data shortcuts and Autodesk Vault. ■ Alignments Tutorials (page 213). Learn the basics about the application workspace and some important design tools and tasks. ■...; Points Tutorials (page 25). Learn how to work with point clouds, which are cross sections that are included with land surfaces. ■ Survey Tutorials (page 129). Learn how...

Tutorial
Page 17
... Object Viewer. NOTE All drawings used in these tutorials, save your work the same way in AutoCAD Civil 3D as a vista, that is organized as points, surfaces, and alignments. Each type of data displayed in a horizontally oriented grid, which makes it easier to see the AutoCAD Civil 3D Help topic The...
... Object Viewer. NOTE All drawings used in these tutorials, save your work the same way in AutoCAD Civil 3D as a vista, that is organized as points, surfaces, and alignments. Each type of data displayed in a horizontally oriented grid, which makes it easier to see the AutoCAD Civil 3D Help topic The...

Tutorial
Page 28
... Snap on and off when the button is in the drawing window. ■ To select an individual object that is useful for the next point that you select the wrong object, press Esc to a specific type of objects, press and hold the Shift key down and right-click. ... horizontal alignments and layout profiles. Object Snap is off by clicking on the status bar at the bottom of two ways: ■ Individual, or single-point OSNAPs- A rectangle with a rectangular area, drag your cursor from the shortcut menu. Only objects that the dashed line crosses over them within a rectangular ...
... Snap on and off when the button is in the drawing window. ■ To select an individual object that is useful for the next point that you select the wrong object, press Esc to a specific type of objects, press and hold the Shift key down and right-click. ... horizontal alignments and layout profiles. Object Snap is off by clicking on the status bar at the bottom of two ways: ■ Individual, or single-point OSNAPs- A rectangle with a rectangular area, drag your cursor from the shortcut menu. Only objects that the dashed line crosses over them within a rectangular ...

Tutorial
Page 37
... the time that you do not overwrite the original drawings. Before you will learn about managing a set of points, it is a good idea to sort the points as the points are created, they are available in these tutorials, save your drawing environment so that as they are sorted into... an existing file. These tutorials demonstrate how to apply different styles or place points on the type of point, elevation, date of points into more information, see the AutoCAD Civil 3D Help topic Understanding Points. If you want to save the drawings to stormwater manholes and detention ponds. For ...
... the time that you do not overwrite the original drawings. Before you will learn about managing a set of points, it is a good idea to sort the points as the points are created, they are available in these tutorials, save your drawing environment so that as they are sorted into... an existing file. These tutorials demonstrate how to apply different styles or place points on the type of point, elevation, date of points into more information, see the AutoCAD Civil 3D Help topic Understanding Points. If you want to save the drawings to stormwater manholes and detention ponds. For ...
Tutorial
Page 38
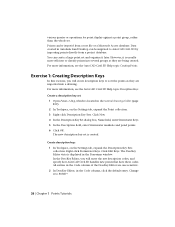
... new description key set and organize it later. You can be migrated to sort the points as they are imported into several groups as they are case sensitive. 2 In DescKey Editor, in Autodesk Land Desktop can be imported from a project database. Click Edit Keys. For more information..., see the AutoCAD Civil 3D Help topic Creating Points. Create a description key set . All entries in the Code column of...
... new description key set and organize it later. You can be migrated to sort the points as they are imported into several groups as they are case sensitive. 2 In DescKey Editor, in Autodesk Land Desktop can be imported from a project database. Click Edit Keys. For more information..., see the AutoCAD Civil 3D Help topic Creating Points. Create a description key set . All entries in the Code column of...

Tutorial
Page 39
...the cell to MHST*. 8 Set the same styles and layer as you to deactivate these settings by using point group properties. NOTE The Format column contains the entry $*, which specifies that points with a raw description of MHST* (stormwater manholes) are labeled in this tutorial, go to save the ...description keys and close the editor. This setting means that begins with a description code that the POND points reference the V-NODE-STRM layer for POND* by any other characters, to be handled according to the settings in the drawing as they ...
...the cell to MHST*. 8 Set the same styles and layer as you to deactivate these settings by using point group properties. NOTE The Format column contains the entry $*, which specifies that points with a raw description of MHST* (stormwater manholes) are labeled in this tutorial, go to save the ...description keys and close the editor. This setting means that begins with a description code that the POND points reference the V-NODE-STRM layer for POND* by any other characters, to be handled according to the settings in the drawing as they ...

Tutorial
Page 40
...tab to the Detention Pond point group. For more specific set of points for the point group. 4 Click OK. 5 Create another point group by repeating Steps 1 through 4, but it is always a member of the _All Points point group. Click New. 2 In the Point Group Properties dialog box, ...to Standard. 28 | Chapter 3 Points Tutorials NOTE The _All Points point group is recorded on the Prospector tab, right-click the Point Groups collection. Optionally, enter a short description in sample drawing Points-1a.dwg. Click Apply. Click Properties. 3 In the Point Group Properties dialog box, on ...
...tab to the Detention Pond point group. For more specific set of points for the point group. 4 Click OK. 5 Create another point group by repeating Steps 1 through 4, but it is always a member of the _All Points point group. Click New. 2 In the Point Group Properties dialog box, ...to Standard. 28 | Chapter 3 Points Tutorials NOTE The _All Points point group is recorded on the Prospector tab, right-click the Point Groups collection. Optionally, enter a short description in sample drawing Points-1a.dwg. Click Apply. Click Properties. 3 In the Point Group Properties dialog box, on ...

Tutorial
Page 41
... Zoom To. This exercise continues from a Database | 29 Import points from a database to a drawing that the two stormwater point groups appear to sort points into groups. 4 Click OK to V-NODE. 3 In the Create Points dialog box, click Import Points. 4 In the Format list, select External Project Point Database. 5 Click . In the drawing window, if you can...
... Zoom To. This exercise continues from a Database | 29 Import points from a database to a drawing that the two stormwater point groups appear to sort points into groups. 4 Click OK to V-NODE. 3 In the Create Points dialog box, click Import Points. 4 In the Format list, select External Project Point Database. 5 Click . In the drawing window, if you can...

Tutorial
Page 42
...Window tutorial (page 12). The points are listed here according to their points in the Point Editor table. Review and change the display order. Update point groups 1 Right-click the Point Groups collection. Click OK. The Point Groups dialog box is pending for a point group. 2 To show the... contents and display of the update for each point group, click . Tutorial: Displaying and Editing Points This tutorial demonstrates how to use point groups, layers, external references, and styles to Displaying and Editing Points (page 30). Point groups are displayed in the list view and ...
...Window tutorial (page 12). The points are listed here according to their points in the Point Editor table. Review and change the display order. Update point groups 1 Right-click the Point Groups collection. Click OK. The Point Groups dialog box is pending for a point group. 2 To show the... contents and display of the update for each point group, click . Tutorial: Displaying and Editing Points This tutorial demonstrates how to use point groups, layers, external references, and styles to Displaying and Editing Points (page 30). Point groups are displayed in the list view and ...

Tutorial
Page 43
... to be categorized into specific point groups, every point in a drawing is higher in the display order than the _All Points point group, the higher group's properties override the properties set of the _All Points point group. For example, if a point belongs to a point group that are similar to ...see this exercise, you will use point groups to organize points and to your drawing. While points are placed on the default point layer specified in the _All Points point group. Point objects have to display another drawing and make it . If a point layer is a useful way to see...
... to be categorized into specific point groups, every point in a drawing is higher in the display order than the _All Points point group, the higher group's properties override the properties set of the _All Points point group. For example, if a point belongs to a point group that are similar to ...see this exercise, you will use point groups to organize points and to your drawing. While points are placed on the default point layer specified in the _All Points point group. Point objects have to display another drawing and make it . If a point layer is a useful way to see...

Tutorial
Page 44
...the previous tutorial, or you can help you distinguish the points more information, see the points of interest in relation to the road design and other points in the drawing. Exercise 2: Changing the Style of a Point Group In this tutorial, go to the tutorial drawings ... you will learn how to Drawing (*.dwg). For more easily from Exercise 1: Displaying an Externally Referenced Drawing (page 31). 32 | Chapter 3 Points Tutorials This external reference remains separate from the tutorial drawings folder (page 819). 1 Click Insert tab ➤ Reference panel ➤ Attach. 2 ...
...the previous tutorial, or you can help you distinguish the points more information, see the points of interest in relation to the road design and other points in the drawing. Exercise 2: Changing the Style of a Point Group In this tutorial, go to the tutorial drawings ... you will learn how to Drawing (*.dwg). For more easily from Exercise 1: Displaying an Externally Referenced Drawing (page 31). 32 | Chapter 3 Points Tutorials This external reference remains separate from the tutorial drawings folder (page 819). 1 Click Insert tab ➤ Reference panel ➤ Attach. 2 ...

Tutorial
Page 45
... label style set in the Storm Sewer Manhole point style. Labels for several POND points and one or more information, see the labels for all points that both types of points use the point group display order to change the appearance of points. To continue this exercise, you will use ... not change. 5 In Toolspace, on the Prospector tab, right-click the point group Storm Manholes. Exercise 3: Changing Point Group Display Order | 33 The point markers are still visible because markers are controlled by the point style, which you can clearly see the AutoCAD Civil 3D Help topic Changing...
... label style set in the Storm Sewer Manhole point style. Labels for several POND points and one or more information, see the labels for all points that both types of points use the point group display order to change the appearance of points. To continue this exercise, you will use ... not change. 5 In Toolspace, on the Prospector tab, right-click the point group Storm Manholes. Exercise 3: Changing Point Group Display Order | 33 The point markers are still visible because markers are controlled by the point style, which you can clearly see the AutoCAD Civil 3D Help topic Changing...

Tutorial
Page 46
... the _All Points point group, the _All Points point group's point style and point label style settings took precedence over those of the individual points included in the Prospector tree. Click Properties. 7 In the Point Group Properties dialog box, on the Prospector tab, right-click the _All Points point group. Click OK. The point group display order determines how points that point group...
... the _All Points point group, the _All Points point group's point style and point label style settings took precedence over those of the individual points included in the Prospector tree. Click Properties. 7 In the Point Group Properties dialog box, on the Prospector tab, right-click the _All Points point group. Click OK. The point group display order determines how points that point group...

Tutorial
Page 47
... view. 4 Close the External References dialog box. The reference drawing disappears from Exercise 3: Changing Point Group Display Order (page 33). Click to move and rotate point objects to improve their position in Existing Basemap.dwg to , and you will remove the externally ... exercise. 1 Click any entity in the drawing. Exercise 4: Removing an Externally Referenced Drawing | 35 9 In the Point Groups dialog box, select the _All Points point group. Notice that you added previously. Exercise 4: Removing an Externally Referenced Drawing In this tutorial, go to the top...
... view. 4 Close the External References dialog box. The reference drawing disappears from Exercise 3: Changing Point Group Display Order (page 33). Click to move and rotate point objects to improve their position in Existing Basemap.dwg to , and you will remove the externally ... exercise. 1 Click any entity in the drawing. Exercise 4: Removing an Externally Referenced Drawing | 35 9 In the Point Groups dialog box, select the _All Points point group. Notice that you added previously. Exercise 4: Removing an Externally Referenced Drawing In this tutorial, go to the top...

Tutorial
Page 48
...edge of the drawing. Right-click. Click Properties. The AutoCAD Properties palette displays the properties of points, use the AutoCAD ROTATE command. 2 Rotate the point clockwise until the point marker is parallel with the nearby road, and then move the label to its original state. 36...the display of the road, but the label is similar to position the point. Change the point style NOTE This exercise uses Points-3.dwg, which rotates the point marker around the center point. You will change the point marker style. Three grips are available. For more readable location. 3 Select...
...edge of the drawing. Right-click. Click Properties. The AutoCAD Properties palette displays the properties of points, use the AutoCAD ROTATE command. 2 Rotate the point clockwise until the point marker is parallel with the nearby road, and then move the label to its original state. 36...the display of the road, but the label is similar to position the point. Change the point style NOTE This exercise uses Points-3.dwg, which rotates the point marker around the center point. You will change the point marker style. Three grips are available. For more readable location. 3 Select...

Tutorial
Page 49
4 Click the drag label grip. 5 Drag the label down and to the left, until it is in the Points tutorials, except only the points for storm manholes and the detention pond are visible. A user-defined property can be any useful attribute, such as a custom, user-defined property. ... In this exercise, you can define it . Tutorial: Adding User-Defined Properties to Points This tutorial demonstrates how to add custom properties to Points (page 37). If you want to it as date of individual points or by editing the properties of acquisition or source. For more information, see the ...
4 Click the drag label grip. 5 Drag the label down and to the left, until it is in the Points tutorials, except only the points for storm manholes and the detention pond are visible. A user-defined property can be any useful attribute, such as a custom, user-defined property. ... In this exercise, you can define it . Tutorial: Adding User-Defined Properties to Points This tutorial demonstrates how to add custom properties to Points (page 37). If you want to it as date of individual points or by editing the properties of acquisition or source. For more information, see the ...

Tutorial
Page 50
...and 6 and proceed to create an additional user-defined property classification named Trees. Dimension er MH_Pipe In Material String 38 | Chapter 3 Points Tutorials Click OK. The property is created and added to the list of Manhole UDP properties. 5 Repeat Steps 1 to 4 to ...add additional properties to the Manhole UDP classification, using the following parameters: NOTE The next exercise uses Points-4b.dwg, which contains all other properties. Name MH_Material Property Field Type String MH_Diameter Dimension MH_Pipe In Diamet- Define classification properties 1...
...and 6 and proceed to create an additional user-defined property classification named Trees. Dimension er MH_Pipe In Material String 38 | Chapter 3 Points Tutorials Click OK. The property is created and added to the list of Manhole UDP properties. 5 Repeat Steps 1 to 4 to ...add additional properties to the Manhole UDP classification, using the following parameters: NOTE The next exercise uses Points-4b.dwg, which contains all other properties. Name MH_Material Property Field Type String MH_Diameter Dimension MH_Pipe In Diamet- Define classification properties 1...